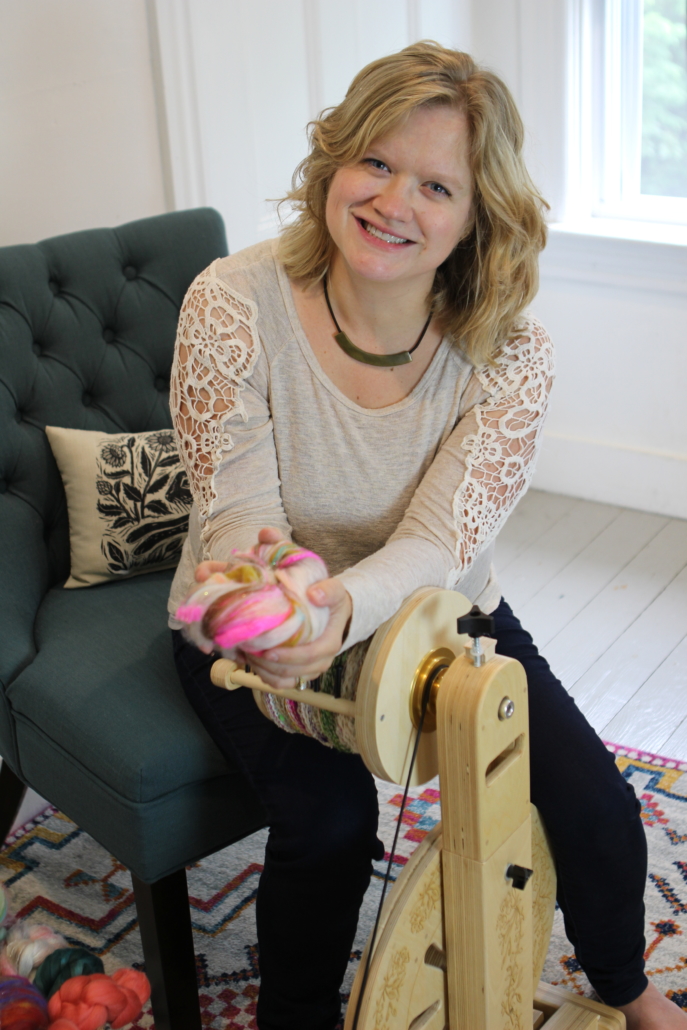
Tell us a little bit about yourself and how you got started spinning. My mother and grandmother always encouraged me to be creative, and I really enjoyed visiting craft shows with them growing up. I was lucky that my primary school had some great volunteers who came in each week to teach us art and craft, and this is where I discovered weaving and then spinning, which was demonstrated for us to learn where yarn came from. My mum made me a drop spindle, and one of the school volunteers agreed to give me a few lessons on her wheel, and that’s where my love of spinning really began. I joined a local group and got my first wheel (an Ashford Traveller) soon after.
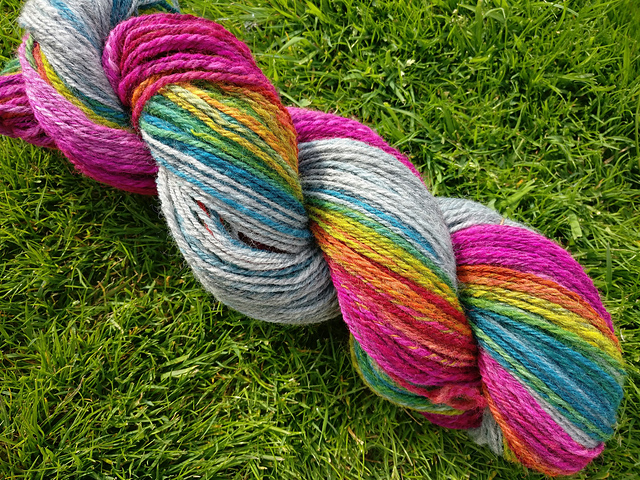
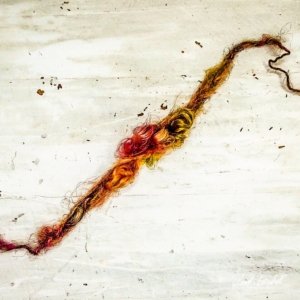
Rainbow through the clouds fibre club yarn, wheel spun and chain plied
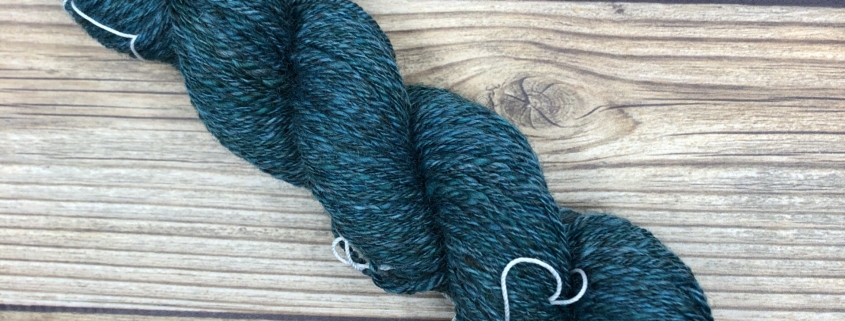
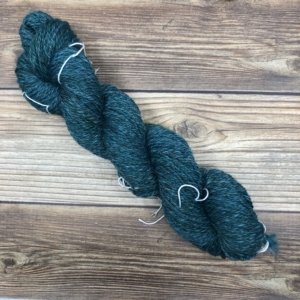
Do you have a favorite type of yarn to spin? At the moment, my standard yarn seems to be a sport weight 2 ply; I’ve been really focusing on creating smooth and consistent yarns to knit a sweater, but I’ve also been spinning lace and thread weight on my Turkish spindle. I’d like to have a go at creating art yarns next.
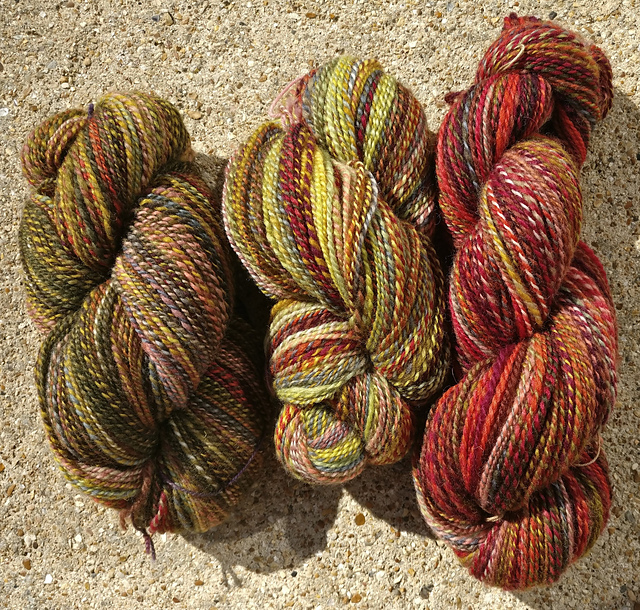
Wheel spun yarn for a fade sweater
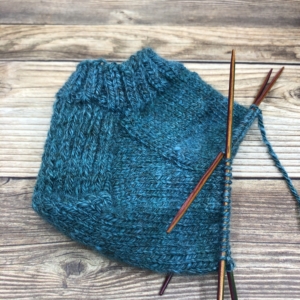
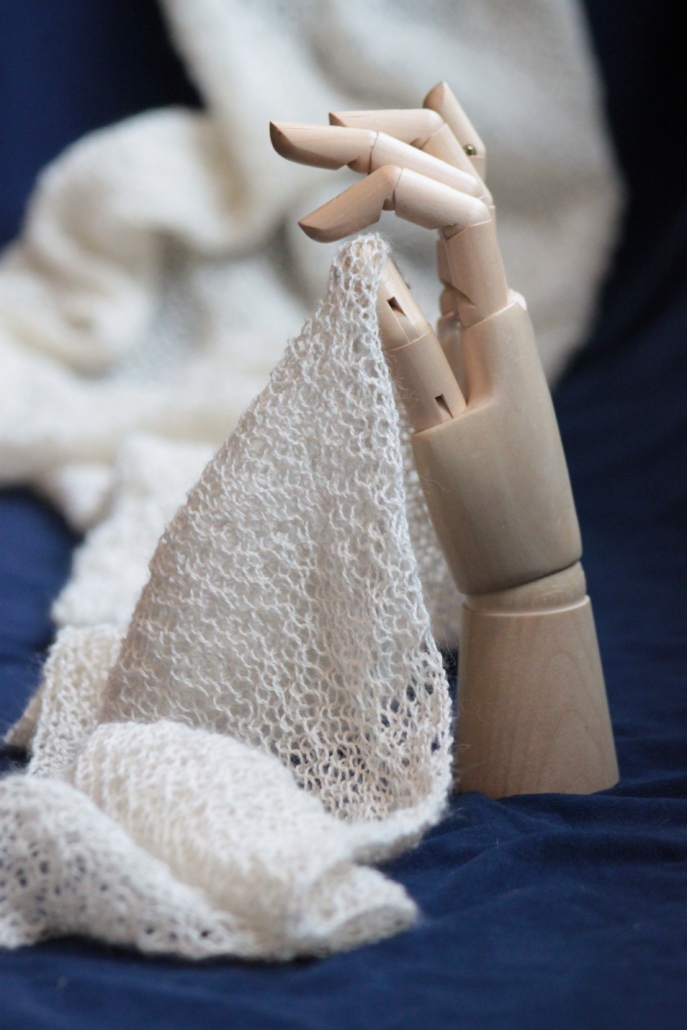
What do you like to make with your handspun yarn? I love a good scarf or shawl knitted in handspun yarn; now the weather is cooler I really look forward to choosing one to wear because it makes me so happy to be wearing something I’ve made! I’ve also been using my handspun yarns for weaving on my knitter’s loom to create scarves and cloth I can cut for jackets.
How long have you been reading PLY? I’ve been reading PLY since the very first issue. I was so pleased to find a spinning magazine that was colourful and relevant for the modern spinner. Before I read PLY, I had been led to believe that handspun yarn had to be woollen, 2-ply, and never, ever forward drafted. Imagine how my eyes were opened!
What do you look forward to most when you get an issue? I love to find a quiet moment and sit down with a cup of tea when I open my issue of PLY. My favourite articles are about techniques as I always find there’s something new to learn and I also love reading the reviews of wheels, spindles, and equipment. Although I sometimes find the articles quite technical, it really deepens my understanding and I’m a better spinner because of it.
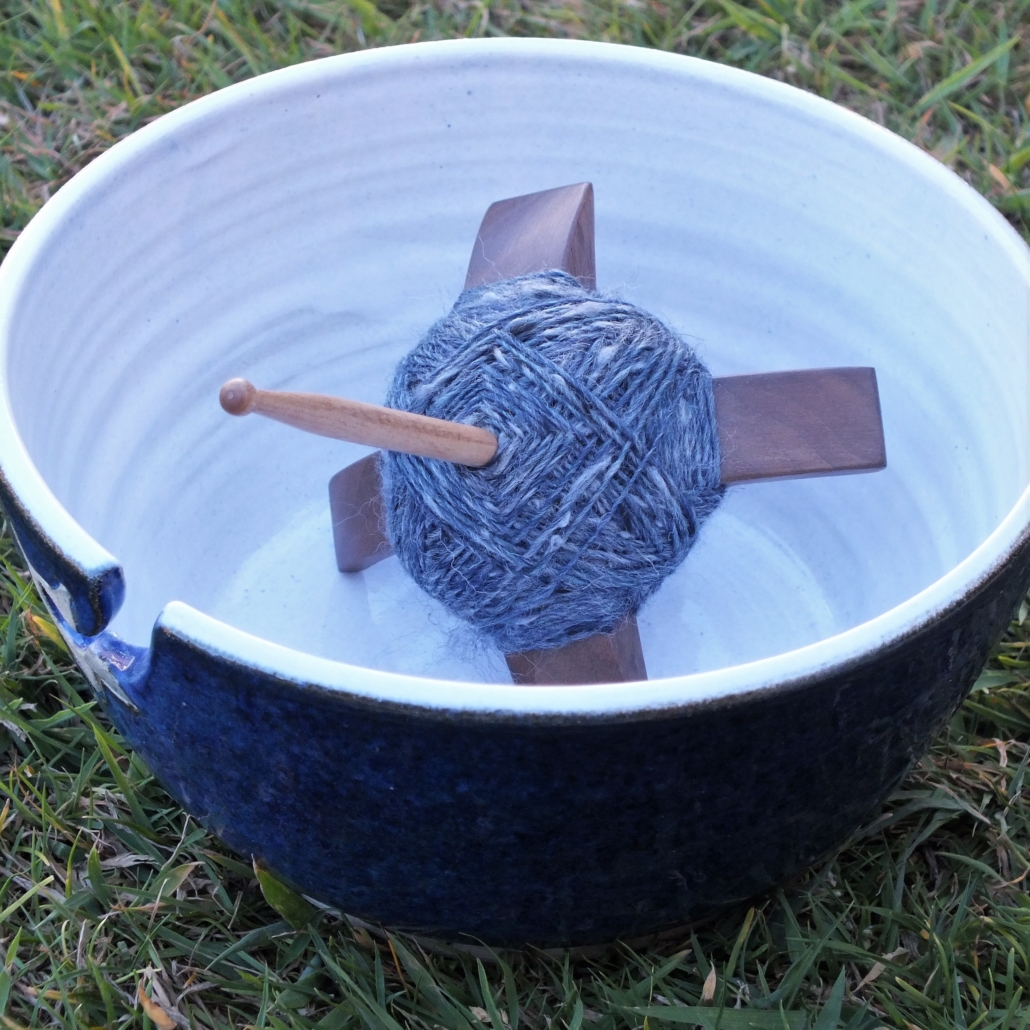
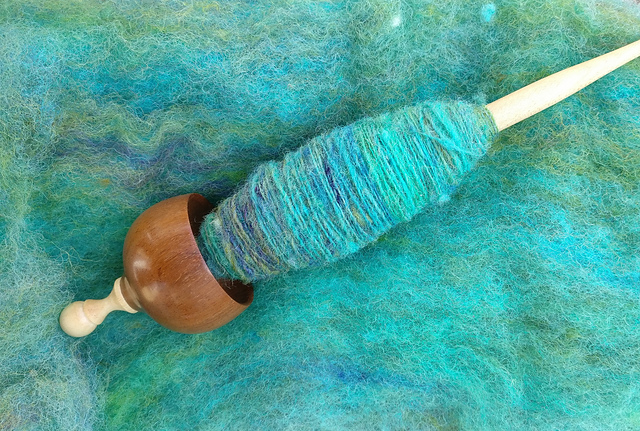
Turkish spindle in yarn bowl
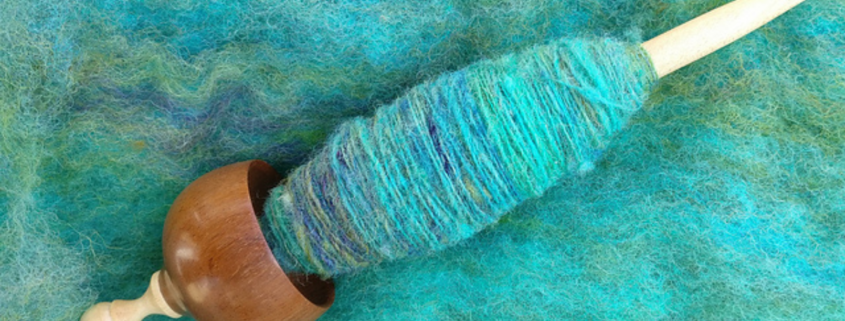
Tell us about a project you worked on that was inspired by an article, project, or issue of PLY. I was really excited to read the support spindle issue as this is a new technique I’ve learned this year. I have used a drop spindle since I learned to spin, and last year I bought a Turkish spindle to add to my flock. This was soon joined by a support spindle, and I figured that if I could spin on a drop spindle it would be easy to transition. I watched a couple of videos and read an e-book and could spin quite smoothly, but I was finding it hard work; I could control the spindle, but the fibre and yarn was unruly – maybe it wasn’t for me?
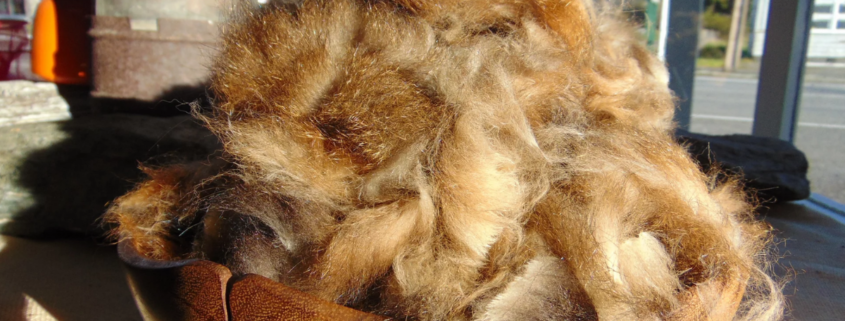
My first batt and singles on my support spindle
When I swapped to a support spindle, I presumed that I would use my normal fibres, straight from the braid like I would for spinning at my wheel, but after reading PLY I could see where I was making mistakes, and I realised I needed to make some changes and start over. I changed my fibre straight away and reached for 100% alpaca; I would never consider using this with my wheel as it’s so fine, but it seemed it was made for the gentle art of support spindling.
I also read with amusement that I had been holding my fibre supply incorrectly and needed a lighter, more lady-like hold, so I carded an airy rolag and followed the photos and directions – suddenly I could spin on my support spindle without a death grip on either the fibre or the spindle and the yarn was flowing beautifully! My support spindle is now my friend, and we spend many happy evenings together spinning superfine fibres into yarn.
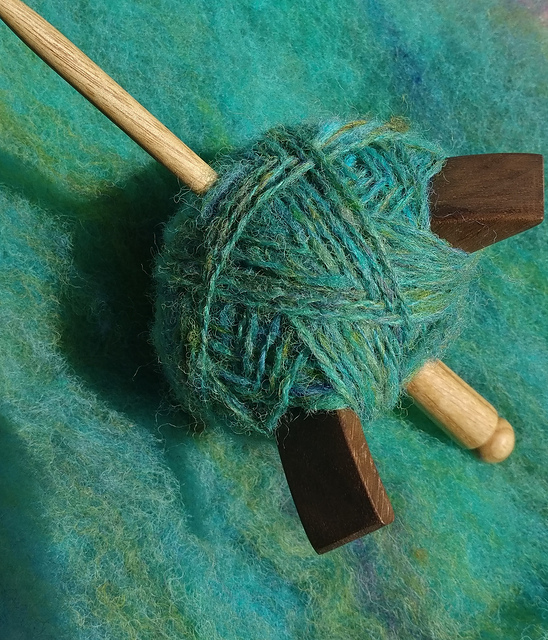
Support spindle singles Andean plied on my Turkish spindle
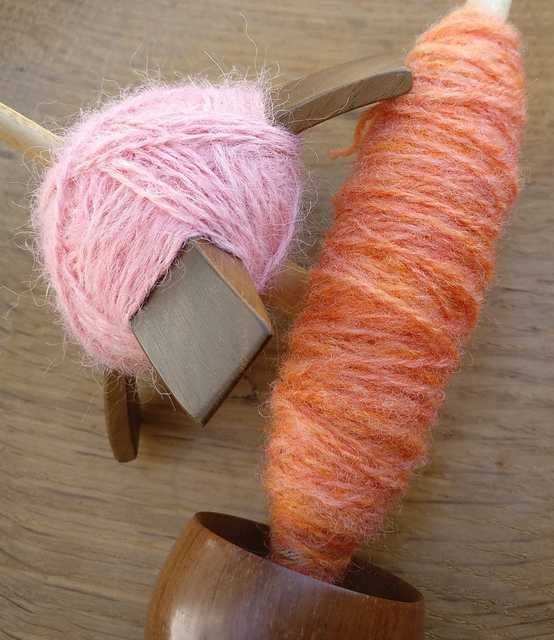
Support spindle woollen-spun alpaca (pink) and Jacob wool (orange)
Is there anything else you’d like to share with the PLY blog readers? Try different fibres. In general, I’m a wool or wool blend spinner, but I’ve spun some wonderful yarns on my support spindle by using finer fibres that I wouldn’t normally consider. I’ve become a better spinner by adventuring outside my comfort zone!
PLY Magazine believes that Black lives matter, as well as LBGTQI+ lives. Those most vulnerable and persecuted in our communities deserve our love and support. Please be good to each other.
Counting Sheep: Reflections and Observations of a Swedish Shepherd by Axel Lindén. “Norwegian Wood meets The Tao of Pooh in this philosophical, witty, and heartwarming collection of daily observations from a Swedish academic-turned-sheep farmer who finds peace and meaning outside the hustle and bustle of modern, urban life.”
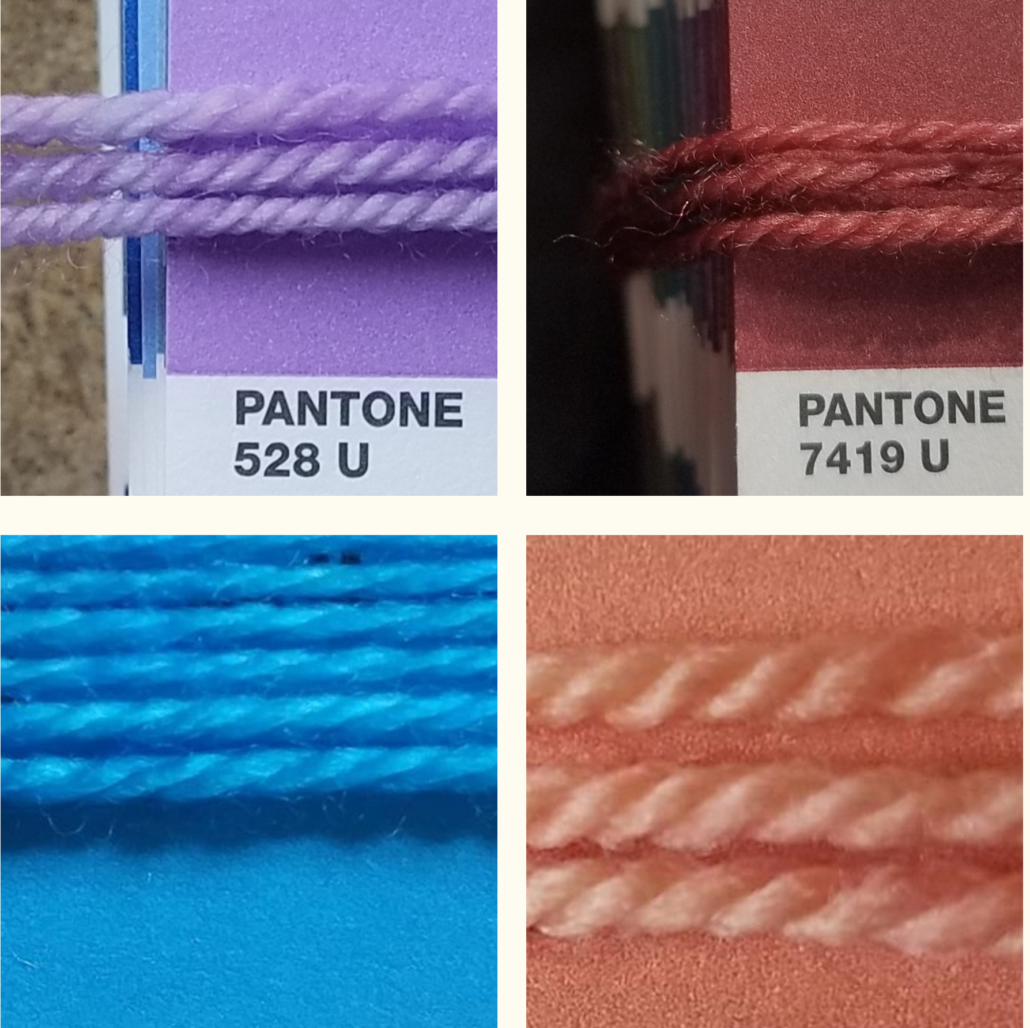
Color Matching Dye Formulas: Alanna Wilcox has developed a service where a dyer can select a color from a photograph or a Pantone U color and I will send them a formula designed to help them match that color. The formula includes the brand of dyes to use, the specific colors of dyes, the amount of dyes, and the amount of acid needed to dye a particular weight of fiber. Her system isn’t endorsed or affiliated with Pantone, but rather the culmination of hours of experiments and testing.
New Zealand Gamekeepers Possum Fiber: A startup business in New Zealand is selling A-grade possum fibre (with yarn and roving to come). A booklet on “How to work with possum fibre for fibre artists” is coming. You can also find them on Facebook as a page and a group.
https://plymagazine.com/wp-content/uploads/2020/12/SCENE-featured-image.png6281200Heather Fulfordhttps://plymagazine.com/wp-content/uploads/2014/06/plylogo-condensed-pnk-300x164.pngHeather Fulford2020-12-17 10:00:002020-12-14 20:32:29Winter SCENE
Let me begin by saying I am not a patient person. Once I set my mind on something, it’s full steam ahead and I want to see results as quickly as possible! Unfortunately, I have found impatience does not work well in some projects, such as dyeing experiments. However, I’ve found a few ways to use my oops fibers instead of throwing them away in disgust.
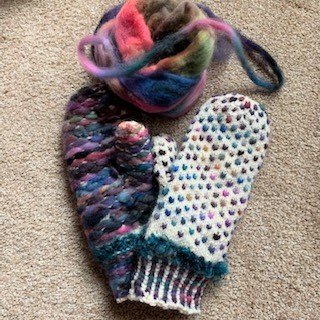
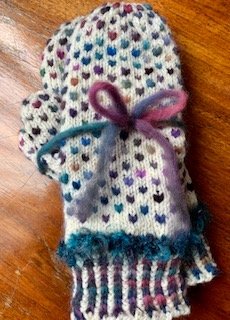
Thrumming mitts
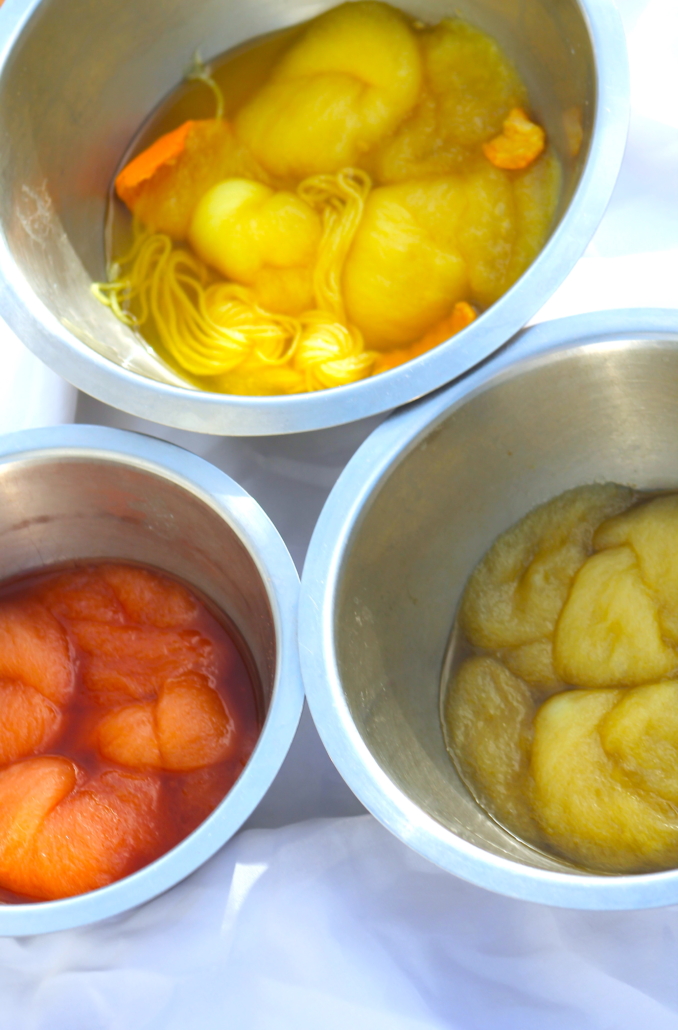
My first foray into dyeing wool seemed simple enough. I procured the needed supplies and dyes and watched a few YouTube videos. Then I couldn’t decide between low immersion, the crockpot, or steaming methods, so I decided to do all 3 at once because, hey, everything was out and the kitchen was already wrapped in plastic to prevent any possible spills. I happily prepared my dye stocks, squirted a bunch of different colors onto my soaked rovings, and set them all to cook different ways. What I wasn’t prepared for was the time it took for them to cool to room temperature, which where my impatience reared its ugly head. After about an hour, I dumped them all into a big colander. After another hour, they were still hot, so I started rearranging and fluffing a bit so they’d cool off faster. After another hour, I thought, “Well, I’ll just gently rinse them off with water a little cooler than the fiber.” Big mistake. I rinsed and then squeezed to get most of the water out, and then I set them in the sun to dry. After drying, although the colors were brilliant, I could not for the life of me pull off a staple length! Nor any length! Hmmm. I rolled them up and decided I would worry about that later.
About that time I was getting ready to make mitts for Christmas gifts. I had made thrummed mitts in the past, but people had advised me they were so bulky that they were unable to keep hold of a snow shovel or steering wheel. And personally, making all those individual thrums drove me crazy. I decided to try using roving and stranding it on the inside of the mittens to keep the warmth but not the bulk. Ah ha! Using that felted fiber would be perfect as it would not drift apart as easily as normal roving or top but would still provide protection from the cold and wind.
I set to work stripping (scratch that, I mean ripping) apart thin strips from my felted roving, and I used a basic mitten pattern I’ve had for ages. This was a slow process because it was definitely a rip instead of a normal strip! I just did a few inches at a time, trying to keep my strips as even as possible, about a quarter inch wide. Since my roving was multi-colored, I spun some white Cheviot to use as the main color and started knitting, using the roving to knit every 3rd stitch on every other row and taking care not to pull the stranded roving too tight. They came out wonderfully! I even used the roving in the ribbing, which created more beauty in the finished item.
Since then, I’ve been looking for different ways to use my oops and have even purchased more oops fiber from a popular indie dyer that was offered at a discount. (I had asked her if she had any extra, but she replied she hoped she would not have any more!) I know I am not the first person to think of stranding roving instead of using thrums for mitts, but let me tell you this technique is perfect for using up the occasional mistake. I can’t wait to try it for hats and slippers, or perhaps a cozy sweater or wrap for these cold winter months!
More ideas
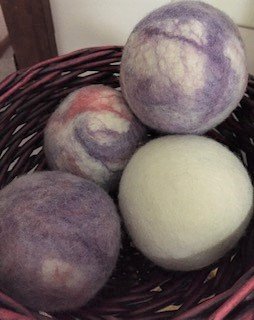
I’ve had great luck adding bits to dryer balls. I roll white wool into balls and then take a small piece of felted roving and really stretch it out, gently pulling it in all directions to cover part or most of the ball as desired but still letting the base color show through. I use the nylon stocking method of stuffing them into knee highs, tying a knot in between each one, and throwing them in with a hot load in the washing machine and dryer to felt them. I have not had any color transfer, but I made sure the dye had been fully absorbed and the water was perfectly clear when I rinsed. If you experience any color leakage after you dye, I wouldn’t recommend using your felted fiber for dryer balls.
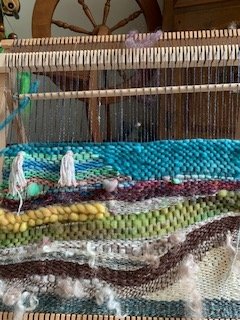
Tapestry weaving is another area to dabble in with your oops. Felted roving holds up fabulously with the abrasion of back and forth weaving across the warp. It’s interesting to see the color variations in the woven product, and it’s a very soft organic color shifting. How about needle felting? I bet it would be simple to needlefelt to a background.
There are so many ways to use up unintended oops fiber. I’m sure there are many more applications that I have not discovered yet!
Carole Bournias is a Buyer for a large food ingredient company. Residing in a small town on the banks of the St. Clair River in Michigan, her main focus is spinning, knitting, and creating. She is currently dabbling in dyeing and weaving; next on her bucket list is designing and commissioning.
PLY Magazine believes that Black lives matter, as well as LBGTQI+ lives. Those most vulnerable and persecuted in our communities deserve our love and support. Please be good to each other.
https://plymagazine.com/wp-content/uploads/2020/11/ply-coverbanner-6violet-dk.jpg234932Heather Fulfordhttps://plymagazine.com/wp-content/uploads/2014/06/plylogo-condensed-pnk-300x164.pngHeather Fulford2020-12-10 10:00:002020-12-08 16:51:38Use Your Oops
As I was writing my book, Spinning and Dyeing Yarn, I noticed several challenges of teaching from a book. It felt nonsensical, like learning how to ride a bike by reading a sentence and looking at still photos. I realized if I was going to effectively reach my students, I needed a different avenue of instruction.
In 2015, I organized all I’d ever learned about spinning yarn into 60 methods to teach with multiple fiber types and preps. Then I started recording videos while my babies napped. Last year I started uploading these videos weekly to YouTube to inspire the next generation of textile designers and yarn spinners. I’ve already published over 40 of these videos online and continue to post them weekly.
My goal in this work was to teach anyone anywhere how to spin yarn and to provide the resources lacking on the internet when I was trying to learn from home. It does not replace the value of in-person instruction but can be a helpful resource to learn how to spin when you are isolated, can’t afford a teacher, or don’t have instructors or wool festivals in your area.
After the events of 2020, I especially hope to reach those who are looking to replace lost income by working from home (many yarn shops will gladly purchase locally spun handspun yarns at wholesale or consignment pricing) and to parents who want to provide extracurricular art instruction to their children while unexpectedly homeschooling this fall. I also want to give the next generation of textile designers and creative minds some inspiration as they navigate online college coursework.
Other Resources
There are many online handspinning instructors who have free lessons on YouTube when you search for “spinning yarn” or “how to spin yarn.”
Some spinning teachers allow you to purchase a one-on-one virtual class with them. Look for the authors of your favorite spinning books and see if they provide this option.
Perhaps a handspinner you admire with an online shop or social media presence might be available for a paid one-on-one zoom or skype class.
When the world opens again, visit your local sheep and wool festival to take a class in person. In person instruction is the highest level of instruction you can find.
Local yarn shops often have spinning classes available, with wheels to test drive before you purchase.
Wheel Recommendations
I recommend SpinOlution wheels for the methods I teach in my video series, as creative yarn textures require an open orifice and bypassable flyer to prevent textures getting stuck or snagged. If you have a wheel with a small bobbin, ratios faster than 1:6, a small orifice, and a closed flyer system (tiny hooks or loop), you will need to drastically minimize the textures of my videos to get them to smoothly fit through your orifice and onto your bobbin. Hand winding is common when you are using a wheel that isn’t engineered to spin untraditional texture or you’re spinning bulkier than what the wheel was engineered to uptake.
You can find a SpinOlution dealer to take a test drive and learn how to spin yarn on a wheel engineered to spin both traditional yarns and creative textures. Many SpinOlution dealers are happy to teach spinning classes virtually thru zoom or other video conferencing software.
I hope you find these resources helpful as you stay safe this season and discover your new favorite creative spinning methods. Being a teacher is a privilege I don’t take lightly, and I am excited to meet the next generation of spinners who will blow me away with their talent.
Ashley Martineau, author of Spinning and Dyeing Yarn, teaches new spinning methods at howtospinyarn.com on YouTube. Ashley hopes to inspire spinners of all ages around the world to embrace their own creativity and create new, unique textures of yarn for use in fashion, craft, and art. When Ashley isn’t spinning yarn, she’s homeschooling her 3 kids, weaving tapestries inspired by ancient civilizations, and working with the SpinOlution company to create new features for their spinning wheels.
You can watch all of Ashley’s videos on her website, which has playlists designed to be watched in consecutive order on topics such as single-ply methods, plying methods, corespinning methods, and creative drop spindle methods. Special thanks goes to these generous fiber contributors, without which this series would not be possible.
PLY Magazine believes that Black lives matter, as well as LBGTQI+ lives. Those most vulnerable and persecuted in our communities deserve our love and support. Please be good to each other.
https://plymagazine.com/wp-content/uploads/2020/11/spinningposter-copy.jpg11422298Heather Fulfordhttps://plymagazine.com/wp-content/uploads/2014/06/plylogo-condensed-pnk-300x164.pngHeather Fulford2020-12-03 10:00:002020-11-24 20:22:39Learning to Spin Online
With every kind of tutorial and technique easily searchable online, dyeing has never been more accessible to spinners and knitters. Most crafters are likely to experiment with some type of dyeing or colour blending at some point in their practice. The creator of Sweet Georgia Yarns, Felicia Lo, has managed to produce an extremely comprehensive guide to dyeing that proves useful for the novice and experienced dyer alike.
In the early chapters, Lo touches on some fascinating cultural aspects and responses to colour. As a child, she was drawn to bright colours and wanted to wear them often, but her peers thought it strange. It resonates a lot with my own experience in western society, where it seems that dull, muted, or neutral colours are most favoured. It leads to all kinds of complicated feelings about colour, such as which are pleasing together or not or which look good with certain complexions. I find myself suspecting that we project a lot of feelings of inadequacies into our colour senses, especially in the west. It’s a shame, when they’re really meant to bring us joy, and maybe even freedom.
The author’s journey from craving to rejecting colour to rediscovering and exploring it in depth is very compelling. The idea that we need colour in our lives in some fundamental way stands out to me. We naturally have emotional reactions to colour, and particularly as crafters, we have the ability to explore them in such a way that can end up feeling therapeutic. Many of us can resonate with that feeling of awe when working with a special colourway. For those who are perhaps wary of starting to experiment on their own, there is an excellent chapter on colour theory that provides a basis for how colours interact and are perceived.
The sections on dyeing are very thorough, with instructions on setting up a dye studio as well. A lot of small-scale dyeing can be done in the kitchen, but when using acid dyes, it is advisable to have a separate area if possible. I found a lot of invaluable tips in this section, like choosing heavier bottomed pans over thin ones to ensure even heating. Lo touches on natural dyeing and the richness of colours that can be created with it, providing lots of tantalising photos. In the case of acid dyeing, she explains how to measure dyes to get the same colour, even without the use of a precise scale.
We go on to learn how to dye yarn for all types of different effects: solid colour, tonal, variegated, hand painted, self striping, gradient, resist dyeing, layering. There is enough inspiration in these pages to pique the interest of dyers who may already know these techniques. The part on mistakes and troubleshooting mistakes is much appreciated – I could have used these at several points in my own dyeing journey.
Spinning with colour opens up a whole new world of possibilities, and this was my favourite part of the book. There are so many ideas to explore that it left me buzzing. The beautiful complexity of the yarns created with optical mixing and combination drafting, for example, made me want to pull out some fibre right away. There is plenty of material for non-dyeing spinners to experiment with, such as the ways in which grist, pre-drafting, or staple length can affect colour.
One of the key take-aways from the spinning chapters was the multitude of ways in which fibre can be split and spun to create various effects, like short or long colour repeats, gradients, or muted colour stories. Spinning straight from dyed top can be interesting but doesn’t always result in the most exciting fabric. Batts add another layer of fun and experimentation, despite being time intensive to make. The blending possibilities are greatly increased, so even mixing two colours gently can result in a more complex yarn than other methods. The author teaches us how to make layers of different colours and spin them to different effects.
Lo obviously knows spinners well, because she nudges us to actually knit, crochet, or weave with the yarn instead of calling the process finished once it’s washed. I will, Felicia, just as soon as I’m finished spinning it all…
The book helpfully tries to explain how to best use multicoloured yarn in knitting, and how stitch patterns are affected by the way it’s dyed. It ends with a chapter of knitting patterns designed by the author. Some of these are handspun, and the rest could easily be adapted to work with handspun. They are mostly cowls and shawls, a blanket and a pair of socks.
In my view, almost every dyer or spinner could find some value in this book, even if they’ve been playing with colour for a while. The ideas, inspiration, and photographs alone make it a worthwhile addition to the spinning bookshelf – the author’s passion is quite infectious.
Rating: 4/5
PLY Magazine believes that Black lives matter, as well as LBGTQI+ lives. Those most vulnerable and persecuted in our communities deserve our love and support. Please be good to each other.
https://plymagazine.com/wp-content/uploads/2020/08/ply-coverbanner-1-red-dk.jpg234932Heather Fulfordhttps://plymagazine.com/wp-content/uploads/2014/06/plylogo-condensed-pnk-300x164.pngHeather Fulford2020-11-26 10:00:002020-11-24 20:23:36Book Review: Dyeing to Spin and Knit by Felicia Lo
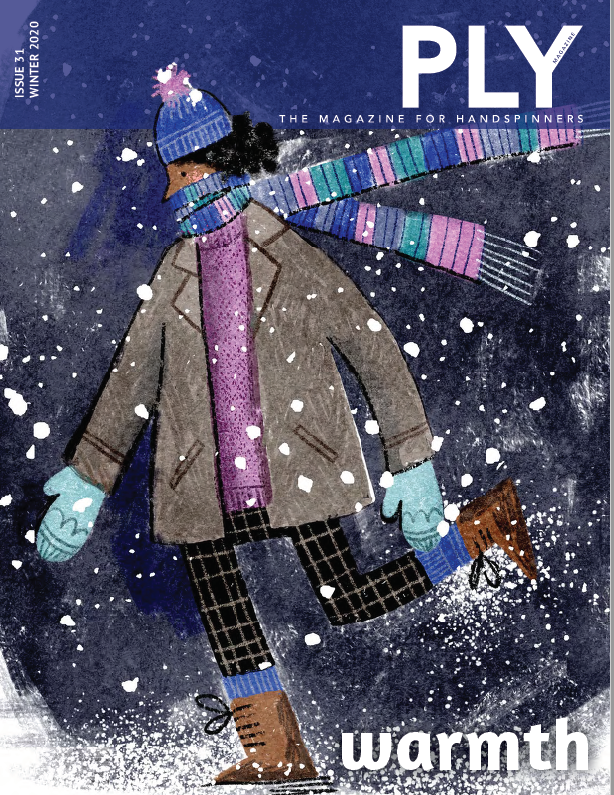
The Winter 2020 issue on Warmth is coming next month, and it’s specially crafted to keep you toasty as we slide into December. This issue is full of everything: it’s got smart, informative articles that run the gamut from dyeing (with Sasha Duerr) to how to spin the warmest worsted yarn possible, from what the warmest sheep breeds are to how to spin a very fine woolen yarn. It’s got colorwork convertible mittens as well as a brioche hat from Nell Ziroli, and Maggie Casey and Judy Steinkoenig team up to make the warmest yarn and the warmest woven scarf. Judith MacKenzie writes “Notes from a cold country,” 6 of our favorite spinners tell you about the warmest yarn they can make, and we take socks that were once warm and make them warm again. You’ll read about things that warm a heart and community, such as fibersheds, community art, and Shetland’s traditional pile blankets, and a piece about one of the warmest women in the community. Of course, there’s more, too! Don’t miss it. Make sure your subscription is up to date by November 20th and look for it around the 10th of December!
PLY Magazine believes that Black lives matter, as well as LBGTQI+ lives. Those most vulnerable and persecuted in our communities deserve our love and support. Please be good to each other.
https://plymagazine.com/wp-content/uploads/2020/11/ply-coverbanner-6violet-dk.jpg234932Heather Fulfordhttps://plymagazine.com/wp-content/uploads/2014/06/plylogo-condensed-pnk-300x164.pngHeather Fulford2020-11-19 10:00:002020-11-18 20:34:33Winter 2020 is coming
Your first textured creative yarn (art yarn) may feel like a disaster. I know mine did! Learning to draft thick and then thin, auto wrap thread, and try out other textured techniques left me with no shortage of “bad yarn”: yarn that at first glance and handle felt like it would be better if I gave up on it altogether. However, with a few simple tips and tricks you can take your first trials with textured creative yarn from bottom-of-the-barrel yarns to stash-enhancing yarns.
As a lover of both texture and colour, I consider handspun yarns to be the crown jewels of my collection, and I include my first handspun in this collection of yarn jewels. Not because I was some sort of amazing natural who spun the perfect textured yarn from the get-go, but because in its imperfections I can still find inspiration. I was not, and I am not, afraid to tweak my first version, second version, and all the versions that come after.
It is truly rare that in any learning process our first attempts are what we envisioned. Sometimes those first attempts can feel utterly hopeless; the magic happens when we keep with something and let nothing go to waste. It is true that sometimes we just need to start again from scratch, and in this case those yarn fragments, barely-spun pieces, and springy bits of fibre can have a home in your scrap bin: pull them apart, cut them up, and card them into a wild and wonderful batt to combo spin with some roving.
The issues
First yarns usually have a few common problems: they often have weak spots, are of an uneven tension (overspun/underspun), and have uneven width – unintentional thick and thin spots that lack flow.
Weak spots
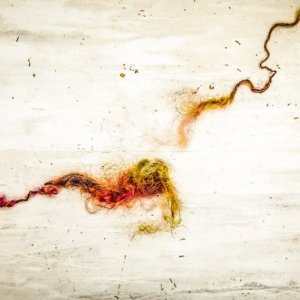
Weak spots are areas that are too thin for comfort, a yarn that broke when you took it off the bobbin, or yarn that lacks stability when you try to use it in a project.
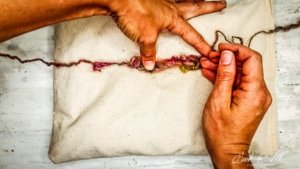
The fix: Needle felt and then add a little friction felt magic. First, take the 2 ends and twist them around each other, crossing them by approximately 1–2 inches (12–25cm). Hold the newly twisted area (it will be a loose twist around) with 2 fingers. I use my thumb and first finger to hold the 2 broken ends in place. I hold them on top of a needle felt pad and then needle felt with a 36-gauge needle starting in the middle and then moving to one end and then the other. Flip the yarn around regularly, from top to bottom and side to side, repeating the needle felt process. As you work, wrap any stray ends around the yarn and then needle felt in place.
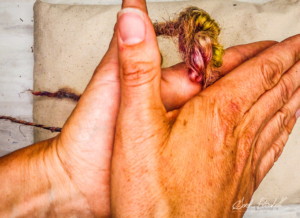
Once the 2 broken ends are joined together, roll the yarn between your hands. I don’t want to give this area a really different look, so I don’t use an actual wet felt process; rather, I use a friction felt by using the natural moisture of my hands and the friction of the rolling action to help further join (tangle) the fibres together.
At this point, I give the section of yarn a little tug to find out if my repair work is holding. If I sense any residual weakness I will continue to both needle and friction felt until the broken ends are joined to my satisfaction.
Overspun or underspun sections
Overspun yarn will be very kinky and twist back on itself tightly without effort on your part. Overspinning singles is used for yarns to be plied, so one of the most common fixes for an overspun yarn is to ply it. However, if I intended to create a singles yarn, I would put the yarn back on my wheel or spindle and work in the opposite direction to that which I spun the yarn in the first place. A slightly overspun yarn or one with sections of overspin can also sometimes be dealt with once skeined during the finishing process while the yarn is still damp. I work the skein by gently snapping small sections of the yarn, gradually working around the entire length. I will repeat this process a number of times in one session and sometimes repeat a session as the yarn dries. Lastly, my favourite way of working with an overspun yarn is to spin it again, either in the opposite direction to release the additional twist (for extremely overspun yarn) or with another yarn to experiment with coiling it onto base yarn or leaving twisty back loops!
Underspun sections in your yarn can show up as puffy areas that look more like the fibre before spinning and can leave weak spots. They can be dealt with by using the weak spot repair technique discussed above. If your entire yarn lacks twist and integrity, you can re-spin the yarn by putting it back on your spindle or wheel and spinning in the direction you spun it. When I re-spin a yarn on my wheel, I work with more brake tension to increase the uptake and reduce the likelihood of creating the opposite problem of an overspun yarn.
Thick and thin
Having uneven width along the yarn strand may be the easiest to work with: knit it or crochet it on a needle or crochet hook that is bigger than standard for the yarn weight. The uneven thick and thin will make lovely net fabric. This may require a bit of experimentation to get the correct size for the nicest look. I start with the ideal tool size for the thickest part of the yarn I am working with and tweak sizing from there. If your thick and thin yarn also has other issues, such as those mentioned above, or you want to knit it into a project where the look or style you would like requires a more even yarn, I would move to plying the yarn as a way to smooth out the worst of the uneven areas. Plying 2 uneven yarns together often works in an uncanny way, creating an unexpected level of evenness. Of course if your yarn has significant width differences, your yarn, plied or not, will still have an uneven texture. If the yarn you would like to ply does not have enough twist after a plyback test, you can re-spin the yarn in the same direction you spun it to begin with, creating enough overspin that the yarn will not be underspun when you ply it. You can also chain ply yarn made of an uneven thickness to create a very interesting rope-like yarn. Another method is to ply your thick and thin yarn with a thread or cord for a bubble or bobble look.
Use them as they are
One of my favourite ways to enjoy my first handspun yarns both of the more traditional vein and those first creative textured yarn attempts has been to embrace them for what they are and to find uses that suit their unique nature. Find some examples below and then use your creativity and curiosity to experiment!
Use yarn that is overspun, thick and thin, or from a scratchy fibre (or all of the above) to crochet or knit into a small cloth, either alone or with another suitable yarn. Use it as an exfoliator or for your dishes. This yarn in finer or softer fibres can make a delightful springy and interesting fabric. Arm knit or use large needles to create a cowl, scarf, or shawl with this living yarn.
Small samples that twist and turn and that are uneven and unique can be used in simple projects without a pattern. Projects that use single or double crochets or stocking or garter knit stitches will be the most straight forward to work shorter lengths of handspun yarn into. Hats, fingerless mitts, and leg warmer patterns, along with shawls, cowls, and sweater edgings are all places you can use small amounts of not quite perfect handspun yarn. By using wraps per inch (WPI) to match the weight of a base yarn, it is straightforward and easy to insert rows of handspun yarn next to a base yarn. A bonus to this approach is that an even millspun or handspun yarn juxtaposed with a textured creative yarn is the perfect way to show off the beauty of both yarns.
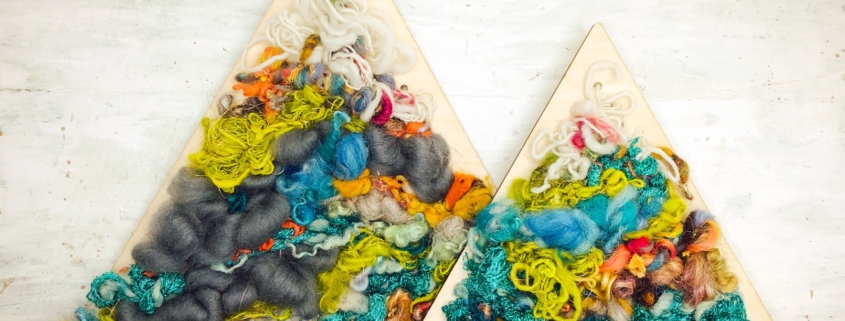
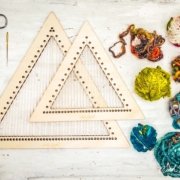
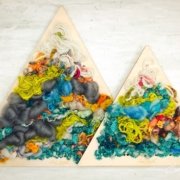
Project Looms are a wonderful way to play creatively and to make it up as you go! Project looms are a style of loom in which your project is left in the frame after completion, which means no finishing, easy to hang, and almost no rules! Project looms come in a variety of shapes, sizes, and styles such as stars, circles, rainbows, mountains, clouds, animals, and more! The brilliant aspect of the project loom is that because your project remains in the frame, it matters very little if the yarn you use has weak spots, is overspun or underspun, or is not really a yarn at all! Use the yarn in a plain tabby weave (over one, under one, repeat), make bubbles, create tassels, or simply stuff it into the spaces between the warp. Let your imagination be your guide!
Don’t let imperfection spoil your creative fun, for often that which we perceive as flawed is where true beauty can be found.
Sarah Elizabeth is a Canadian born, classically trained painter and sculptor with a Baccalaureate of Arts from the University of Guelph. Her current focus is in mixed media works with a basis in textiles. Sarah uses traditional and functional handcrafts such as spinning, weaving, macramé, felting, and stitching to inform the basis for her professional works, which are inspired by the breathtaking landscapes of the Kootenays. Sarah is the artist and owner behind Sarah Elizabeth Fibre Works, a destination fibre art supply business based in Rossland, BC, Canada with a focus on ethical, sustainably sourced and produced fibre art supplies and tools for all fibre art enthusiasts including knitting, crochet, weaving, spinning, felting, macramé, stitching, and more.
PLY Magazine believes that Black lives matter, as well as LBGTQI+ lives. Those most vulnerable and persecuted in our communities deserve our love and support. Please be good to each other.
https://plymagazine.com/wp-content/uploads/2020/11/Elizabeth-Photo-7.jpeg.jpeg10521610Heather Fulfordhttps://plymagazine.com/wp-content/uploads/2014/06/plylogo-condensed-pnk-300x164.pngHeather Fulford2020-11-12 10:00:002020-11-02 20:52:10Make the Best of Your First-Version Handspun Yarns
I love knitting socks, but I had never knit socks using handspun yarn. Even though I was inspired by the Sock issue of PLY (Winter 2018), I still hadn’t sat down and actually tried any of the techniques given in that issue. So I was really excited to take this online course from Alanna Wilcox on Spinning for Socks.
Upon purchase of the course, I received a PDF with a link to the course and a unique password. The course contains two hours of pre-recorded videos that you can watch on your own schedule as many times as you’d like. (You can schedule individual one-on-one lessons with Alanna after taking the class if you need/want more in-depth lessons.) There are also 3 worksheets provided as part of the course: an overview of the videos, a chart of wool grades and micron counts, and a twist gauge tool.
On the course website, the list of prior knowledge makes it clear what you need to know to be successful in this course. Essentially, it’s suitable for spinners with a basic knowledge of spinning. A list of materials is also provided, although it is recommended to watch all of the videos first before purchasing any items to be sure you don’t buy anything you personally wouldn’t find beneficial.
The videos include an introduction plus 4 videos, with a time stamp list of contents for each video so you can jump to a specific topic. This is very handy for when you want to go back and watch part of a video again. Videos are between 21 and 35 minutes long.
The intro video gives a brief overview of the workshop, why you’d want to use handspun for socks, and suggestions for how to go through the workshop. The course videos cover spinning from already prepared fiber as well as spinning from fleece. Alanna does a good job outlining at the beginning of each video what will be covered in the video. Each video contains some lecture, some demonstration, and some slides with images. Overall the presentation is clear and organized.
Video breakdown
The first video gives a good overview of the considerations to keep in mind when planning for spinning and knitting socks (desirable sock qualities). An advanced spinner would probably be familiar with this information already, but the video is still worthwhile watching for little tidbits here and there. For someone less familiar with this information, you’ll get a solid foundation.
One small issue I noticed is that when you finish a video (which is hosted on Vimeo), another video from Alanna’s channel comes up (not related to this course). Although it doesn’t autoplay, it does replace the course video on the website you are viewing, so if you want to get back to the course video, you need to refresh the page.
The second video looks specifically at the best wool for socks as well as possible blends. Alanna shows example of carding and pulling through a diz and gives options for what to do if you don’t have hand cards. (You can also use commercial top.) There’s a short quiz toward the end of the video giving 3 options for you to choose which blend would be best for socks, which is nice to test the knowledge you’ve learned in this lesson.
The third lesson is divided into 2 videos. The first one starts with a lesson on worsted spinning and uses short backward draw. At one point in the video, the sound quality isn’t quite as good (it seems like some minor feedback); if you’re listening with earbuds, you should watch for this about 5 minutes in because it might be jarring to your ears (it lasts about 5 minutes). Alanna does a worsted vs woolen comparison (which is a little repetitive because it was also done in the first video but it’s more in depth and can be good to reinforce the knowledge, especially if it’s new to you). She shows how to measure twist angle and then gives a challenge for you to try out measuring twist. (I found this to be a really helpful part of the course.) She also shows how to use plyback samples to figure out the best twist and WPI to use. (Note: the camera had some autofocus issues during this part.)
In part 2 of the third lesson, Alanna shows you how to deconstruct commercial sock yarn to find twists per inch of both plied yarn and the singles and then shows how to spin to match that commercial sock yarn. The focus here is on how much twist to add in both the single and the plied yarn. She discusses the number of plies best appropriate for sock yarn; however, she does not mention other options such as cable, crepe, or opposing ply yarn. She also talks a bit about fiber prep and wheel setup. The challenge for this lesson is to spin a specific WPI and twist angle yarn using a fiber recommended.
There are some great examples of pretty handspun socks (credit given to the spinners/knitters at the end of the last video). If you like cats, make sure to watch to the very end.
The verdict
If you’re new to sock spinning (or have tried sock spinning but haven’t felt successful) and want a good foundation for where to start, this video course will definitely be helpful to you. If you’ve done some spinning for socks using 3-ply and 4-ply yarns that you’re happy with and want to expand your skills beyond those yarn constructions, you won’t find that in this particular video course, though you may find some tips sprinkled throughout that you would find helpful.
My sock spinning experience so far
As for myself, I started with some BFL fiber and spun some samples to put on a card to help keep me consistent as I spun. I feel like I did great with regard to the twist angle and twists per inch; however, I was so focused on that part that I didn’t pay as close attention to my WPI. So when I finished my 3-ply yarn, I realized that it was more of a sport weight than the fingering weight yarn I had been aiming for.
I did start knitting a sock with it, but I used my usual size needles for fingering weight yarn and realized that was making my hands hurt. So I haven’t finished the first sock yet (and I even made it an ankle sock) as the knitting is slow going. But I did spin only half of the fiber, so with the other half, I’m trying again, this time trying to focus as much on the thickness of the yarn as I did on the twist. I’m still working on this project but so far I’m already noticing a difference and feel hopeful that this attempt will produce something much closer to the fingering weight yarn I am aiming for.
PLY Magazine believes that Black lives matter, as well as LBGTQI+ lives. Those most vulnerable and persecuted in our communities deserve our love and support. Please be good to each other.
https://plymagazine.com/wp-content/uploads/2020/11/Sock-yarn-scaled.jpg25602560Heather Fulfordhttps://plymagazine.com/wp-content/uploads/2014/06/plylogo-condensed-pnk-300x164.pngHeather Fulford2020-11-05 10:00:002020-11-02 20:27:10Review: Spinning for Socks online course
Beth provides PLY’s customer service, so when you write to the contact us email address or call the PLY phone number, Beth is who you’ll reach!
Tell us a little bit about yourself, what fiber craft(s) you do, and how you got started in the fiber world.
Knitting is my “main” fiber art, but I also love quilting, spinning (obviously), needlepoint, and sewing. I also dabble in weaving. Oh, and photography. And drawing and watercolor painting have recently been added in to the mix. It all got started in the Girl Scouts when I earned the Knitting badge. Other than that, I was a pretty terrible scout! I’m not one to blindly follow along with whatever the rest of the crowd is doing, so that was a mismatch from the get-go.
Tell us about how you got started with your role at PLY and what you do for PLY.
My best friend told me about the opening at PLY after she saw it on Facebook, and I still don’t know why she didn’t keep it for herself! She would have been an excellent choice. She’s also the one I blame for getting me into spinning because she raises Finns and I think she just wanted to off-load some of her fleeces! Anyway, I sent in a totally non-traditional email as an application, didn’t include a resumé, and was completely shocked when I made the cut to have an online interview with Jacey, and even more so when she offered me the job!
This photo is from a class with Franklin Habit on photographing your knitting. The man is genius personified, I tell you; take any class with him that you can!
And I must say that I absolutely love this job! I have had so many customer service and retail jobs where the clients were just so consistently unpleasant, but that has not been the case at all with PLY! Most of my work comes in by email, but I absolutely love it when our readers call. One customer even called from Australia! There are a few readers who keep in touch with an email every now and then, and it absolutely makes my day to know that someone on the other side of the country is thinking about me when we have never met face-to-face. What an honor!
What do you do with your free time?
Free time? Hah! What free time? Have you seen the list of hobbies? My beloved and I also moved to a new home at the end of May. It had been empty for some time and needs a lot of work, so that is currently taking up a bunch of our time. It has been a lot of fun putting our creative energy into faux painting techniques, using stencils for wall decorations, and choosing paint colors. He is orignally from South Korea, so finding a mutually-pleasing aesthetic is proving to be a challenge: he favors a more Zen approach, while I am left drooling over all the super colorful renovations Lucy Neatby has been posting on Instagram!
What else would you like to share about yourself?
We live in Conneticut with my two boys and two frisky kitties (Jacey and I are cat twins!). I fully intend to milk the “my house is a mess because we’re not done unpacking” excuse to avoid housework as long as possible. And I love the fact that I can do my job in pajamas and nobody knows the difference.
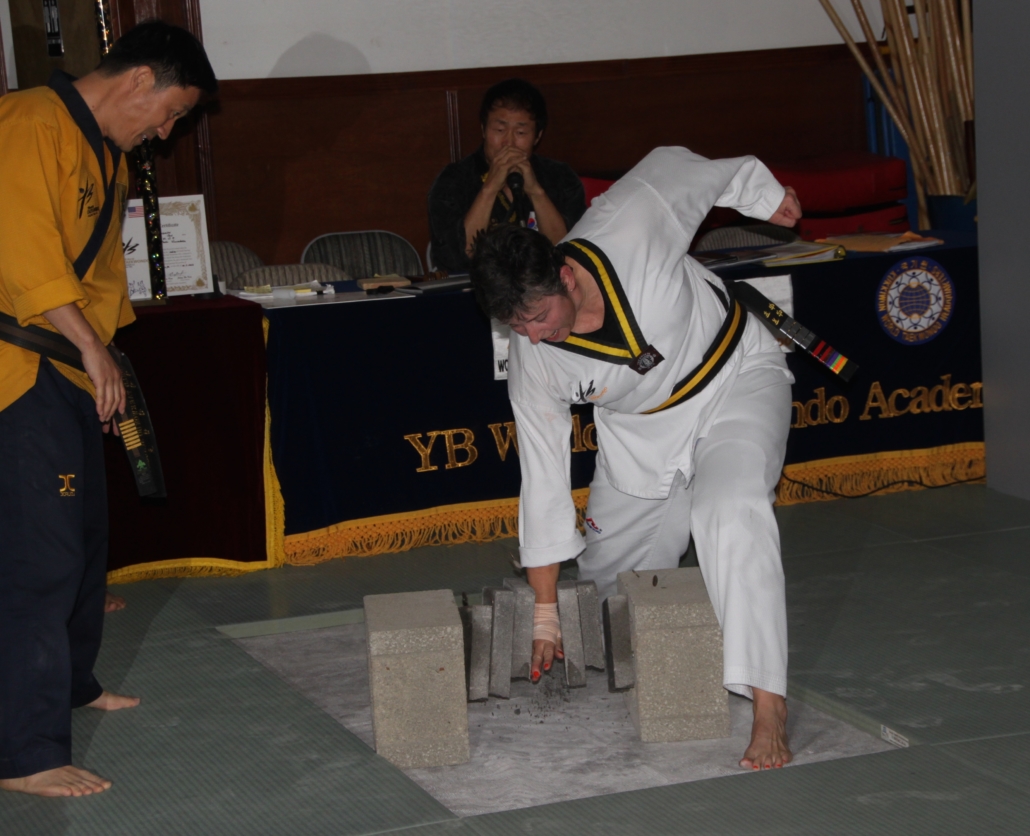
I used to be a bad ass. This was the test for my Third Degree Black Belt in TaeKwonDo. Before I hit them, those bricks were on fire. The man on the left, in the two-tone uniform, is my teacher and my beloved. I met him in class.
Am I a Consistent Spinner and Other Lies I Tell Myself
Consistency is tough. It has been something I have strived for in so many aspects of my life, my spinning being only one small example. As PLY’s customer service representative, I try so hard to provide a consistently high level of assistance to all of our wonderful readers. I try to make my spaghetti sauce taste pretty much the same every time I make it. But my yarn? Oh. My. That is another story.
I try, I really do. Thankfully, being a world-class spinner was not a job requirement. (Thank you, Jacey!) Please bear in mind that I have ADHD, and sometimes I forget to take my meds. For those of you who don’t know what it’s like to live with this type of brain, I refer you to the movie Up. If “Squirrel!” means anything to you, now you get it. If you don’t know the movie, it’s fabulous on so many levels, so you should watch it. Really. Without meds, I see a lot of squirrels on an hourly basis.
For example, I may start out with the intention of spinning a lovely laceweight in an amazing blue fiber that’s a blend of silk and Merino and other lovelies, and I’m fine until “Squirrel!” And my fully focused, mostly even worsted yarn becomes a mostly even-ish woolen yarn a few (hah! several!!) less WPI than what I started with. This is the sad but true story of my spinning life. I console myself by saying that nobody will ever notice once the shawl is knitted up after the singles have been plied. I mean, plying hides a multitude of sins, doesn’t it?
I consistently tell myself that if I concentrate really, really hard, I can make sure the rest of the spinning is 100% worsted so the plying will make up for my encounters with grey rodents. That my whimsy merely shows the “hand” in handmade. Maybe I tell myself that only expert eyes will examine my knitting that closely, and if they do, maybe they need to relax a bit and back off.
At the end of the day, the one consistent thing about my spinning is that I try. Sometimes I actually succeed. For very brief periods of time. The trick is to not let that stop you. You just have to find the “convincing arguments” (some would say “lies”; po-tay-to, po-tah-to) that keep you going. Find them. Use them. Don’t let anyone tell you otherwise. My personal motto is “It will be fine.” The “it” changes all the time. Sometimes it’s my spinning, sometimes the spaghetti sauce. Either way, I end up with something worth the effort.
PLY Magazine believes that Black lives matter, as well as LBGTQI+ lives. Those most vulnerable and persecuted in our communities deserve our love and support. Please be good to each other.
https://plymagazine.com/wp-content/uploads/2020/08/ply-coverbanner-1-red-dk.jpg234932Heather Fulfordhttps://plymagazine.com/wp-content/uploads/2014/06/plylogo-condensed-pnk-300x164.pngHeather Fulford2020-10-29 10:00:002020-10-21 22:00:04Get to know the PLY team: Beth Vincelette