We often spin yarns to cover the heads and hands of kinds, what is the best handspun for these high-wear but low-care projects? Blends, structures, fibers?
We share tips in every issue of PLY; these tips will for the Head and Hands Winter 2021 issue.
The person who submits our favorite tip will get a prize from us! It’s our way of saying thanks for sharing your wisdom with the PLY readers.
Did you know we also have a monthly PLY newsletter? Sign up here!
PLY Magazine believes that Black lives matter, as well as LBGTQI+ lives. Those most vulnerable and persecuted in our communities deserve our love and support. Please be good to each other.
https://plymagazine.com/wp-content/uploads/2020/01/ply-tipjar1.jpg4301500Heather Fulfordhttps://plymagazine.com/wp-content/uploads/2014/06/plylogo-condensed-pnk-300x164.pngHeather Fulford2021-07-22 10:00:002021-07-21 19:38:15Send Us Your Tips
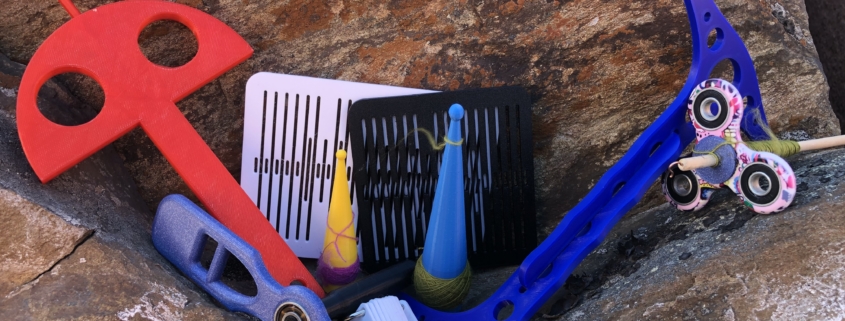
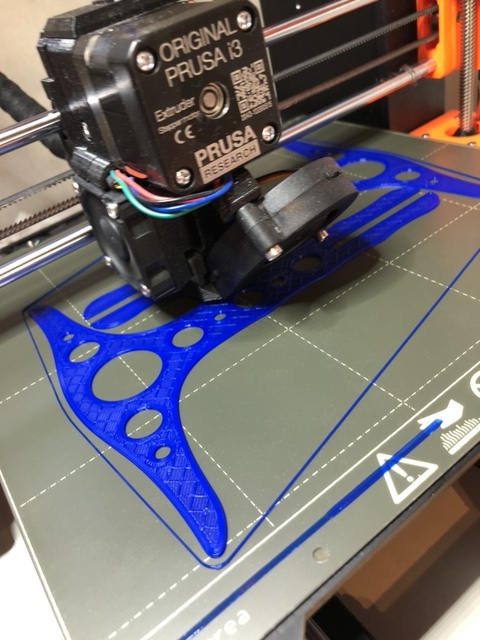
When the Coronavirus cancelled our plans for summer vacation, I decided to invest the airfare refund in a 3D printer. The initial thought was to print fun stuff for the kids, useful things for the house, and bobbins for my EEW Nano and other tools for spinning and weaving. The printer is useful for all sorts of projects. Where I earlier had to make things of wood or metal, I can draw up my project on the computer and some hours later the finished thing is ready. Now, I must admit, it not always quite as easy as that. There have been a lot of trials and errors, a lot of hours cursing the computer for not understanding what I want it to do for me in the design program, and the occasional spaghetti incidents.
A lot of finished designs for spinners are available on sites like Thingiverse, ranging from simple drop spindles to entire plans for electric spinners. On Thingiverse, all files are free to use, and some you can even print for sale. Just be sure the designer has released the design with such a license. It is never fun to find your design being sold on Etsy by someone else if your intent is just to share designs for personal use.
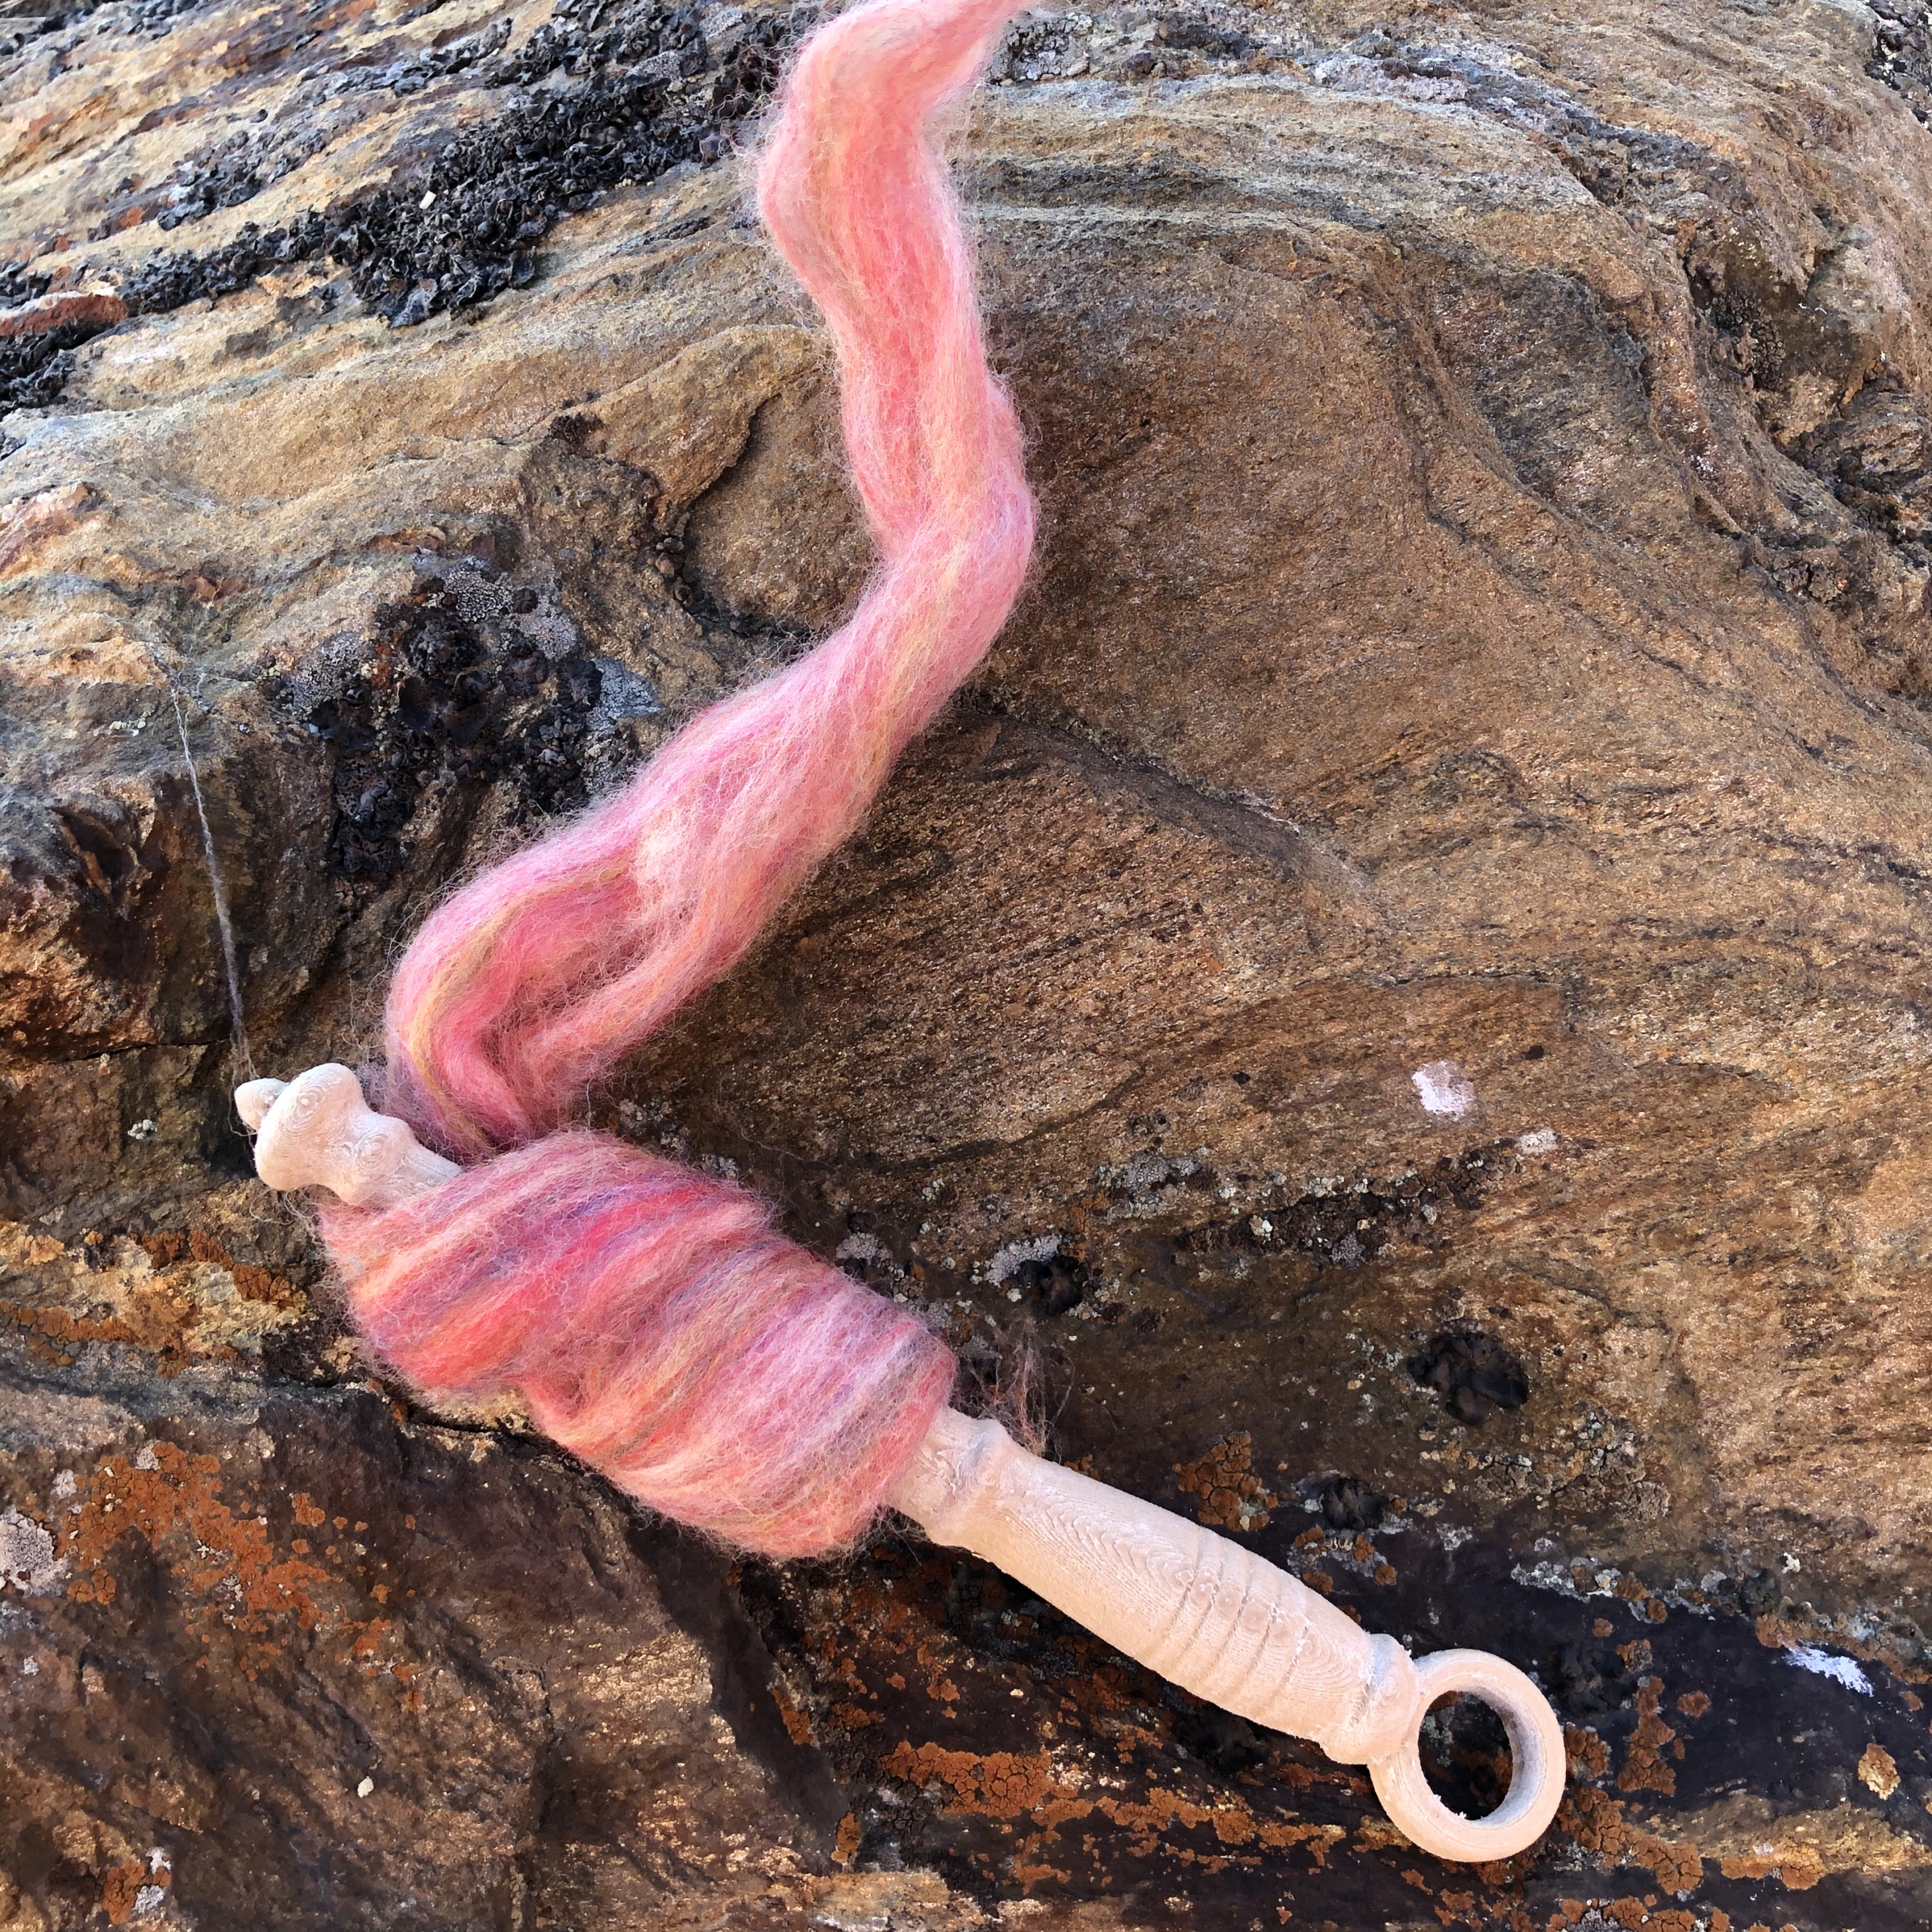
The first 3D-printed spindles I saw in a spinning forum was Chivampi’s dealgan back in 2016. I had never even seen a spindle like that, and 3D-printing itself was quite new to me. The dealgan spindle is of Scottish origin from the 18th century and doubles as a nostepinne if you wind your yarn right. A dealgan is an easy to print, easy to use spindle (once you get your leader attached), and the spindle can be used just as is, straight from the printer. You can find a couple more dealgan designs on Thingiverse too if you should want a little more curved look. There are often many different options on a theme, and it is always encouraged to post makes and adaptions to a design; just remember to be nice and credit the designer if you use an existing design as a template.
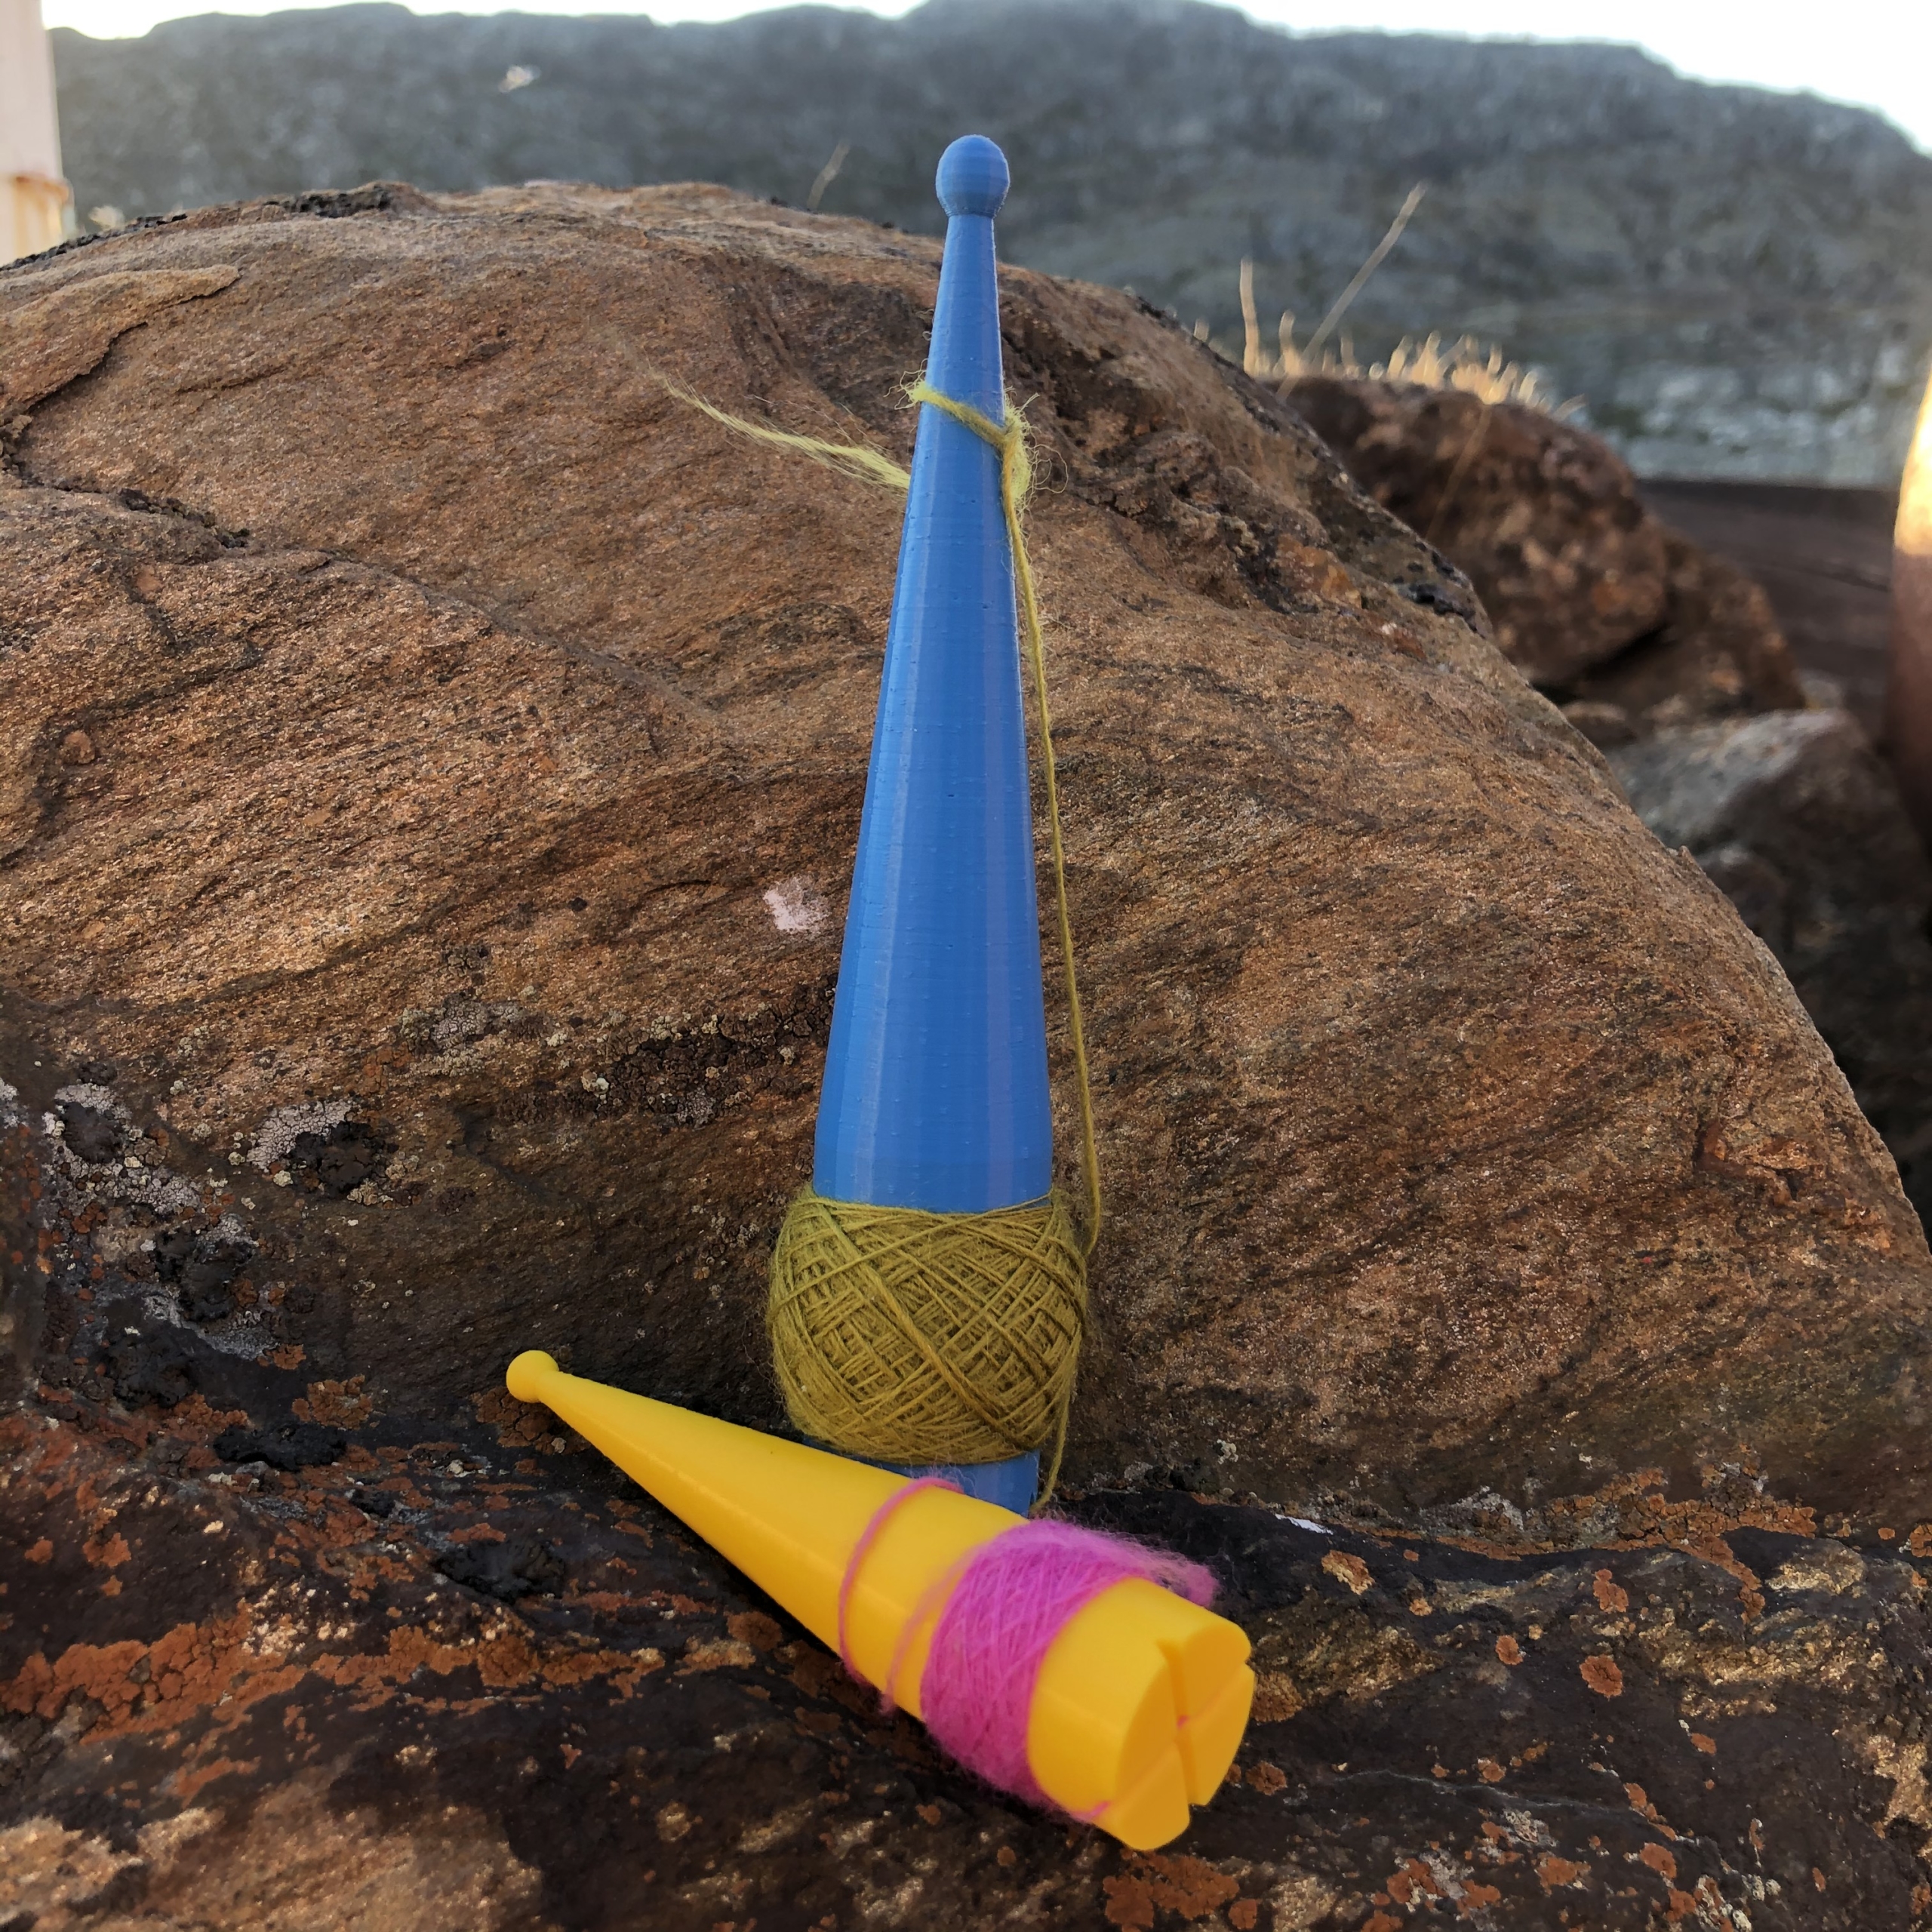
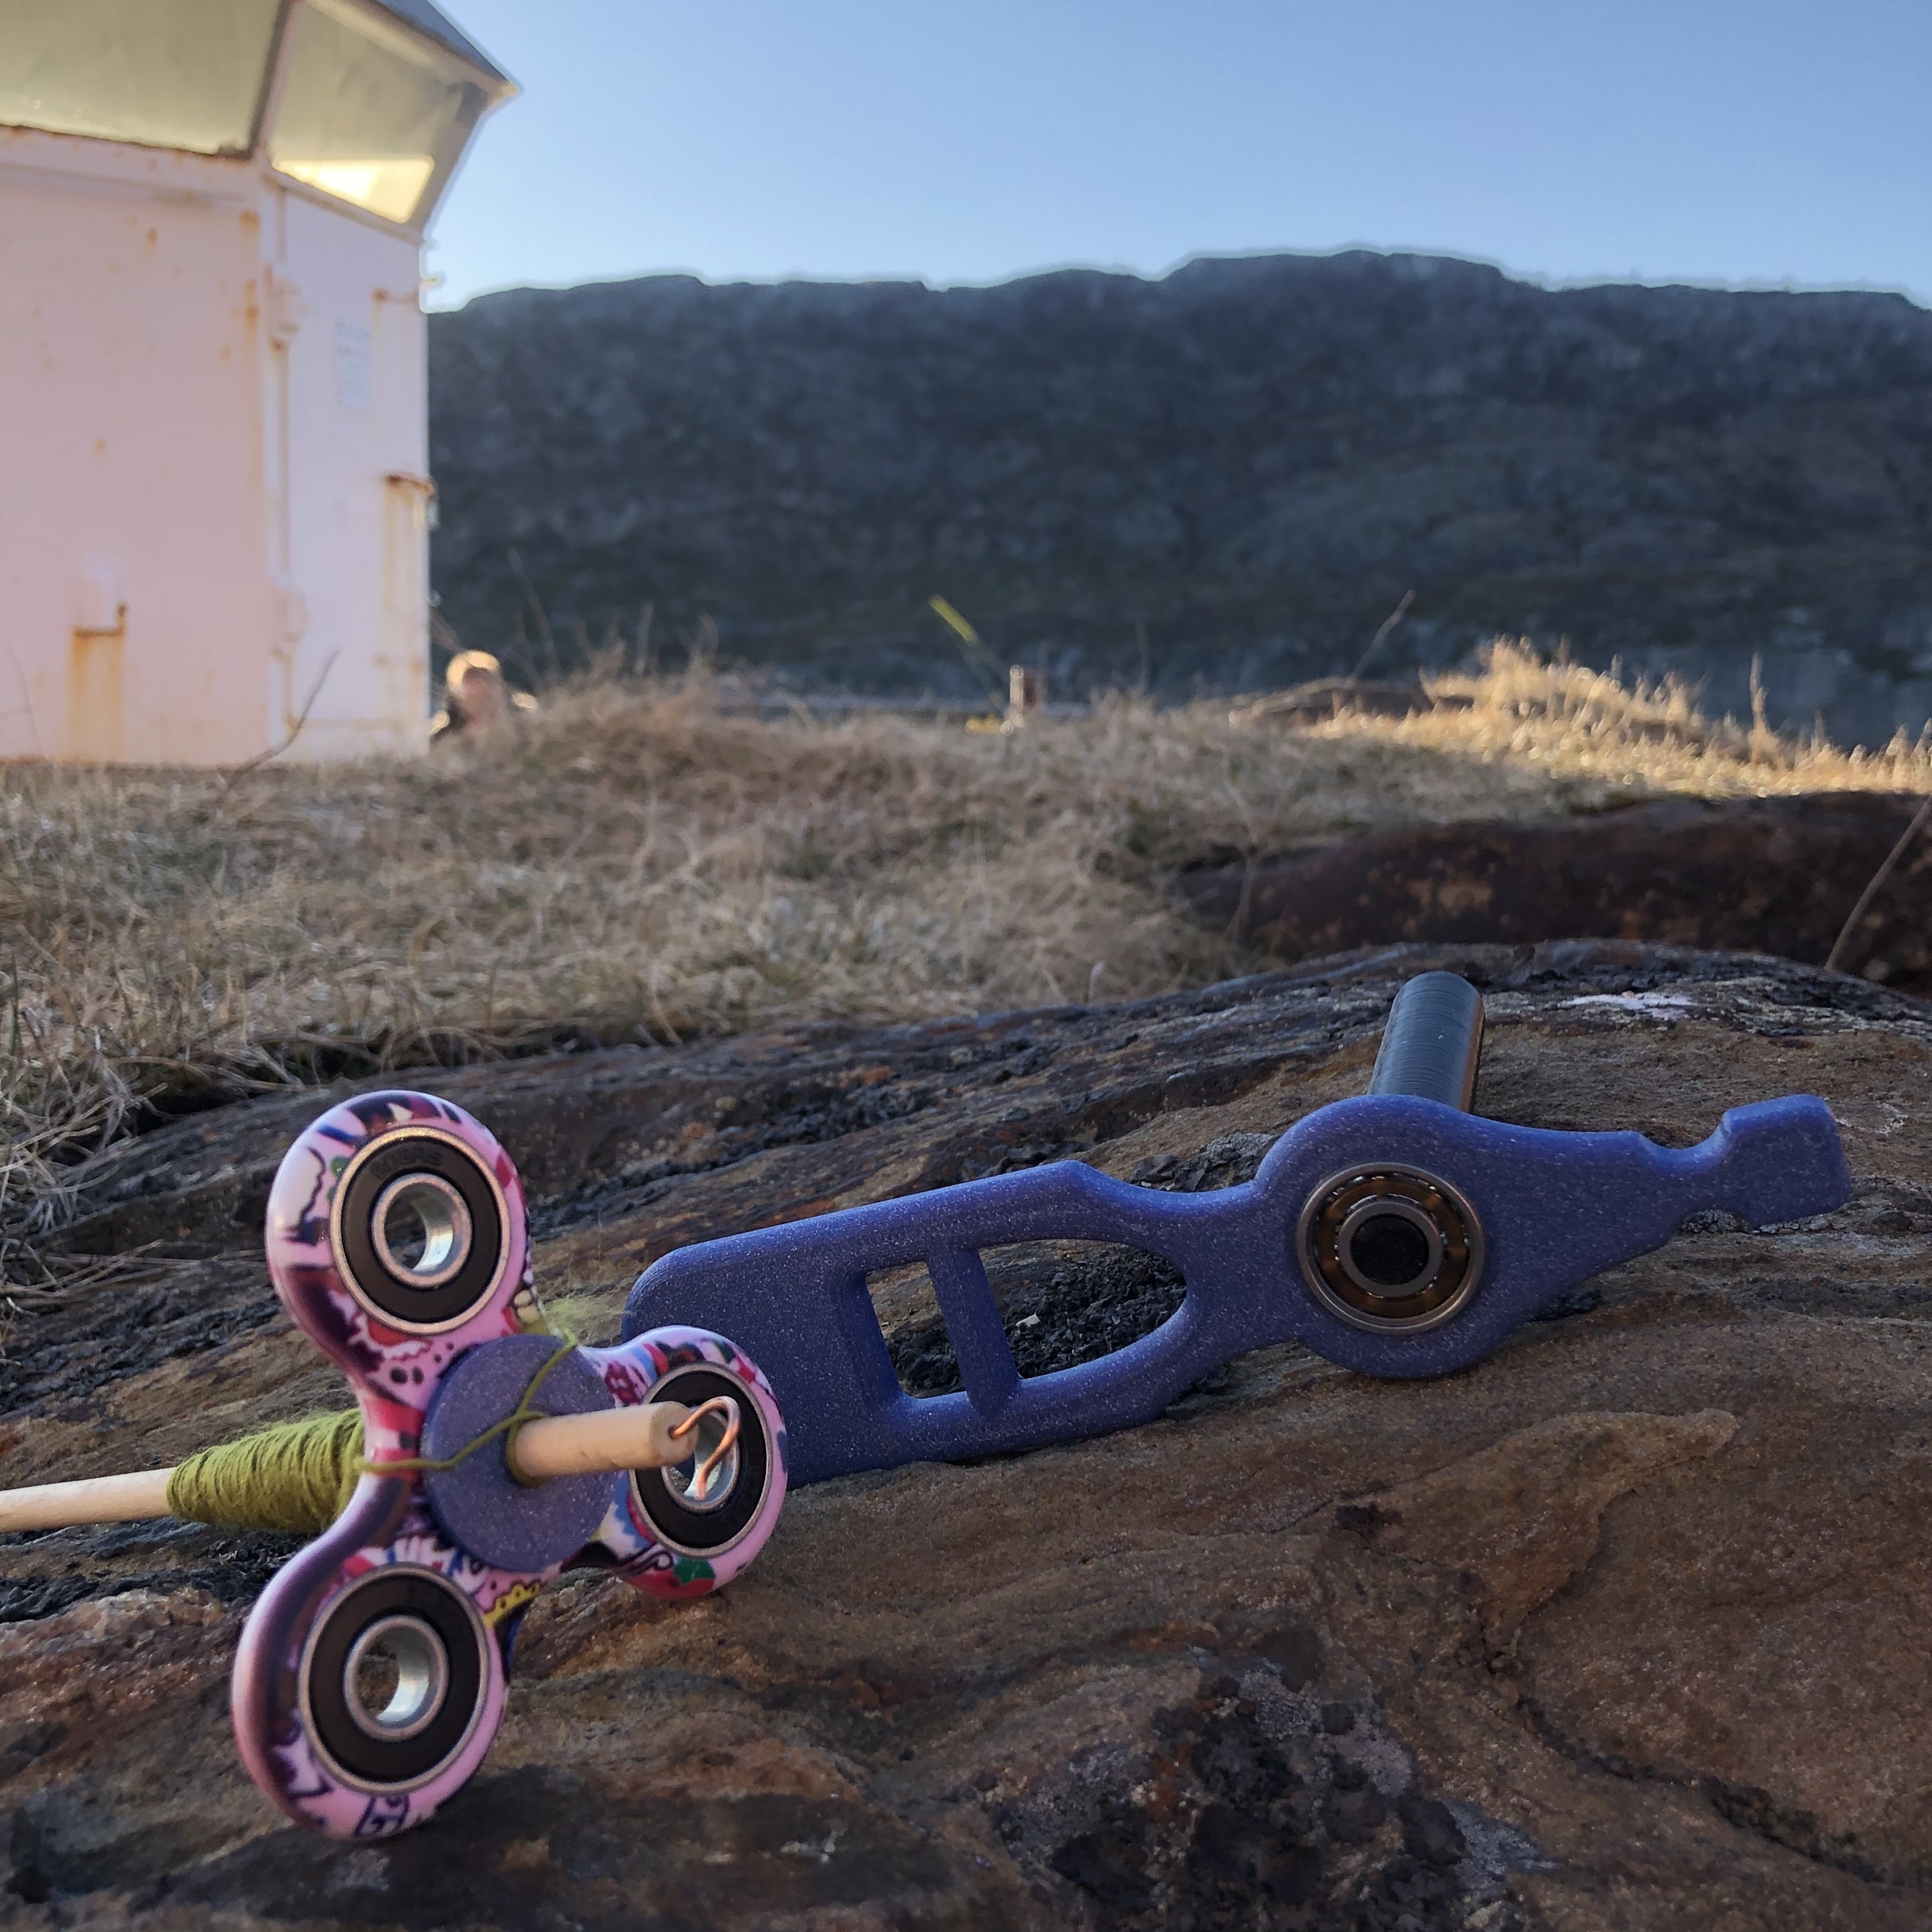
Another fun and easy printed spindle project is Scott Snyder’s little Mayan paddle spindle. The design requires a 22mm bearing and a stick to get going, but if you have some of those fidget spinners lying around, you can easily pop out a bearing from the center of one. Since you now have a fidget spinner with no spinner action in sight, why not check out Scott’s other designs and print up a top whorl fidget spinner adaptor? Find a dowel and a hook and you will have two cool new spindle toys to play with.
Some of you might like a small distaff to help manage the wool while spindling. Verdrus uploaded a nice finger distaff a while back. I printed this design in wood-filament which is plastic containing real wood fibers. A print in wood filament can be sanded and oiled like real wood. I find this filament needs a lot of sanding and finishing while other plastic filaments are much easier to use, like the most common in use polylactide (PLA) family.
PLA comes in a wide array of colors and finishes. It prints on fairly low temperatures and can be used on the simplest of printers. PLA is a renewable thermoplastic and a polymer. It is “processed” from the starch of plants such as corn, sugar cane, and sugar beet, making it environmentally friendly and sustainable. It will not stand well for heat so it should not be used for things that will need to withstand the heat from the sun.
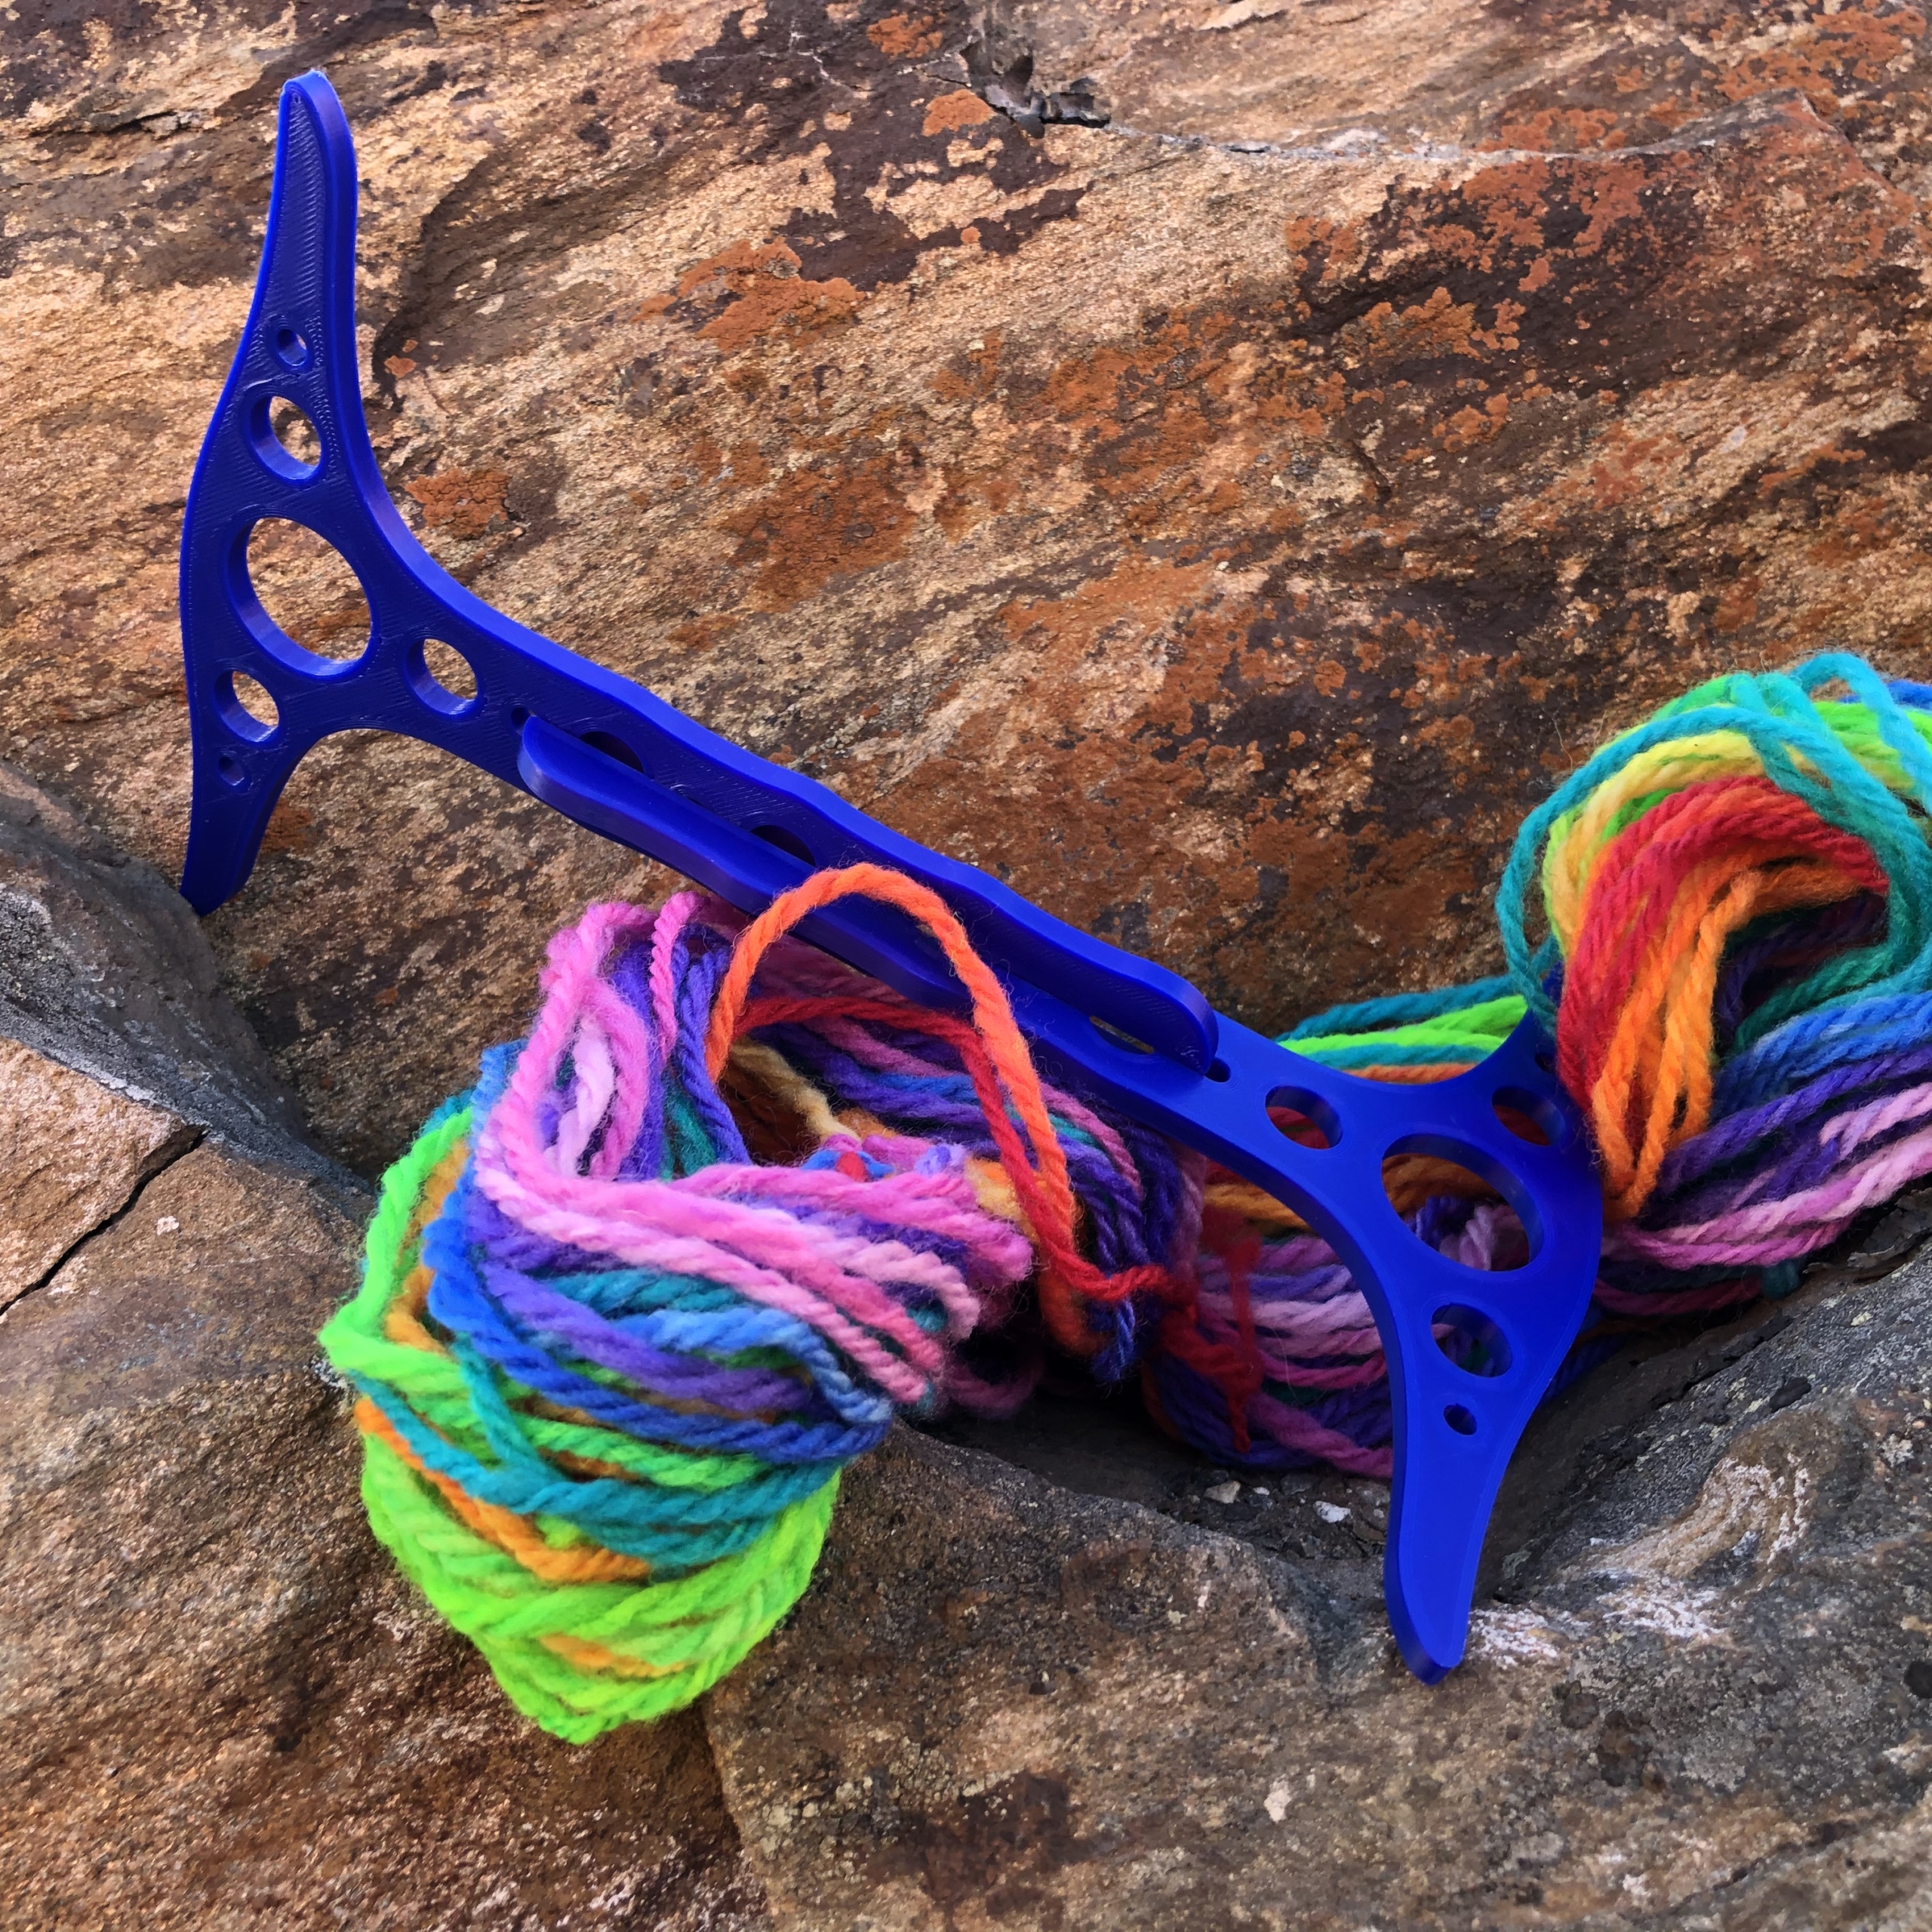
Now that you have made your spindles, you might need a niddy-noddy to skein your yarn? You have several designs to choose from, like this quite easy to print, one-yard niddy-noddy from Sarahspins.
Are you going to knit with your yarn? Check out the sock blockers, stitch markers, yarn bobbins, and even several yarn ball winder designs available out there. Some even have full plans to motorize the winder. Now, not all designs available will hold water. There are incomplete files and downright awkward designs, but there are also perfect designs. You just have to go exploring. Be aware though, time flies when you’re down the rabbit hole… Other than Thingiverse, several other sites offer printing files both for free and for payment. Yeggi.com and stlfinder.com are useful search engines that will help you search multiple sites at once.
You can also find a lot of different bobbins and some other wheel accessories for various wheels to print too, like for the EEW e-spinner family. In addition to the EEW community’s designs, Maurice Ribble – the inventor of the EEW e-spinners – has made all design files for bobbins and accessories available to print and customize the spinners. He even allows people with 3D-printers to print and sell his designs. The EEW Nano has a lot of gadgets to choose from like battery boxes, various lazy kates, bobbins and yarn guides. With the new EEW 6.0 with its big bobbin capacity, I expect we are going to see some very cool bobbin designs in the future.
For the much smaller Nano, you have a lot to choose from if you want to buy finished fancy bobbins. Swedish Wool and Yarns as well as Snyder Spindles on Etsy sell fun bobbins, as do Snortimers Hub and Theresa Ehlers from their own web shops, and there are others out there offering the standard bobbins Maurice has designed.
Designing for 3D-printing can be done in various programs. I like Fusion360, which is free for personal use with limited functionality. It is quite an advanced program, and I don’t need the limited functions for my designs in any case, so the light version is good for me. One other commonly used program from the same developer is Tinkercad, a simpler program which also is free to use. Any design program will take some time to learn to use, but when you master designing on the computer there is little limit on what you can make. My husband is my best customer, often coming home with ideas of what I could make to hang this and that to the walls in his home brewery. I have also repaired toys for the kids by replacing a water tank in a loved fire truck, rebuilding the trailer hitch on a small car model, and making tons of Among Us miniatures for the tween.
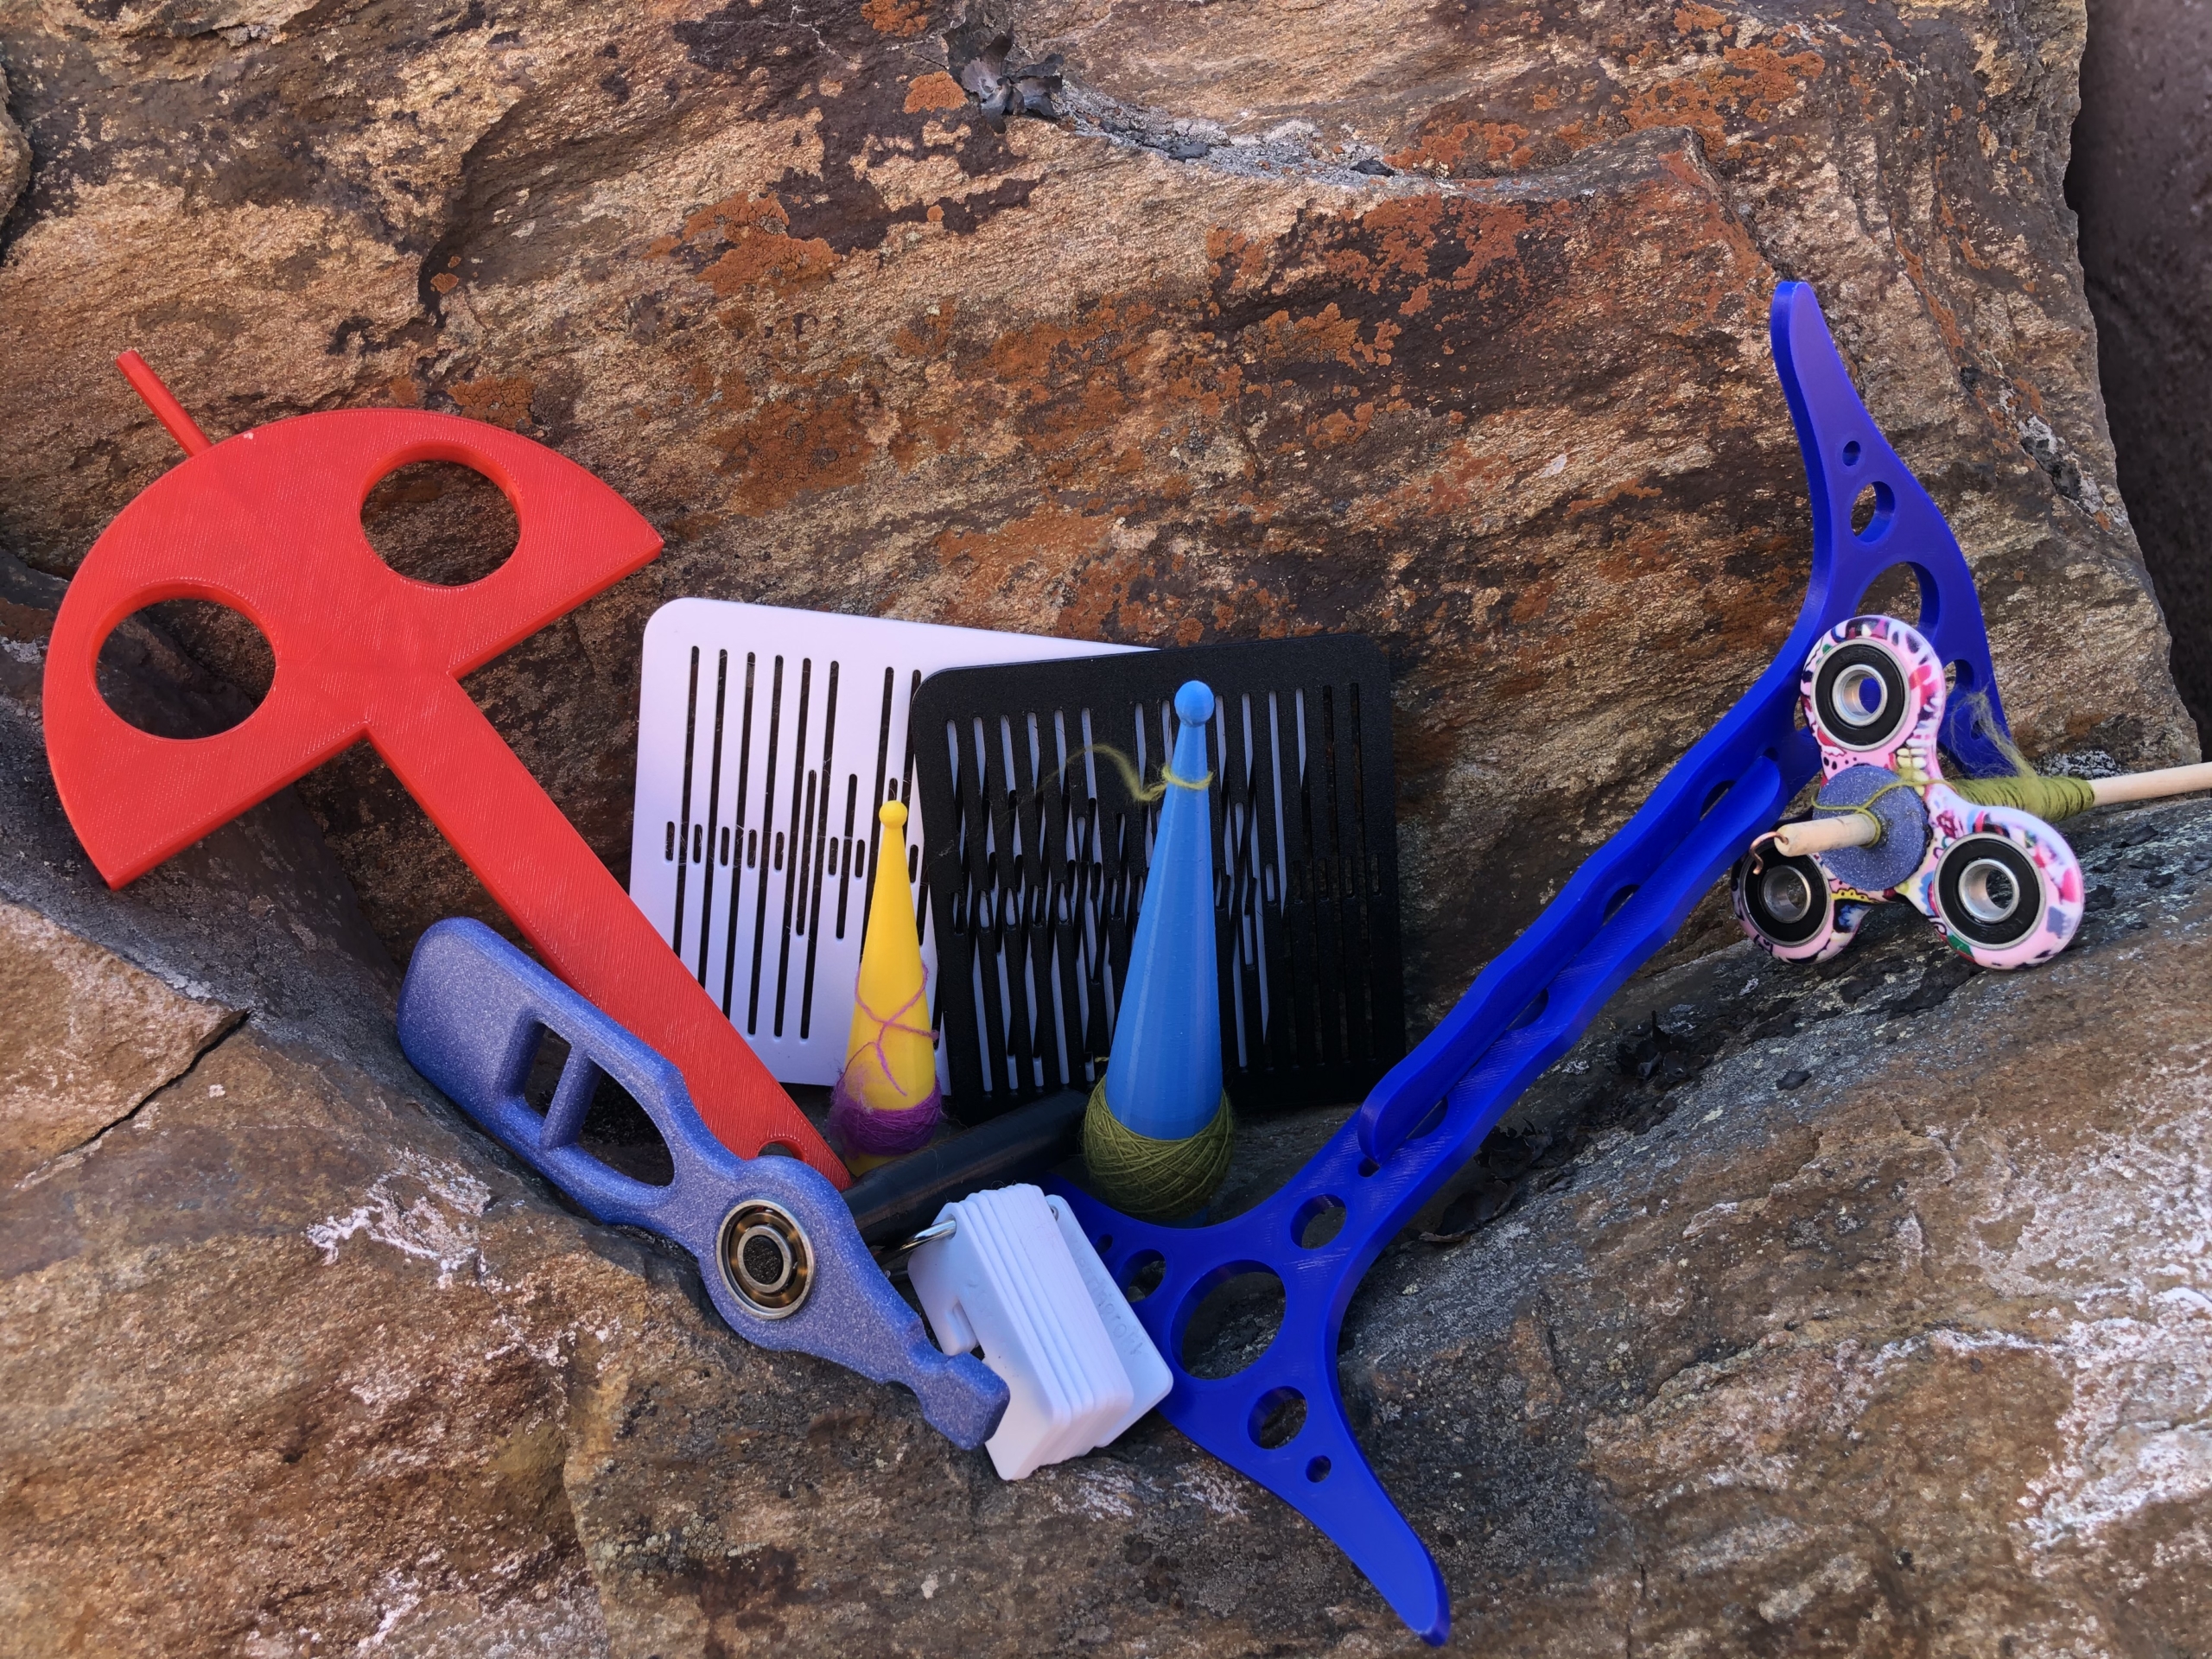
I find the 3D-printer especially useful for making band weaving heddles in all sizes imaginable, and I have made loads of the different Turkish spindles on Thingiverse to gift my friends who are interested in spindling.
3D-printing as a hobby is both fun and challenging. A lot of resources are available online to master both designing and how to perfect your prints, and a lot of forums are available online to get answers to problems. There are a lot of different printers available in all price ranges, so if you are in the market for a printer, be sure to use your time to choose the right one. If you don’t want to invest in a printer yourself, some libraries have printers and will let you use them, sometimes for a fee. Also, if you have a Makerspace community in your area, go check them out! Makerspaces usually have printers and all the other cool toys and tools, and Makerspace people are usually super cool people.
Did you know we also have a monthly PLY newsletter? Sign up here!
PLY Magazine believes that Black lives matter, as well as LBGTQI+ lives. Those most vulnerable and persecuted in our communities deserve our love and support. Please be good to each other.
Thanks so much, everyone, for sharing your experiences of spinning during lockdown. We’ve shared responses throughout the past few months in the newsletter and blog. Here’s the final collection of responses.
“I have been spinning on my wheel to calm my mind if it was too frazzled to knit. I have also ordered fibre online from producers I hadn’t tried before, such as the fabulous Countess Ablaze. It’s a pity many producers haven’t been able to restock their shops or send out to customers easily, but I had a good time spinning what I could get, and planning the projects to make with the finished yarns.” ~Mickey T., UK “For Christmas received an e-spinner so learning to spin on a wheel since I have been using spindles. Love listening to audio books while I spin. Very relaxing while I spin fiber samples, learning as I go.” ~Marilou, Murrysville, PA
“Around the start of the pandemic, I had been in a spinning slump for a while. But once I was working from home, it was much easier to get a little spinning done here and there, not to mention the time gained from not commuting. My mojo came back, and over the summer I found myself (finally!) finishing processing my first fleece, a Jacob that I split into three groups by color, combed and spun. In the fall I made a great big comfy shawl out of that yarn that’s the perfect thing to wrap up in on chilly mornings.” ~Daisy F. W., Columbus, OH
“On my electric wheel.” ~Jessica P., Clifton, TN
“Sitting in my recliner with my 3 mini dachshunds. I use my Hansen pro and have been working on an order of lace weight 100 percent vicuna. Mostly I’ve been spinning exotics the last few months to restock my online stores. The luxury yarns such as qiviut, mink, and cashmere seem to sell out pretty quickly. Next up is to tackle the mountain of French Angora fiber from my bunnies, then back to exotics.” ~Gayle P., Coos Bay, Oregon
“Yak/silk dyed by Greenwood Fiberworks on support spindles and BFL gradients on my wheel from The 100th Sheep.” ~Katrina K., Colorado
“I mostly used a drop spindle and spun infrequently. Once the pandemic measures were in place, I didn’t have the bandwidth to work on my usual lace projects. Spinning was a simpler more soothing , stress relieving activity. I took up support spindling for even more ease on the body. I’ve really embraced the spinster life. My collection of spindles has gotten a little out of control and I’ve been experimenting with lots of different fibers. Spinning has definitely (for now) overtaken knitting as my #1 hobby.” ~Marilyn E., Dallas, TX
“A friend who lives near a bison farm sent me a big bag of fiber. She’s not a spinner, and she said ‘it’s not much, sorry’ but it’s an overstuffed 2-gallon ziploc bag! It’s now all been washed and I’ve been chipping away at it as I binge-watch TV. Some of it is too short for me to manage and some of it is coarse, so it’s like hunting for treasure in this big bag, but I’m finding lovely, soft fiber about 1-1.5″” long and cleaning out the grit with a dog flea comb because my carders made a mess of it. If nothing else this pandemic has taught me patience and given me the time for projects like this. I am spinning it on a fairly light spindle and the spinning goes beautifully, it’s the prep that’s taking forever, but it’s destined to be the weft for a scarf that will go to the friend who send me the fiber.” ~Anne S., Los Angeles, CA
“More than usual. Over 5,5 kg 2 ply yarn and total in singles over 29000 meters. Part of it from my own sheep’s wool.” ~Sanne H., Sweden
“I was lucky enough to be able to take a full-day breed study class with Devin Helmen last winter in which I learned about the Shave ’Em to Save ’Em program. So I embarked upon that last summer and have been using it as DIY professional development – I’m shooting for completing 15 breeds by Labor Day 2021 (just finished #5 this morning).” ~Lindsey S., Stanwood, WA
“Non stop . Actually when I’m not working!” ~Susan B., Port Sydney, Ontario
“I started spinning around 3 years ago, but hadn’t touched my wheel in 18 months, my hands were constantly sore especially my fingers, and it was almost impossible to draft and or spin, then I moved from a hardwater area to Lincolnshire lockdown 3 arrived and although my hands were constantly being washed they started to heal, I seemed to be reading about other peoples spinning tales, questions and seeing beautiful yarns being created, inspiration all around so I dug the wheel out of its cupboard (Ashford Joy 2) and tried spinning some Jacobs to see if I could still do it. In my stash I have merino, Jacobs silk, Polwarth, amazing how much you can acquire I am now on Merino/silk the days fly by as my wheel spins away, I am by no means perfect, but getting more consistent, but most of all I am enjoying myself, its very therapeutic, and the days fly by looking forward to when I can sit in the garden and spin, for now I am in the living room, trying not to take over the whole room! How am I spinning in one word, happily.” ~Sandra M., Lincolnshire
“Going back to basics – drop spindle-and learning new spinning methods – takli and supported spindle.” ~Christi, Nebraska
“Before the pandemic I had a monthly spinning meetup at a yarn shop in Ontario, once the pandemic hit we could not longer meet in person so now each week on Sunday at 11:00am we meet virtual and spin together. It is a fun way to relieve stress and chat with other spinners while working on projects and having a show and tell session. Conversation is often lively and humorous but also supportive and caring as each of us have had our own struggles with the pandemic. Some of the spinning group requested that we start a breed study to help pass the time and continue learning about spinning and sheep fibre. Each month I distribute a fleece to all and we wash, process, discuss and spin our portion of the fleece. Each of these events give us something to look forward to and keeps our group open and sharing information about sheep and spinning and fibre. It is a wonderful supportive group that allows us laughter and relief. We are thankful for each other as it helps keeps us grounded and sharing about our spinning adventures.” ~Jane S., Ontario, Canada
“Our guild, Treadles to Threads has had a drop-in casual spinning group on Monday afternoons at various member’s homes. When we were locked down we went to Zoom. There are usually 10-15 people who meet up including some who have moved away. We share what we are working on, get help from each other on spinning and knitting, etc. Our guild is working on a Jacob Sheep project using the yarn to knit one of two sheep related hats. Jacob Sheep have white, brown, black and gray wool. We have a member who has a flock of these sheep. Deb Robson gave a presentation to our guild (via Zoom) this year and we decided to use the Jacob Sheep wool as part of primitive breeds. We have been busy and in touch with each other and our fiber crafts!” ~Joan A. Walnut Creek
“If anything the pandemic changed my daily routine from having time to pick what I wanted to do to having to be more creative with my time. I became the full time caregiver to my two grandsons, which included virtual school. I’m working on my level II Master spinner certification from Olds College so I’m spinning lots of camelids and fine wools. We also acquired our first flock of Finn sheep (in the fall of 2020) on our small homestead. I’m fitting spinning in where ever I can (during zoom school for the boys), in between animal chores and now gardening. I’ve also enjoyed more zoom spin ins with friends from school and joined other spin groups with zoom! I do enjoy that I have these outlets to see others and spin at the same time!” ~Wendy C., Rochester, WA
“Constantly, but finally used some of my stash and actually knitted 2 sweaters!!” ~Susan S., Marshall, NC
“I’ve spun my remaining North Ronaldsay roving … a joy for the senses.” ~Sharon G., Kentucky
Did you know we also have a monthly PLY newsletter? Sign up here!
PLY Magazine believes that Black lives matter, as well as LBGTQI+ lives. Those most vulnerable and persecuted in our communities deserve our love and support. Please be good to each other.
https://plymagazine.com/wp-content/uploads/2021/06/PLY_Blog.png383719Heather Fulfordhttps://plymagazine.com/wp-content/uploads/2014/06/plylogo-condensed-pnk-300x164.pngHeather Fulford2021-07-08 10:00:002021-07-07 16:00:19Spinners During Lockdown
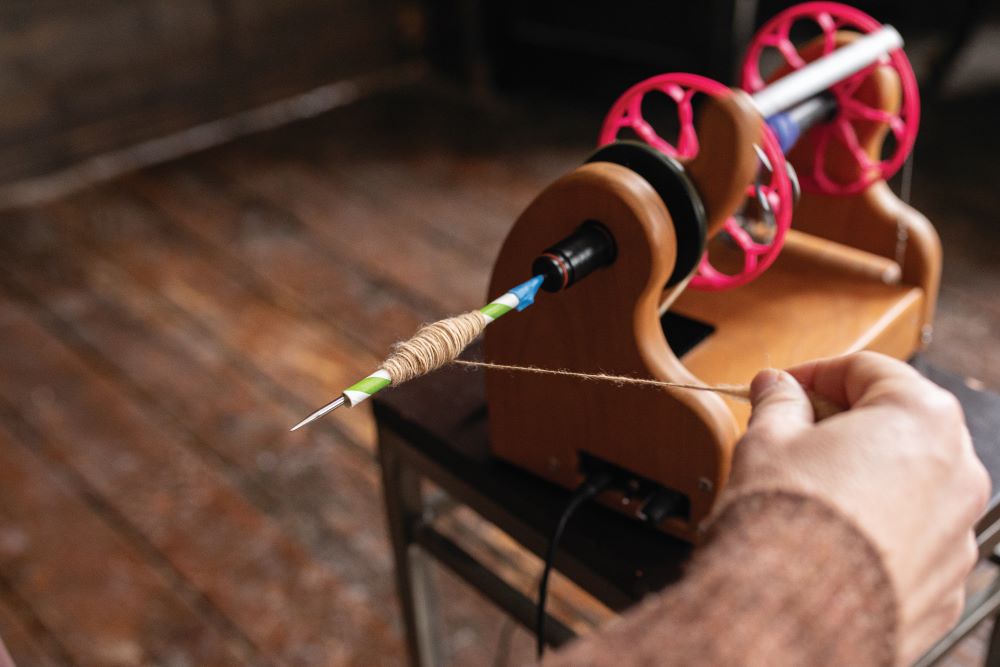
Electric spinning has been around for some decades now and is seeing a rise in popularity, particularly in the past ten years. Most spinners have their preferences based on their lifestyle, whether they opt for spindles, wheels, or e-spinners. The devices take up little space, can be reasonably affordable, and are capable of making any kind of yarn. There don’t seem to be any downsides, other than simply lacking the “feel” of treadling or spindling.
Accessibility makes electric spinning very attractive: spinning on a wheel or spindle can be taxing to the body in all kinds of ways that don’t happen on an e-spinner. For people with mobility issues, it can make a huge difference in being able to focus on the spinning itself. I’ve even known people who love to take them on road trips, spinning in the passenger seat or in the back of a caravan, where wheels or spindles may be impractical. An advantage that particularly appeals to me is that there is no need to worry about wheel ratios; any kind of yarn is doable with the turn of a knob.
It’s interesting then to note that so few resources are available about e-spinning; no major books have yet been released about it. Part of the reason could be that there is just little to say that hasn’t been covered in other books, but I’m not sure.
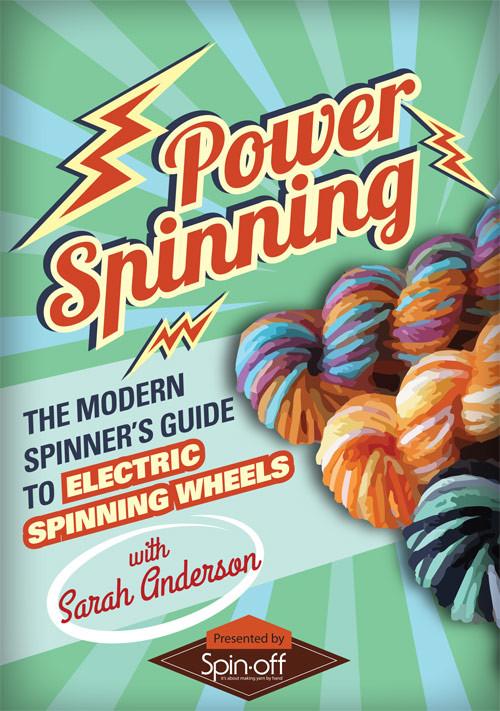
About the length of a Hollywood movie, Power Spinning by Sarah Anderson is set in a craft room, with yarn and knits furnishing the walls. Sarah is seated on a small table with an electric wheel and guides us throughout the video.
The first third or so is dedicated to a general understanding of the components and varieties. Next she talks about the actual spinning, which is explained clearly – beneficial for those who may need the instruction. There is a portion about making slub yarn that I enjoyed. Sarah is a good teacher and makes sure to explain what to expect and look for at each step while making the yarn. She demonstrates spinning woollen yarn in different fibres, including cotton, which could be useful to some. However, this video, while very informative, is lacking subtitles or transcripts, which could be an issue for some viewers.
Personally, as someone who has been spinning for a while, I didn’t learn much from the video. I tried electric spinning briefly at a local guild and found it quite intuitive, so to my mind, a guide wasn’t necessary. Ravelry forums were mentioned a fair bit, which makes me wonder if all the relevant information is already available for free online. I have to admit that I found it a little tedious in parts, to the extent that the poor editing made me rewind in amusement.
For someone just starting out though, who is interested in giving spinning a try for the first time, this provides a great resource with lots of advice and tips. As self-taught beginners, spinners end up watching quite a lot of video content, but I’ve found that it’s all useful in subtle ways.
2/5
Did you know we also have a monthly PLY newsletter? Sign up here!
PLY Magazine believes that Black lives matter, as well as LBGTQI+ lives. Those most vulnerable and persecuted in our communities deserve our love and support. Please be good to each other.
https://plymagazine.com/wp-content/uploads/2021/06/PLY_Sheep.png348719Heather Fulfordhttps://plymagazine.com/wp-content/uploads/2014/06/plylogo-condensed-pnk-300x164.pngHeather Fulford2021-07-01 10:00:002021-08-04 21:31:43Review of Power Spinning (video) from Sarah Anderson
Did you know that PLY has a YouTube channel? We’re posting videos from the vlog, the Ask Jacey column, and videos that go along with some of the articles in the magazine.
Be sure to check out the two videos that go along with articles from the most recent Electric issue. Watch Amelia Garripoli demonstrate the power plying method and see a time lapse video of carding on an electric carder.
Submissions for SCENE
Have or know of a new product, event, fiber, or tool you think the community should know about? Let us know about it here, and we’ll try to fit it in SCENE, the newsletter, or the blog!
Check this out!
Have you seen @rightchoiceshearing on TikTok and Instagram? Their description is “two chicks traveling and shearing animals” or “shorn porn stars.” Make sure to take a look!
Did you know we also have a monthly PLY newsletter? Sign up here!
PLY Magazine believes that Black lives matter, as well as LBGTQI+ lives. Those most vulnerable and persecuted in our communities deserve our love and support. Please be good to each other.
https://plymagazine.com/wp-content/uploads/2021/06/PLY_Blog.png383719Heather Fulfordhttps://plymagazine.com/wp-content/uploads/2014/06/plylogo-condensed-pnk-300x164.pngHeather Fulford2021-06-24 10:00:002021-06-17 09:43:25YouTube Channel and Submissions for SCENE
How much yarn is in this ball? How do I break up a skein into smaller consistent lengths? How can I wind a specific length of yarn off of this cone? Measuring yarn length is a seemingly simple task, until you try to do it, especially if you expect repeatable results. Usually, a ball or skein of yarn will be labeled with yarn length and yarn weight. It stands to reason that you could accurately estimate the length of yarn in a leftover ball by weighing it and calculating length from the original weight/length on the ball. What many people don’t realize is that label markings are very approximate. Weight depends on humidity, so the same skein can weigh different amounts in different locations. Length is also approximate and depends on the amount of tension the yarn is under. Both figures may also be minimum estimates, with the manufacturer/yarn dyer winding off a few extra yards or grams as standard practice.
Another method of measuring yarn length is winding a skein of a certain circumference and counting wraps. This is a pretty typical method used by handspinners – you create a skein with a niddy-noddy or winder, you know the circumference of the skein (typically 1.5–2 yds or meters), and you count the number of loops in the skein. This isn’t a bad method but also depends on tension of the yarn. Also, once the yarn starts wrapping over itself, or depending on the path it takes around a niddy noddy, the circumference will change. It’s still an estimate.
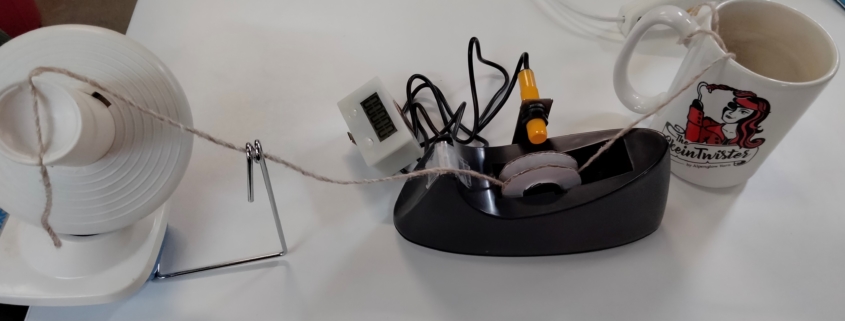
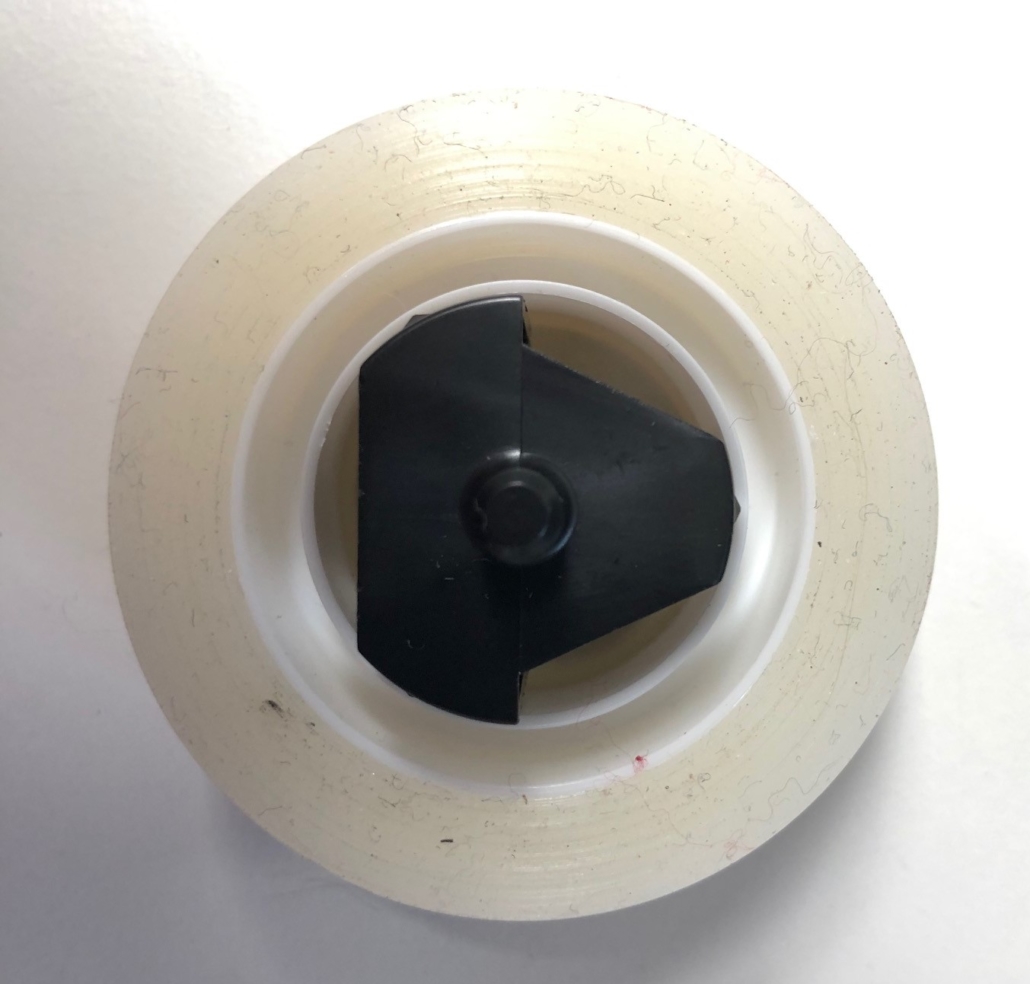
A third way of estimating yarn length is by using the measuring wheel method. In this method, you wrap a piece of yarn once around a wheel and run the entire skein of ball through the wheel, counting the wheel’s rotations. This is similar to the measuring wheels surveyors use, rolling them along the ground to measure distance. The benefit to this method is that the wheel is a fixed diameter, the yarn doesn’t build up on the wheel so the length that the yarn travels is also fixed, and if you wind from a ball to another ball, there’s generally not a lot of tension on your yarn that will stretch it and heavily skew the results (unlike using a skein winder and swift, where there tends to be more tension from the yarn wrapping around the winder and pulling at the swift). It does depend on the yarn dragging the wheel around as it travels, so it does require a certain amount of friction. Very slippery yarns like 100% silk or nylon may lessen the accuracy. Generally, a larger wheel reduces slippage and undergoes fewer rotations so that some errors don’t add up as much. However, for hacking purposes, I thought using a common household item was easier than constructing a custom device, so I tried out a tape dispenser and had surprisingly good results.
The key takeaway is that any talk of accuracy implies that there is some “truth” against which deviations are measured. With yarn length, there is no real “truth” because length changes with tension, so it’s all an estimate!
Building your own electronic yarn meter
Here’s how you can build your own measuring-wheel-style electronic yarn meter. You can also find these instructions on our Hackaday.io page.
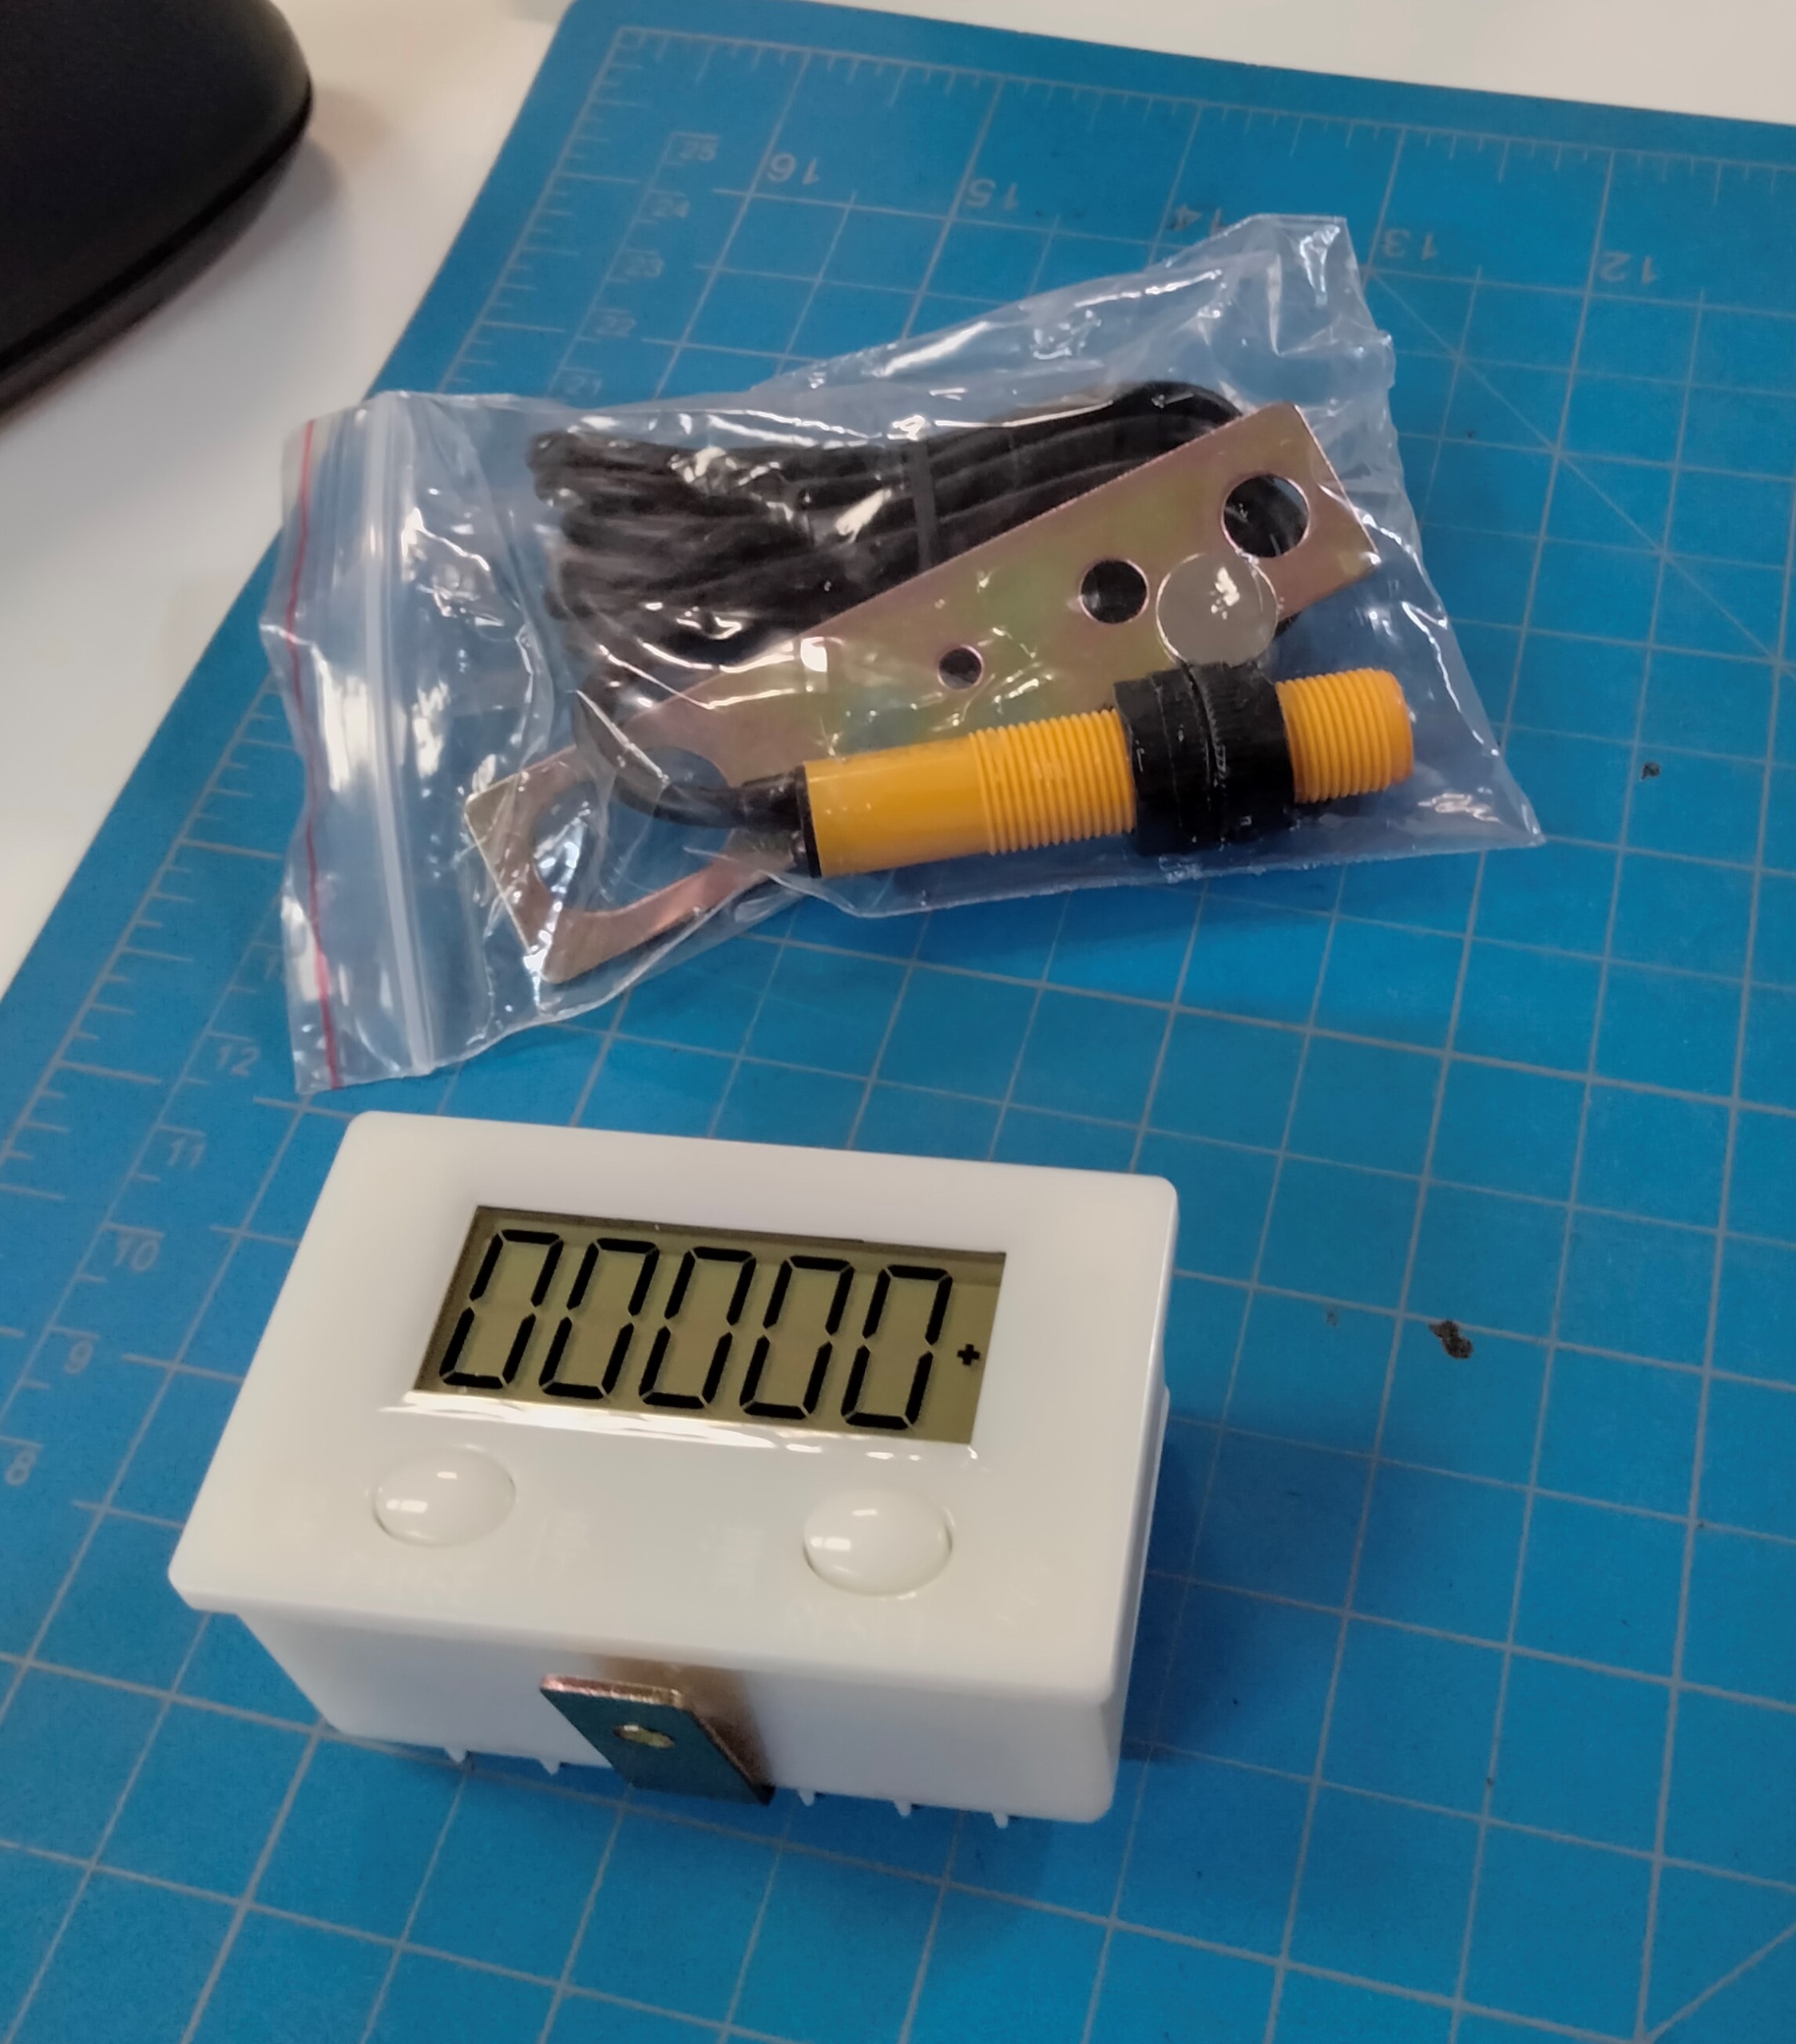
Step 1: Gather your tools
You’ll need:
A weighted tape dispenser with 1-inch core, similar to thisone.
A smooth container or yarn bowl for containing yarn as it unwinds
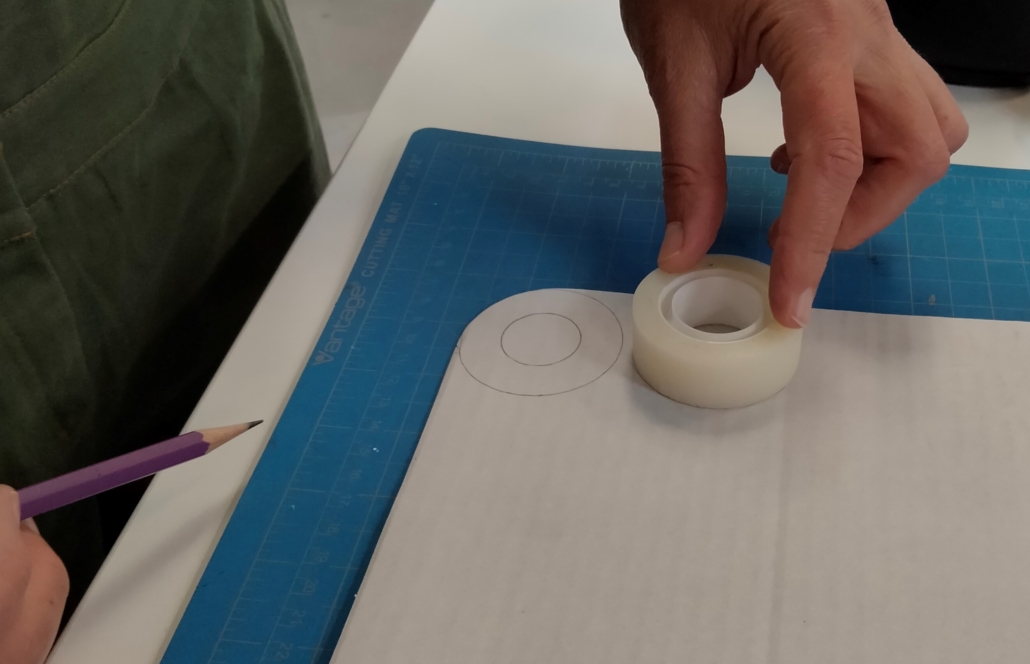
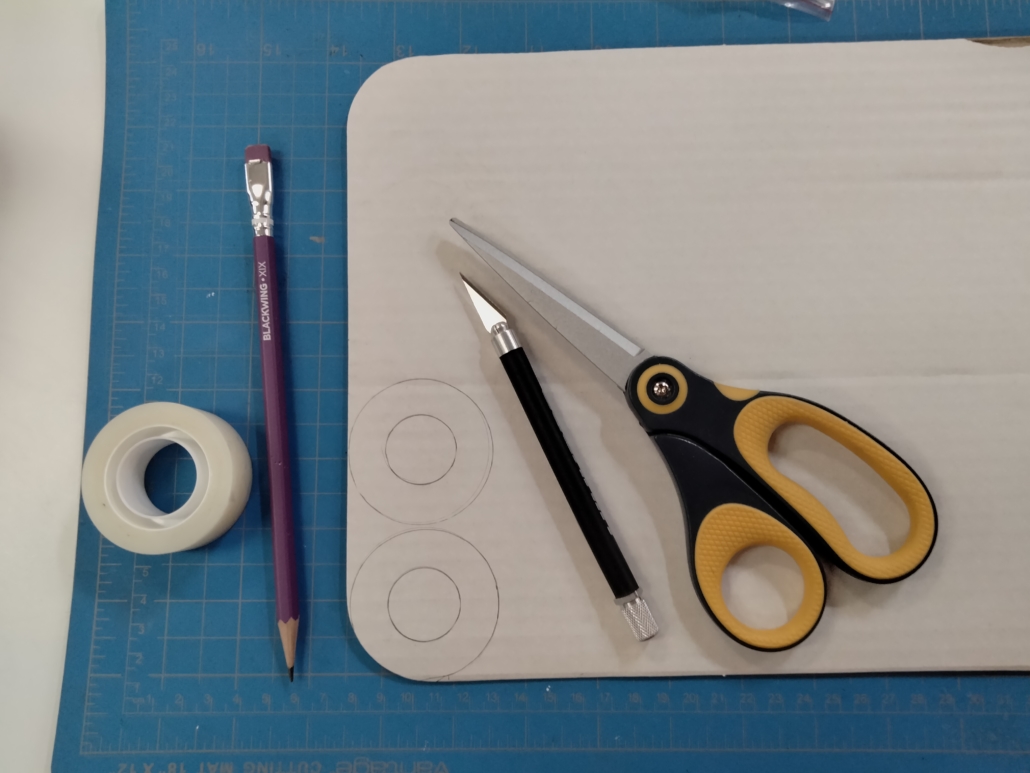
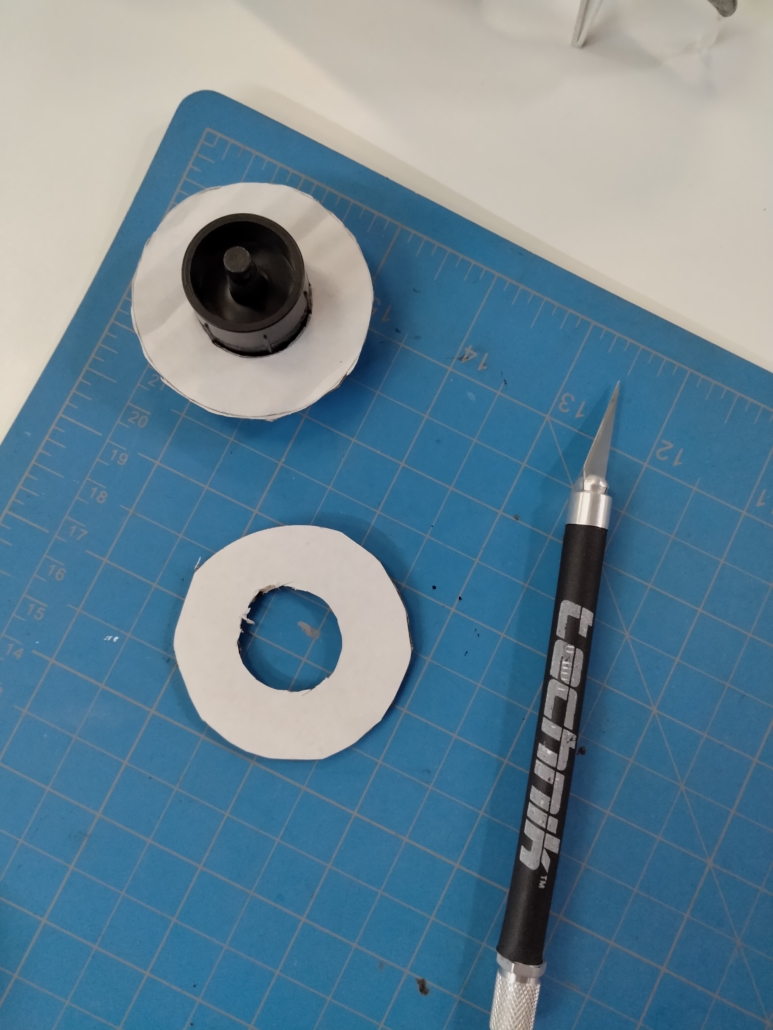
Step 2: Cut your yarn guides
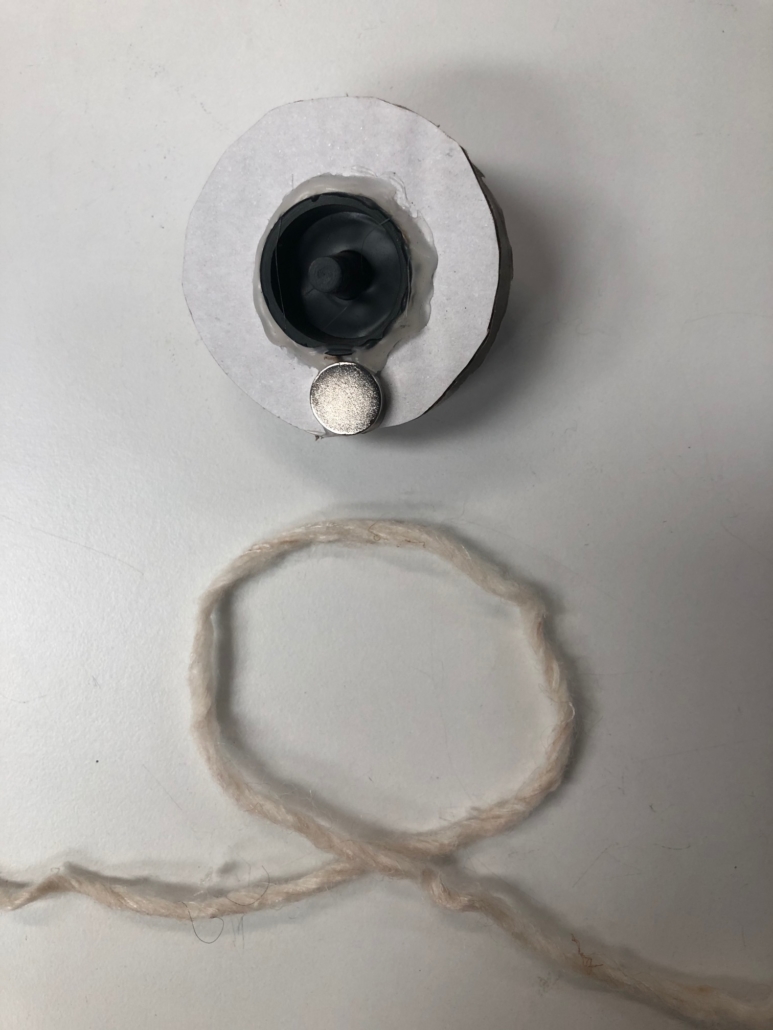
Take the roll of tape and trace the inside and outside of the roll. Make two donuts. Cut them out with scissors or an exacto knife.
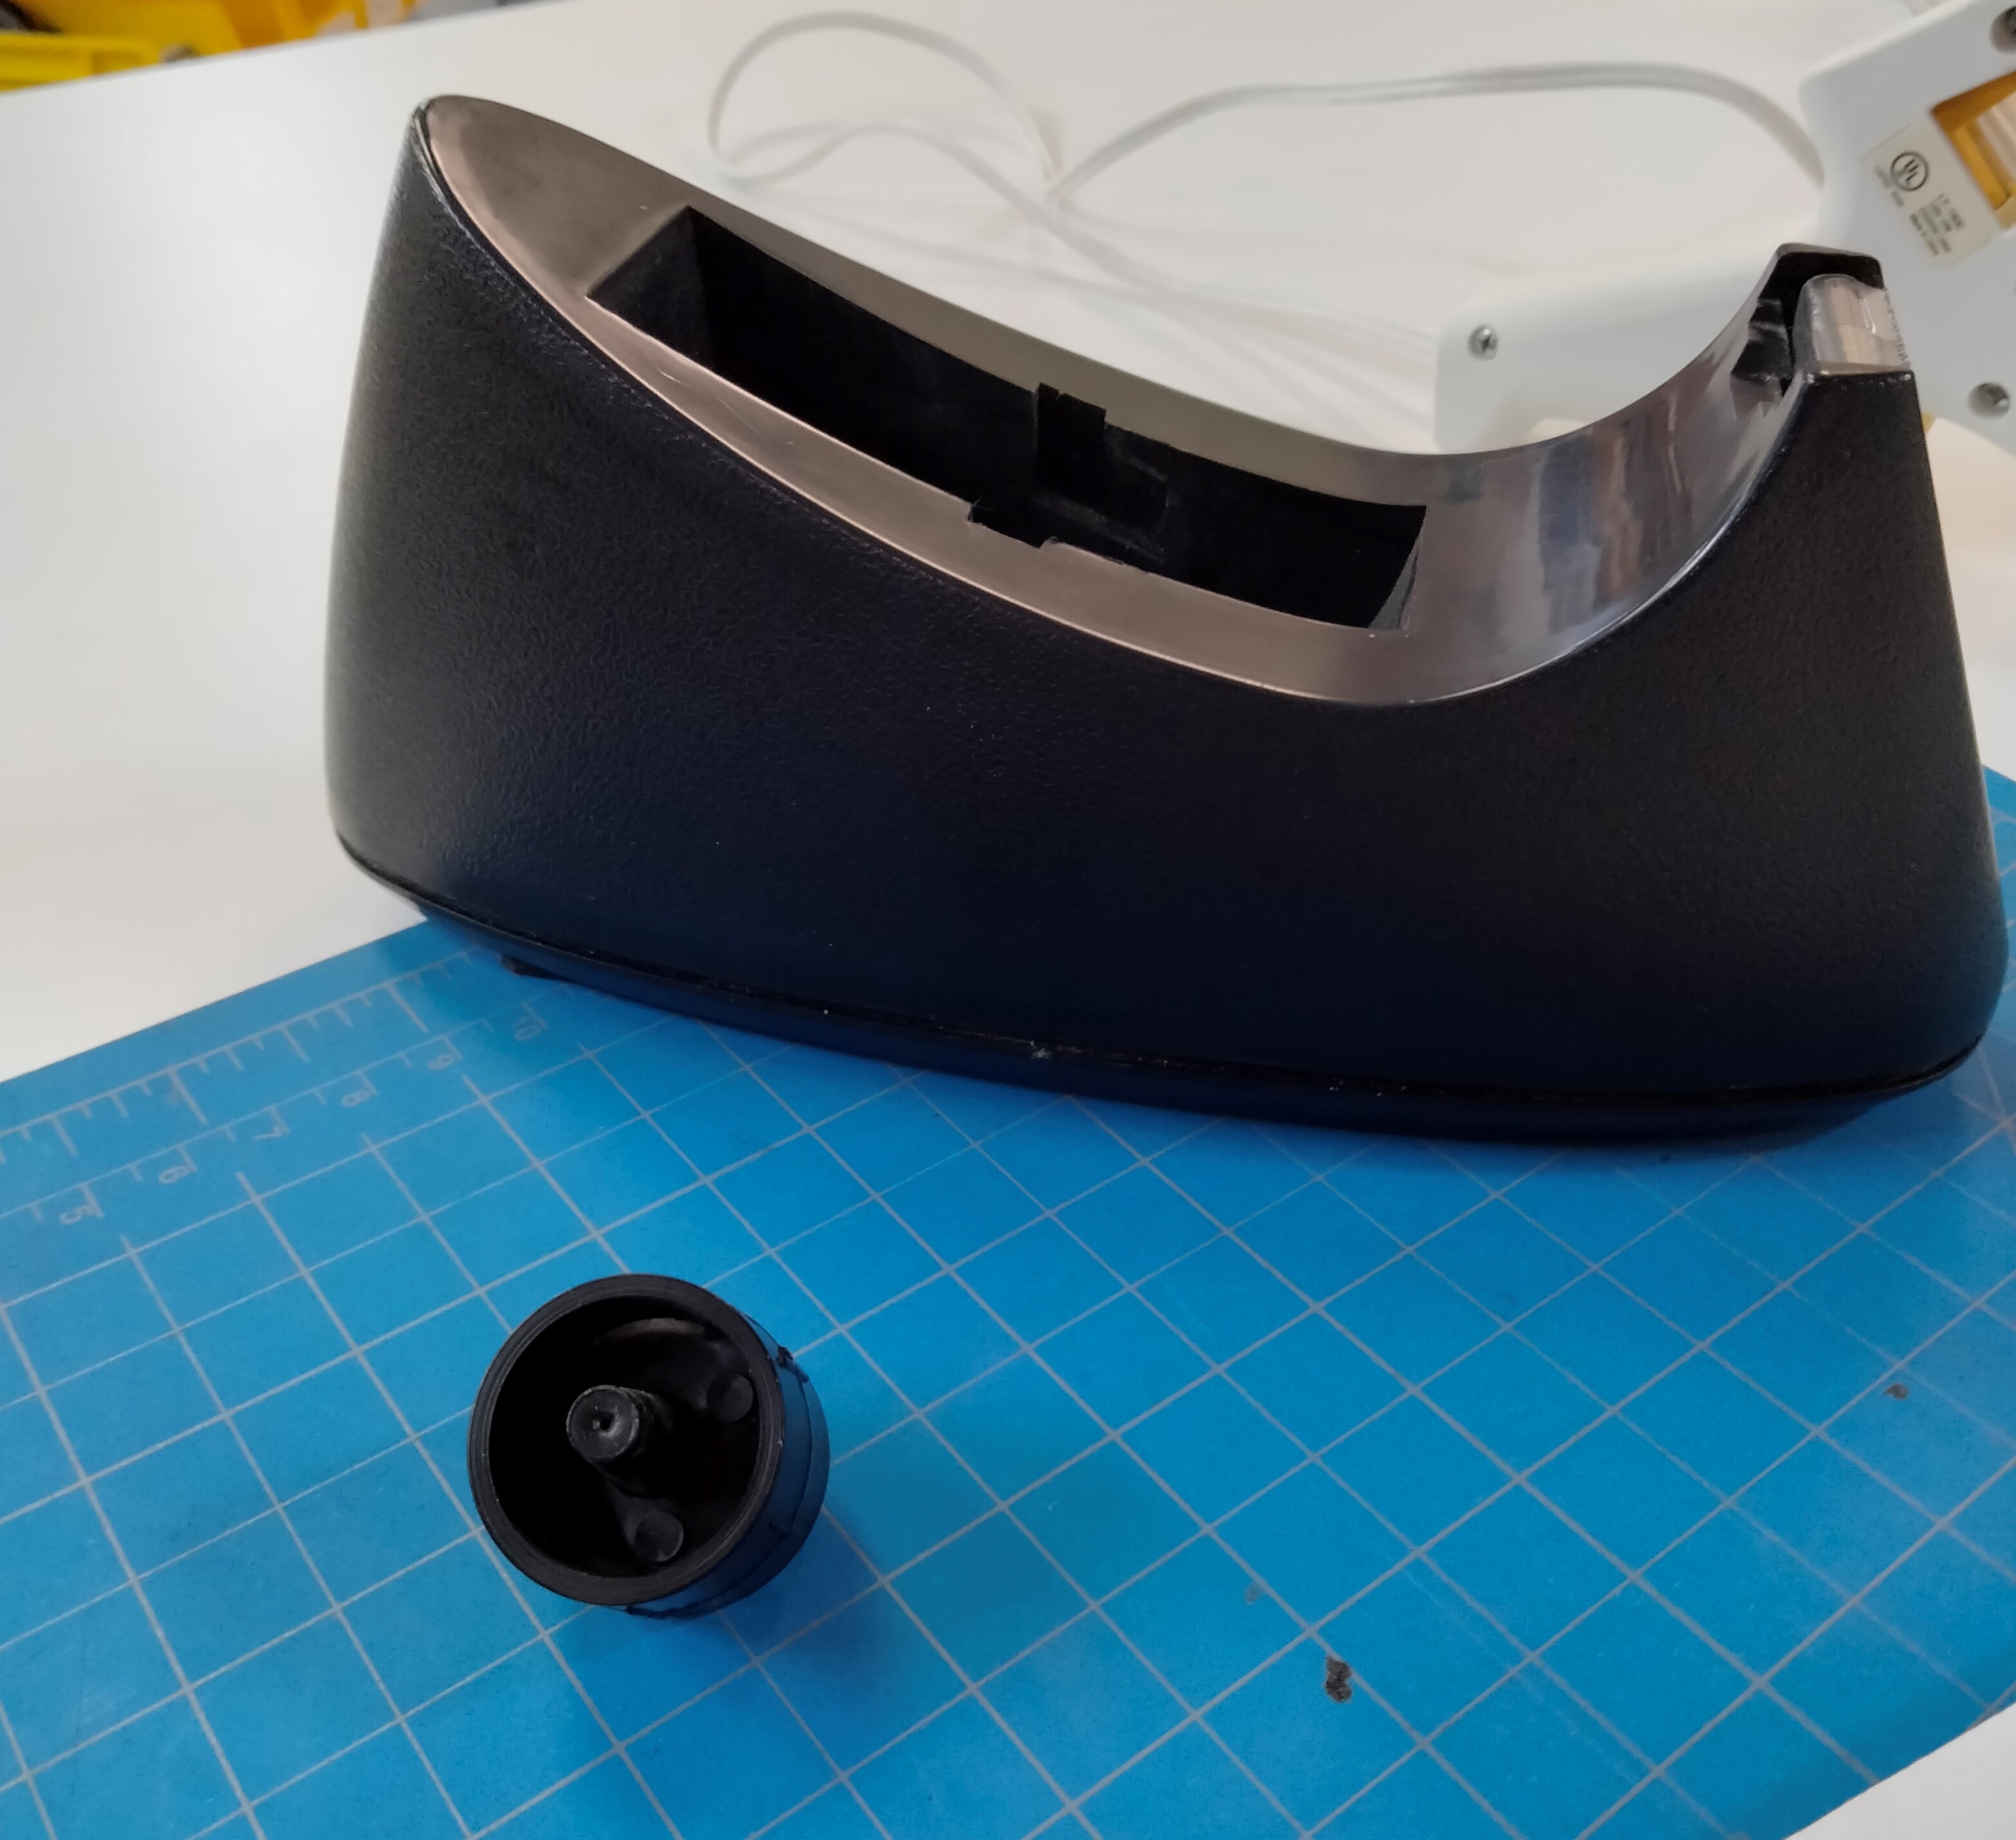
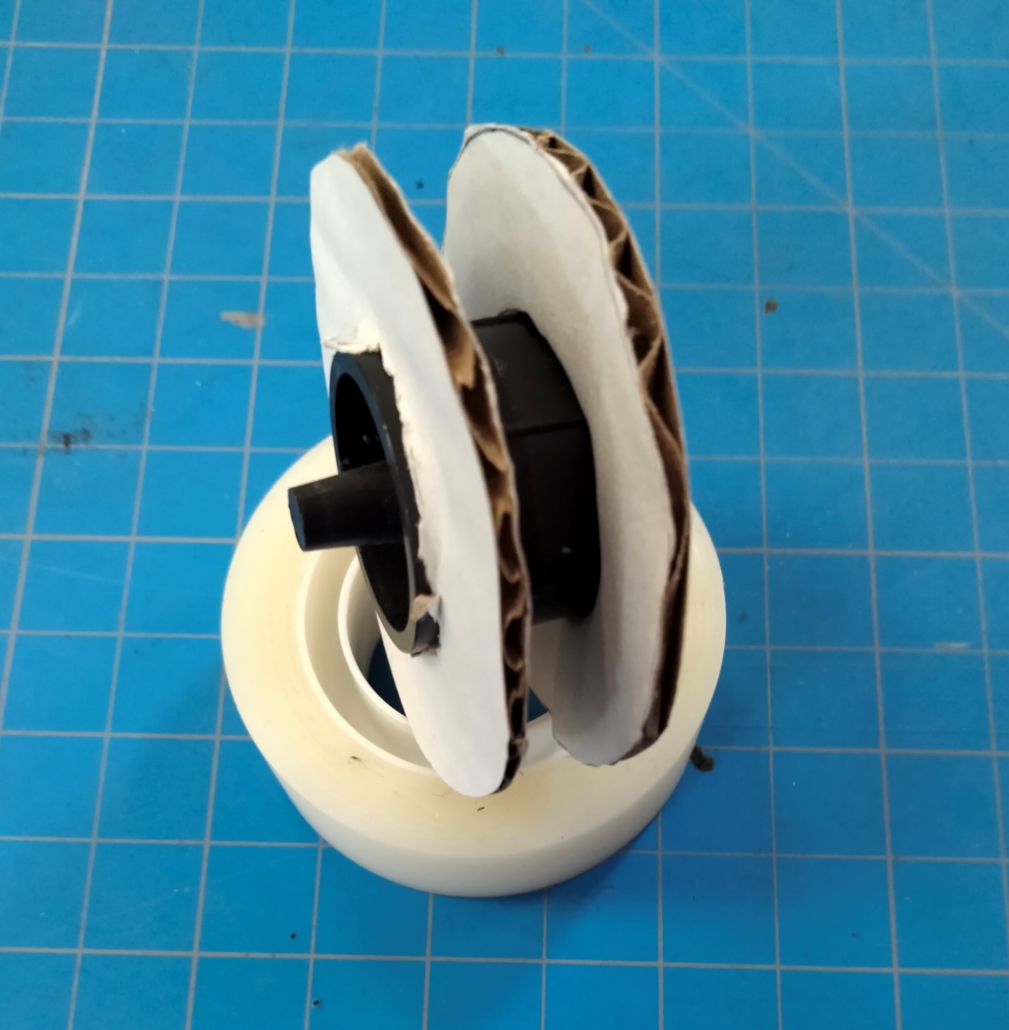
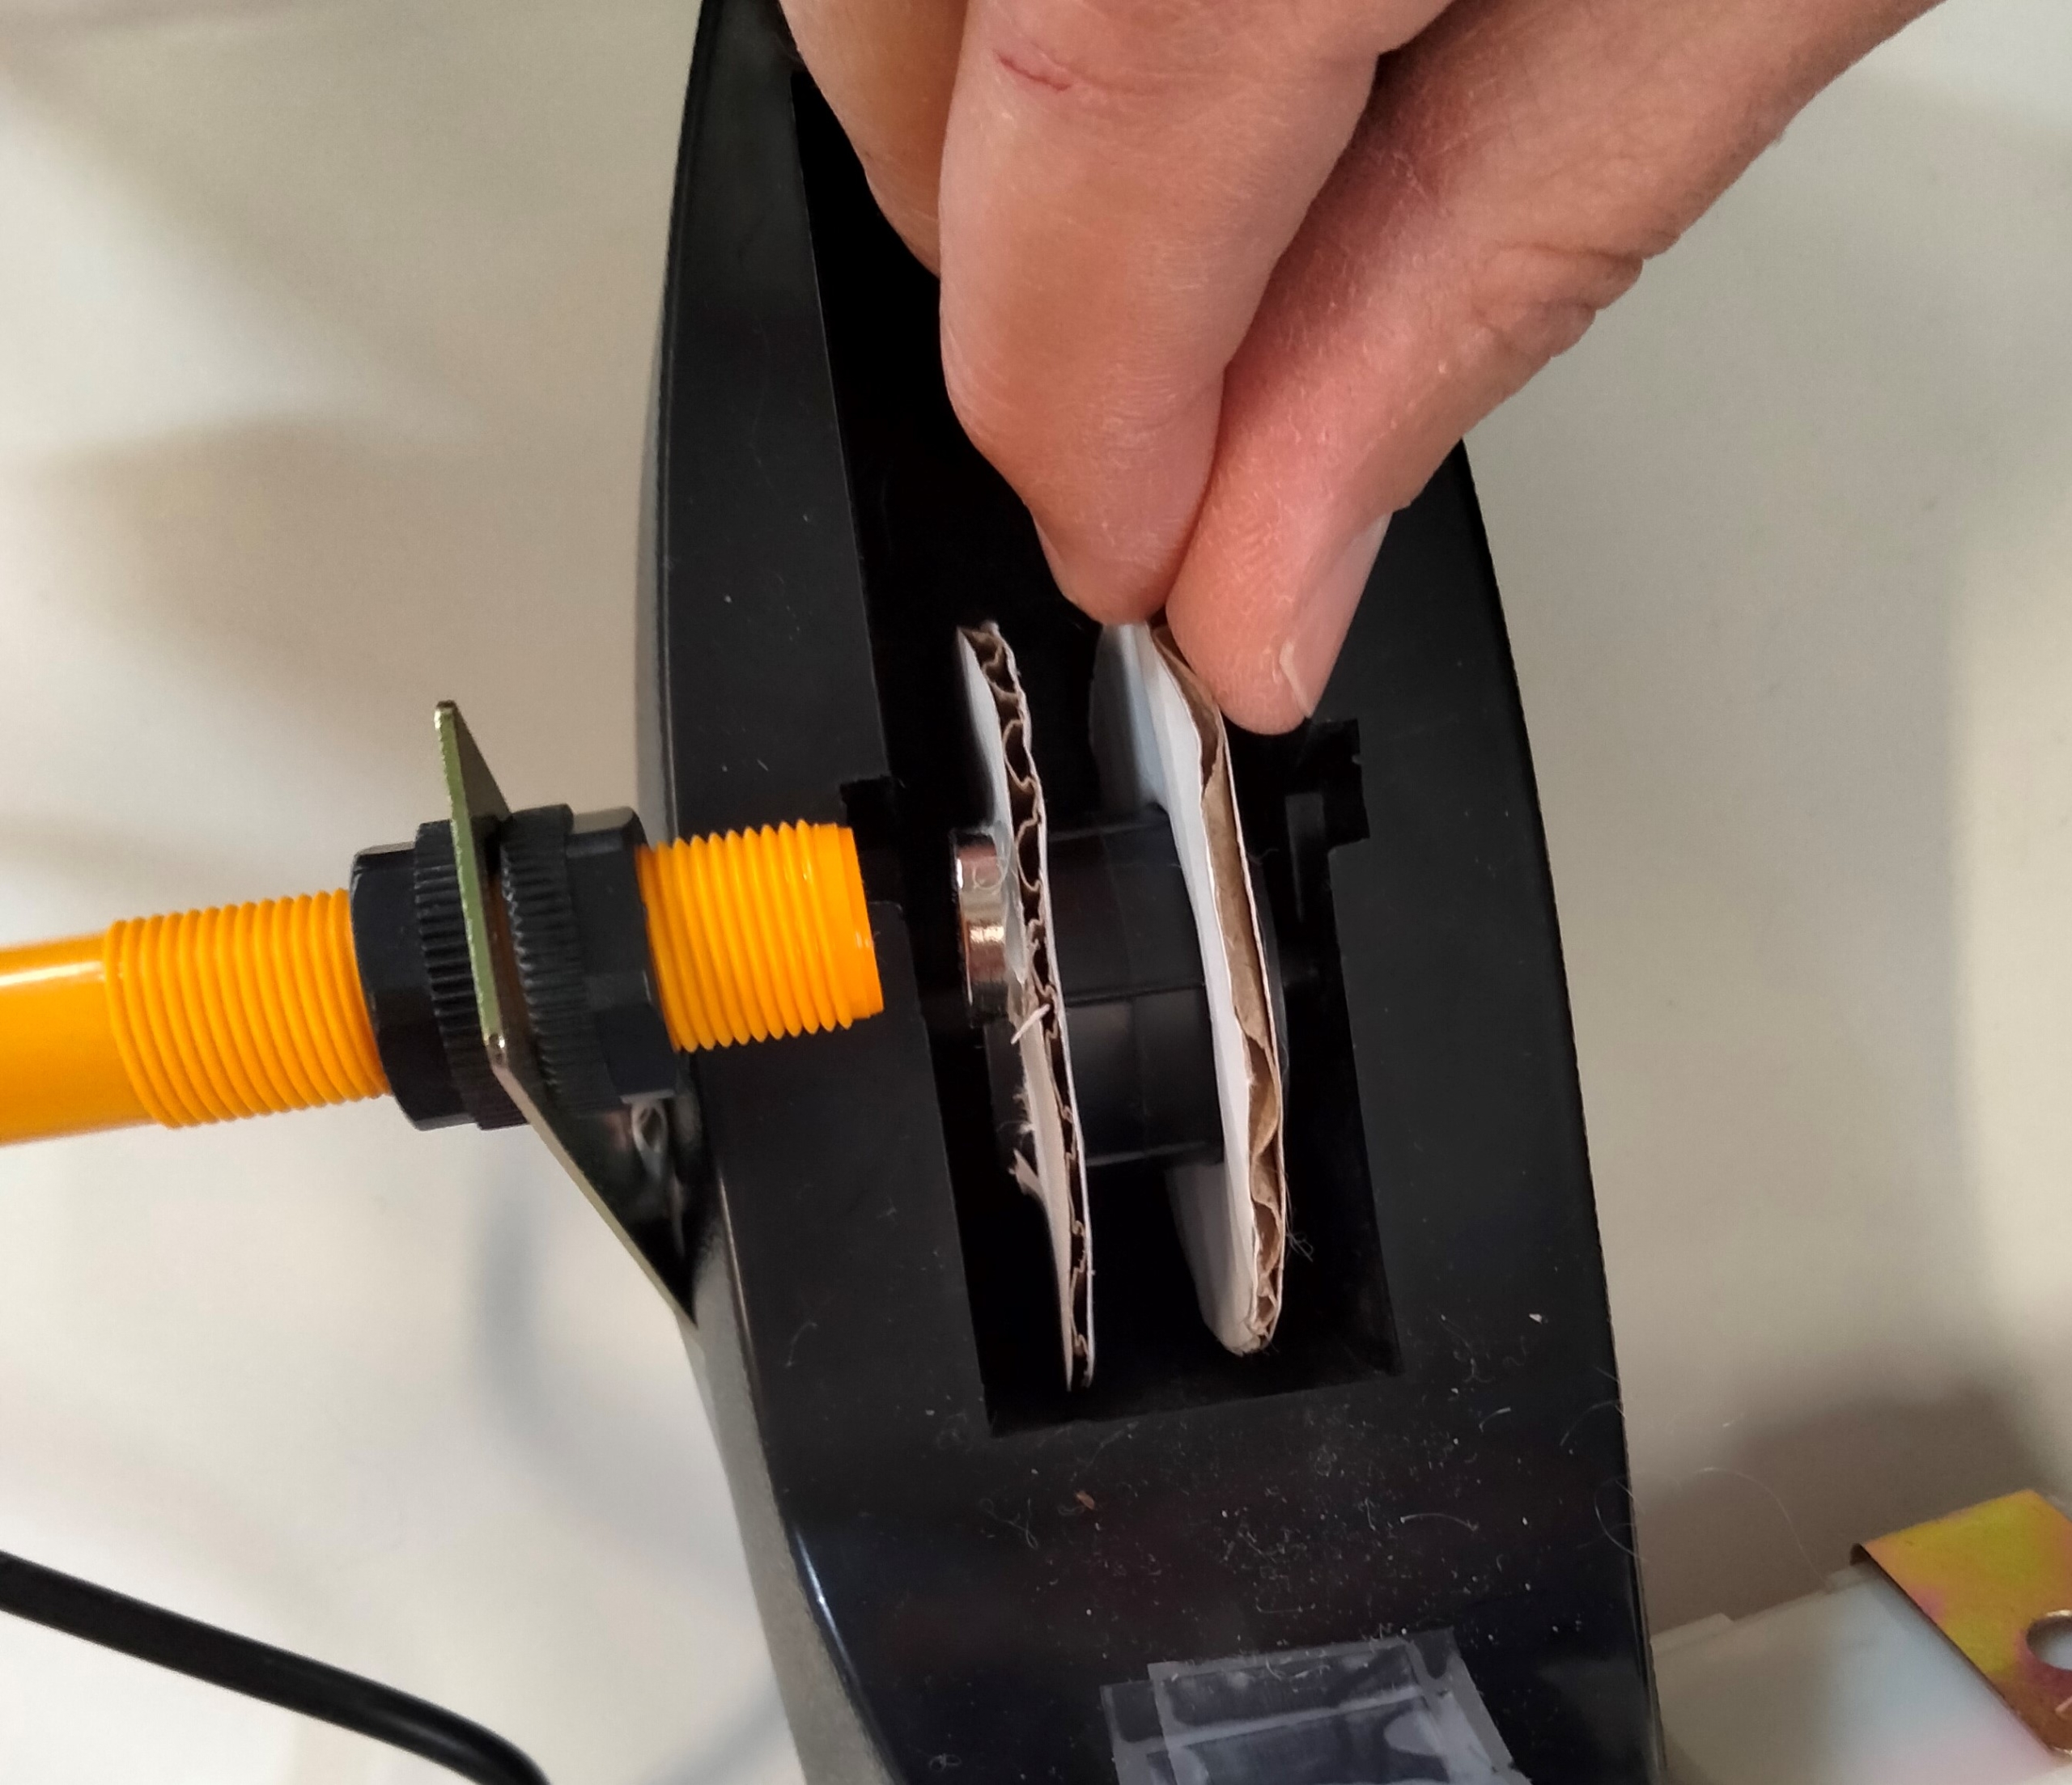
Step 3: Attach the yarn guides & magnet
Take your yarn guides and push them onto either end of the core of your tape dispenser. They may stay put as-is, but ours loosened and flopped after winding a few balls, so we recommend hot-gluing them in place. Also hot-glue the magnet to the outside of one of the yarn guides. Note: We have an older-style tape dispenser with a round core. If yours has a triangular core, that’s okay too.
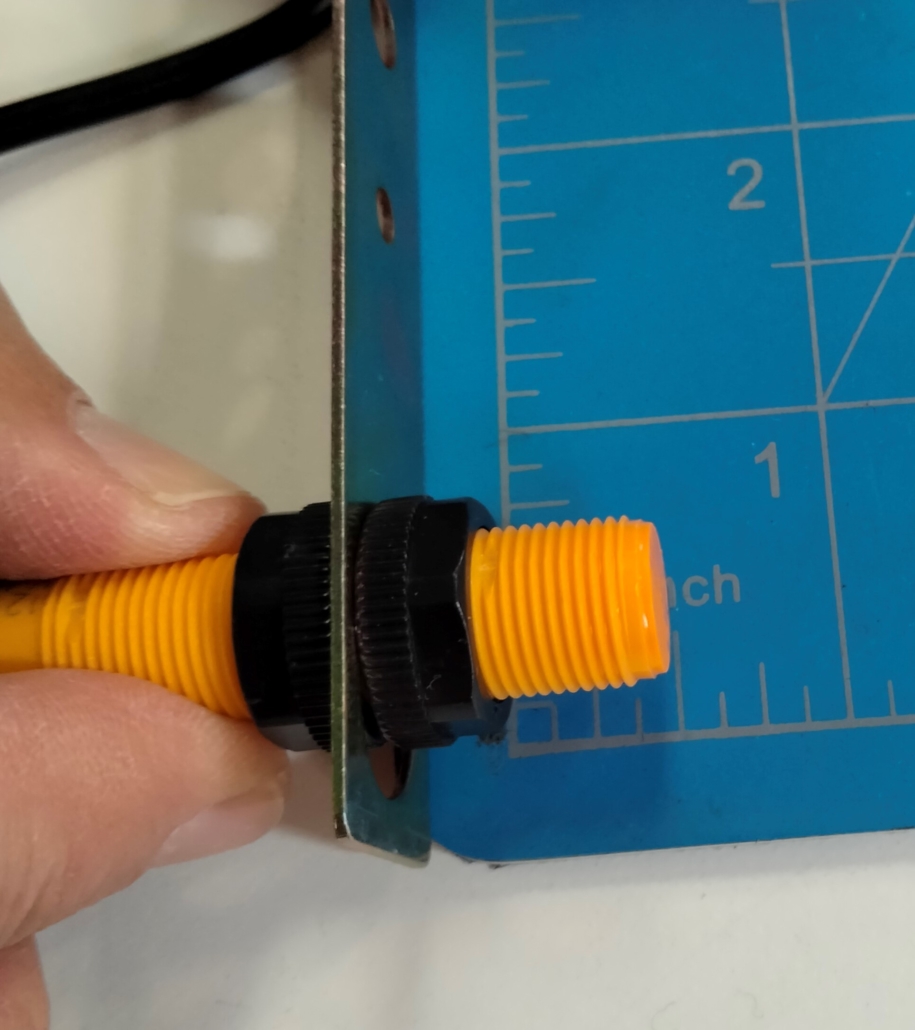
Step 4: Prepare the rotation counter
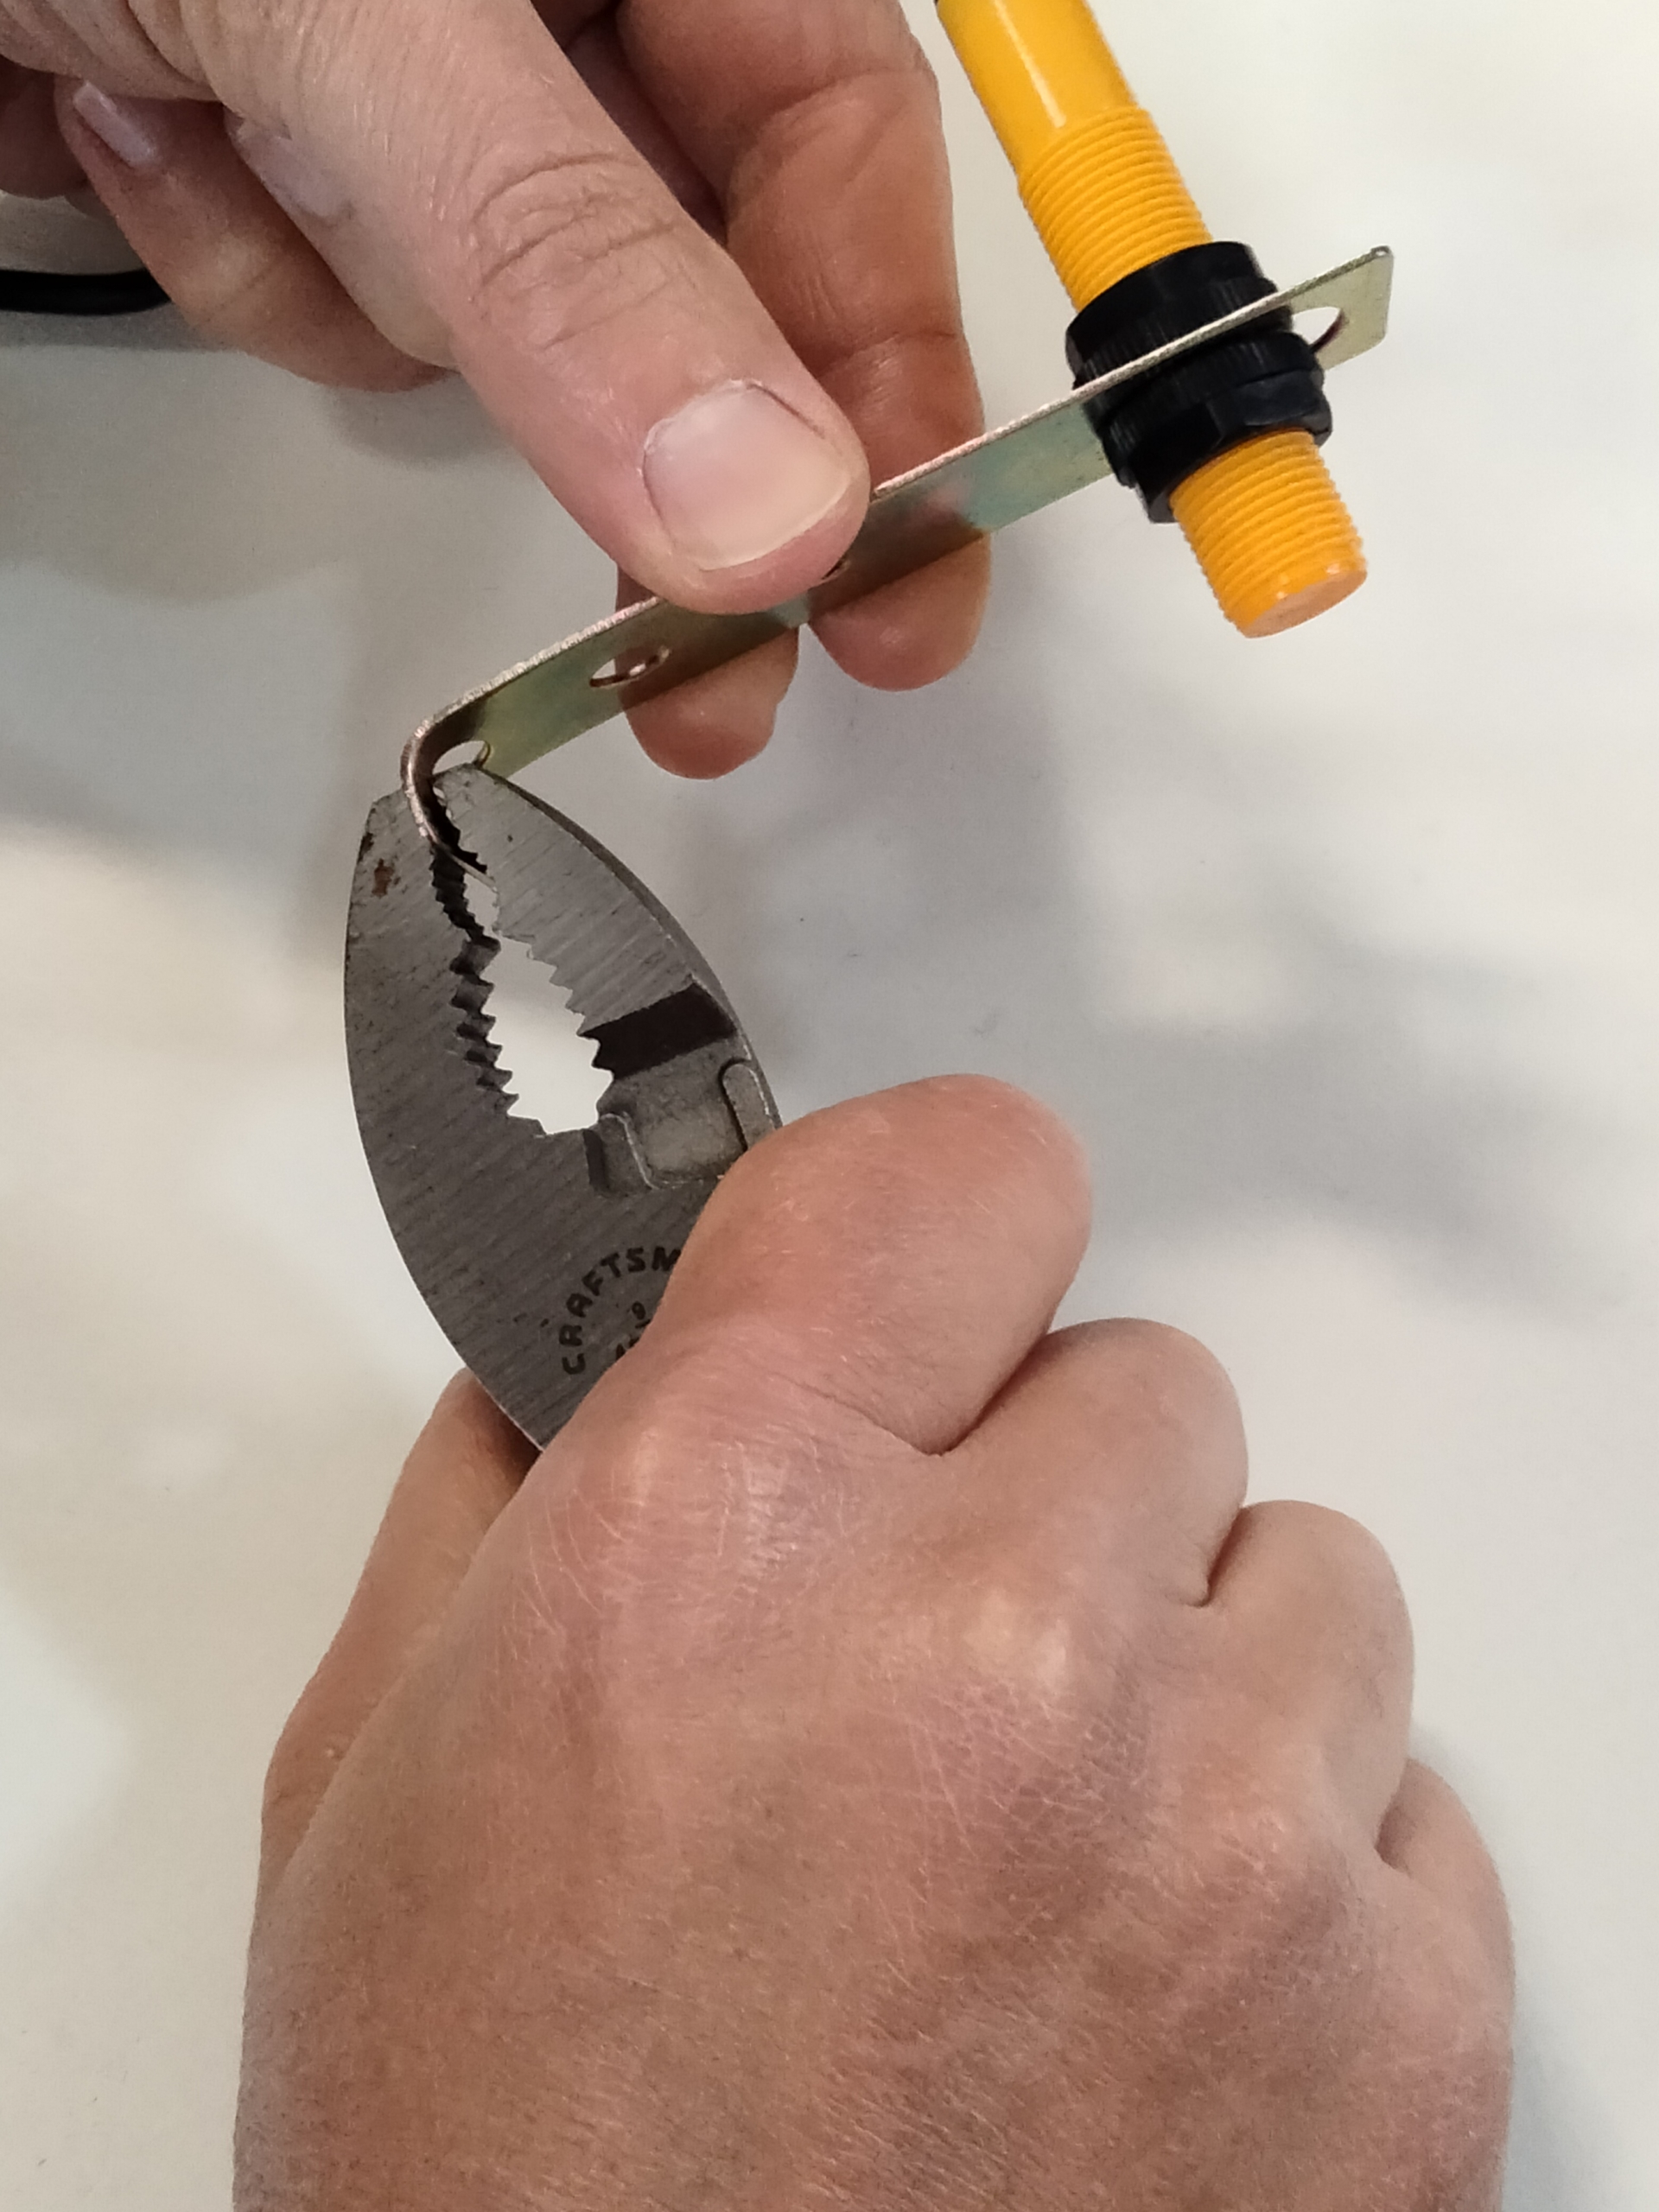
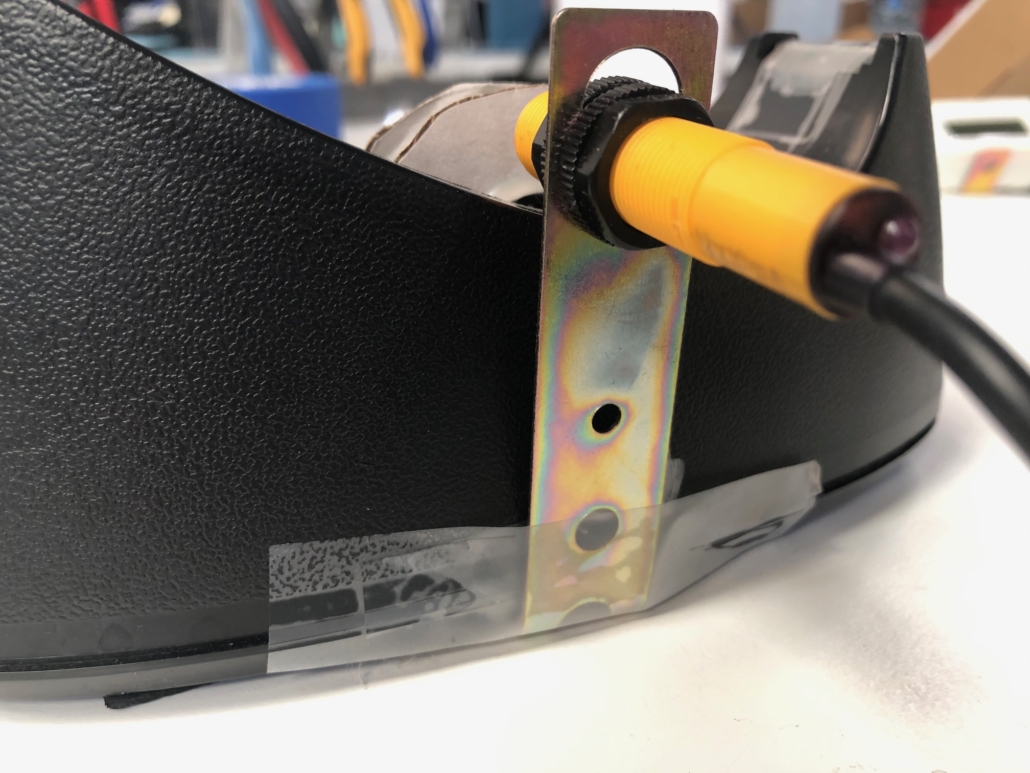
Unscrew one of the nuts on the rotation counter, push the rotation counter through the large oblong hole on the mounting bracket that comes with the kit. Adjust both nuts so there’s about 3/4 inch (19 mm) from the end of the tip of the counter to the mounting bracket. Using pliers, bend the other end of the bracket into an “L”, about midway through the bottom hole on the bracket. (Note: Read through the next step as well; the amount of L or where you bend the bracket may need to be different for your particular tape dispenser.) The tip of the L should be on the same side as the tip of the rotation counter.
Step 5: Assemble the rotation counter and magnet
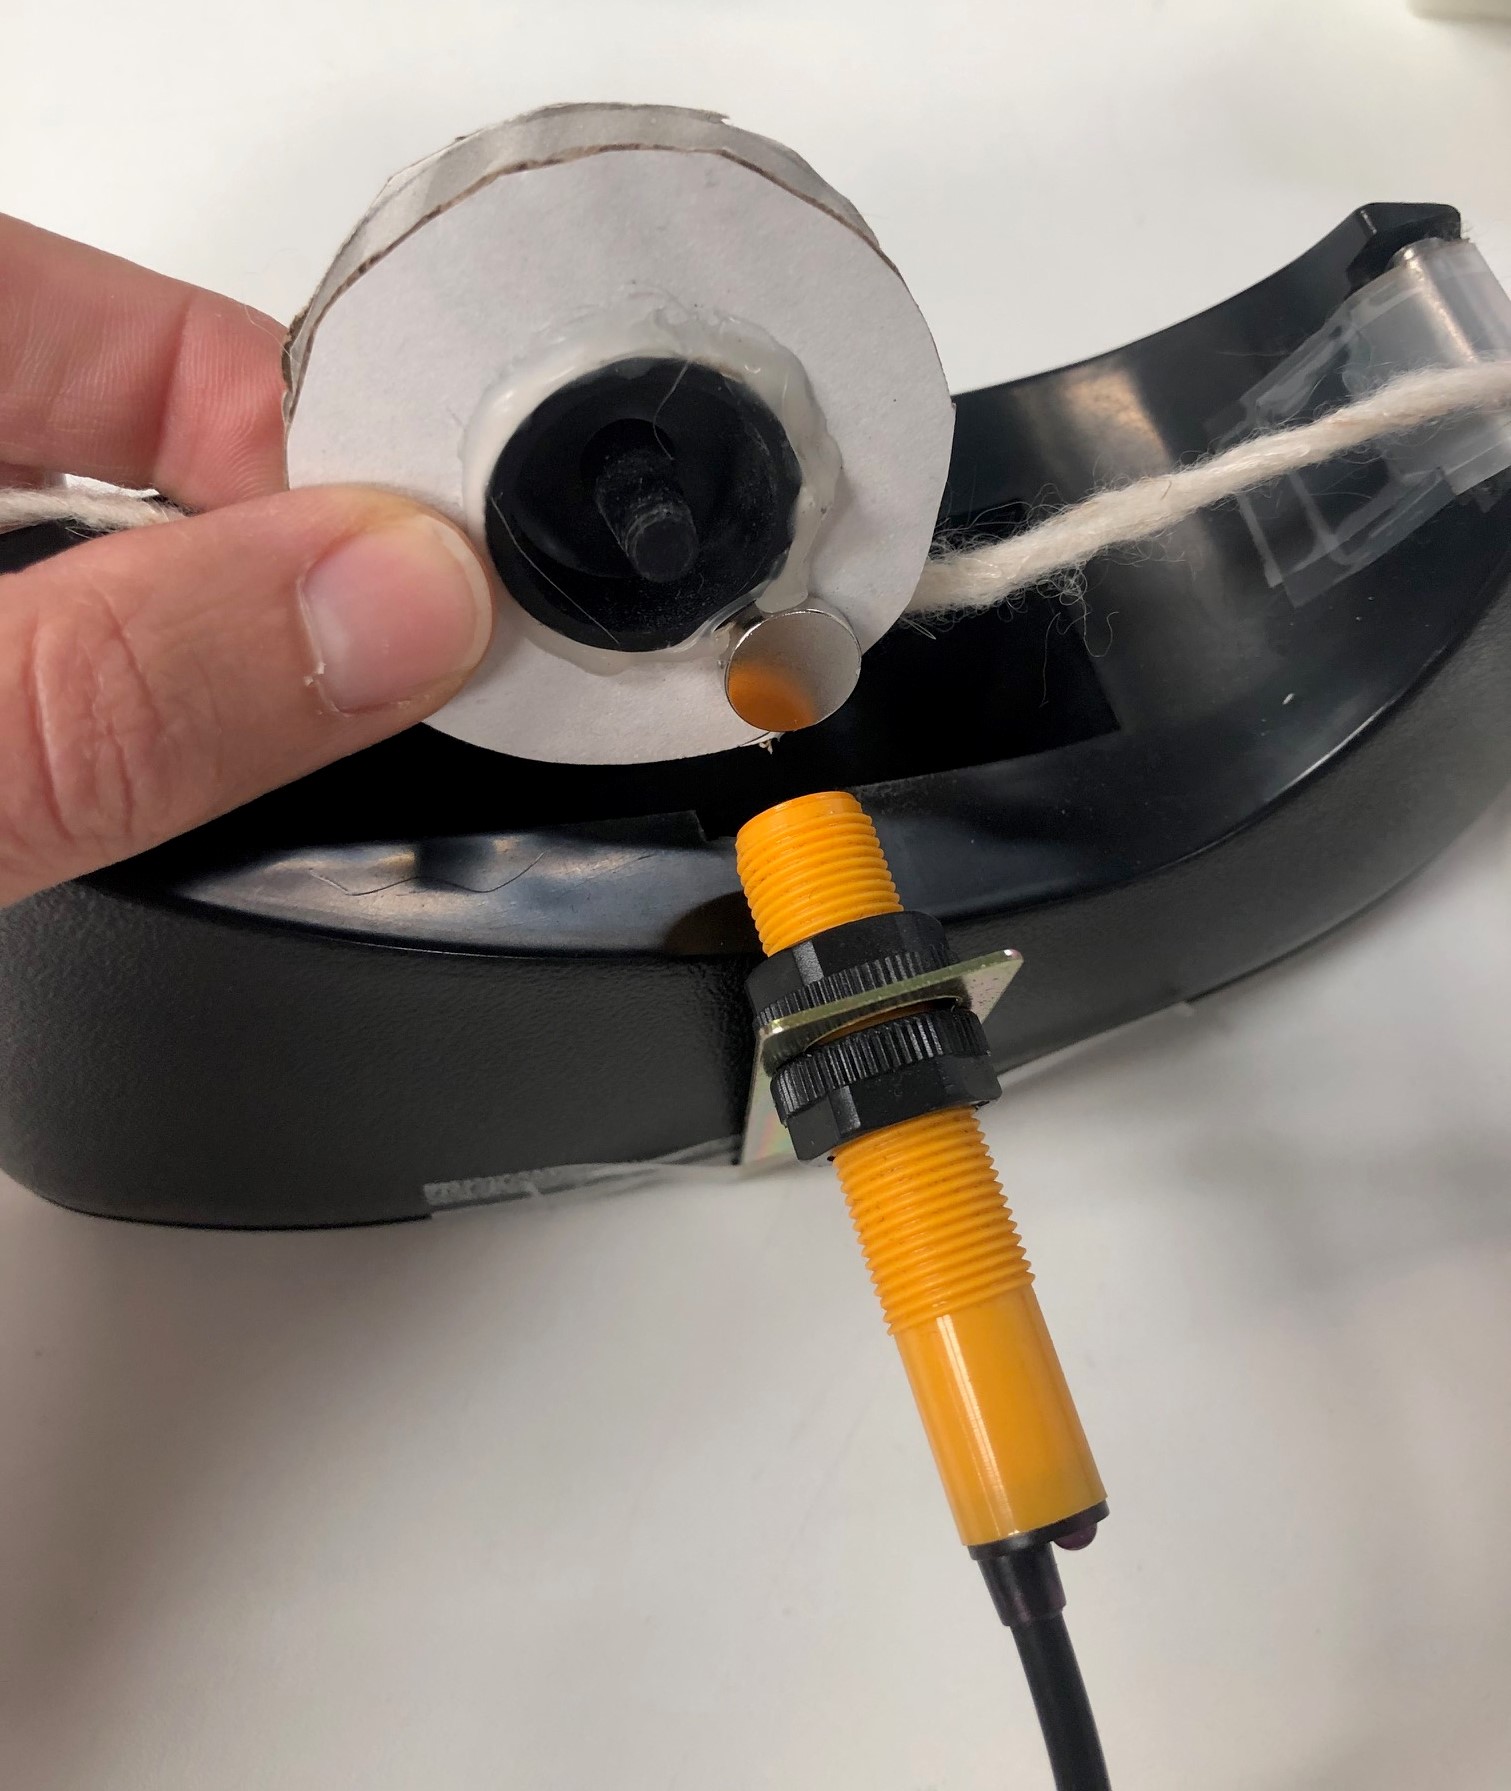
Place the tape dispenser core with yarn guides back into the tape dispenser. Rotate the core so the magnet is at the top; you’ll need to hold it there with one hand. With your other hand, hold up the rotation counter bracket on the side of your tape dispenser. The magnet and the rotation counter tip should be directly opposite each other, with approximately a 1/8-inch (3-mm) gap between them. If the gap is different, adjust the nuts on the rotation counter. If the rotation counter is more than 1/8 inch above or below the magnet, adjust the place where you’ve bent the bracket.
Step 6: Tape the bracket to the dispenser
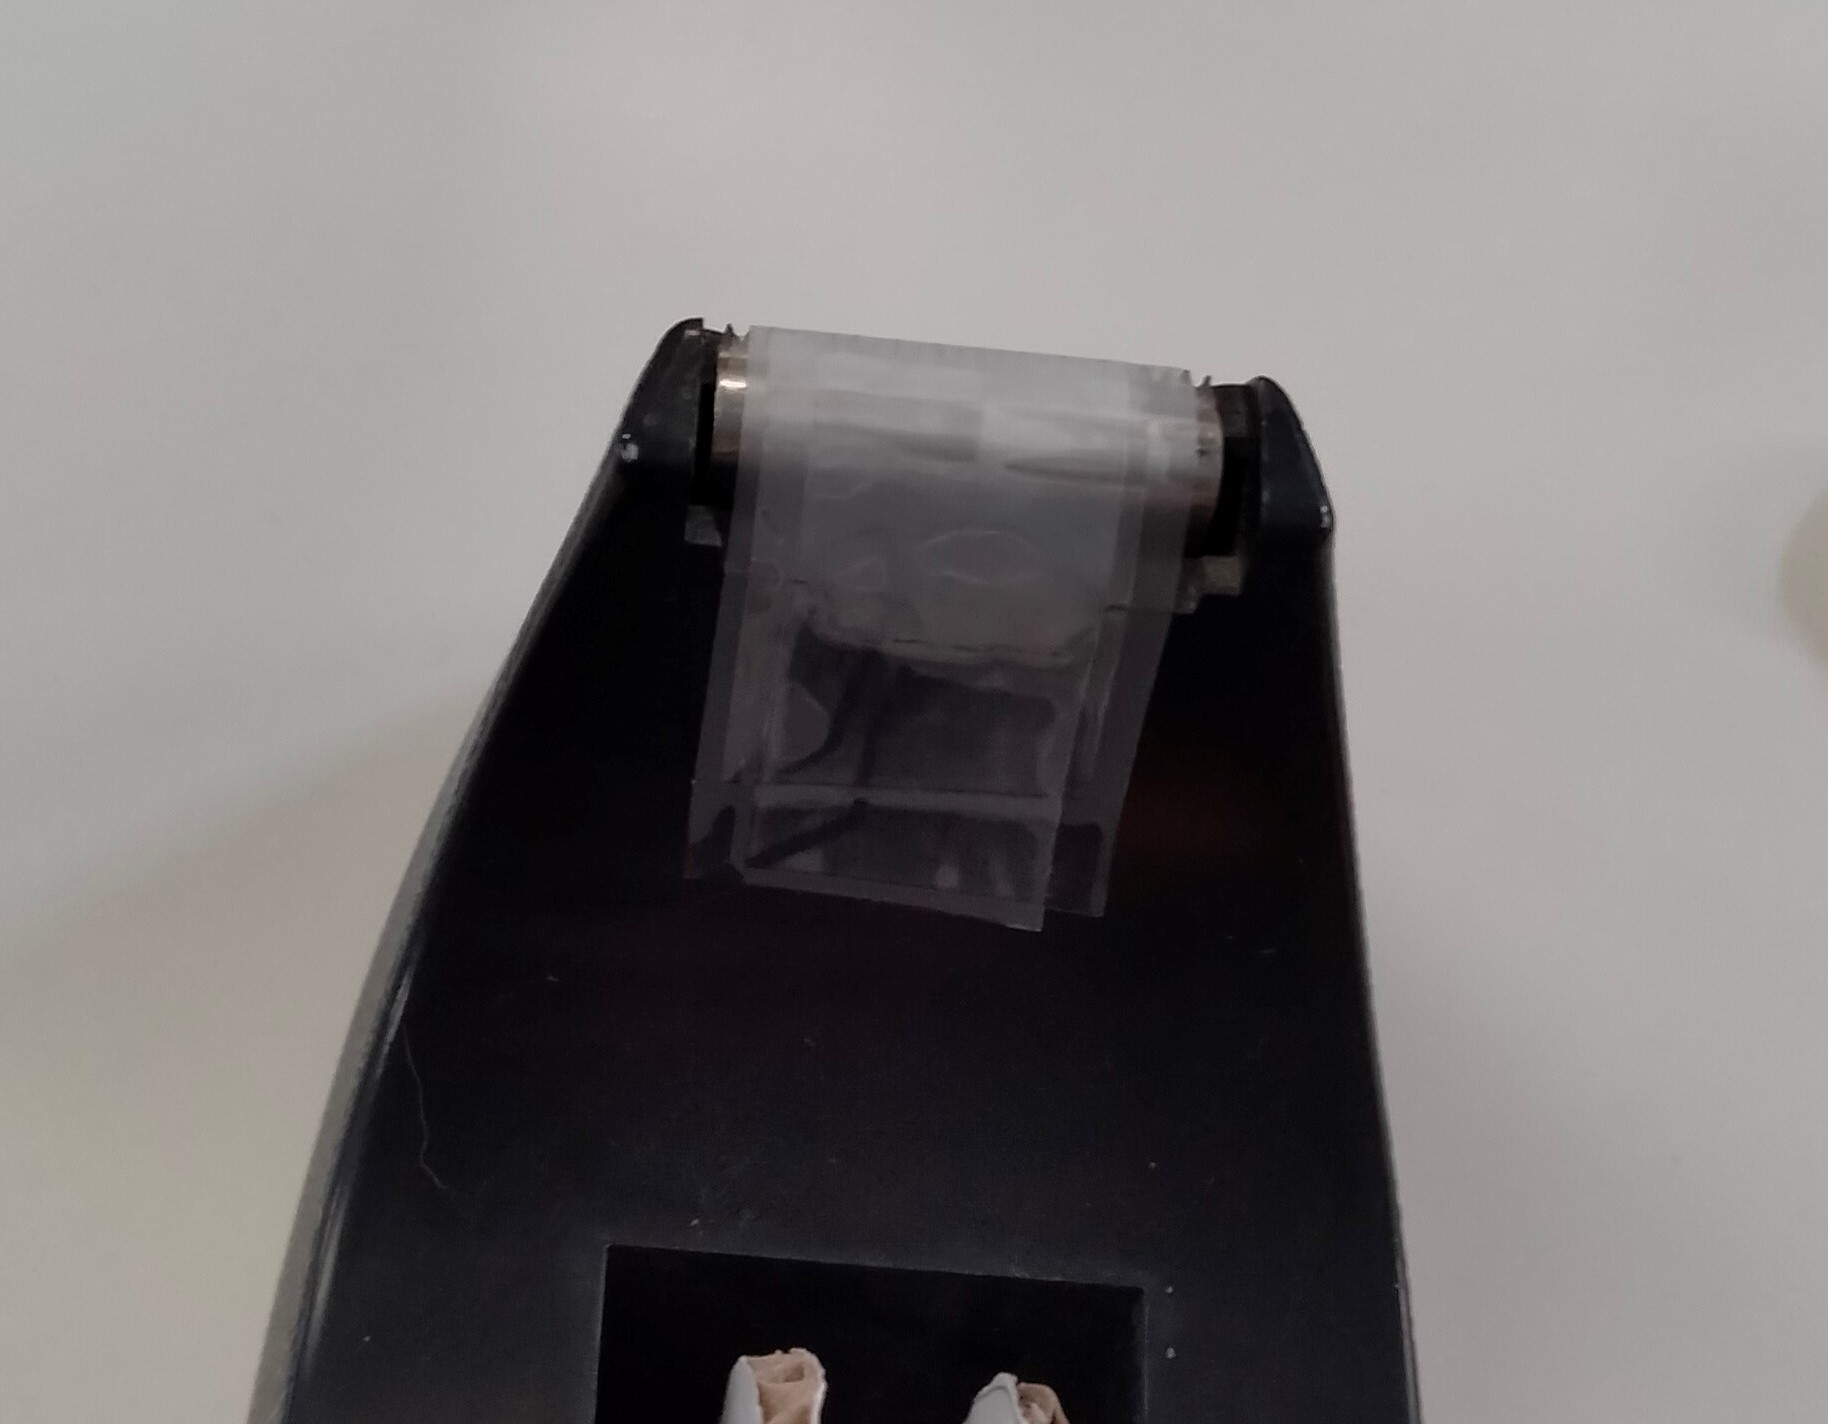
Use a few pieces of tape to attach the bracket to the dispenser. The bracket should be as close to vertical as possible. Our tape dispenser had slanted sides, so we folded up a piece of tape and stuck it between the bracket and tape dispenser to hold it in a vertical position. This helps with consistent spacing between the magnet and counter, which helps with consistent counting! At this time, also use a few pieces of tape to tape over the serrated edge of your tape dispenser. We don’t want it roughing up your yarn!
Step 7: Attach the rotation counter to the display
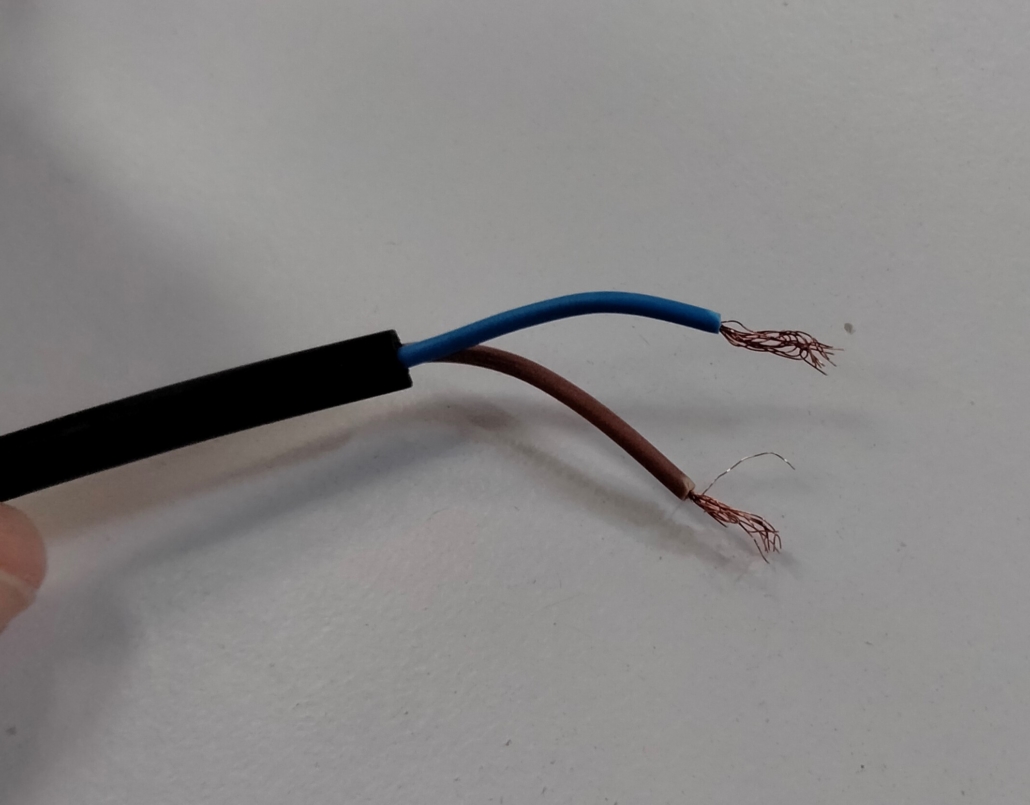
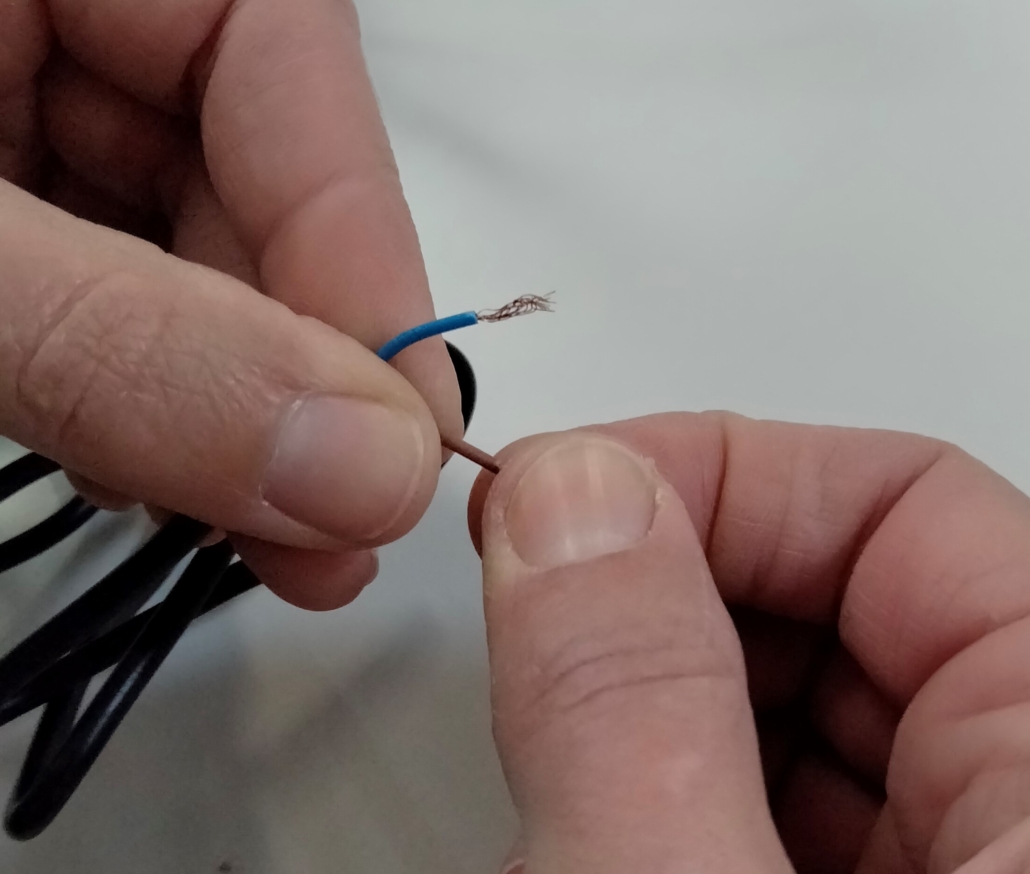
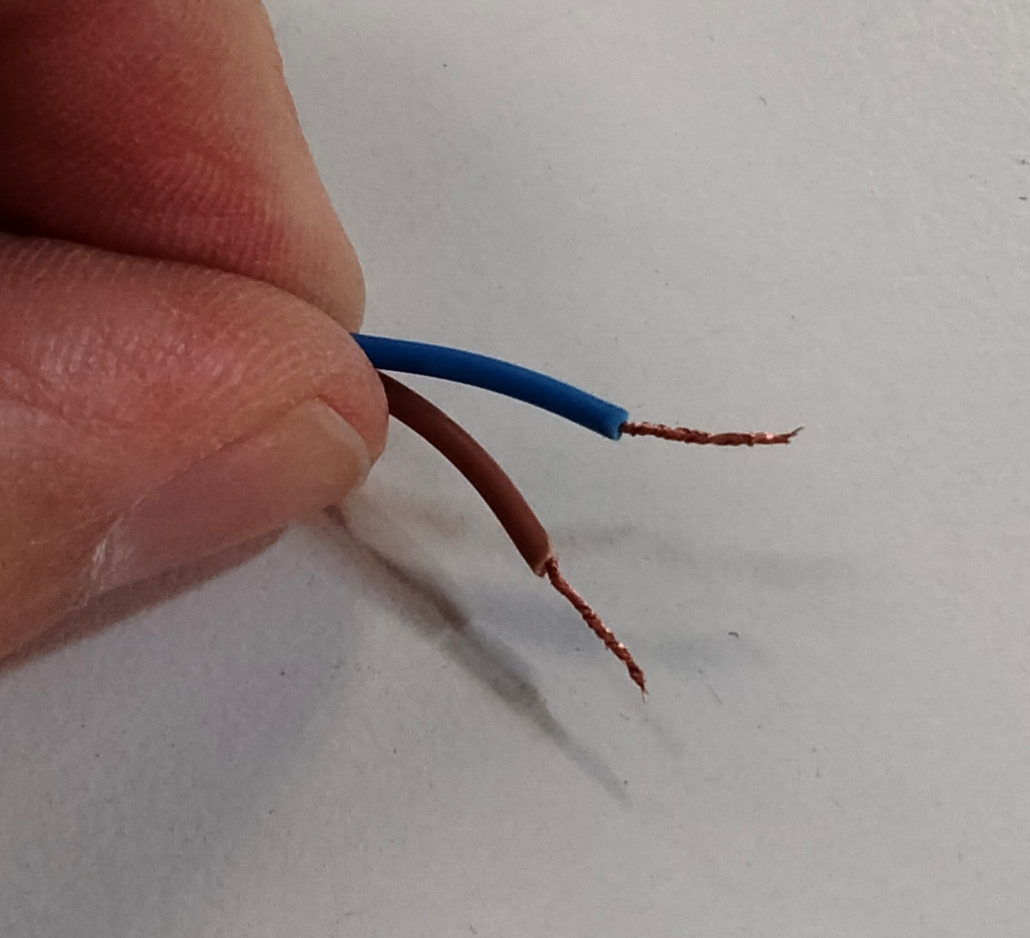
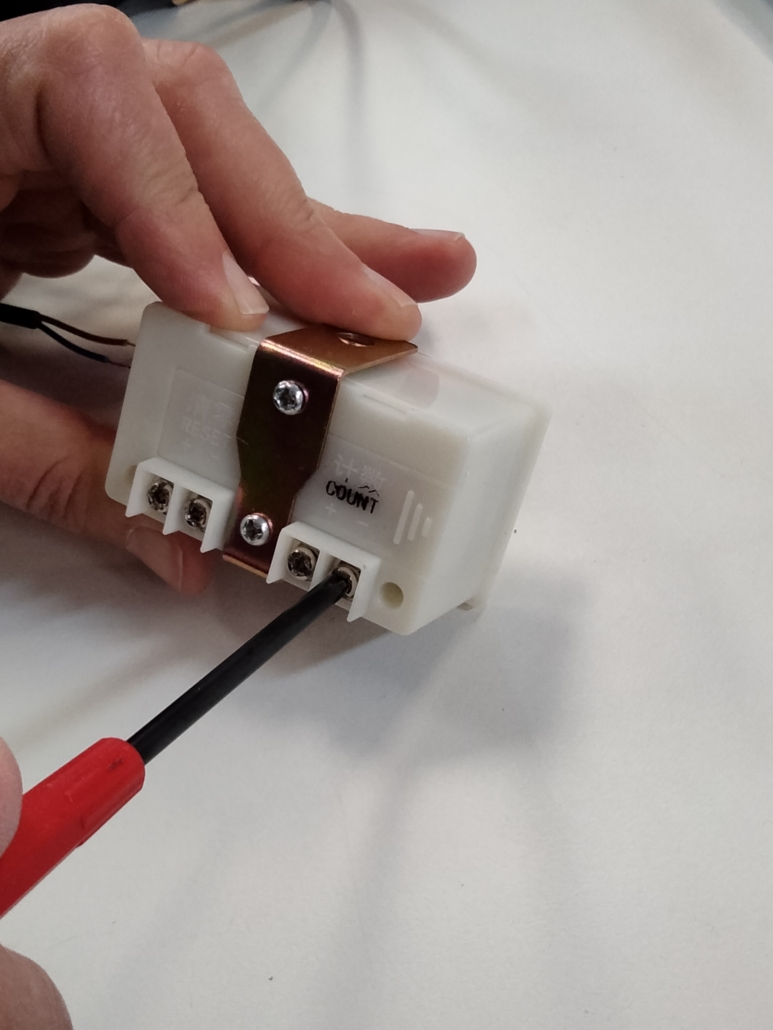
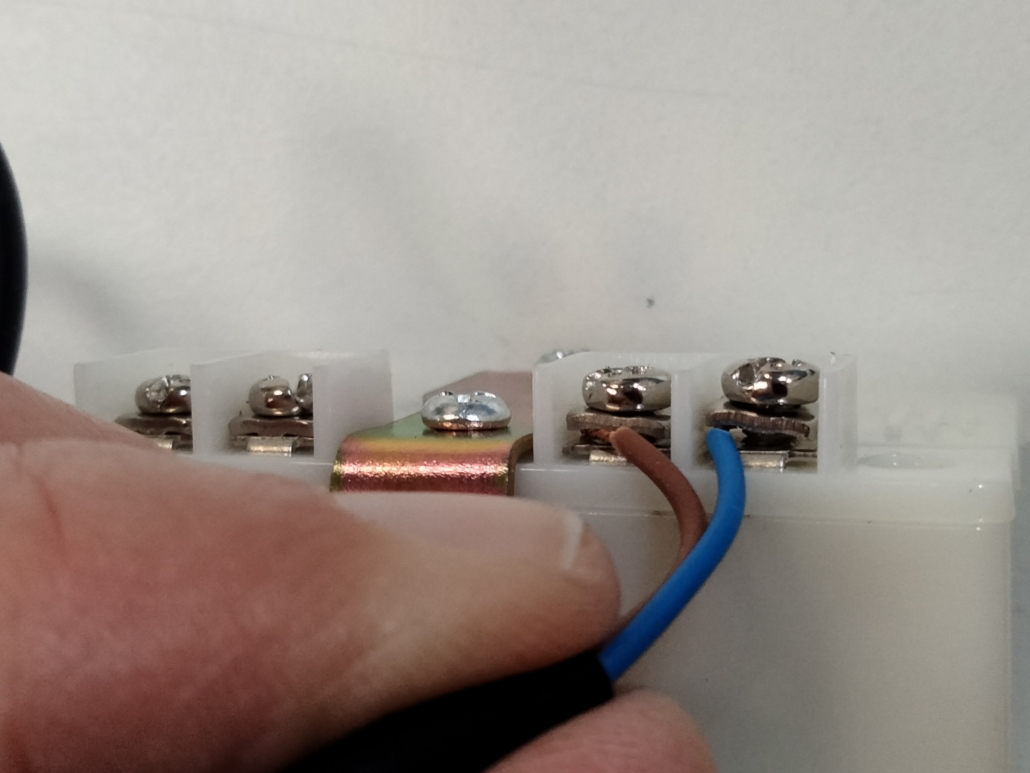
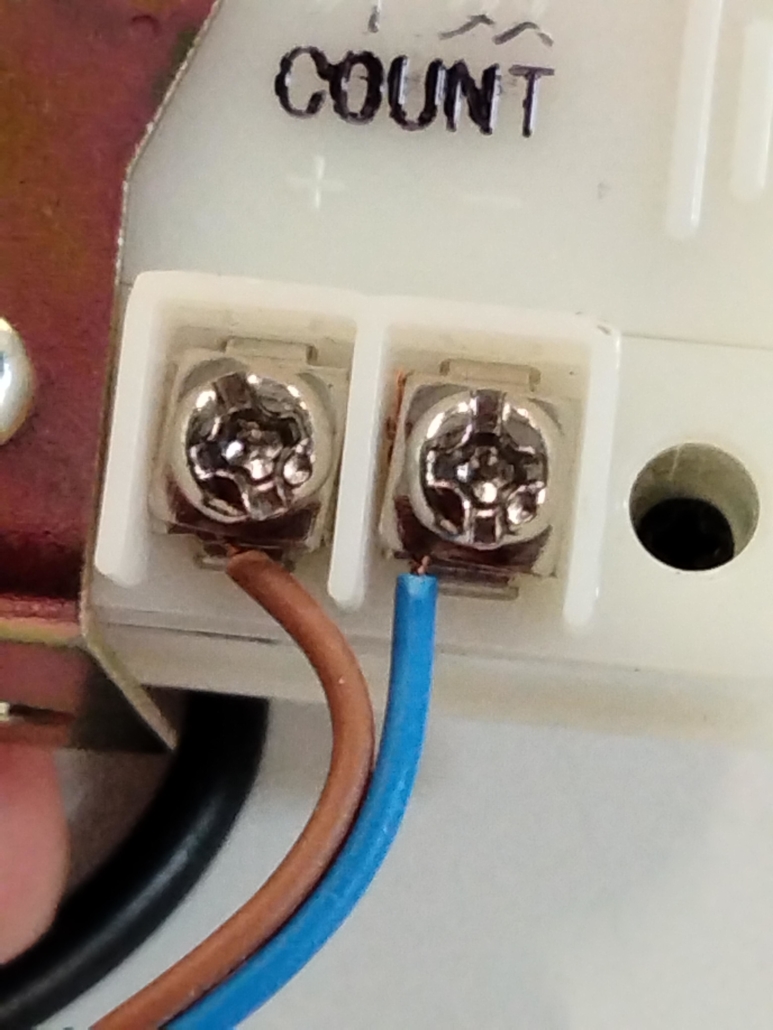
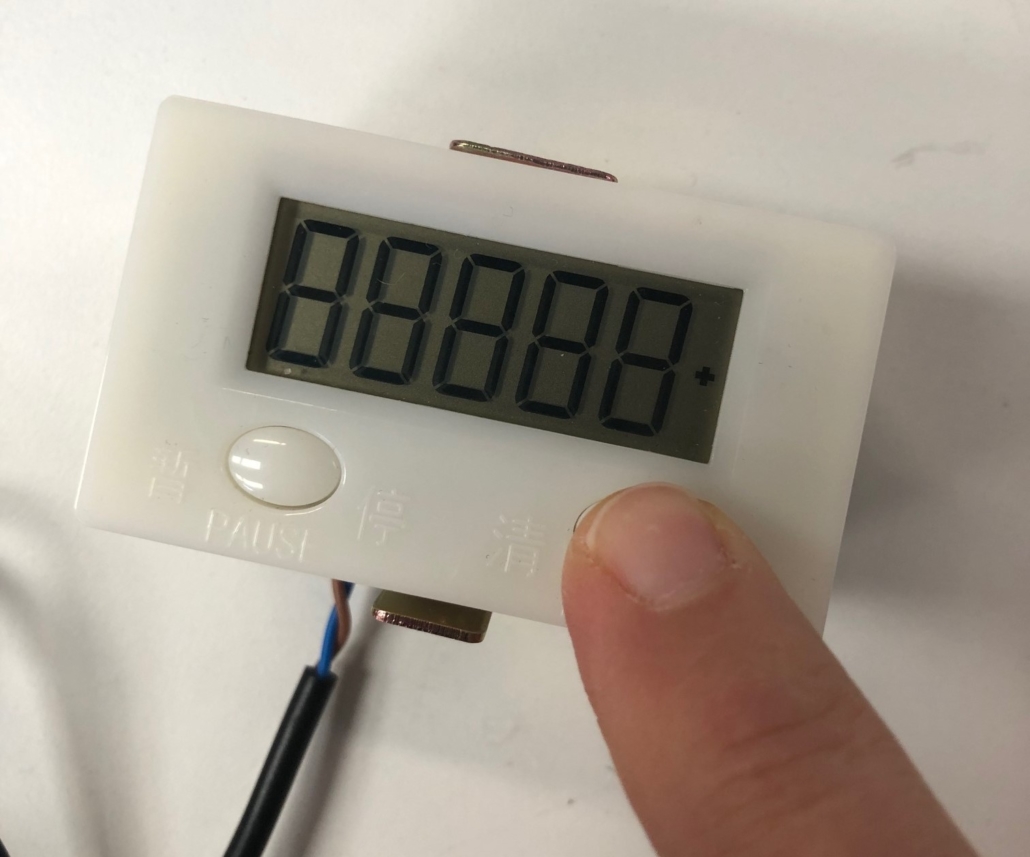
The rotation counter should already have stripped wires, meaning some copper strands are exposed from the insulation, but the strands might be a little frayed. Using your fingers, twist each of the wire ends together so they’re nice and tidy. The LCD should by default have a battery installed and be displaying all zeros in black. If the display is completely blank, unscrew the bracket and back compartment, insert a new battery, and screw it back together. With the Phillips screwdriver, unscrew each “COUNTER” terminal on the LCD display a few rotations so they’re loose but still screwed in a little. The word “COUNTER” is embossed in the white plastic and may be difficult to see; we’ve used a marker to make it black in the photo. Insert the wires between the two plates in each terminal. It doesn’t matter which wire is on the left or right. Screw the terminals back down tightly so the wires are firmly sandwiched between the plates. Set the LCD next to the tape dispenser.
Step 8: Test your counter
Manually rotate the tape dispenser core around a few times, passing the magnet by the tip of the rotation counter. With each pass, the display on the LCD should count up! Note that there’s no way for it to tell direction – it will count up by one no matter which way you turn the core. Press the Reset button to zero the count. We don’t use the pause button; note that if you press it, the counter will no longer count up.
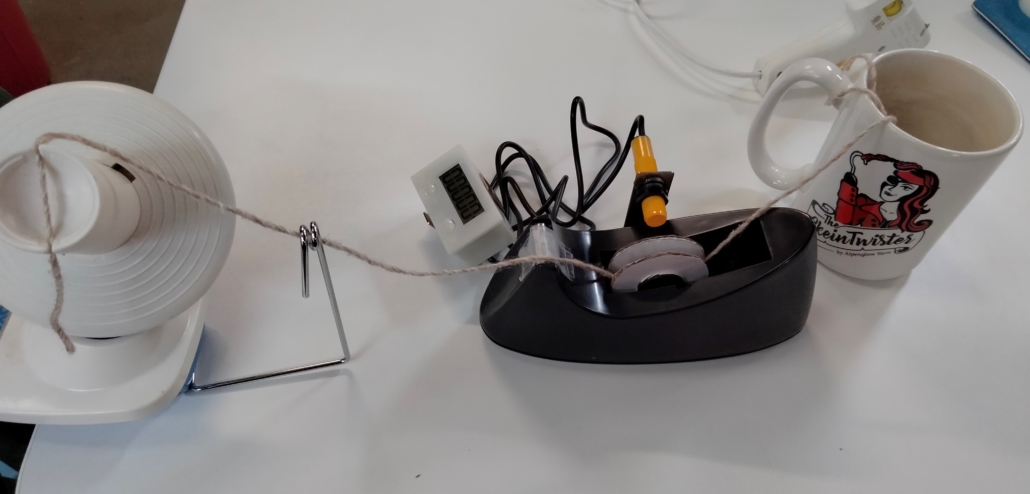
Step 9: Set up your winding
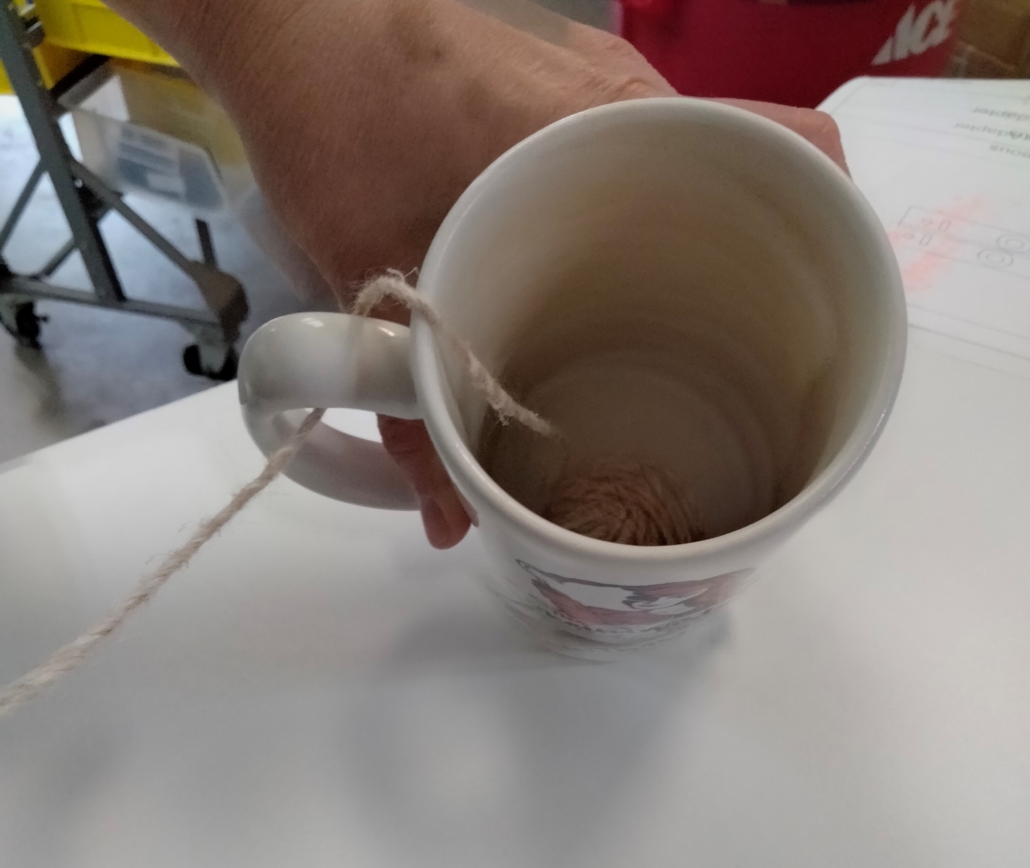
Yay, you’re ready to test it out with some yarn! Clamp your ball winder to a surface, like you would for winding any ball of yarn. Set the tape dispenser in front of the yarn guide so the taped-over serrated edge is opposite your yarn guide. Place the LCD someplace you can see it while winding. Place the yarn container (or yarn bowl) in back of the tape dispenser so all 3 parts are in a line. Take the core out of your tape dispenser. Take an end of your yarn from the ball (if you have an inside vs outside choice, we tend to prefer inside. If the inside is trapped, outside is totally fine), and loop it around the core once, leaving about a one-foot (30-cm) tail. Direction of the loop doesn’t matter. Place the core back inside the tape dispenser, making sure the yarn is within the two yarn guides. Run the end of the yarn through your ball winder’s yarn guide, and attach it to your winder core.
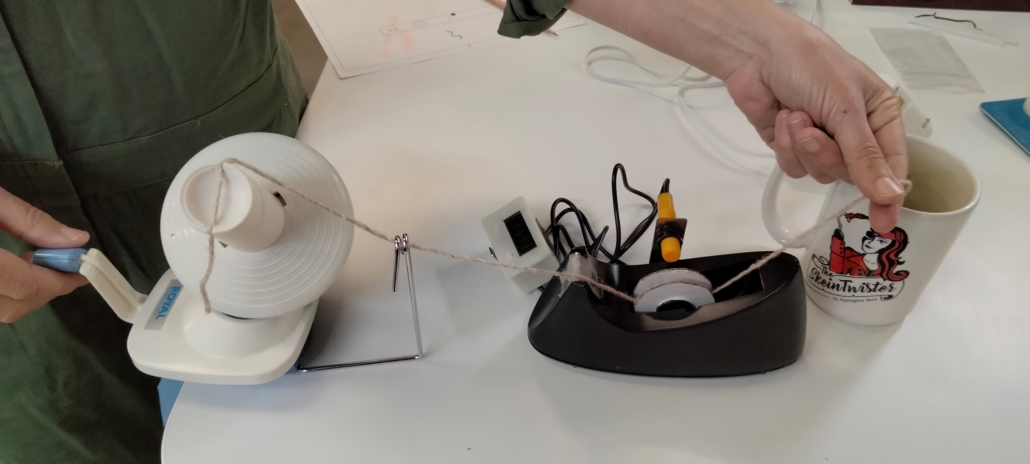
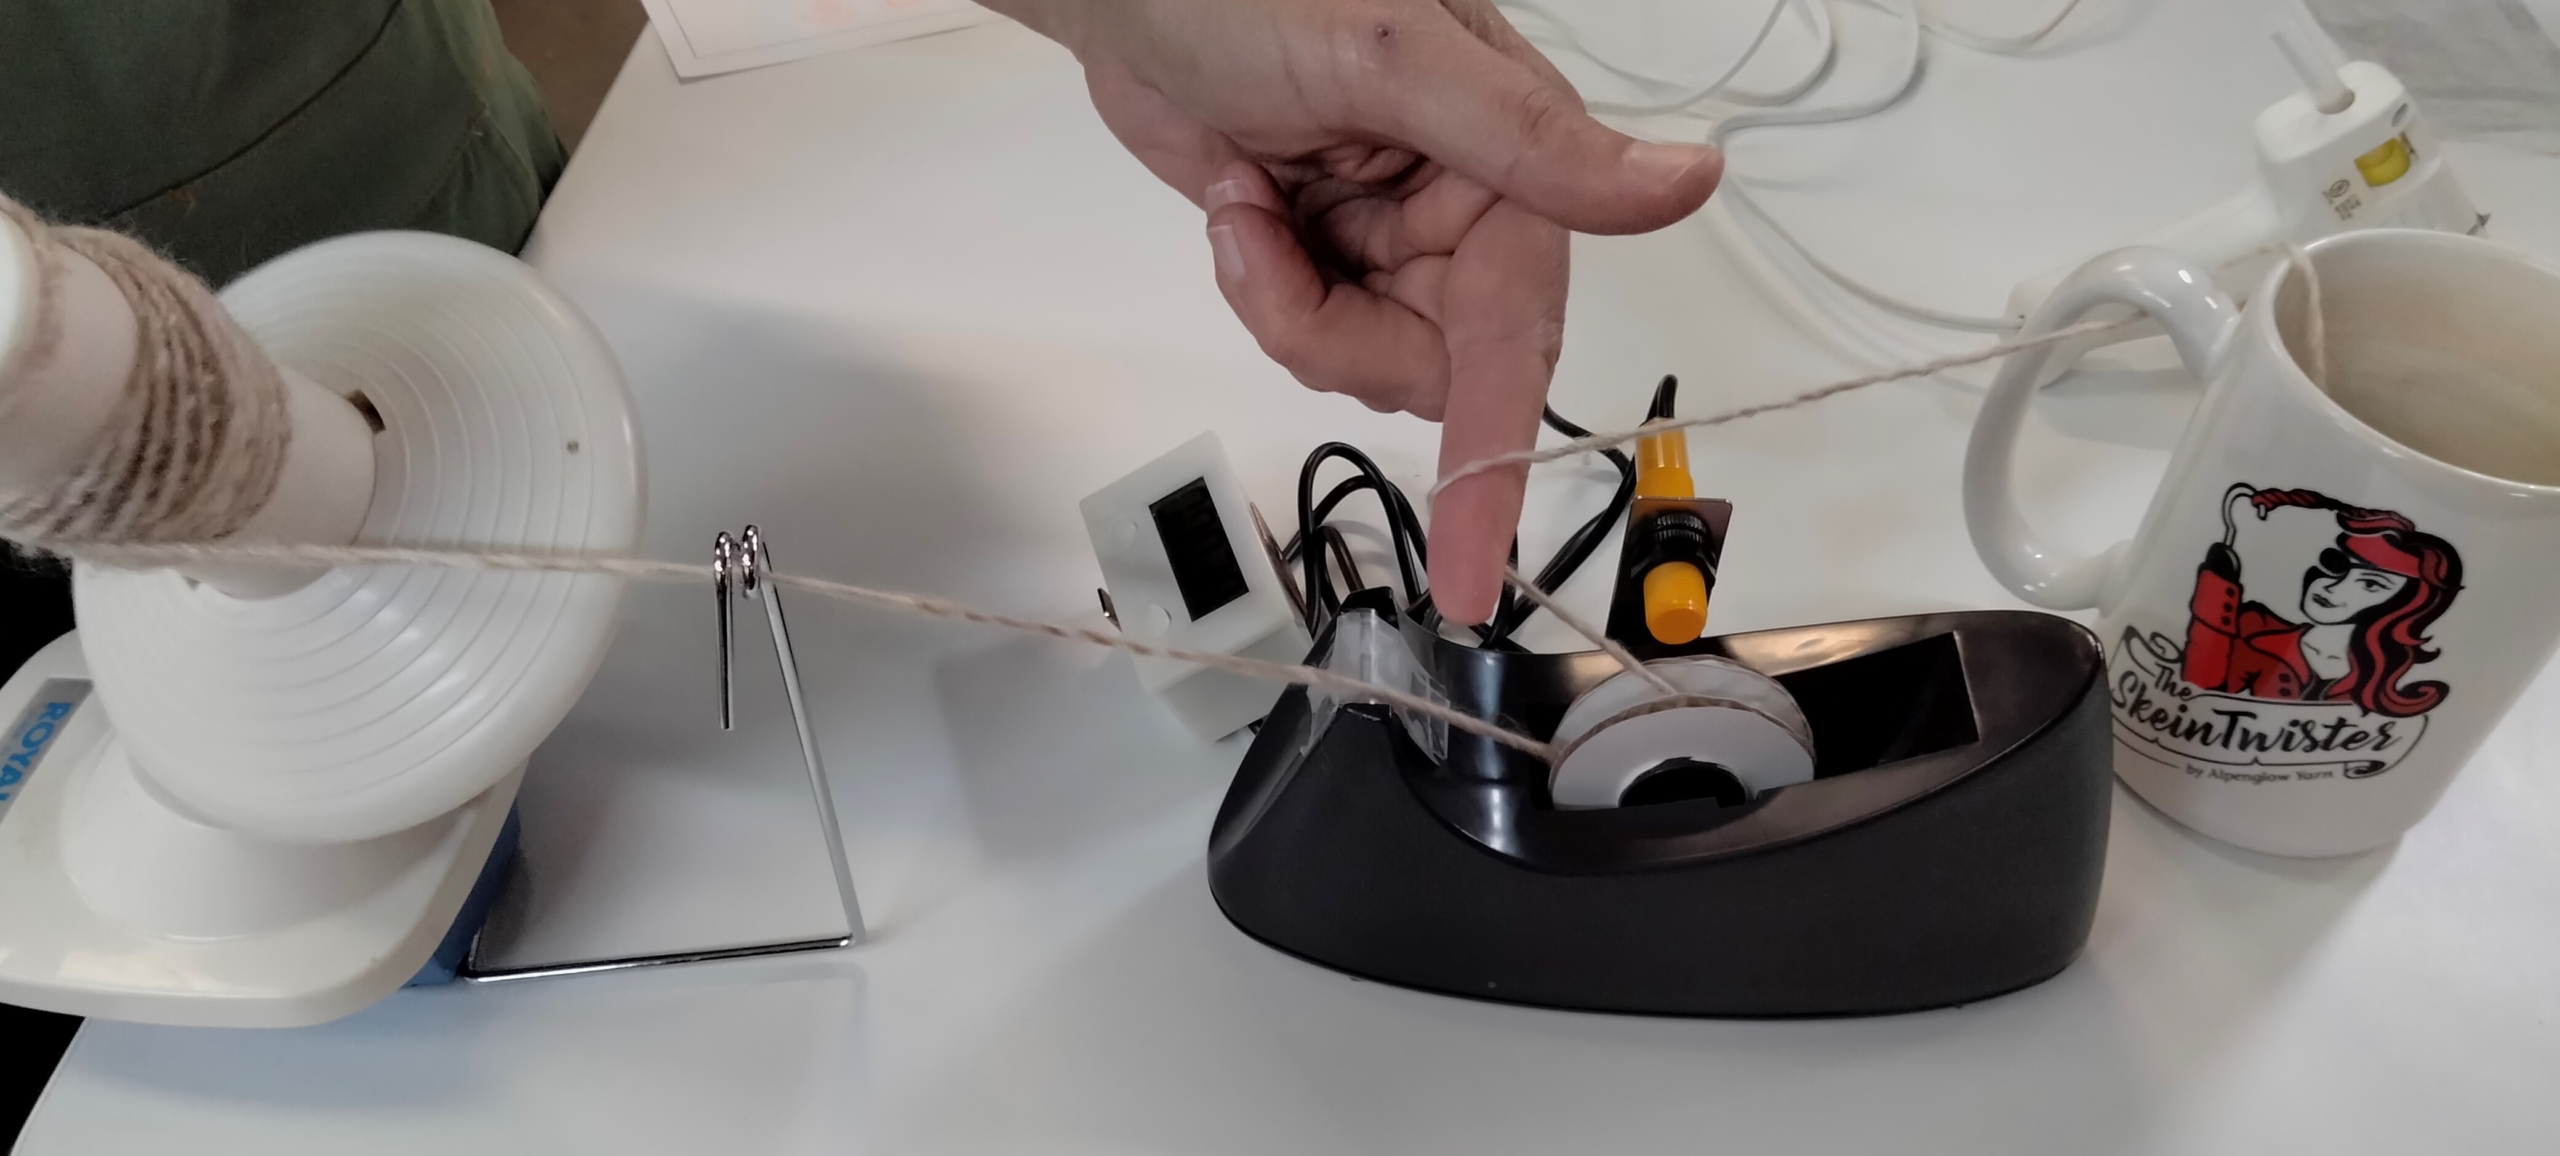
Step 10: Wind and count!
Make sure your yarn is between the yarn guides in the tape dispenser. Zero the count on the LCD display. You will need to guide the yarn properly with your non-winding hand so the core doesn’t jump out of the tape dispenser. Take a loop of yarn from the ball side, and bring it toward you and above the ball winder. Between this and the pull from the ball winder, you should be able to keep a little bit of tension on the tape dispenser core, pulling it toward you, which keeps it seated. We found that pulling the yarn all the way to you and holding it directly above the ball winder was comfortable and worked well. Start winding away! You’ll get approximately 8 rotation counts per crank of the ball winder. Keep winding slow and steady so the core doesn’t jump and so you don’t get going so fast you miss counts. This didn’t happen to us but could theoretically happen. Keep cranking at about 1 to 1.5 cranks per second. When your run out of yarn, since the core is weighted, it will stop. It won’t freespin and add extraneous counts. Check out our video of this step:
Step 11: Do the math!
Now on your LCD, you have a display of number of tape core rotations undergone while winding this ball of yarn. Now let’s turn that into a measurement of length! Tape cores are generally a standard 1 inch (25.4 mm) in diameter in the U.S. We need the circumference to figure out how much yarn goes around with each rotation. Easy-peasy – circumference is just diameter x pi. So 1 inch x 3.14 = 3.14 inches (7.98 cm) of yarn per rotation. There are 36 inches per yard (or 100 cm per meter). So multiply your number of rotations by 3.14 and then divide by 36 to get yards. Or multiply rotations by 7.98 and then divide by 100 to get meters.
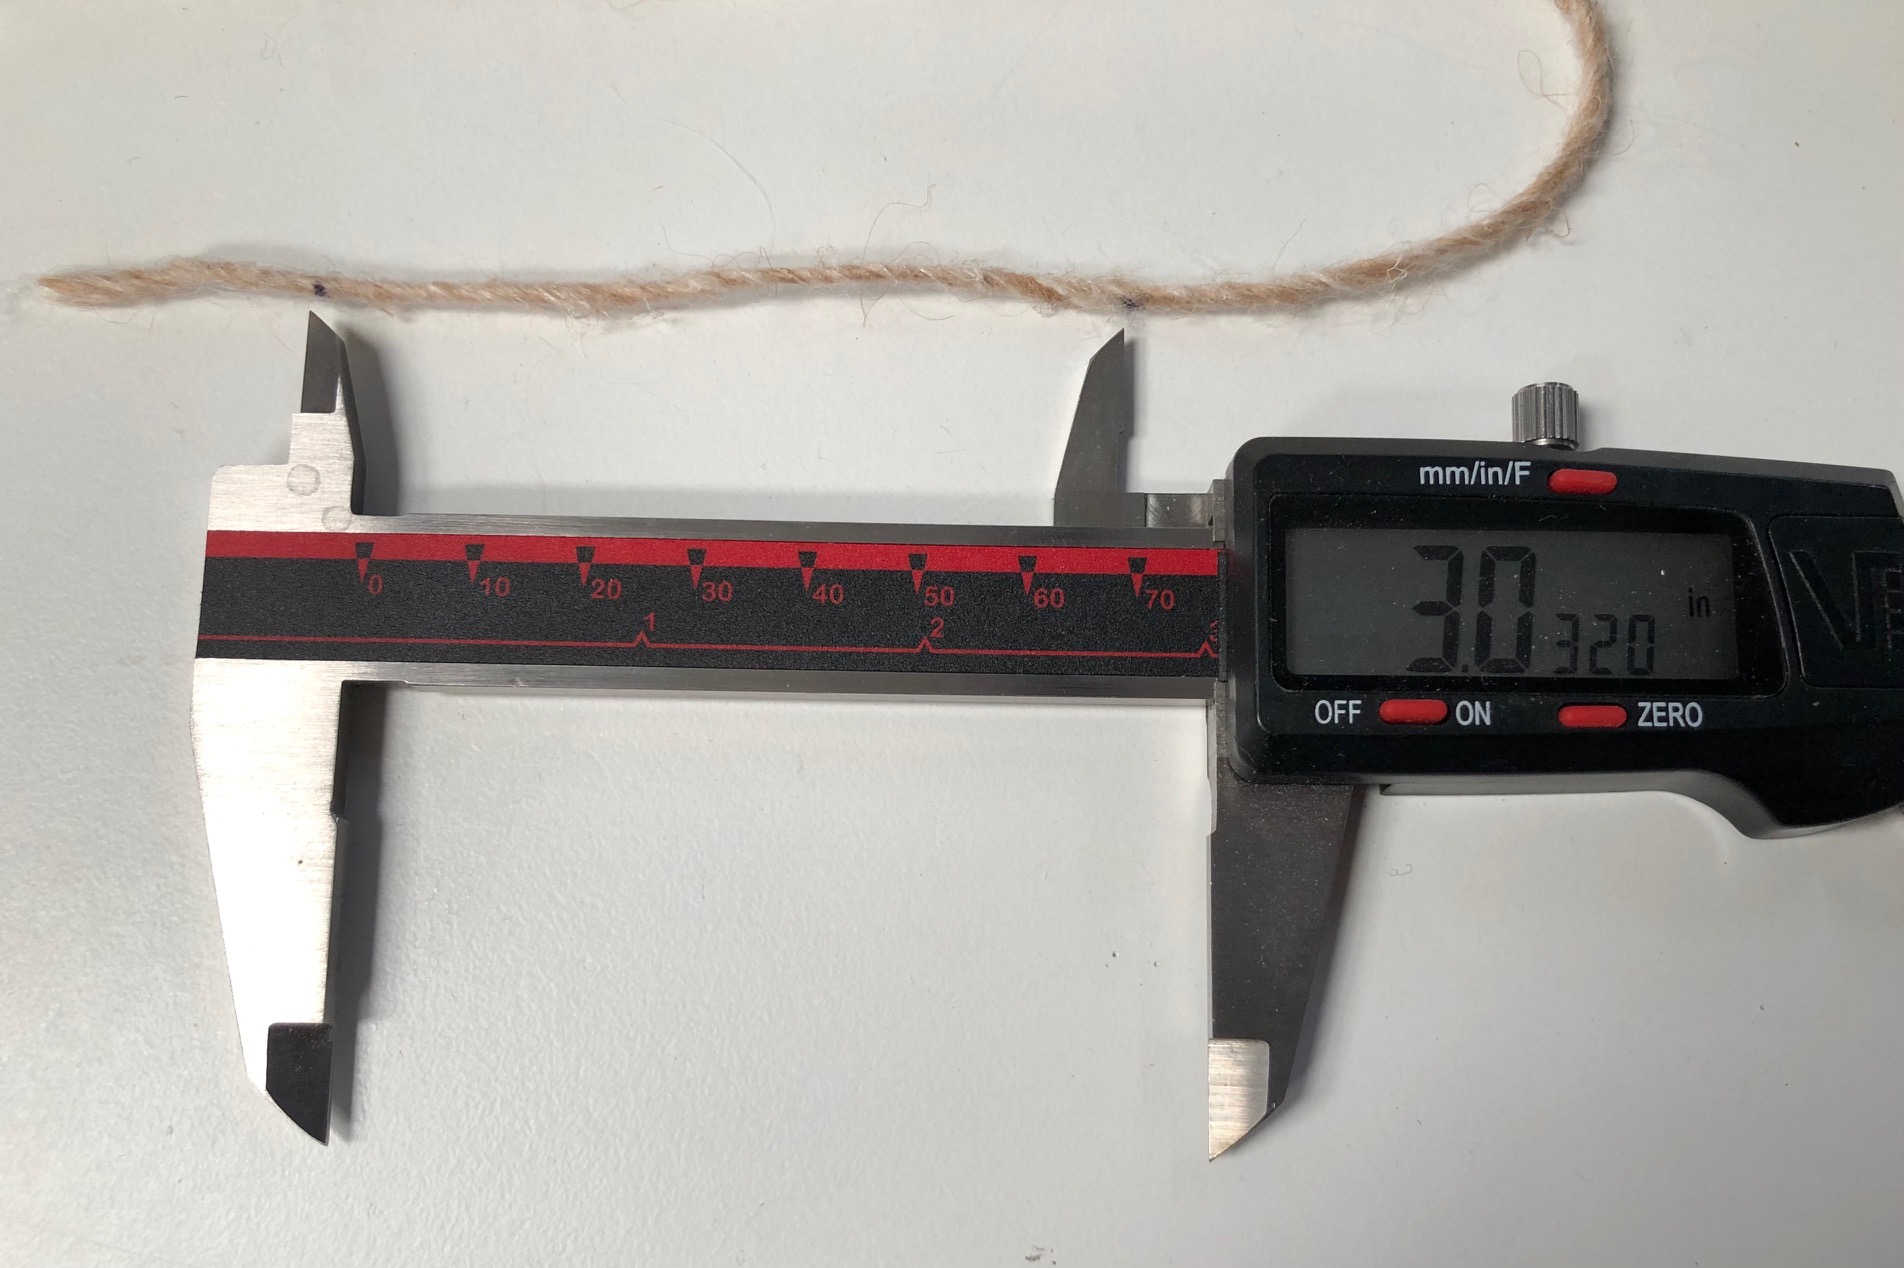
But what if you have a triangular-shaped core? You can take a piece of yarn, wrap it around the core, mark the beginning and end of the wrap, then unwrap it and measure the distance between beginning and end. This is your equivalent circumference. Multiply it by the number of rotations to get total length. If you measured in inches, divide by 36 to get yards, or if you measured in cm, divide by 100 to get meters. Our triangular core’s equivalent circumference was about 3 inches.
We’ve already talked about how it’s difficult to speak of “accuracy” and measuring yarn length because there are so many variables and conditions. There will be a little bit of yarn consumed in the measuring wheel setup that won’t be accounted for, and the last bit that comes off the counter at the end may not cause the core to rotate. This won’t add up to be more than 1 yd. We’ve talked about yarn tension, and consistent length measurement will depend on consistent yarn tension throughout the winding, regardless of how much the ball is flopping around. We also mentioned fiber content and slipperiness; stickier yarn like non-superwash wool won’t slip on the core while 100% silk or nylon might. Speaking of the core, if it’s a little bigger or smaller than the standard 1-inch diameter, that could account for some error, and you may want to plug in the actual diameter of the core into the calculations above. Your speed and whether you have to start and stop to fix snags may also introduce some error.
Even with all of these variables, we can get an idea of measurement repeatability by winding the same ball over and over again. We found that if you’re an experienced yarn handler who is able to quickly and automatically adjust your fingers to keep consistent tension while winding, you can achieve very repeatable results, within 3–5% over multiple windings of the same ball. If you’re not as experienced with yarn management, then it’s closer to 10%. So if you want to be conservative in your length estimation, estimate that the minimum length of yarn in your ball is 10% less than your calculation. Happy yarn length estimating!
Carrie Sundra is an engineer with a serious yarn addiction, who decided to leave a life of electronics and high-tech spy planes for hand-dyeing and knitting. Alpenglow Yarn started in 2009 with 3 words: Glowing Natural Color. Her most well-known products, the SkeinMinder and SkeinTwister, add automation to winding and twisting operations, make the process more efficient, and help scale up production. You can find out more at alpenglowyarn.com.
Did you know we also have a monthly PLY newsletter? Sign up here!
PLY Magazine believes that Black lives matter, as well as LBGTQI+ lives. Those most vulnerable and persecuted in our communities deserve our love and support. Please be good to each other.
https://plymagazine.com/wp-content/uploads/2021/06/31-FullSetup-scaled.jpg12272560Heather Fulfordhttps://plymagazine.com/wp-content/uploads/2014/06/plylogo-condensed-pnk-300x164.pngHeather Fulford2021-06-17 10:00:002021-06-17 11:07:42Hacking Yarn Tools: How to DIY an Electronic Yarn Meter
Although some spinners really enjoy processing an entire raw fleece from start to finish, not everyone has the desire, or the facilities, to handle the initial prep work. A fiber mill can turn a raw fleece into soft, spinnable roving – but double-coated fiber has some special challenges. Here’s what to ask before you send a double-coated fleece to a mill.
Some of the basic questions apply to any fiber sent for processing – what is the mill’s pricing structure, do they have a minimum weight requirement, and what services do they offer? Virtually any mill can wash, pick, and card wool into roving. If you have a preference (such as bumps), find out in what finished form their roving comes.
For a double-coated fleece, the most important question is if the mill can handle the fiber length. The outercoat on some breeds can be 15 inches or longer. Not all mill equipment can deal with that length. Others may have an extra charge for hand-feeding long fiber into the equipment (this does not necessarily make the total processing more expensive).
If you want roving that combines the two coats, many mills are capable of doing that. I have sent Icelandic lamb fleece to Ohio Valley Natural Fibers several times and have gotten back lovely roving. The combined coats of lamb or adult can be softly spun for a lopi-style singles yarn or spun and plied various ways. But some processors have the machinery for an additional service: dehairing.
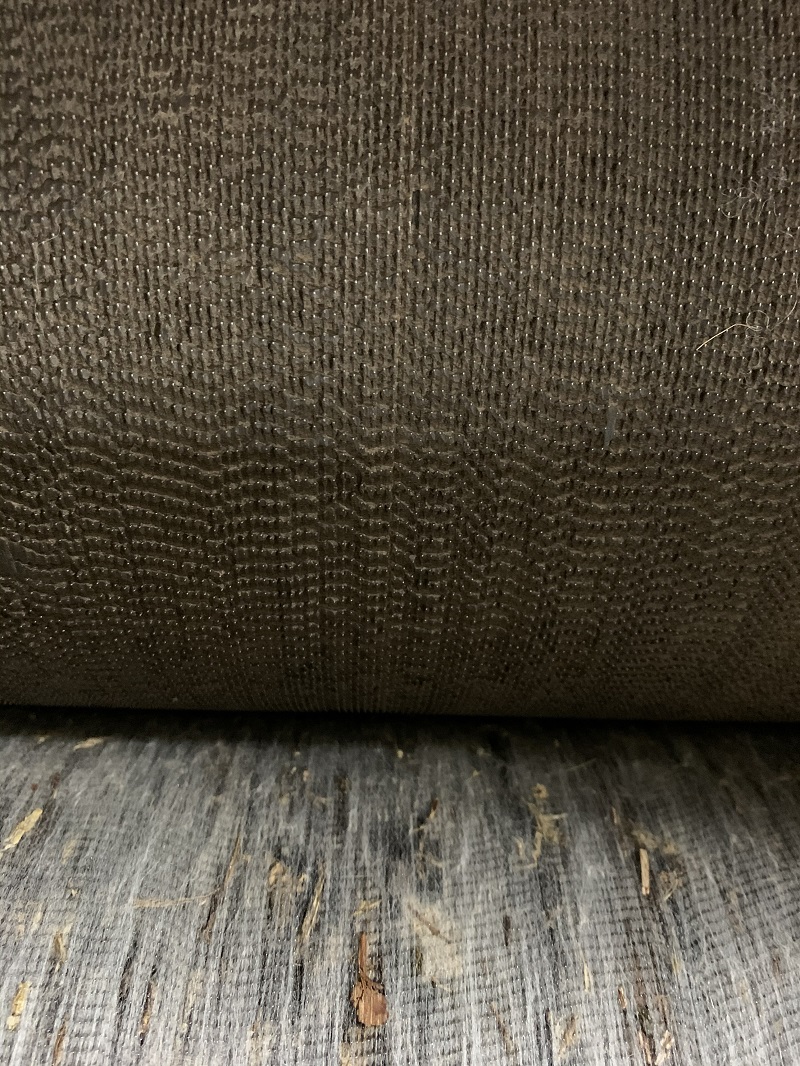
The special carding cloth on the dehairing machine rollers removes coarse guard hair and vegetable matter
Dehairing machines were developed for removing the coarser guard hairs from fibers such as cashmere, alpaca, and bison. A series of rollers with different textures separate out the finer, more desirable undercoat. Double-coated sheep breeds can benefit from this option as well.
Carrie, owner of America’s Natural Fiberworks, said a dehairing machine has another advantage. Although the best results always come from sending good-quality, well-skirted fiber, the reality is that many fleeces have a fair bit of VM (vegetable matter) and second cuts. A dehairing machine will take out quite a bit of both of those undesirable items.
Should you have your double-coated fleece dehaired? For an adult fleece, this will give you two distinctly different rovings – wonderfully soft undercoat and the coarser outercoat. Carrie said clients often get the outercoat made into sturdy core-spun rug yarn, but it can also be returned loose or as roving. Be sure to specify your choice from among your mill’s available options.
For a lamb fleece, the difference between the under and outer coats is not as pronounced, and dehairing will remove little of the outercoat. However, if your lamb fleece has VM or second cuts, dehairing will improve the final result.
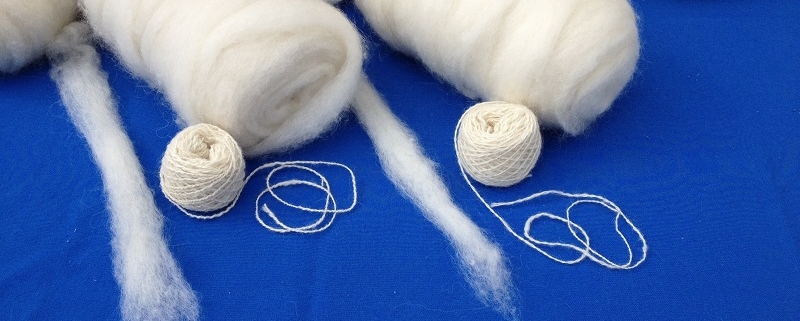
As a comparison, I sent 6 pounds of Icelandic lamb fleece to America’s Natural Fiberworks. I had half of it dehaired and half processed normally. The result – dehairing lamb fleece made only a minor difference (granted, it had nearly zero VM or second cuts). The non-dehaired fiber had a 68% yield versus a 65.5% yield for the dehaired fiber. This meant the dehairing machine removed less than 2 ounces of fiber out of 3 pounds. The spinners who sampled both the dehaired and non-dehaired lamb roving did not consistently find an obvious difference – they liked it all!
Dehaired (left) and non-dehaired (right) Icelandic lamb roving
Dehaired (left) and non-dehaired (right) Icelandic lamb roving and yarn
Fiber mills are a great resource for those who want, or need, their services. If you have a double-coated fleece that needs processed, ask a few extra questions to make sure the mill can handle your fiber. Dehairing is an additional option that may be suitable for the results you want. Let the mill do the prep work – then enjoy the spinning!
In 2013, Terri Louise got two pregnant Icelandic sheep off Craigslist, and discovered the fiber community. She loves caring for the sheep, working with their fiber, and the fact that there is always more to learn. Follow their adventures at Spotted Sheep Farm.
Did you know we also have a monthly PLY newsletter?Sign up here!
PLY Magazine believes that Black lives matter, as well as LBGTQI+ lives. Those most vulnerable and persecuted in our communities deserve our love and support. Please be good to each other.
https://plymagazine.com/wp-content/uploads/2021/06/dcroving1.jpg600800Heather Fulfordhttps://plymagazine.com/wp-content/uploads/2014/06/plylogo-condensed-pnk-300x164.pngHeather Fulford2021-06-03 10:00:002021-06-03 12:42:34Sending double-coated fleece to a fiber mill
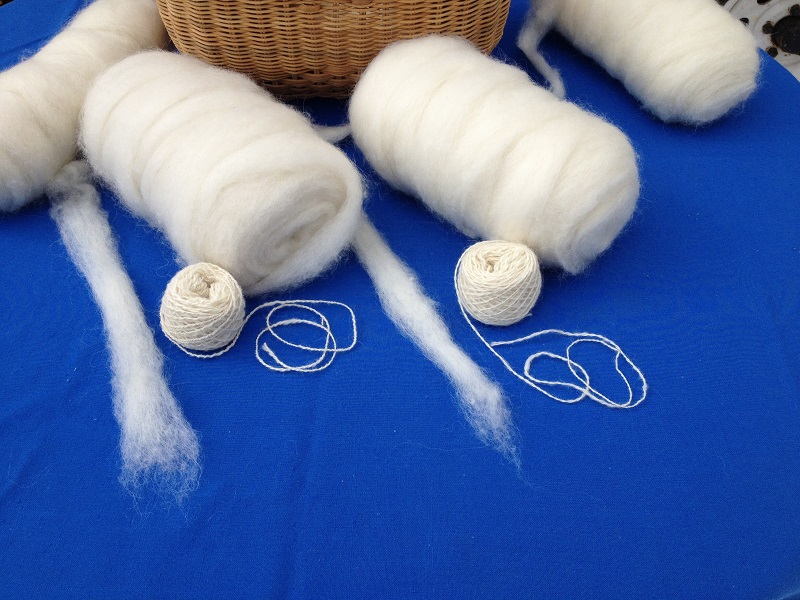
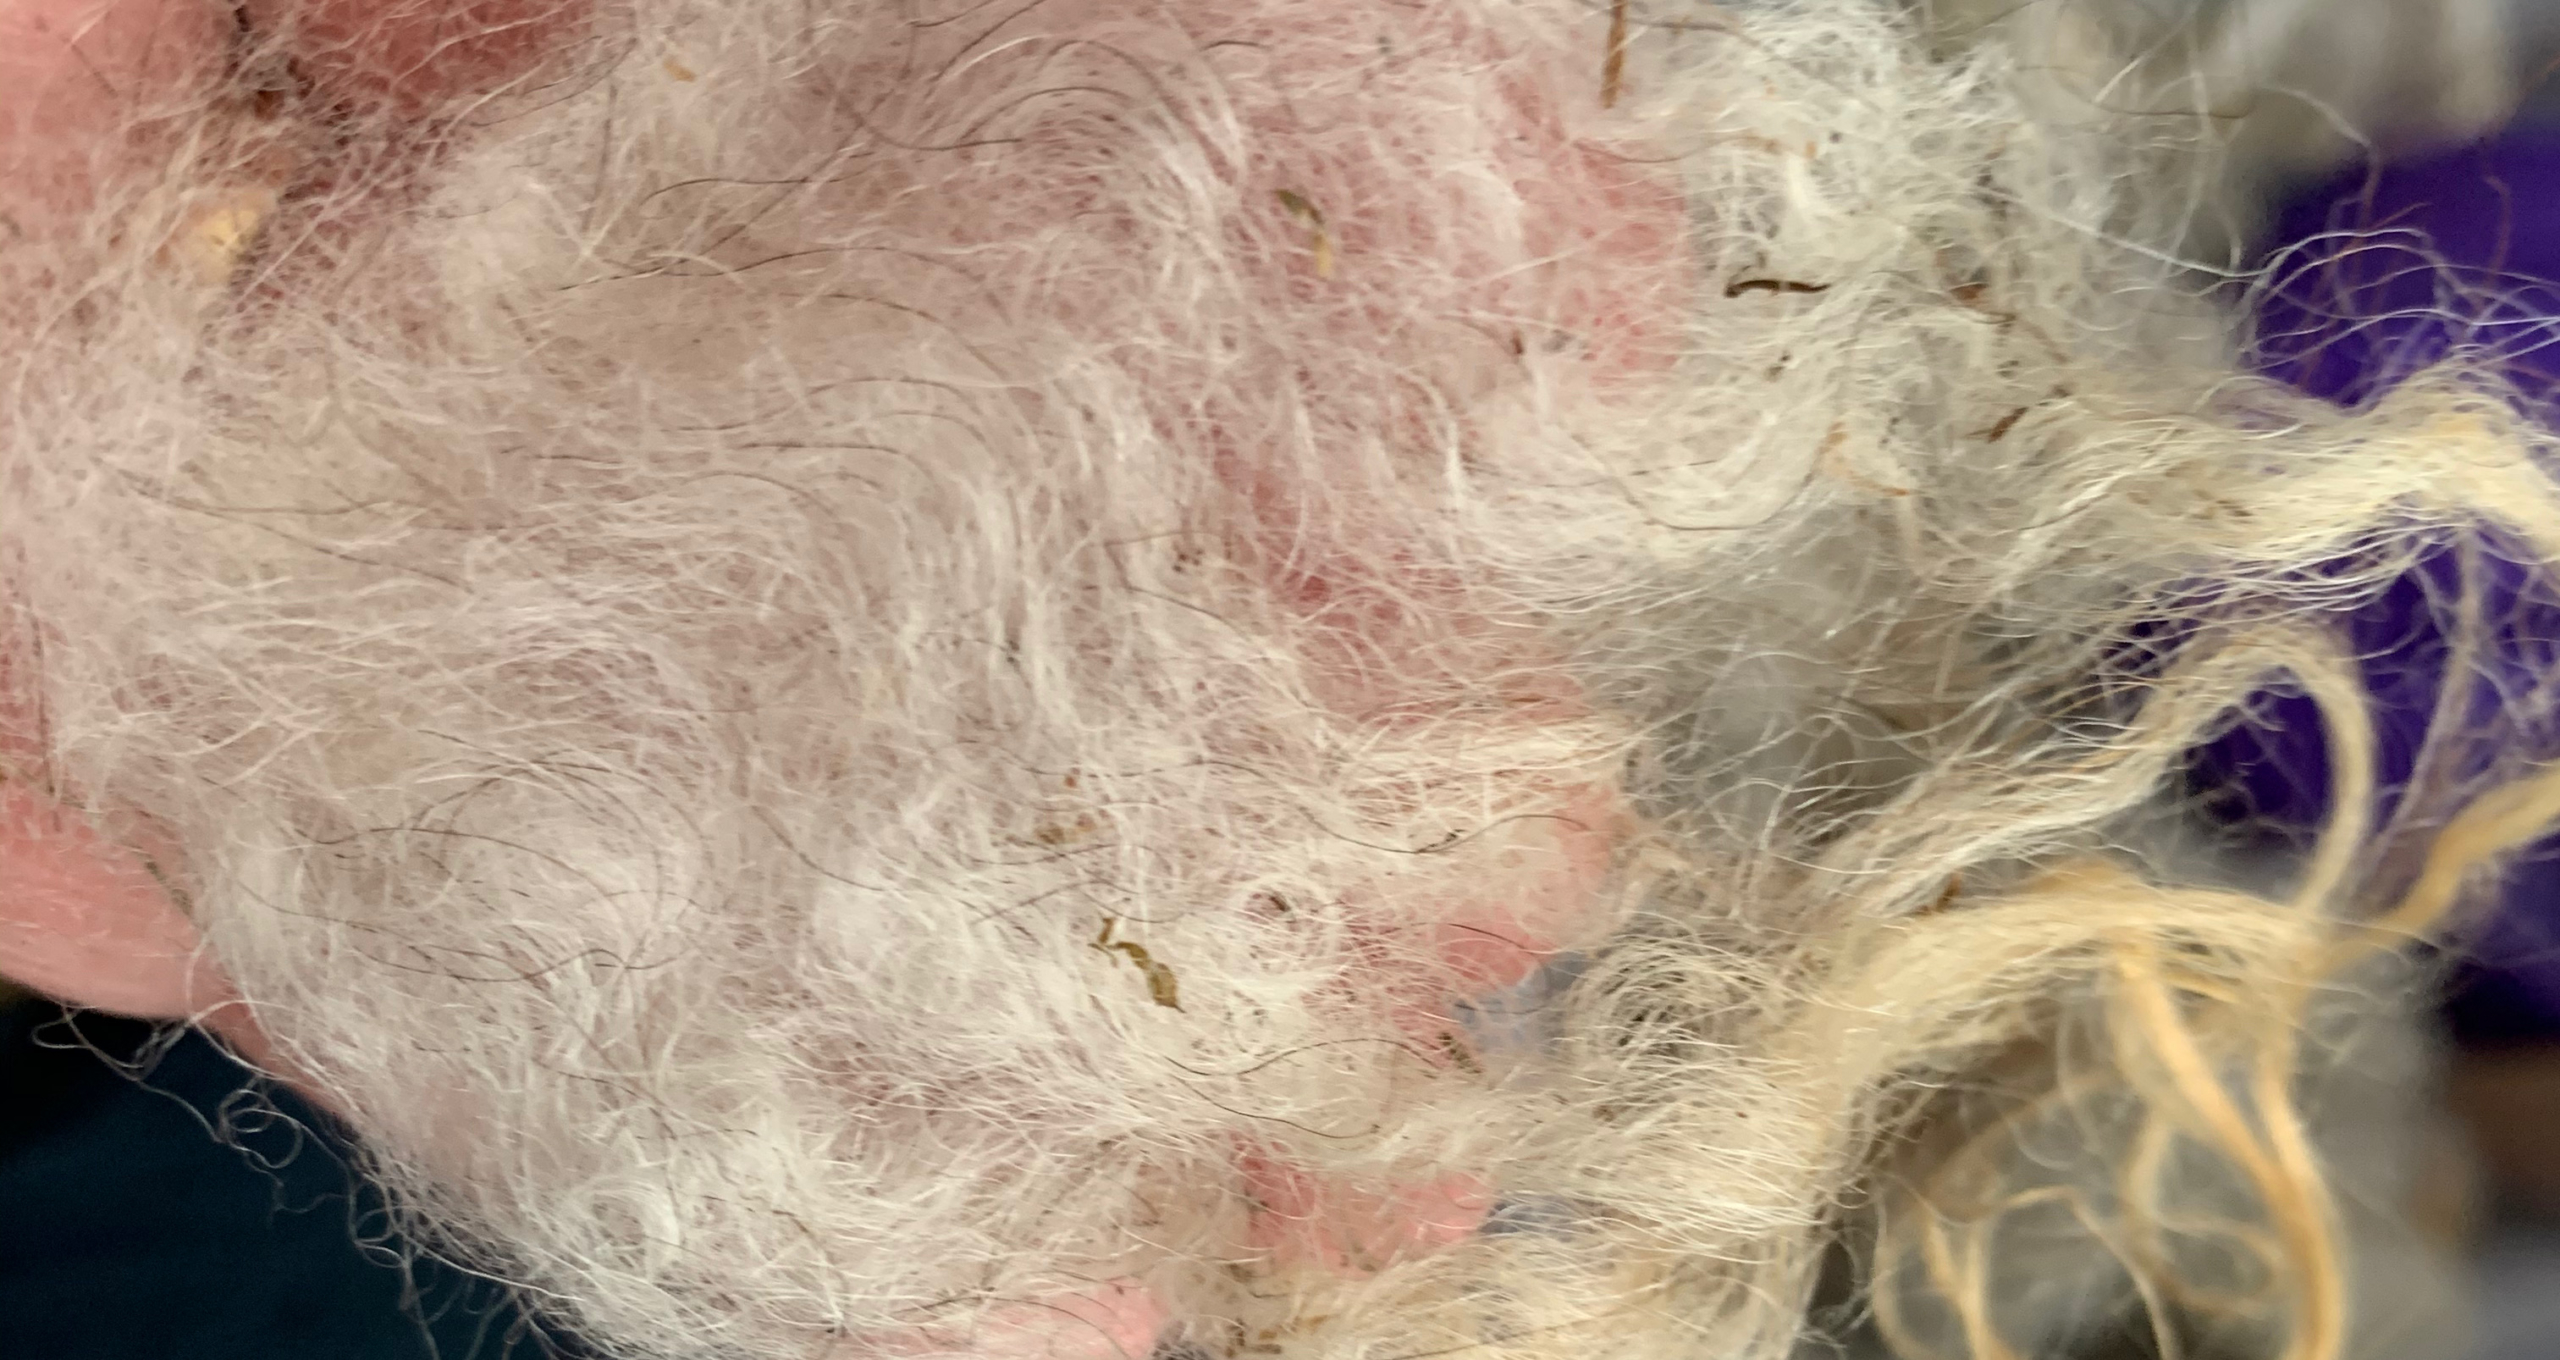
At the 2019 Wisconsin Sheep and Wool Festival, I purchased an Icelandic lamb fleece with lovely golden locks curling over a snow white base.
Whatever I did with this fleece, I knew I wanted to keep the tog and thel together. The tog, by the way, are the long curly locks that shed water, keeping the sheep dry. The thel is the soft down that protects the sheep from the cold. After reviewing my options, I decided to try coreless core spinning the locks.
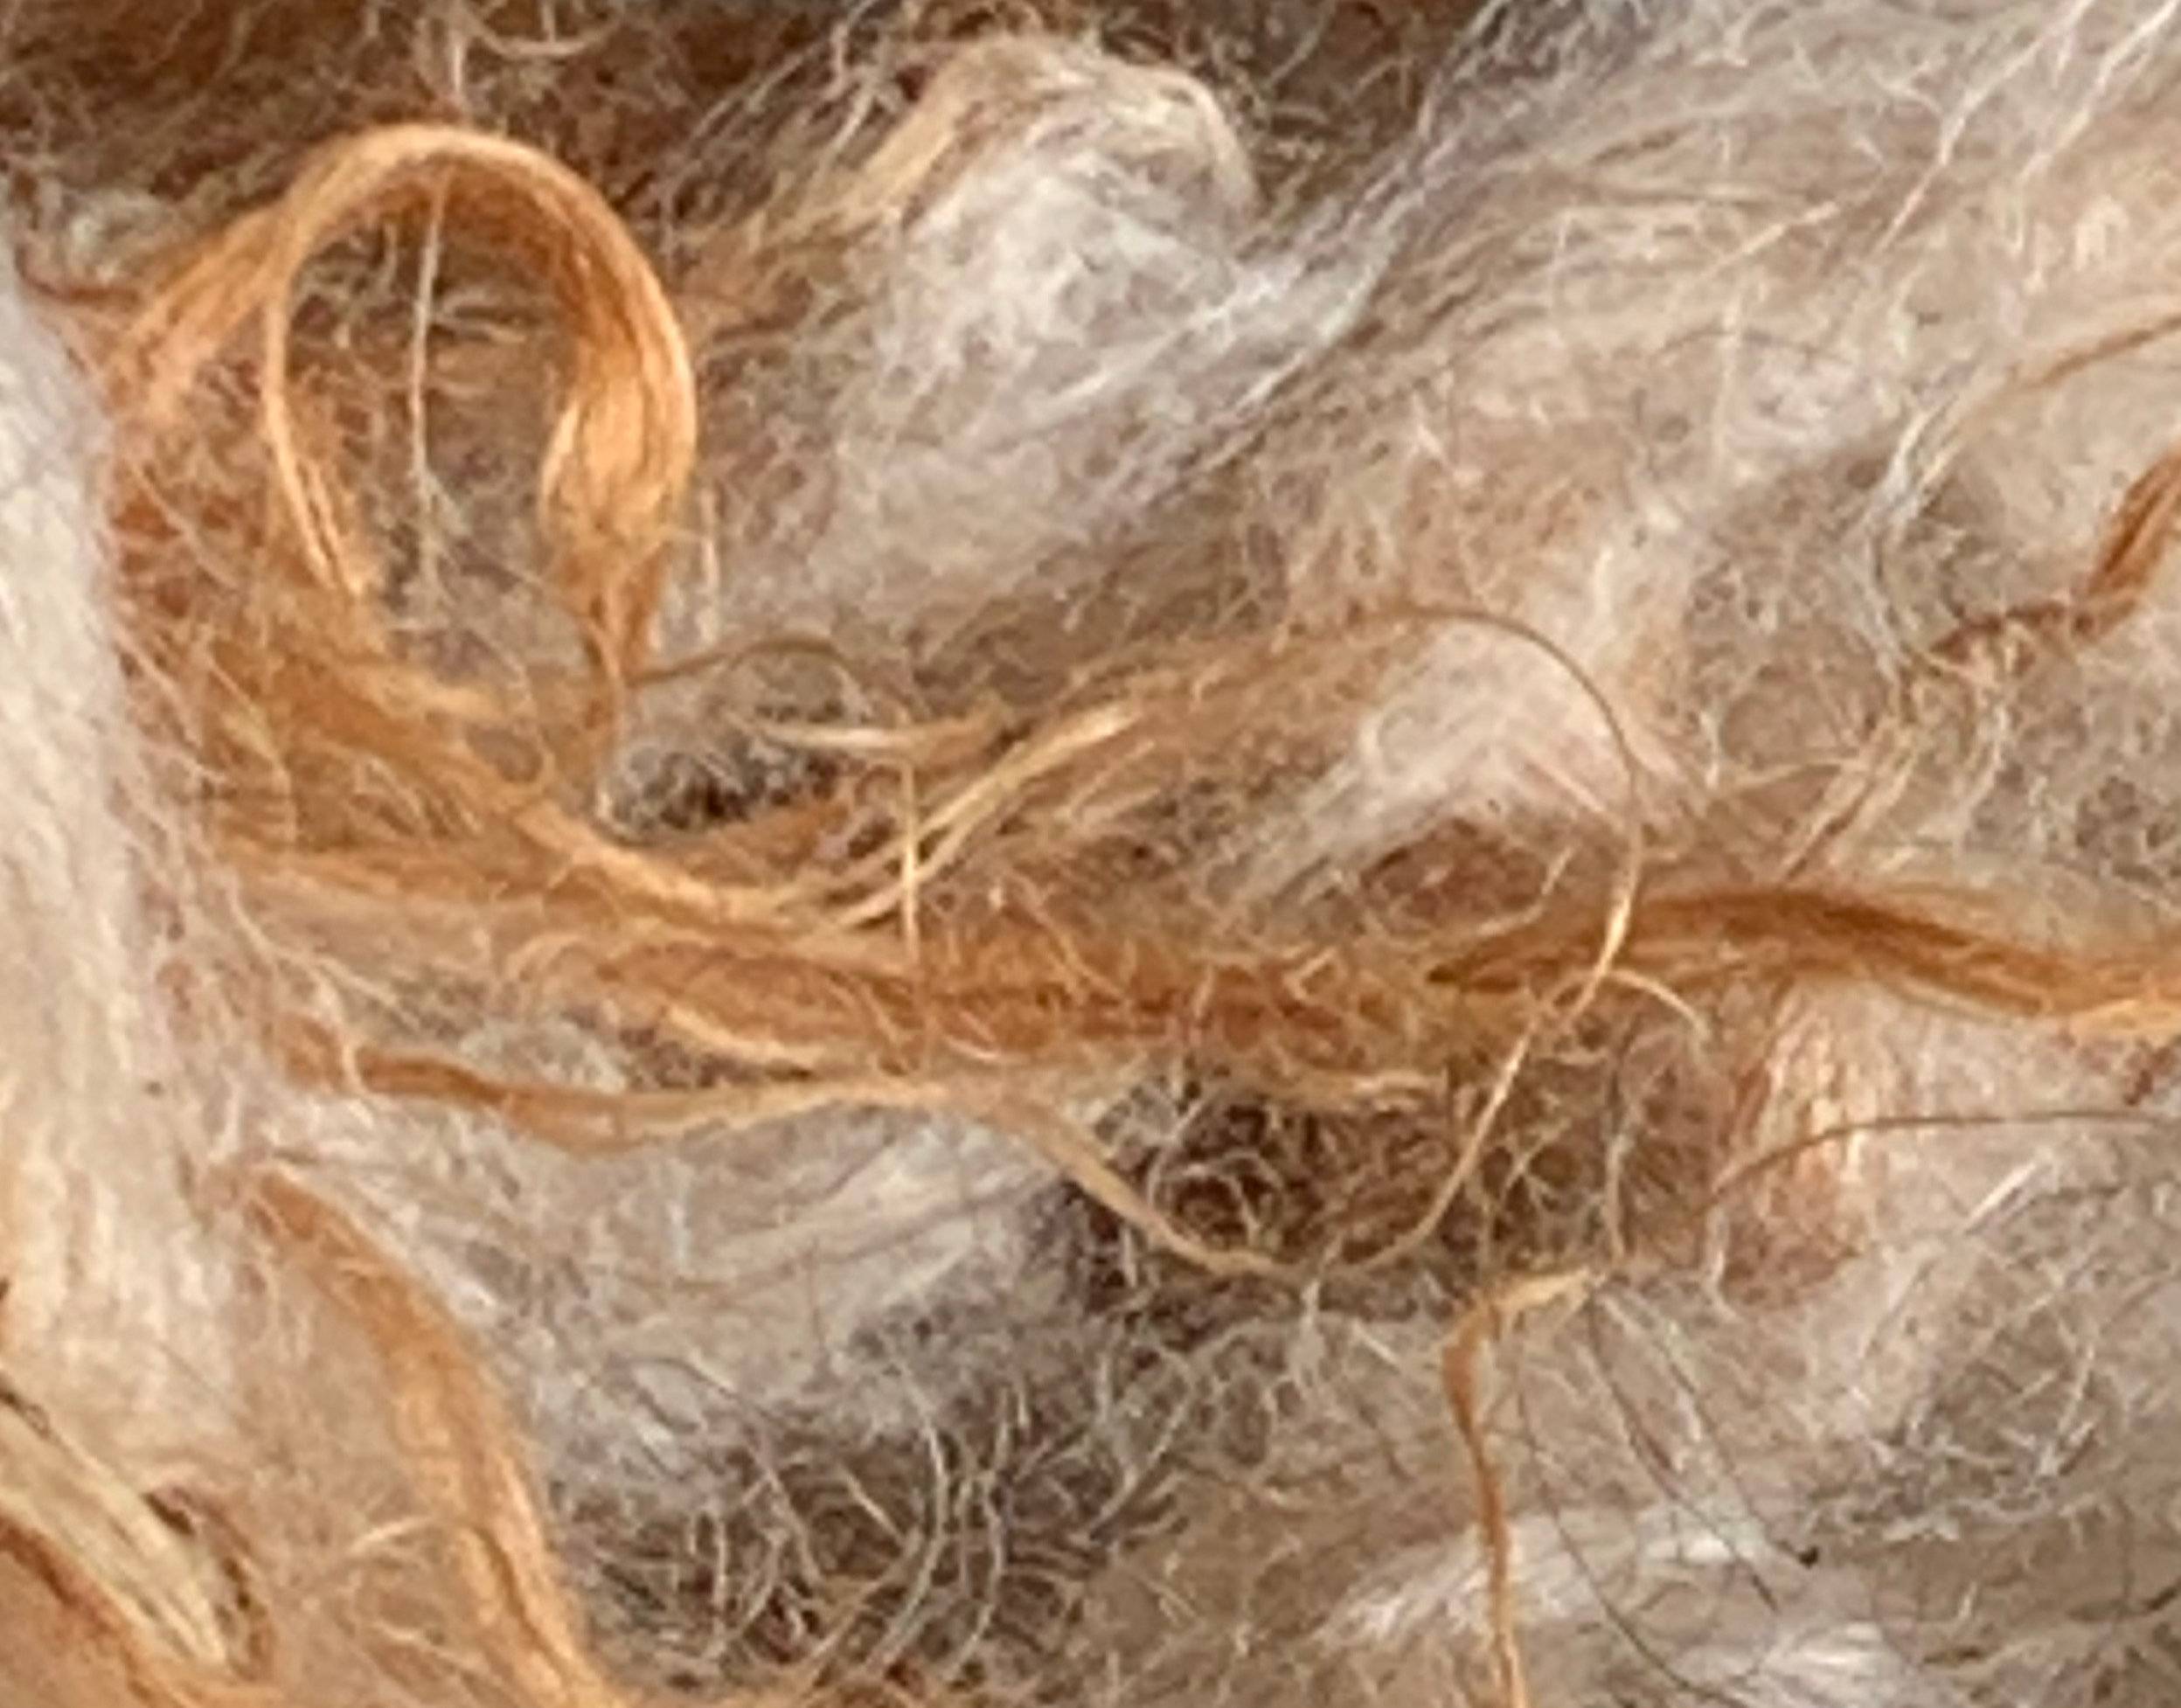
Once I skirted and then washed the fleece, I took a closer look at what I had. I admit I was disappointed. Not only did the fleece contain an overabundance of second cuts and vegetable matter (VM), much of the thel, the luscious soft white down, was shot through with black fibers, probably kemp. There was no indication of any of this in the judge’s review sheet.
Word to the wise: don’t take the judge’s review sheet at face value. Always check for yourself. Second word to the wise: don’t impulse buy a fleece on Sunday morning in the few minutes available before running off to class.
Ah well. Normally I would comb the worst of the VM out. However, since that would separate the thel from the tog, combing wasn’t an option. I was stuck, but since my goal was to practice coreless corespinning, I decided I could live with the flaws.
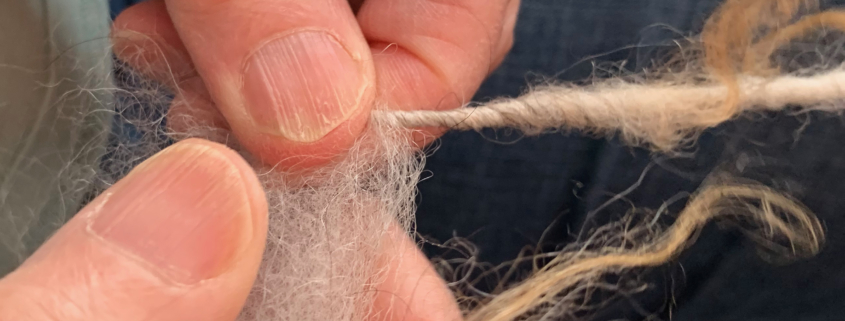
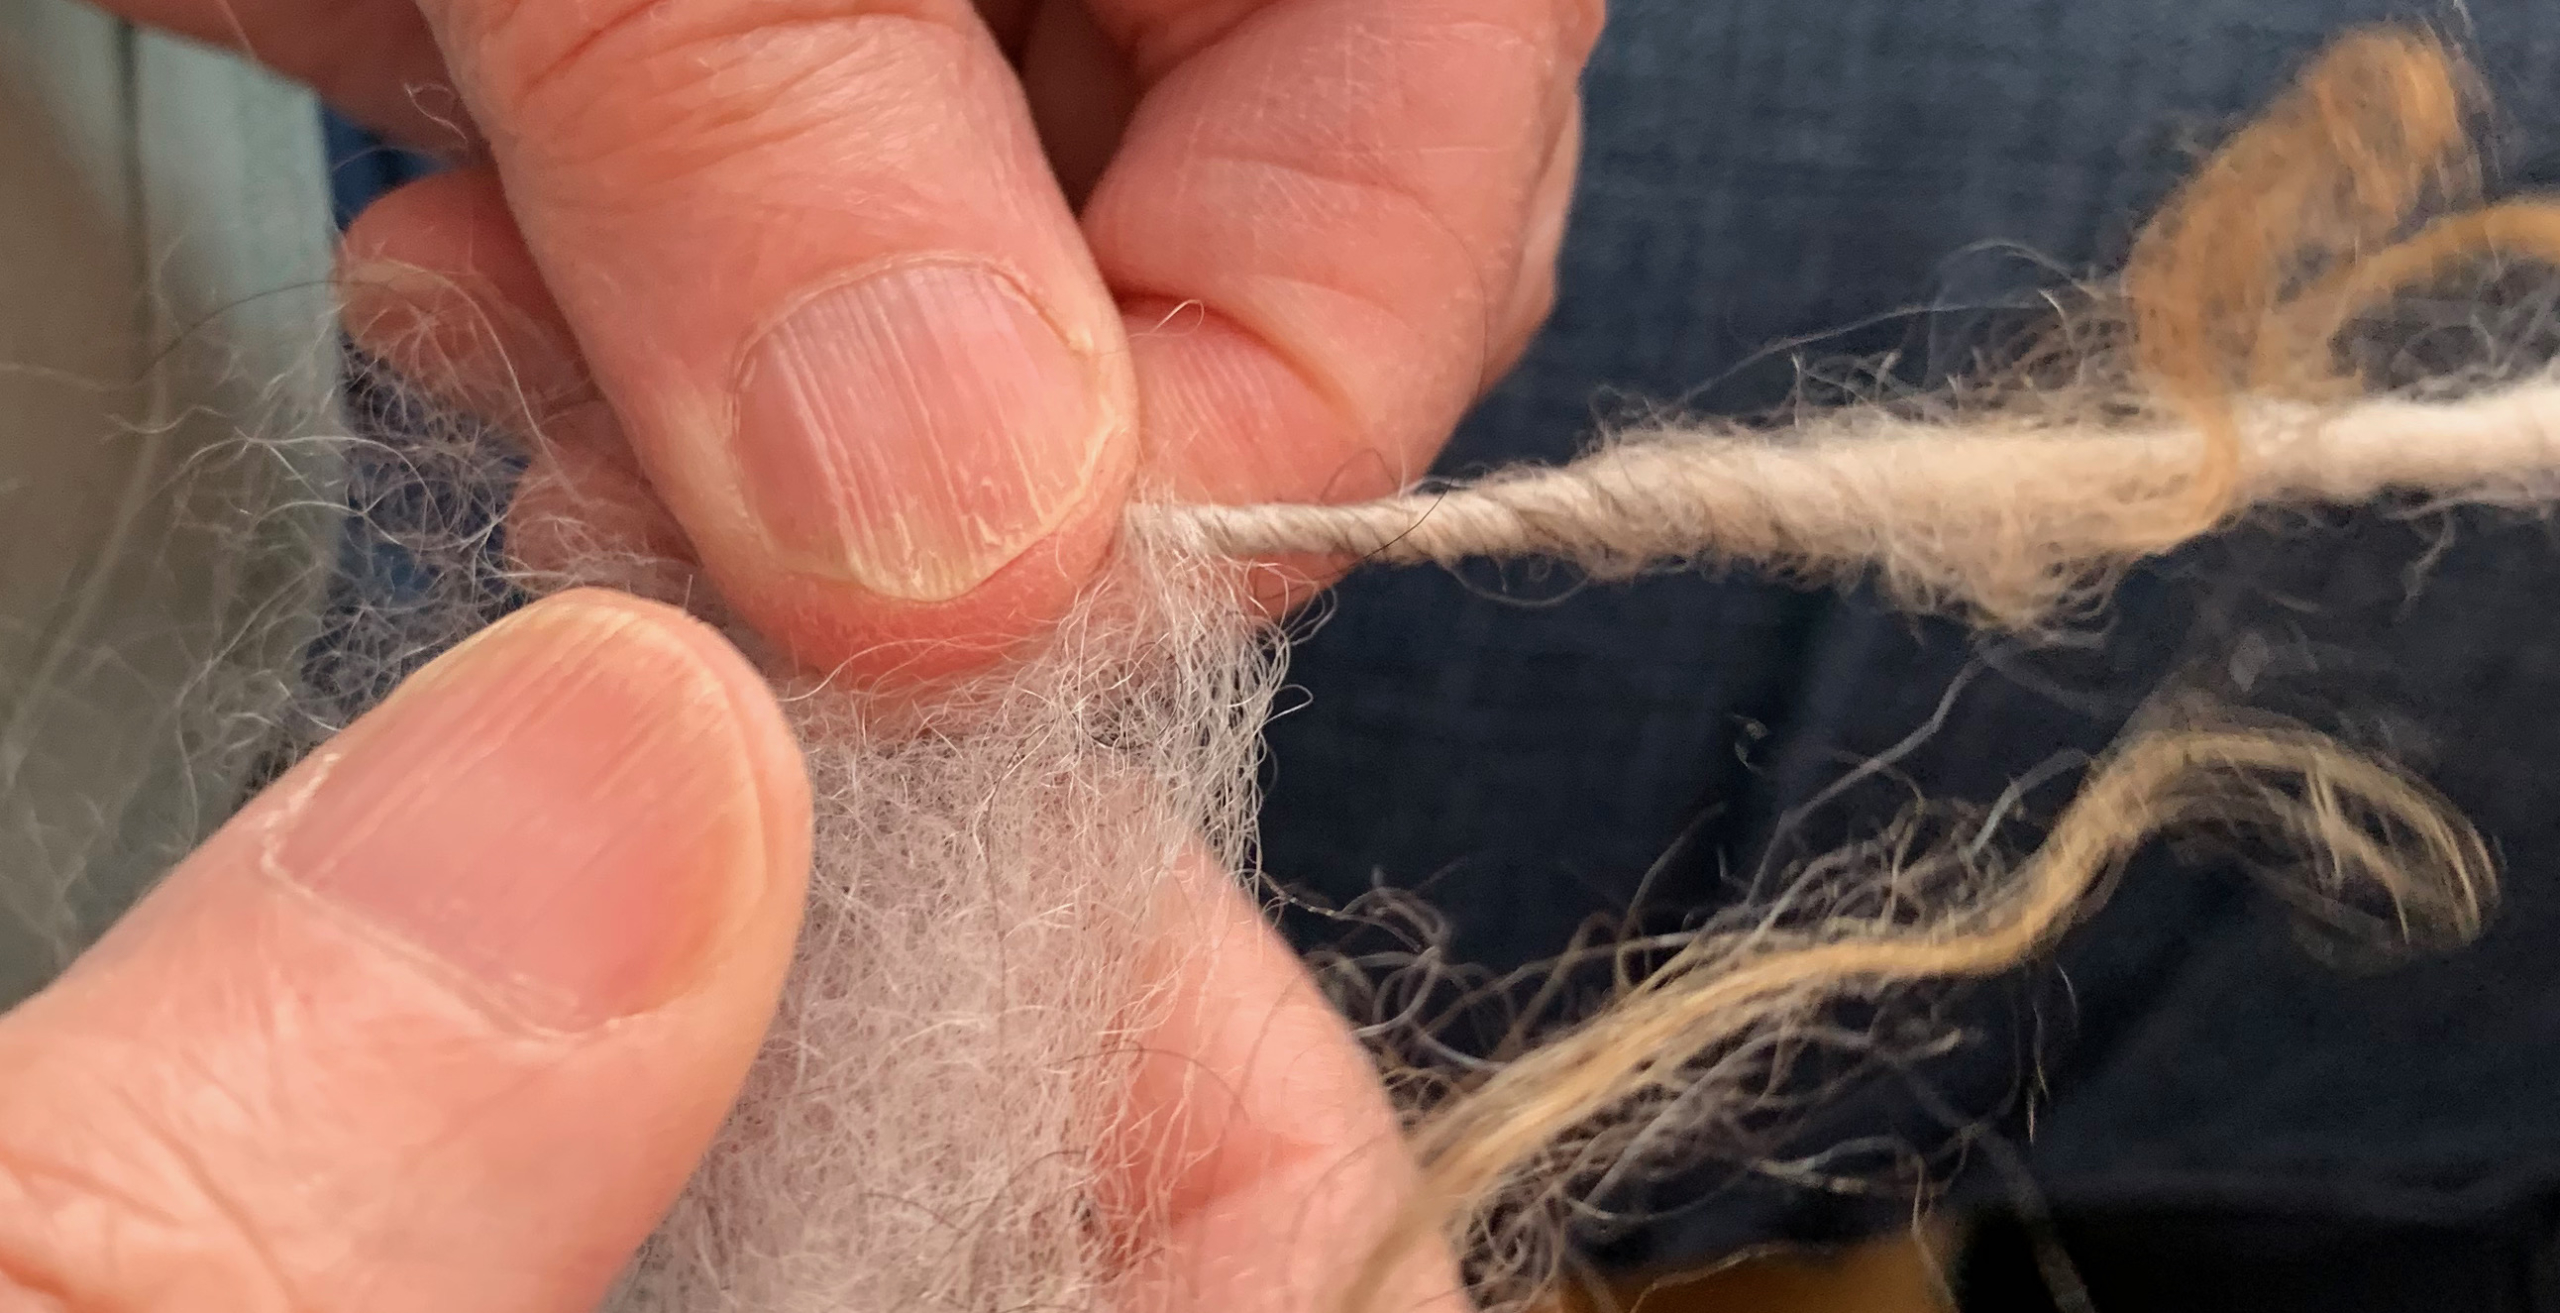
Coreless corespinning is the same as corespinning except you wrap the fiber around the core at the same time you’re spinning the core. For me, that means keeping my left thumb on the edge of the drafting zone and my right thumb in the middle of the drafting zone. I spin the fiber between my thumbs into the core. The fiber outside my right thumb rides up over the right thumb, wrapping itself around the core. By keeping the tog locks on the right, beyond the right thumb, they would be free to wrap loosely around the yarn and then shake free when it was time.
I tried corespinning two ways – fast and slow. The slow method consisted of separating out the locks and fanning out the cut end. I spun the cut end while the lock was allowed to curl around the core. It worked, but it was slow and picky.
So I tried the faster method, which consisted of fluffing out a bunch of the washed locks combined. It also worked, but I wasn’t quite able to keep the locks out of the core the way I wanted to. So I returned to the slow, picky method and declared success – or at least as much success as I was going to get given all the kemp.
Will I try core spinning locks again? Probably. I do love a nice Icelandic fleece. The rest of this fleece, however, will be a gift to the compost pile.
Did you know we also have a monthly PLY newsletter? Sign up here!
PLY Magazine believes that Black lives matter, as well as LBGTQI+ lives. Those most vulnerable and persecuted in our communities deserve our love and support. Please be good to each other.
https://plymagazine.com/wp-content/uploads/2021/05/Bundick3-scaled.jpeg13132560Heather Fulfordhttps://plymagazine.com/wp-content/uploads/2014/06/plylogo-condensed-pnk-300x164.pngHeather Fulford2021-05-27 10:00:002021-05-28 10:29:20Playing with Icelandic
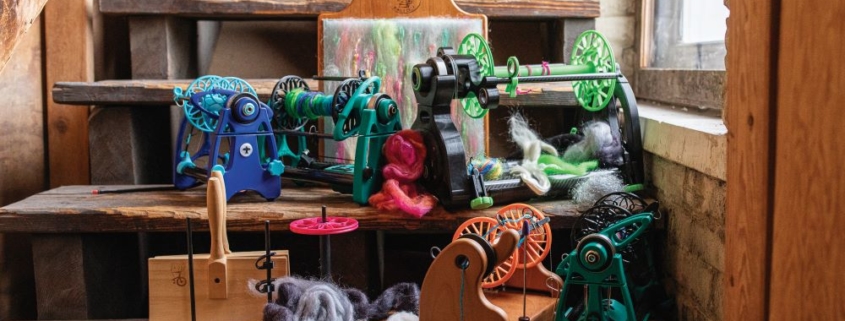
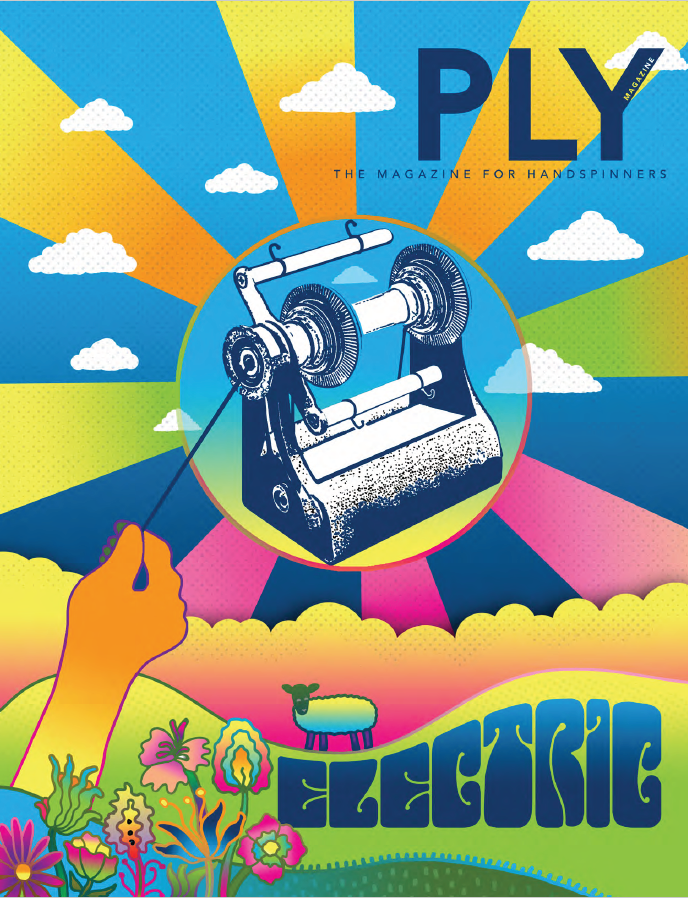
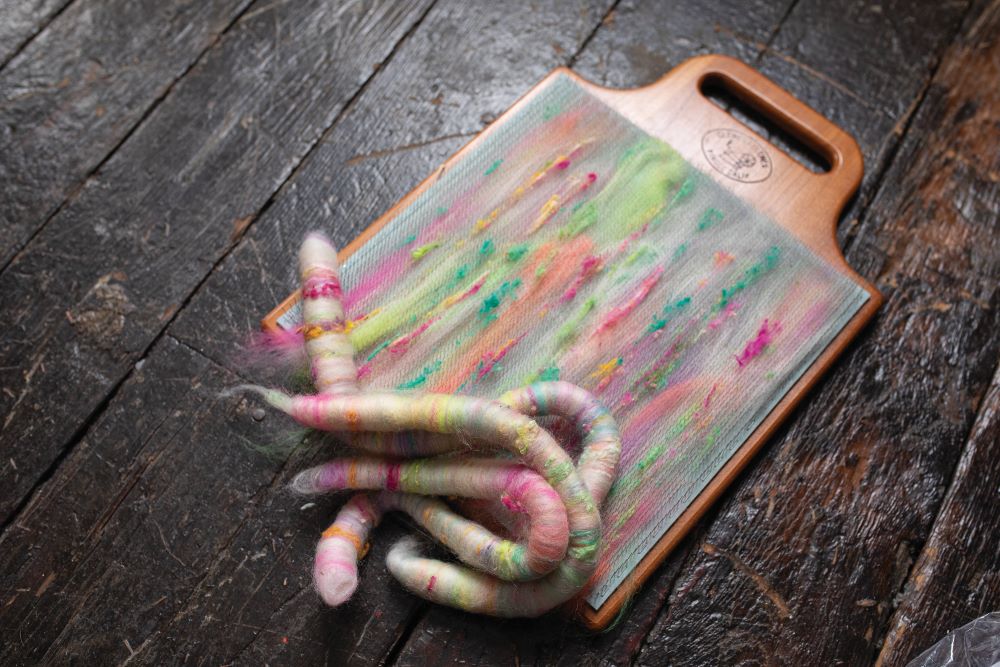
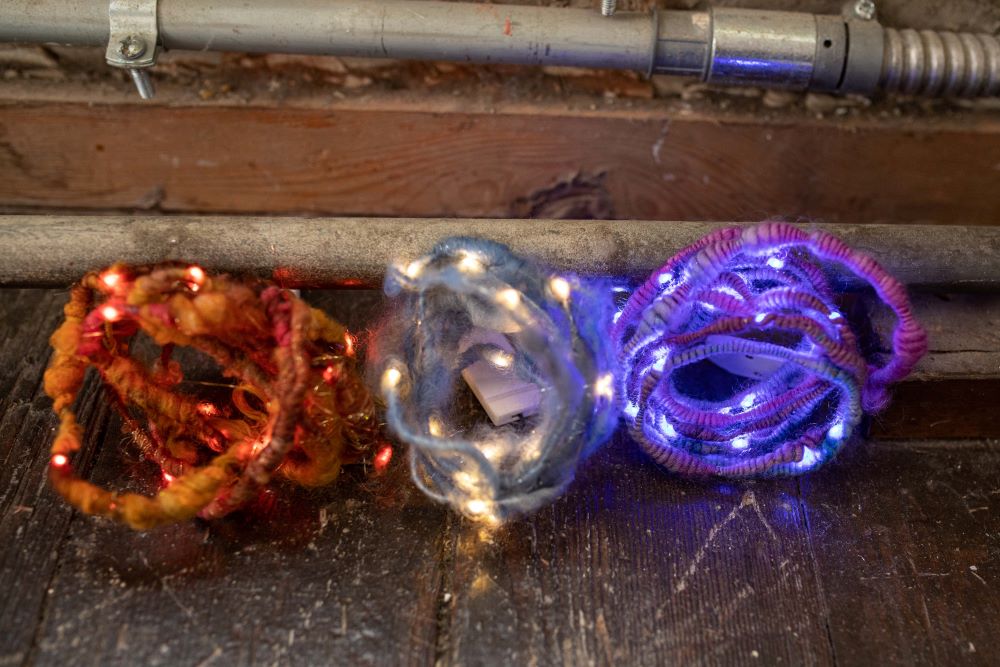
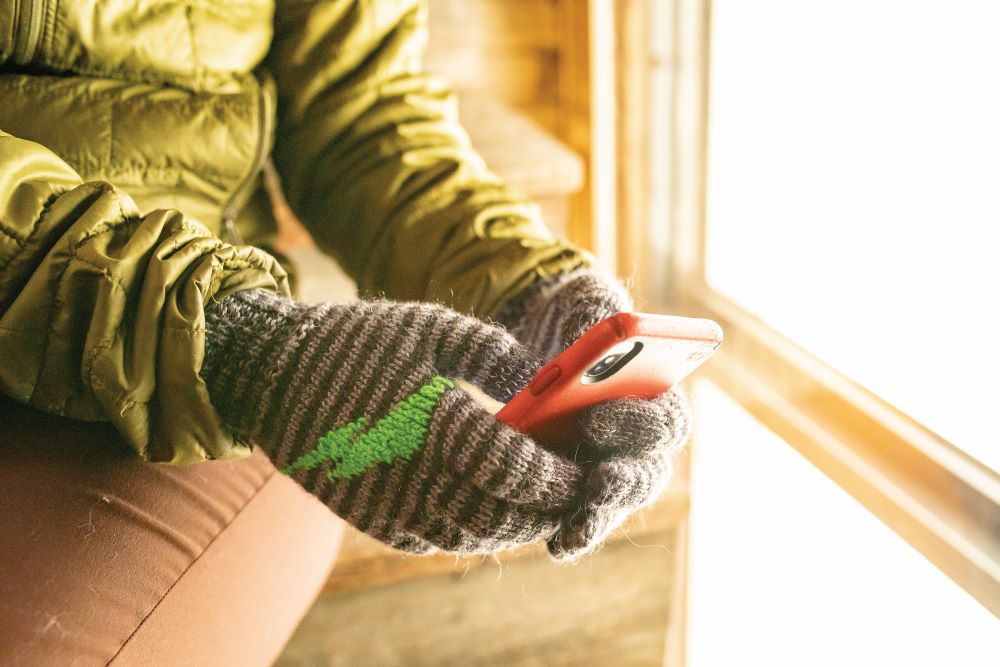
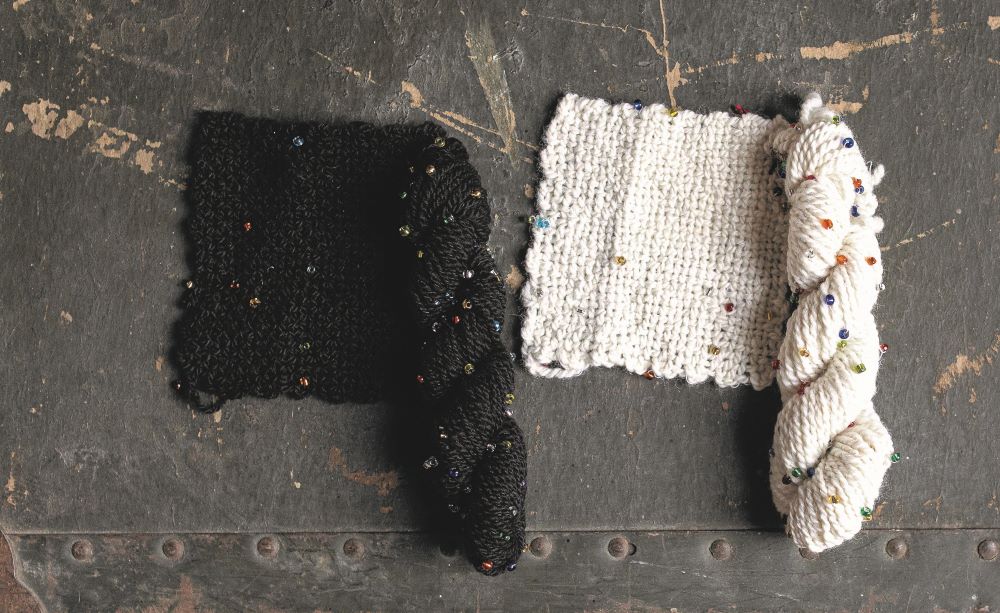
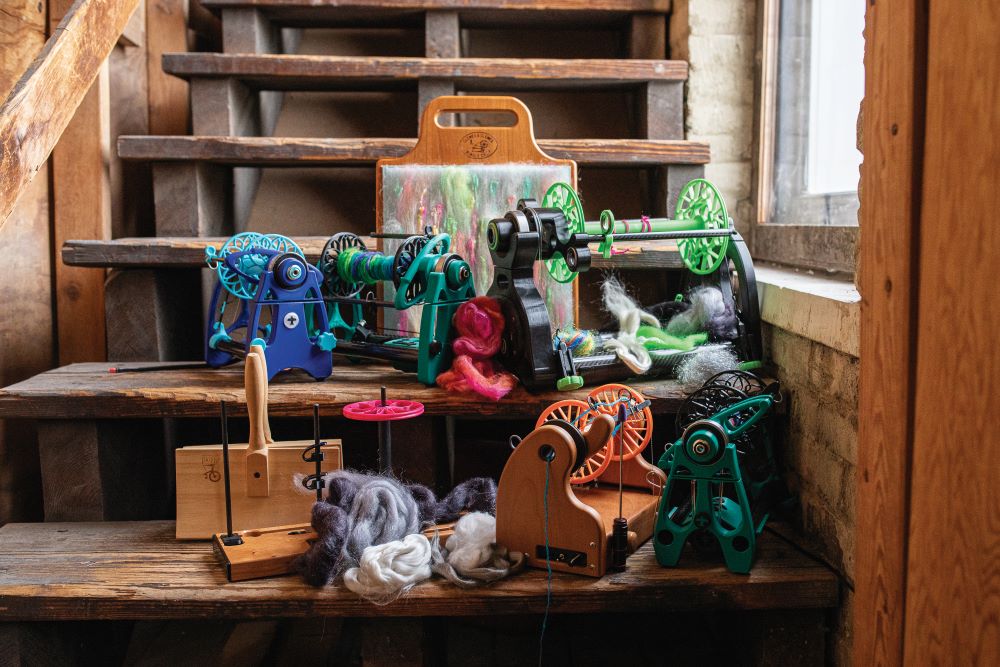
Yes, that’s right, the summer issue is filled with tools that go vroom vroom, buzz buzz, or even purr quietly. So of course it covers the one so many of us have and enjoy – the electric spinning wheel, but it also talks about carders, winders, dyeing, and drones. It includes blending, spinning, plying, consistency, planning, traveling, and stories that will inspire and delight. There’s history, evolution, and a spinner who sells everything to set out as a spinning nomad. Then it more loosely interprets electric and talks about conductive fibers, sparkle, and bright colors. Of course, there are amazing projects too.
Don’t miss this issue; make sure your subscription is active by May 20th (if you subscribe and are out of issues you’ll get a separate email with a direct link to your account).
PLY Magazine believes that Black lives matter, as well as LBGTQI+ lives. Those most vulnerable and persecuted in our communities deserve our love and support. Please be good to each other.
https://plymagazine.com/wp-content/uploads/2021/05/Indie.jpg6671000Heather Fulfordhttps://plymagazine.com/wp-content/uploads/2014/06/plylogo-condensed-pnk-300x164.pngHeather Fulford2021-05-20 10:00:002021-05-19 11:52:35The electric issue is coming!