Have you ever blown out the elbow of a favorite sweater? Or knit up an entire sweater only to find you have to wear a turtleneck under it? When choosing a fleece to spin into a sweater, lots of people reach for one end of the spectrum or another: a Merino or associated crossbreed, or something that makes a nice hard-wearing barn sweater like a Romney. However, both of those approaches leave us with a sweater yarn full of compromises. Fortunately, there is an alternative.
Enter the humble primitive breed fleece. Primitive sheep are those breeds that originated before industrial processing and usually date back to the Iron Age. They are usually on the smaller side, easier to care for than their more modern cousins, and most of them have two or more coats in their wool. The wool is also often quite different from nose to tail on the same animal. Primitive fleeces really are wonderous materials. They can make nearly any textile you could need, and a sweater is no exception. Grading your fleece beforehand will help you make different yarns that meet the needs of your sweater while all getting along happily in one garment. In addition, these sheep produce lovely fleeces, often with clear definition between types of wool, making them an easy way to learn grading.
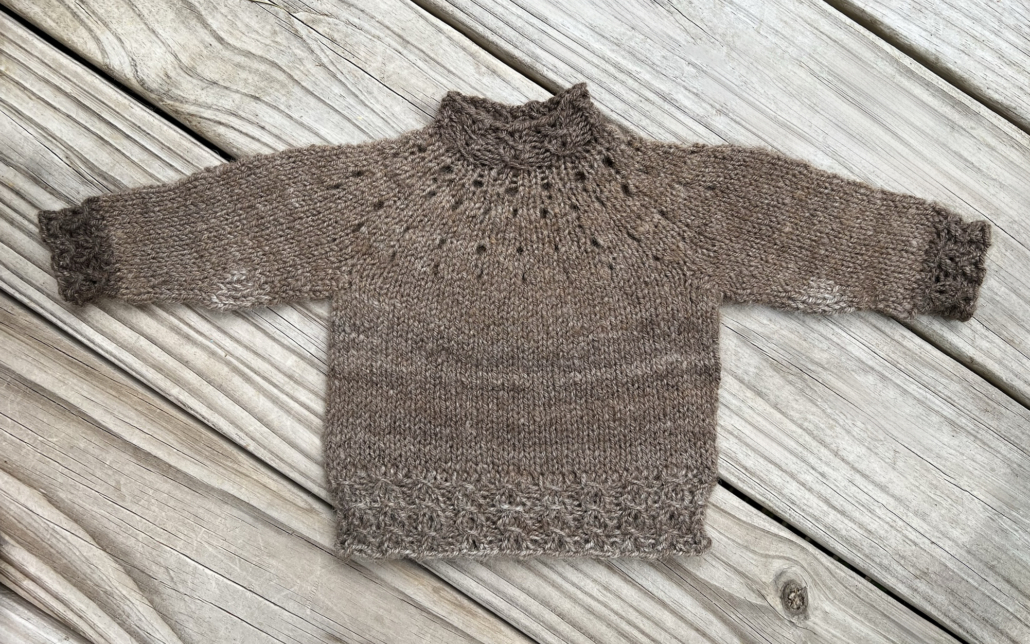
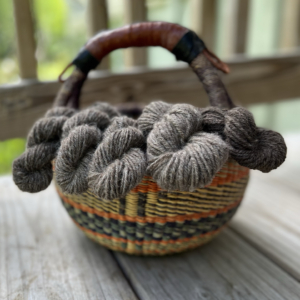
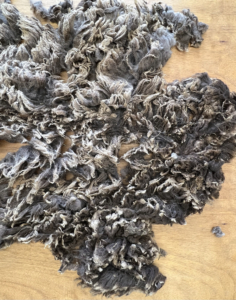
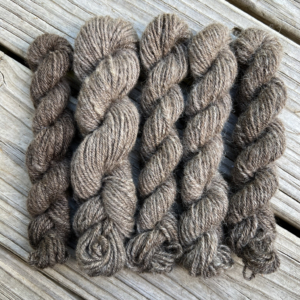
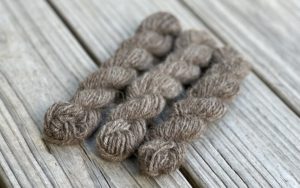
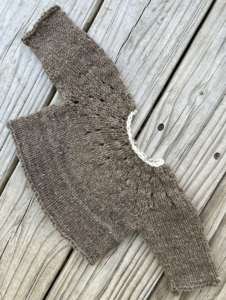
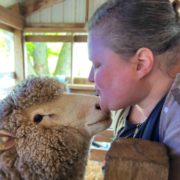
For this particular sweater, I chose a sweet musket (light grey-brown) colored Shetland fleece from a sheep named Oreo and decided on three basic yarns: a body yarn, a softer elastic yarn for the cuffs and collar, and a yarn for areas that need a little reinforcement, namely, the hem and elbows. To do this, I graded my fleece into broad categories and prepped and blended the resulting fiber to control the amount of elasticity and reinforcement.
Skirting the fleece
Let’s talk a little bit about what grading is, why you might want to do it, and how to go about it. Sheep are out in all weather for most of their lives, and like most sensible creatures, they will turn their backs to the snow, wind, and rain. In primitive and other unimproved breeds, the wool on their hind ends is coarser and longer than it is everywhere else on their body. For the sheep, this helps shed water more efficiently. For us, it can make a harder wearing yarn. Likewise, the wool around their necks is shorter and finer, and it will make a softer yarn.
Between these two spots is the rest of the fleece, which, although it varies somewhat in softness and length, is often mostly of a single quality. Separating these qualities of fleece, as well as removing any unwanted wool (a process called skirting) is what grading a fleece is all about.
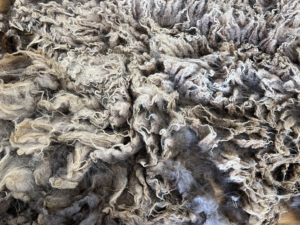
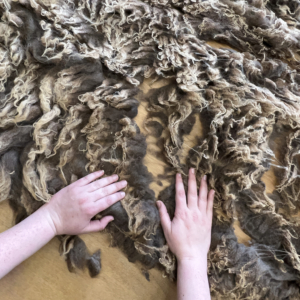
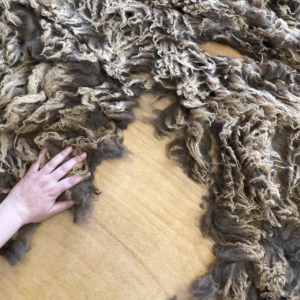
When I get a new fleece, I first roll it out with the cut end up and the tips down. If a fleece has been properly skirted and rolled for sale it will have been folded in thirds, with the cut ends touching, and then rolled from the hind end to the neck. If it’s hard to find the end, sometimes giving the fleece a gentle rolling jiggle will help loosen things up. After it has been rolled out, I unfold the fleece, peeling the cut ends apart. The lanolin can be a little sticky, depending on the freshness of the fleece, so again, some jiggling may be necessary.
At this point, I check for any big shifts in color across the fleece. Primitive fleeces are often deliciously spotty, so I can choose to grade for color or just blend everything together. I can better evaluate color changes across the fleece from the cut end, as it has not had any bleaching from the sun. For this project, I’ll be sticking to a single color.
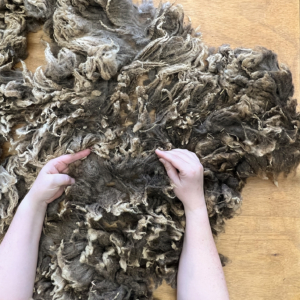
Once that decision is made, I flip the fleece so the cut end is down and the outer tip is up. This is where the fun begins. First, I have to orient the fleece correctly. In a perfect world, they are rolled from tail to neck, but shearing days can be chaotic and accidents can happen. A sheep fleece, all rolled out, will look like a five-lobed blob. That can be confusing, as a sheep obviously only has four legs. However, the shearer takes the neck wool off in one piece, cutting up the side, so it winds up looking a bit like a third front leg. The other (and sometimes best) way to tell which end of the fleece is which is, of course, by the quality of the wool. The wool of the neck and shoulders should be noticeably softer and shorter than that of the hind end, or britch.
Once I have my fleece rolled out and oriented, I start skirting. Usually, the shepherd will have lightly skirted my fleece before I buy it. This means they will have removed the worst of the dung tags, urine damage, and the belly and lower leg wool. Personally, I always make sure to select only the best wool for my projects, so I tend to skirt more heavily. I start at one side of the britch and work my way around the edges of the fleece, making sure to remove any damaged or overly dirty wool. I also remove anything I think is too short to blend well with the rest of the fleece. That’s a judgement call, but for a primitive fleece I usually remove anything less than two inches long.
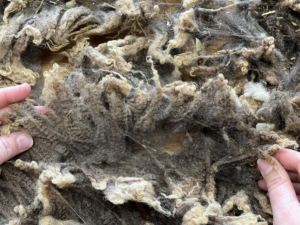
The last bit of skirting is checking the center back of the fleece. Primitive sheep are almost never coated and have low-grease wool, so the back of the fleece can take some serious sun damage, and the rain can wash out what little grease protects it. I can usually tell at a glance if I need to remove the back of a fleece, as it will be much lighter in color and dry looking, like damaged hair. If it feels quite crunchy and dry to the touch, I strip it out. If I’m in doubt, I can evaluate it for strength by holding a lock up to my ear and stretching it gently, listening for the crackling sound of breaking fiber. Once done, everything I’ve skirted goes into the waste pile for composting.
Grading the fleece
Once the fleece is skirted, it’s time to start grading. Because I planned to make three different yarns, I started by mentally dividing the fleece into three grades. The three most easily defined grades in a fleece are as follows:
- Grade 1: The neck, at the front of the sheep, finest wool
- Grade 2: The back and shoulders, the middle section of the fleece, mid-grade wool
- Grade 3: The britch, the hips and hind legs, coarsest wool
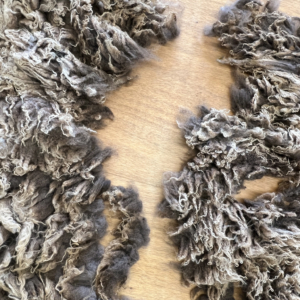
The grading itself I do by touch, moving up and down the fleece, and determining where the wool changes quality. Usually I start with the britch, as it’s often the easiest to separate. It has a long coarse outercoat, whereas the outercoat will shorten and soften as it becomes body wool.
I decide by touch where I want to draw that line and pull the britch away from the rest of the fleece. It goes into the grade three pile. In this particular fleece there was an unusual feature; the wool on the hind legs was much, much coarser than that of the rest of the britch. So I also separated the back leg wool into a grade four pile, for use in a different project.
Next, as I move up the fleece towards the front, are the shoulders and sides.
If I haven’t removed the center back of the fleece because of sun damage, this grade includes that as well. However, for a project like this, if there is a lot of sun bleaching in the center back, I may remove it at this stage even if it’s good wool. This is because mixing a much lighter center back in with the sides and shoulders could shift the color of this batch of yarn, making it harder to match to the rest of the fleece. In this particular fleece, the back and shoulders were a beautiful single grade and very close in color.
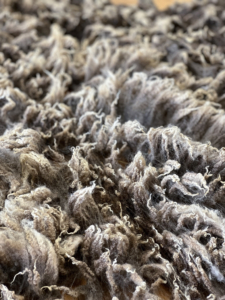
The finest part of the fleece is the neck.
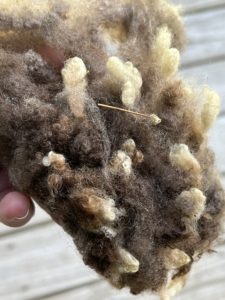
Sometimes this will have been skirted off by the shepherd, especially if it is particularly full of hay and chaff. But the wool is so fine and crimpy that, far more often than not, it is worth the extra work to process for the right project. Depending on how much neck there is, how much fine yarn I need for my project, and how fine the legs and front of the rest of the fleece are, I may pull more of the front of the fleece off with the neck.
The neck goes into the grade one pile, and what remains of the fleece goes into the grade two pile. The front of Oreo’s fleece was fine enough that the front parts of his shoulders and parts of his front legs went into the grade one pile as well.
A quick note about prep
I almost always choose to hand card into rolags or spin locks from the fold when combining the coats of a primitive fleece. Because the coats are different lengths, if they are drum carded and spun from the end of the batt, or combed, the coats can separate while drafting. This leads to parts of the yarn being all outercoat and parts all undercoat. If you really have your heart set on combing, I suggest you trim the tips of the outercoat to match the length of the undercoat.
Planning the yarn
Once the fleece is graded, each pile is washed and dried separately. Then I start thinking about my yarn construction. Generally, I find that the outercoat of Shetland is fine enough to leave in the yarn for a sweater. However, sometimes the britch can be especially harsh, so even though I won’t be using the grade three yarn anywhere it will touch skin, I still need to consider possibly removing some of the outercoat from the britch wool. In all honesty, though, the change in softness across the fleece isn’t the biggest challenge. What really needs to be addressed is the varying crimp structure.
Crimp structure has a huge impact on the elasticity of a yarn. Think about the difference between a bouncy Merino and a drapey Gotland. Generally, the more crimps per inch a wool has, the more elasticity the yarn will have, all other things being equal. If I am going to use fibers with vastly different elasticities in the same project, I often find that some adjustments need to be made. If I don’t make these adjustments, it can cause serious gauge problems and can cause parts of the sweater to stretch more than others over time. Not all of these problems are apparent in the yarn, so, as much as we all hate to do it, sampling is critical.
I usually start by hand-carding one rolag from each grade and fully finishing a small sample yarn. This includes washing the yarn before I check it. Grade two is what I will use for the body of my sweater. Not only is it the largest amount of yarn I will need and the largest amount of wool available, but it is the middle grade. Grade three is my reinforcement yarn, used for parts of the sweater that wear out faster, like the hem and elbows. If I were knitting a cardigan, I might also knit the button bands out of my grade three yarn. Grade one is the softest and most elastic yarn, and I’ll use it where I need those qualities most, namely the cuffs and collar. No one likes saggy cuffs!
The first and most critical thing I check in my sample yarns is elasticity. The yarns don’t have to be identical, but they do have to be similar enough to get along. This is a judgement call, but in general I like my grade three yarn to stretch at least 75 percent as much as my grade two yarn. It’s more critical to match these two yarns because I will be reinforcing the middle of the sleeves, and without enough elasticity, the sleeve will be saggy and baggy.
A quick little 3-ply sample of each yarn, maybe two or three feet, is plenty. Then I wet finish them, let them dry, and stretch them out between my hands, making sure I start with the same amount of unstretched yarn. I don’t measure, to be honest. An eyeball approximation is just fine. I also make up a 3-ply sample grade one yarn. As long as it has equal or more stretch than the body yarn, that’s just fine.
When sampling doesn’t go to plan
The most common problem I have is when the grade three yarn isn’t elastic enough. The coarse outercoat of the britch almost always has a lot less crimp than the rest of the fleece, so sometimes adjustments have to be made. There are a number of ways to increase the elasticity of your yarn.
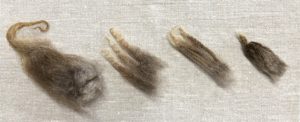
First, you can separate out some of the outercoat. I don’t generally recommend removing all of it, unless it is especially coarse and the undercoat is noticeably stronger and longer than the outercoat of the sides and shoulders of the fleece. That’s because that long outercoat acts as a reinforcing fiber, like nylon in socks. I might also decide to remove some of the outercoat if my britch yarn is noticeably scratchier feeling or less full looking in the stitch than the body yarn that I think it might cause a problem. Removing the outercoat is simple enough. I take a lock of wool, grasp it gently at the cut end with one hand, grasp just the trailing tips of the outercoat firmly with the other, and tug until the outercoat comes away in my hand. I might start by removing the outercoat from about 25 percent of the locks for my next sample, and 50 percent of the locks for a third sample, and see which one I like better.
If I still feel like I’m not getting what I need by removing 50 percent of the outercoat, or if the prospect of going through the whole britch lock by lock doesn’t thrill me, then I have a few more options. I can spin my singles a little softer and then slightly overply my finished yarn, which adds a surprising amount of bounce. It also opens up the single a little more, making the yarn feel a bit softer.
If I have a nice big fleece to work with, and I’m not worried about having enough good wool for the body yarn, I have even more options. By far the easiest option I have is to mix the britch wool and the side and shoulder wool together. Again, I don’t usually find that I want my reinforcement yarn to be more than 50 percent softer wool by weight.
The final option I have is to mix my singles. I can make a 3-ply yarn with a combination of grade two and three singles in any proportion. Because the different singles can have very different amounts of elasticity in this scenario, tensioning my singles is very important while plying. I also sometimes overply these yarns ever so slightly to ensure the grade three singles don’t overly limit the stretch of the grade two singles.
The problems I can encounter with the neck wool are slightly different. First of all, removing all the chaff (also known as vegetable matter, or VM) from this wool is critical. Using softer wool will be for naught if I don’t get the prickly hay out. So I want to make sure I thoroughly pick the locks apart by hand. Depending on how long they are, and whether they are strongly double coated, the neck locks can also be flicked to remove the worst of the VM. For this project, the neck was about a third VM by weight in places, so I found my Lock Pop to be quite useful. Let me be clear, this is not the place to use a mechanical picker. It will just pick the VM right back into the wool. It really isn’t a lot of extra work to go through lock by lock, as I don’t need a lot of this yarn.
The next most common problem I have with this yarn is shrinkage in length. The neck wool tends to be quite a bit springier than that found anywhere else on the fleece, so washing my finished yarn and letting it dry without weight is critical to getting gauge when knitting. This yarn can also bloom significantly after washing, so I have to make sure to sample and watch my gauge while spinning.
Knitting the sweater
Finally, once all my sampling is done, it’s time to knit my sweater. When it comes to the body, hem, and cuff and collar yarns, using them is largely self-explanatory. But with the elbows, I have at least two options. Sometimes I use the grade three yarn on its own, like intarsia knitting. But sometimes if I know the sweater is going to take some really serious wear, or I am knitting for a very sensitive person, I like to knit the sleeve entirely out of grade two yarn and darn a patch of grade three yarn on the outside of the sleeve. These patches can be easily repaired, replaced, and added just where I need them on my sweater.
Tips to keep in mind
- Grading for handspinners is an art, not a science. Make your hands happy. The motto here is “close enough.”
- Watch out for color shifts. It’s fine if you decide you want to have them, just be aware.
- Sample, sample, sample! I know everyone says that, but this is one time not to skimp.
- It might be a good idea to knit the cuffs and collar separately, as the softer yarn can wear out faster. Make extra yarn and store it for future repairs.
- Make sure to choose a fleece with good variation between neck, shoulders, and britch.
- Spinning primitive fleeces from rolags without separating coats tends to result in a textured yarn. My advice is just to lean into it. If you can’t fix it, feature it!
- Lastly, don’t just walk by the primitive section at the fleece show anymore. Give these lovely fleeces a chance to do what they do best!




Leave a Reply
Want to join the discussion?Feel free to contribute!