Dyeing Cloth with Mud
Words and Photos by Suzanne Correira
I’ve been experimenting with using mud for coloring cloth ever since I took a class from Judy Dominic in the early 2000s. She studied African mud dyeing extensively. Then I started reading about the Japanese technique of Dorozomo – also mud dyeing. I fell in love with the fun and experimental aspect of it. And the historical bits of course. Plus, how can you resist playing in the mud?
Colors
I’ve worked mostly with clay-ey type soil – most easily obtainable for me – and these tend to have the best colors. Think Georgia red clay, Oklahoma red dirt, Texas red dirt, and Montana red mud. There is a whole business built around the Montana red: Montana Dirt Shirts. And they’re rather nice T-shirts. For the record, my students have all declared the Georgia red clay as the out and out winner in the red department.
Red seems to be the most available color in nature. Green is also something you can find in heavily naturally mulched soils and in desert areas – New Mexico and far West Texas have several spots for a good deep green. And black is something you can get from a good deep natural mulch – or a peat bog. These are going to be your basic colors, but you can also find some others including some good yellows. And if you don’t want to drive around with a bucket and shovel, think facial clays, yes, clay masks – certainly for the green clay and a black clay mask. The red may be harder to find, but there is a rose facial clay out there.
Plain old mud from the garden or a potting soil also works, especially if it is full of composted leaf material – think tannin here – and this works extremely well if you are dyeing or painting on cotton. The tannin acts as a mordant, intensifying and fixing the colors.
Mordant
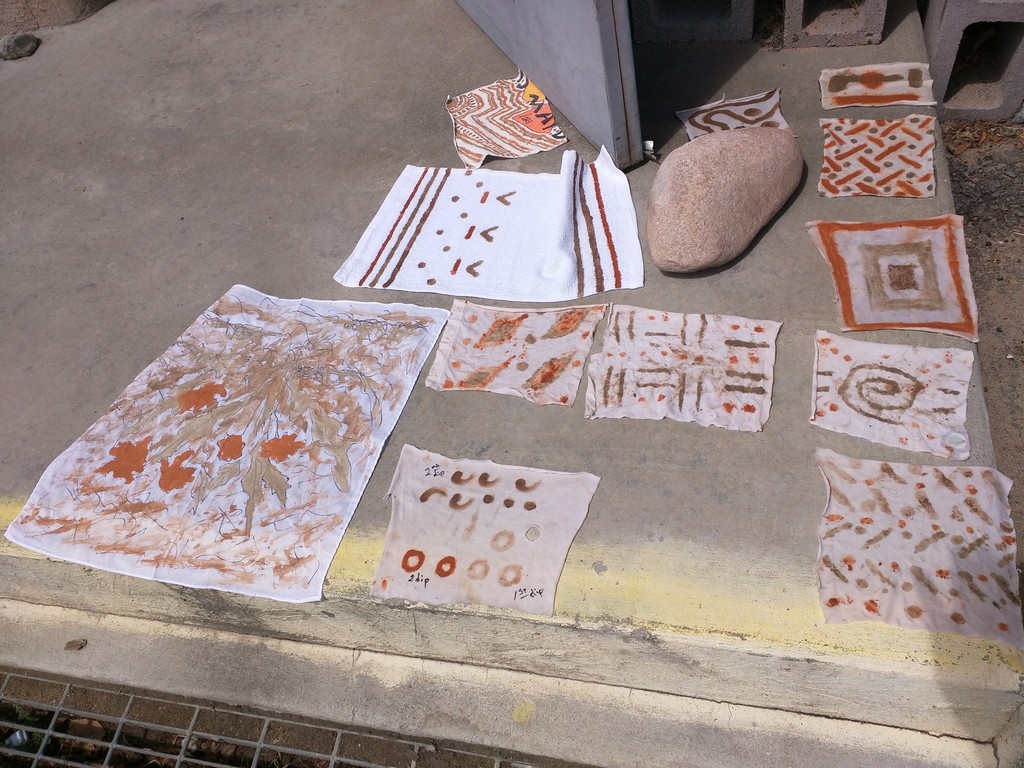
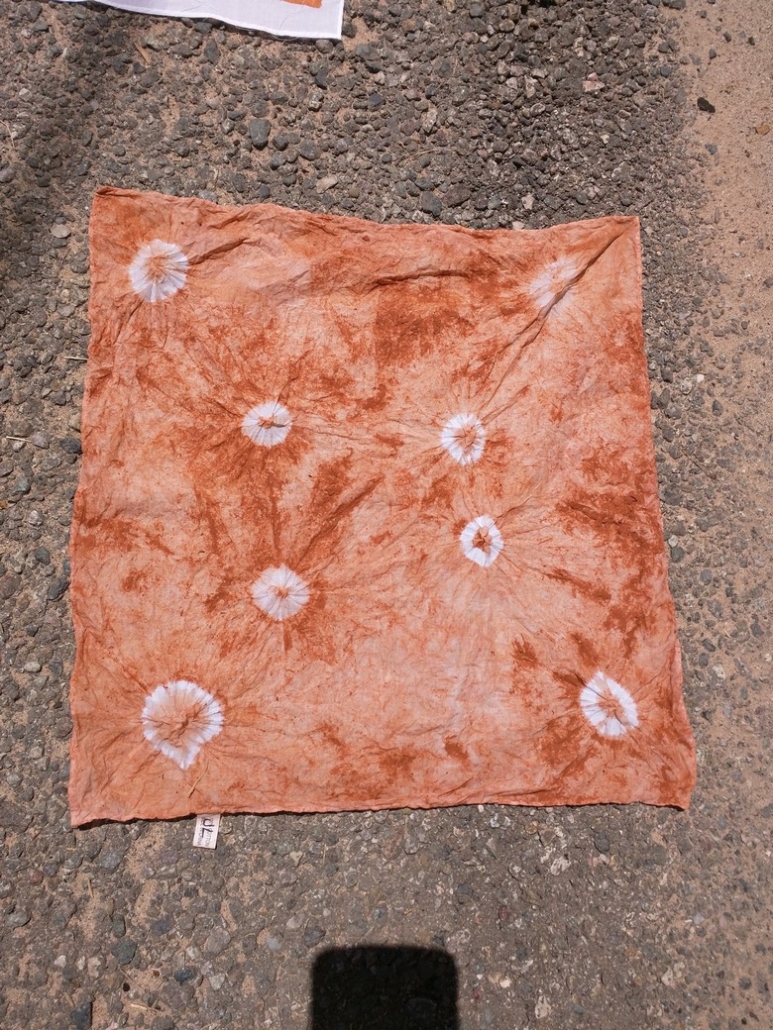
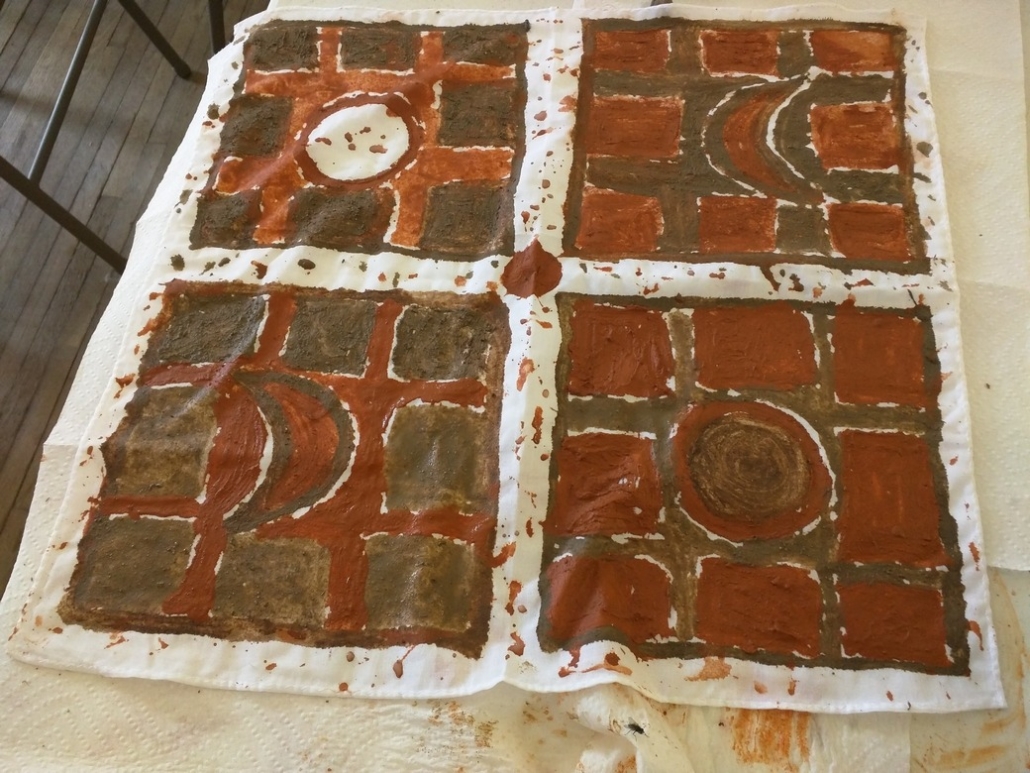
You are not actually dyeing with these clays, as they are a pigment and do not absorb into the fibers and fabrics, but are rather staining with them. Think of what happens when the kids play in the mud and grass and what happens when you kneel down to work in your garden. This time, we are doing it deliberately. And for that, we need something to “mordant” the colors if you don’t have a swamp or peat bog handy. While it is a tradition to bury the decorated cloth in the ground, in peat bogs, or in other areas for weeks, evens months at a time, I’ve been using mostly soy milk as I learned in Judy’s class. Canned or fresh, it doesn’t matter. In fact, the last time I taught this technique in New Mexico in 2016, I used 2-year-expired soy milk. Quite honestly, I think the colors were the best I’ve ever seen a class of mine come up with! The photos included are from that class.

Our real star here as far as fixing the colors is the soy milk. Soak whatever you are dyeing in it, use it to emulsify the clay, or do both. I like to do both. The enzymes in the soy milk serve as a binder for the clays. Leave it on as long as you can – even months to bind the clay to the piece.
Types of Dyeing
You can use immersion dyeing techniques – the Montana Dirt Shirts are done this way – and you can design tie dye effects. Soak the fabric in a solution of soy milk and clay, where the solution has taken on the color of the clay (think of the color of the water of the Red River or any clay pond), and leave it as long as you can to soak – overnight is good. Dipping more than once helps build up color. Hang it to dry and “cure” as long as you can – about a week. Rinse and let it dry and cure again. Hand wash in a gentle soap and dry carefully. I experimented with wool yarn and achieved a soft color this way, but it required a lot of rinsing. If you plan on wearing your clay-dyed pieces, handwashing is definitely recommended.

Clay painting is what you most commonly see, both using clay as the actual color and as a resist to other natural colors. Again, mix the clay and soy milk, and even dip your cloth in soy milk first, then paint on the surface using cheap disposable brushes or even Q-tips. Leave the clay paint on the piece as long as possible to cure as above. Layer gradually to build up the colors. Please note: You may get some really deep colors, but you will be washing out a great deal of that color. Still, the longer you let it sit, the deeper it gets!


Resources
Mud/clay dyeing shows up in many cultures and has become quite popular with surface design artists and hobbyists, so there are tons of articles and tutorials. There is a wonderful tutorial online. It is suitable for grade schoolers but interesting to all.
Kimberly Baxter Packwood: Clay Dyeing Info
Judy Dominic – I took one of her first classes on the subject in Berea, Kentucky, after she’d been to Africa to study the method. Turkey Red Journal, Vol 17, no.1, Fall 2011, Bogolan Fini Mud Cloth from Mali Africa (U.S. adaptation). This is decorating a cloth with clays painted onto the cloth, using the clays both as color and/or as a resist. The cloth may be buried in mud for months.
John Marshall: Also Turkey Red Journal, same issue – Dorozomi Japanese Mud Dyeing (he is quite insistent on using fresh made soy milk, not the prepared stuff, but then, he is a stickler for traditional methods). Here he writes about 2 distinct Japanese methods: Bingata, in which various muds, as pigments, are glued to the cloth using soymilk as a binder, and Dorozome, where the mud is serving as a mordant to the vegetal juice color that the cloth is saturated with first. Both articles can be found at Turkey Red Journal, along with more recent articles on all sorts of dyeing.
Suzanne Correira has been a professional fiber artist since the 1980s and has been Fire Ant Ranch since 1992. She has published with Knitter’s, Knitting Digest, Threads, Lion Brand, and Ravelry. She has exhibited/taught in many places, including PLYAway, Estes Park, Taos, Big Sky, Kid ‘n Ewe, DFW, Interweave Yarn Fest, and Georgia Fiber.
For more articles like this, subscribe!
Get sneak peeks, extra content, behind-the-scenes details, and updates straight to your inbox


Leave a Reply
Want to join the discussion?Feel free to contribute!