

Give me an inch and I’ll take a mile! I’ve always been a person who has had an insatiable curiosity. I’m not necessarily mechanically inclined, although I can change a tire, troubleshoot a loom issue, or notice when one of my dogs, cats, or ponies is not feeling well. But when it comes to a historic or cultural technique like making linen thread from a flax plant or setting up a traditional warp-weighted loom – well, bring it, as they say!
I’m not sure when I first became interested in a vertical loom. I guess having a cottage studio which is quite small, I was drawn to that loom orientation because such looms take up less space. Mind you, looms can be like potato chips – you can’t eat or have just one! My journey began with the purchase of a vertical, 2-harness loom (the harnesses are horizontal rather than vertical in orientation) with a weighted beater. A friend and I traveled to New York state to pick the loom up, and as with many loom adventures, naturally, despite careful measurement, the loom would not fit in the van. But thank goodness for simple construction and a maker who a hundred years ago used no glue. Once we removed eight screws holding the harness brackets on, the loom came apart easily.
Historical warp-weighted looms

Trying to find more information on this loom led me to finding images of traditional warp-weighted looms – search engines and books on weaving loom evolution can be quite dangerous, or in my case, a source of inspiration. I saw photographs of traditional simple upright looms, starting with Navajo looms from the American Southwest. From there, I discovered Viking style looms, ones that were described as “warp weighted.” I was hooked!
Weaving throughout history has been a crucial part of textile manufacture. Cultures evolved from clothing made from animal hides to wearing woven or felted fabric, and garments were produced through a variety of techniques. Some ethnic groups were mobile and had to move with the herds of animals they either kept or with the food source they hunted. The idea of a loom that was a permanently placed and a non-mobile piece of equipment was just not practical.
Enter a simple frame loom which could be broken down, easily transported, and reassembled when needed. The back-strap loom fit the bill, but the warp-weighted loom was also a solution. The key to consistent weaving is even tension on the warp threads, and to create this, the weavers simply used rocks or weights formed from clay. Although few complete looms remain today from historic times, the loom weights have been discovered in excavations of primitive settlements.
The mechanics of the loom are simple – a rectangular frame, either freestanding or one that could be leaned against a wall or tree; a top beam to hold the cloth once woven (the weaving progresses from top to bottom rather than from bottom to top); a bottom horizontal crosspiece, necessary to separate the front warp from the back warp; and the most critical part – a horizontal heddle bar (or multiple bars – yes, twill can be woven) and brackets to allow the heddle bar to be in two different positions (against the upright frame or forward, allowing for the warp threads to move, creating the two different sheds).
Building my first warp-weighted loom
I had to somehow try this form of weaving. I was drawn in by the simplistic nature of the loom, the ties to weavers of long ago, and the challenge of making cloth on a loom I could build myself. Let the fun begin.
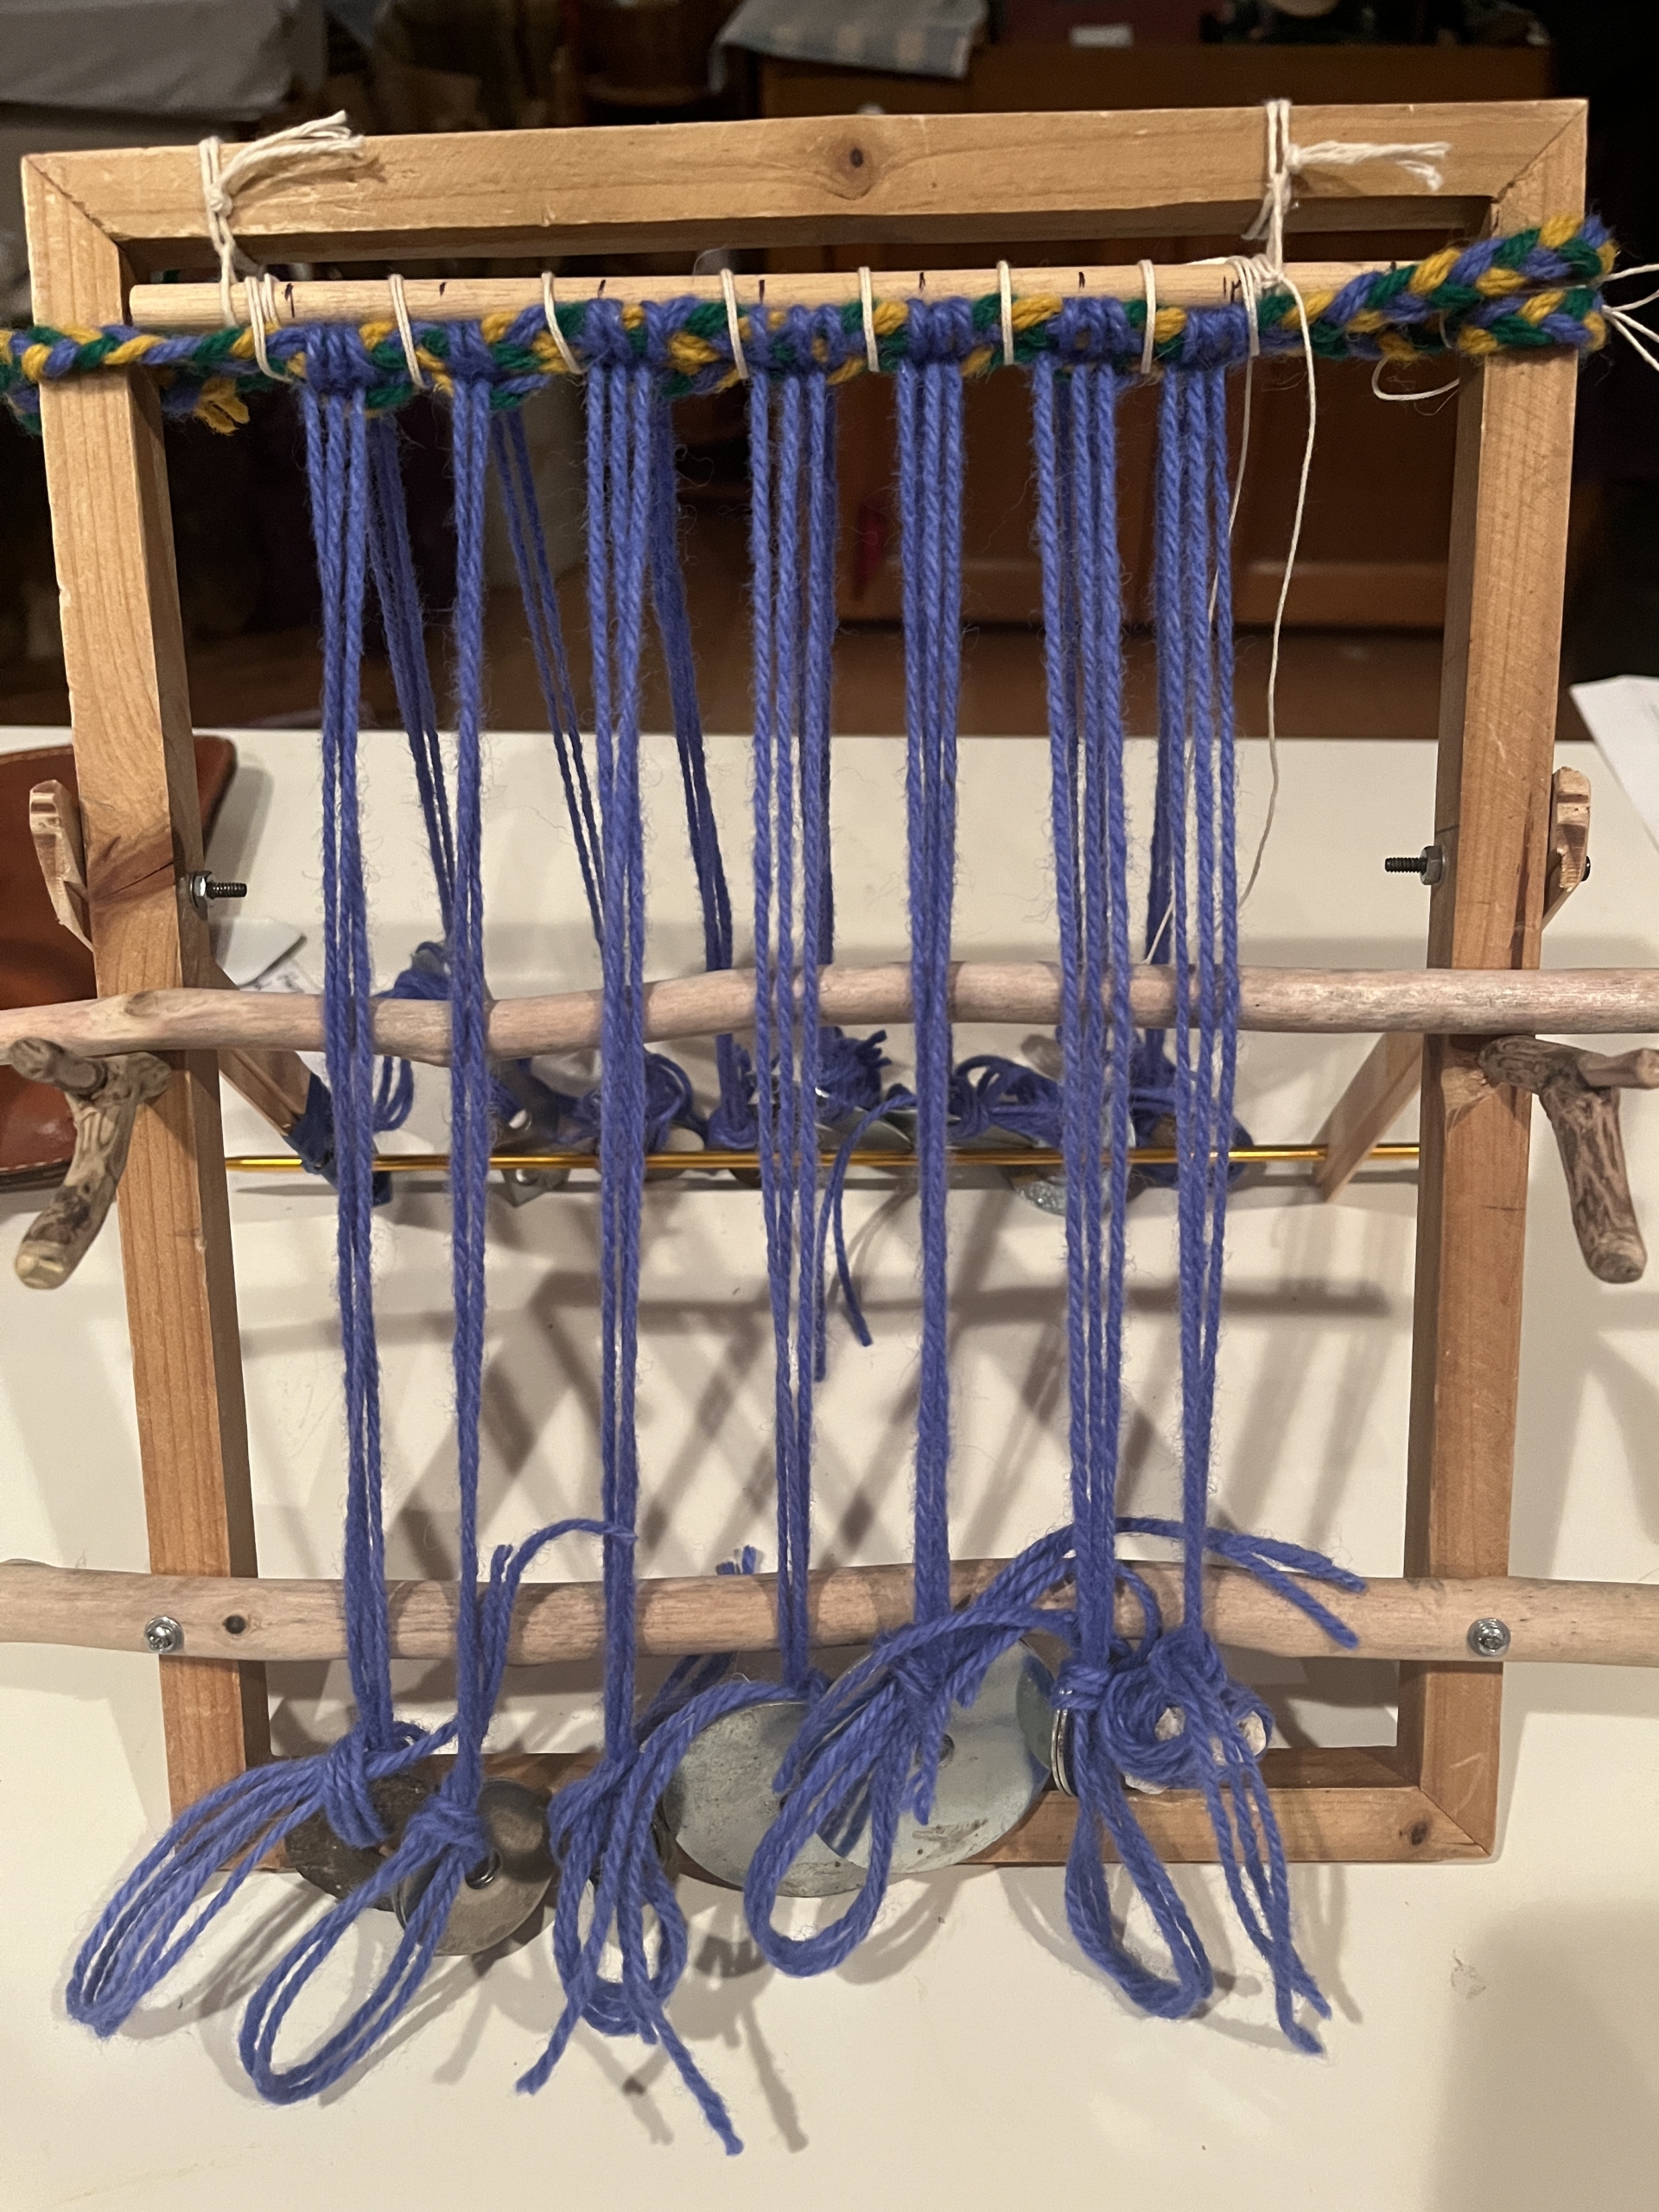
One of my favorite places to shop is at our local university surplus warehouse. Thanks to my father-in-law’s insight and smart shopping at the surplus store years ago, he found what would become my first warp-weighted loom. Some readers might be of the vintage and recall the newspaper racks, with bamboo rods, holding papers in the college libraries. Yes, my father-in-law had picked one up at the surplus! I had used it for studio display, but it was soon to be reconfigured as a warp-weighted loom. With a few simple modifications – forked branches for the heddle brackets, Tulip Poplar sticks for a heddle rod and bottom cross piece, and rocks from my stream as weights – I had my first warp-weighted loom! I was in business. Time to warp and get weaving.
Just having the loom was a small part of the project. Getting the warp on the loom and learning a few other techniques were necessary before I could actually start weaving. Enter YouTube. Thankfully several people around the world have researched and studied and made videos for others to watch and learn. Hanging warp threads from the top beam seemed simple, but traditionally there might have been a tablet woven decorative tape as part of the warp or there could have been a braided edge along the top selvage.
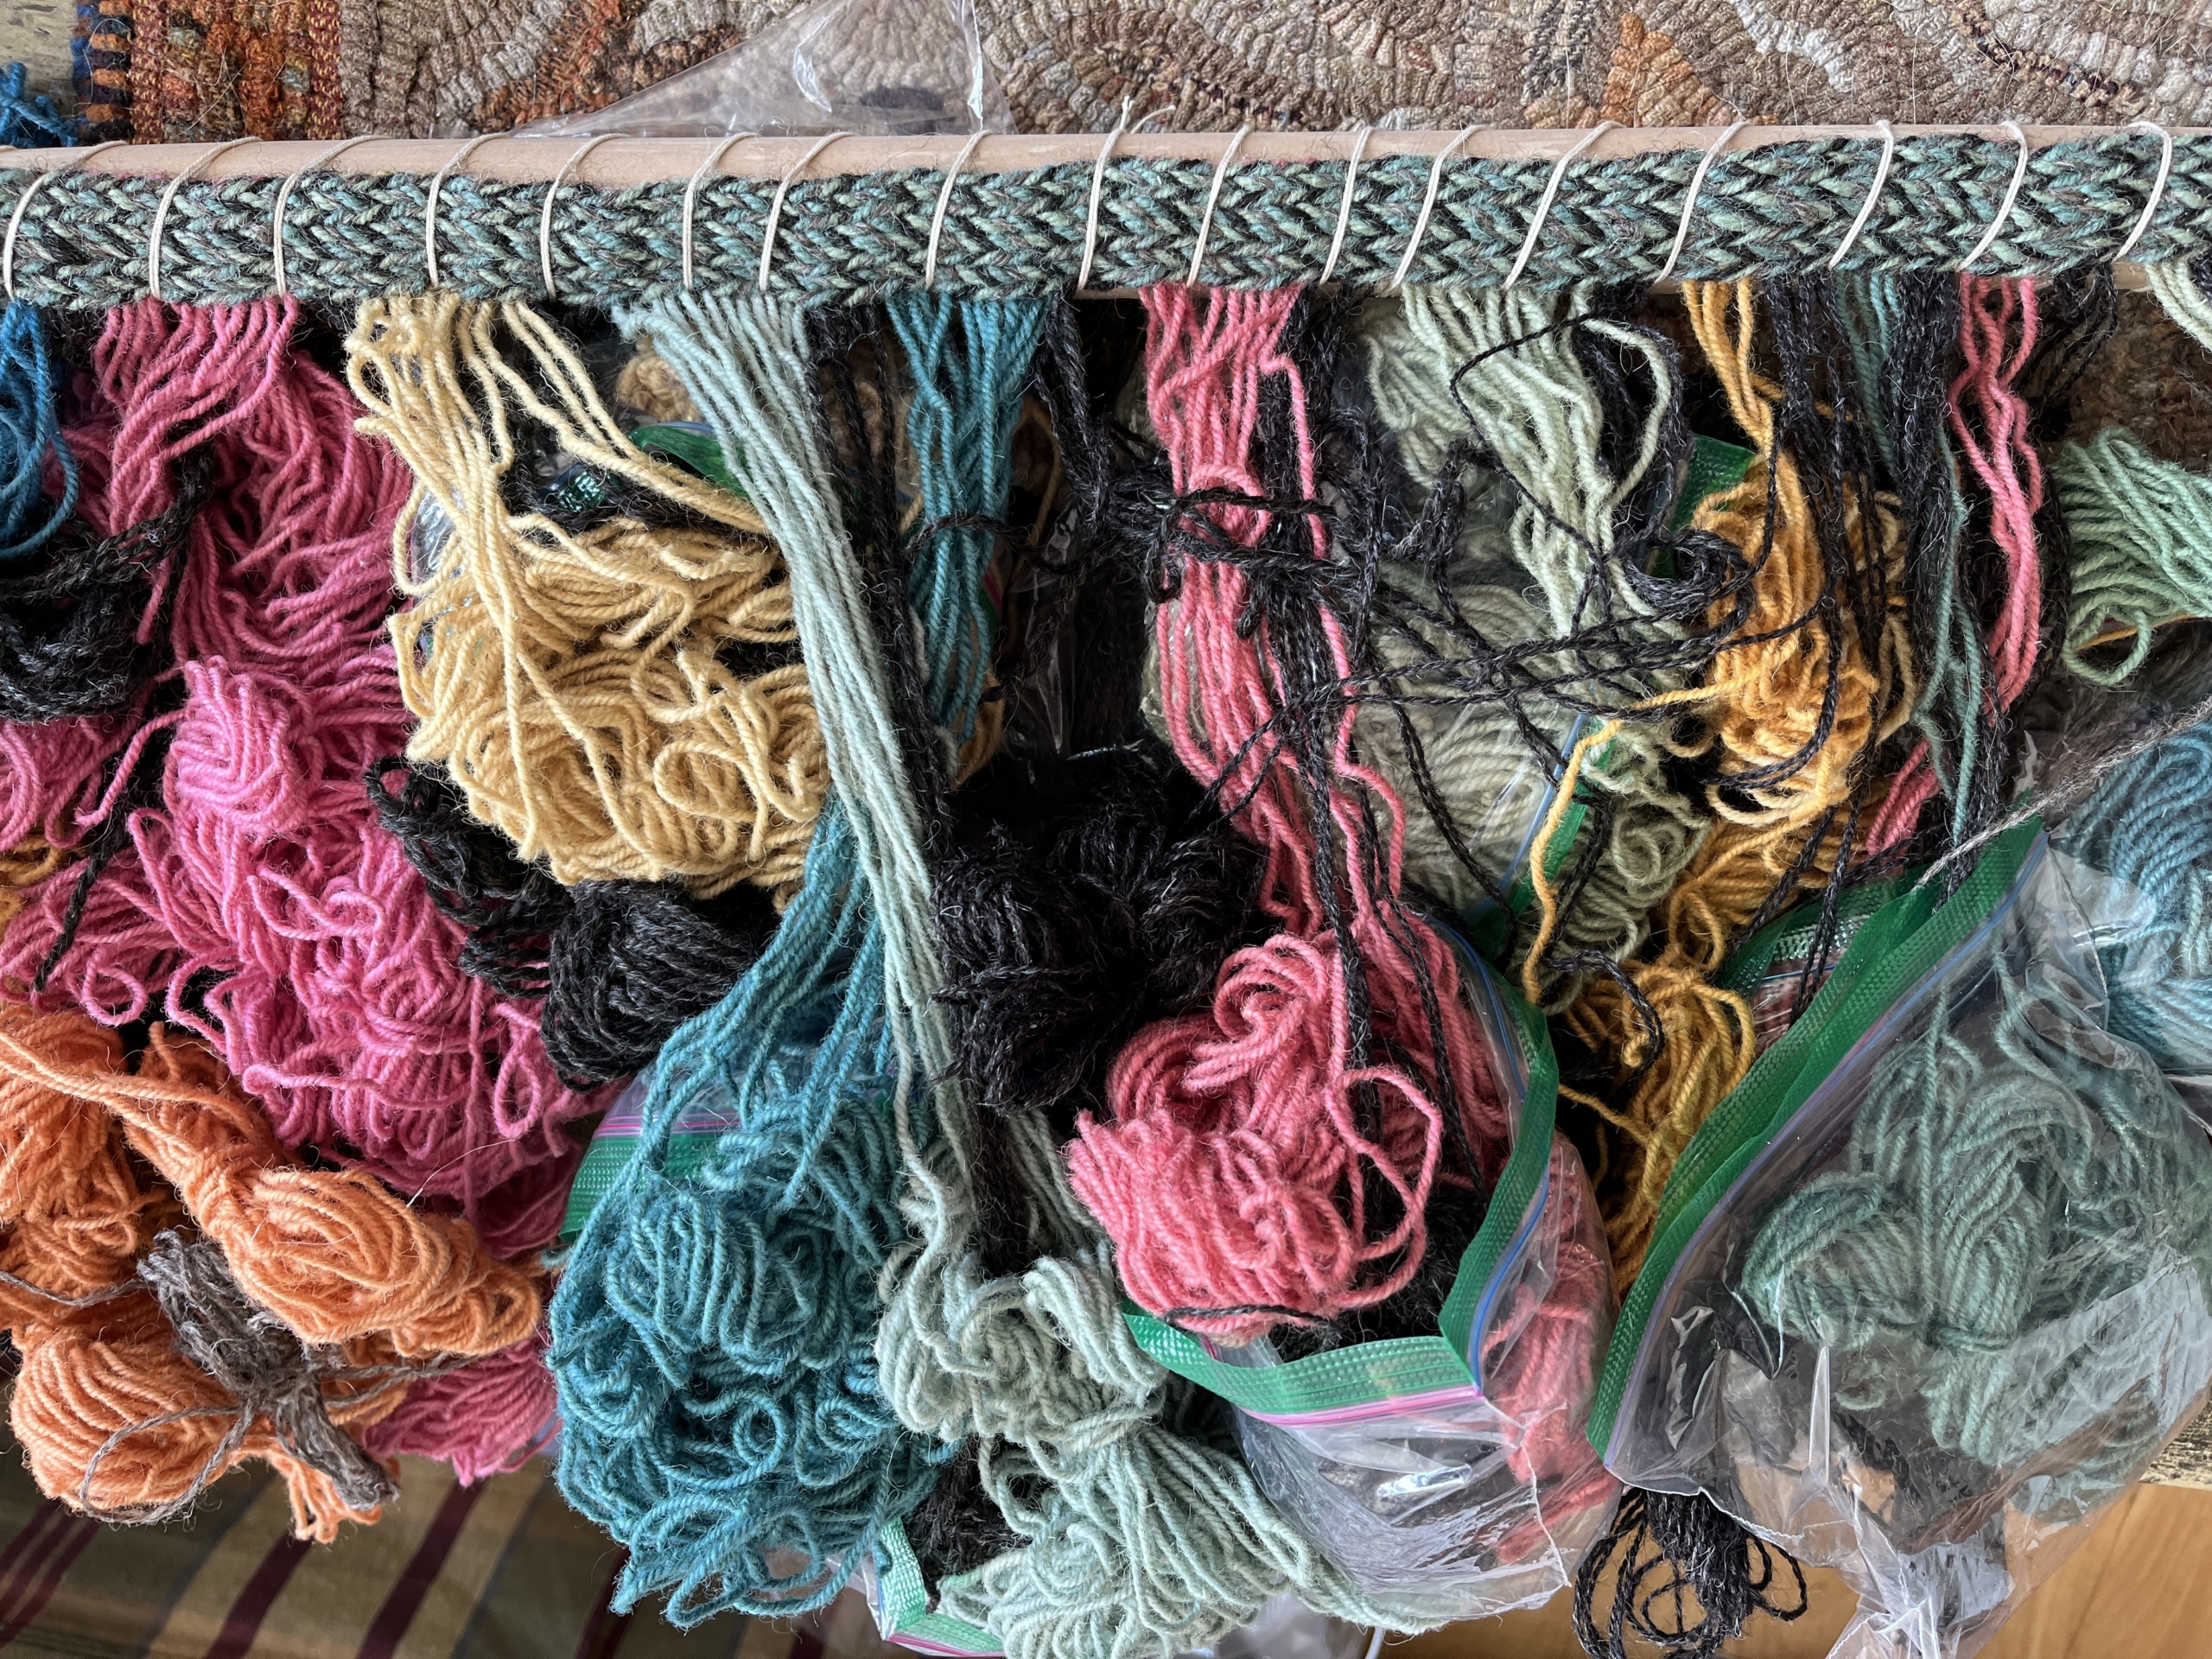
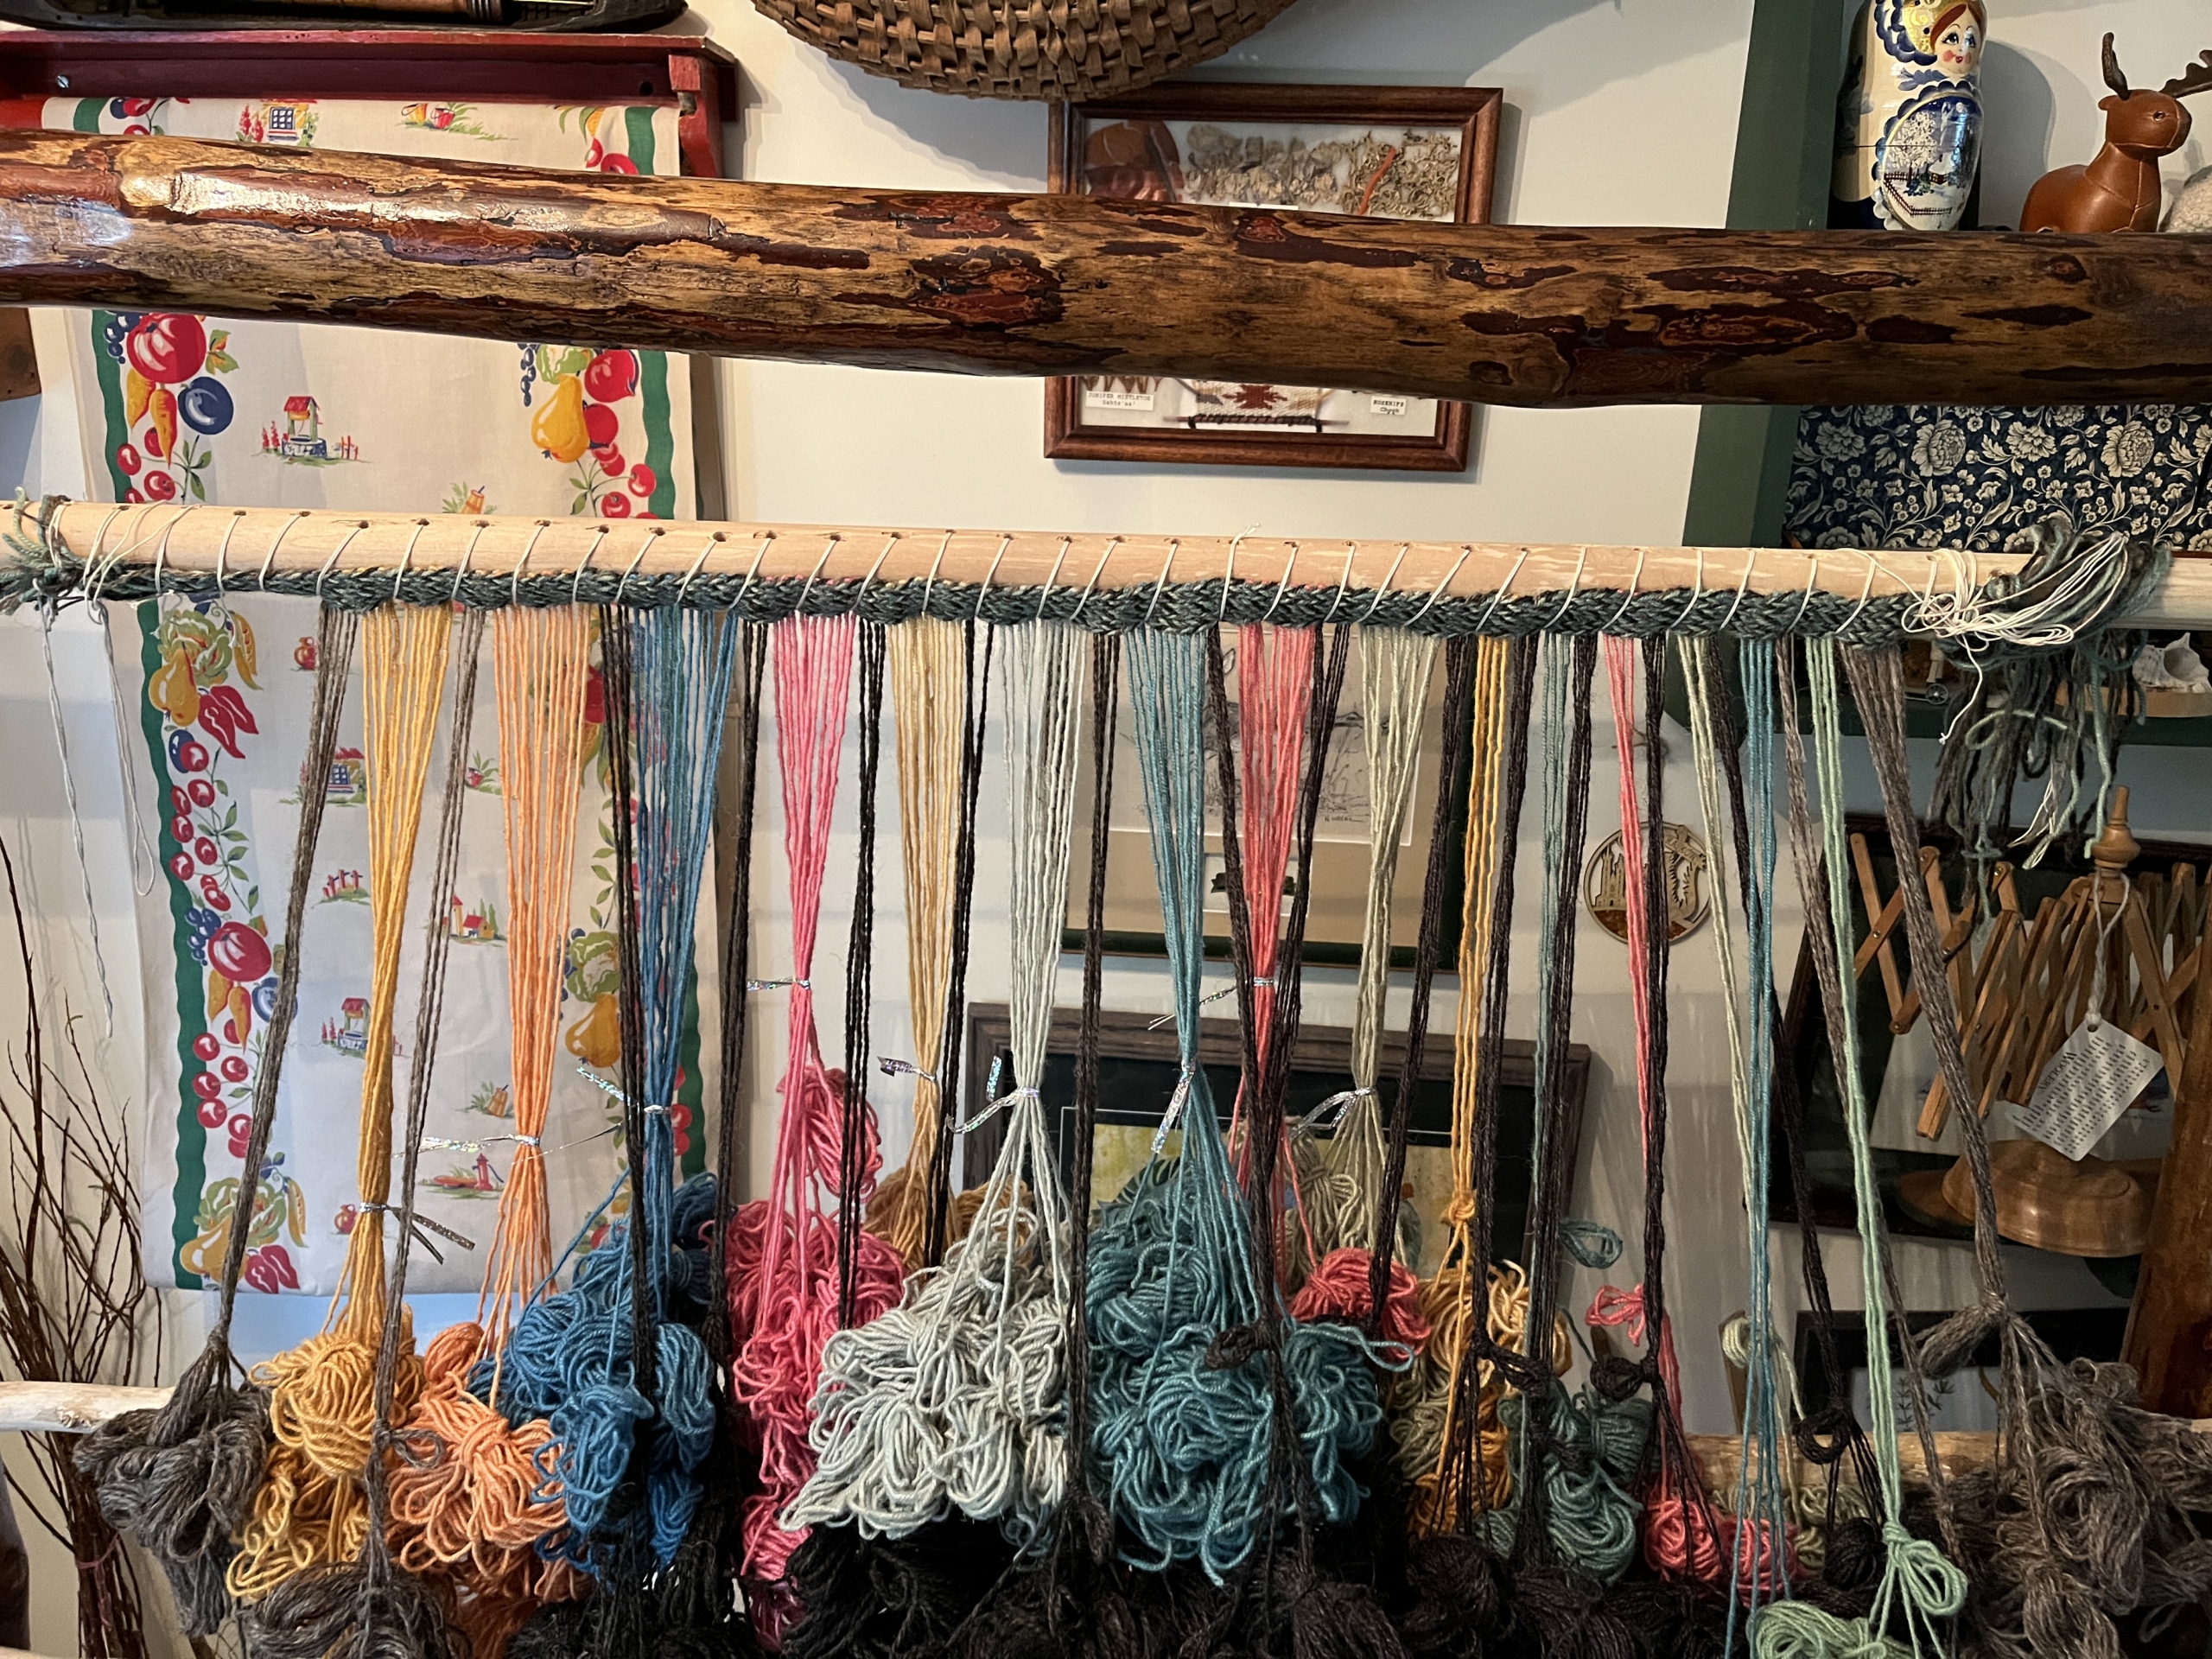
I opted for simple – for the inaugural project. I decided to use a commercial wool I had on hand. I measured the warp threads, cut them to length, and lashed them around a top beam (a stick with holes through which I could lace and secure the warp), and I was ready to weave – well, almost. The warp needed to be brought under tension and the traditional means of doing this was rocks. The warp is divided into front threads and back threads. When the weights are attached to each set of warp threads, now grouped in sets, the rock needs to be the same weight as its mate on the back bundle, which creates even tension.
Time for a hike in my woods to the stream, or better yet, a forage through my rock collection. The rocks can simply have the extra warp wrapped around them, but I opted to either drill holes in the rocks (my rocks were Indiana sandstone and easy to drill) or wrap them with wire and then use a loop of twine (called a doupe) to suspend the rocks from the warp.
With warp-weighted looms, there is a horizontal bar, the heddle bar, which is moved from a “home position” (next to the frame of the loom) to an “out position,” the bar being moved into a bracket or in my case a forked tree branch. In order to move, the back warp threads need to be laced in such a fashion as to create string heddles around the horizontal bar. A return to YouTube and watching for the millionth time one of the excellent videos by British experimental archaeologist and heritage educator Sally Pointer, I was able to form the string heddles. Success! When I moved my heddle bar to the out position, the back warps came with it. I was ready to weave.
Warp-weighted weaving creates fabric from the top down. Weaving begins with the same yarn as the warp and each weft shot needs to be beat up or pushed up by either using a tapestry beater or traditional weaving sword. Long and slim, weaving swords are about the length of the width of the warp. By having this total length, the weft threads are evenly pushed up. Traditionally made of whale bone, that material was just not a realistic option here in South Central Indiana. I discovered that my flax scutching knife was a great substitute for the sword. (Afterthought: when I built my larger warp-weighted loom, I found pelt stretching boards in Wisconsin used in the fur trapping industry worked well as weaving swords.)
Building a full-size loom
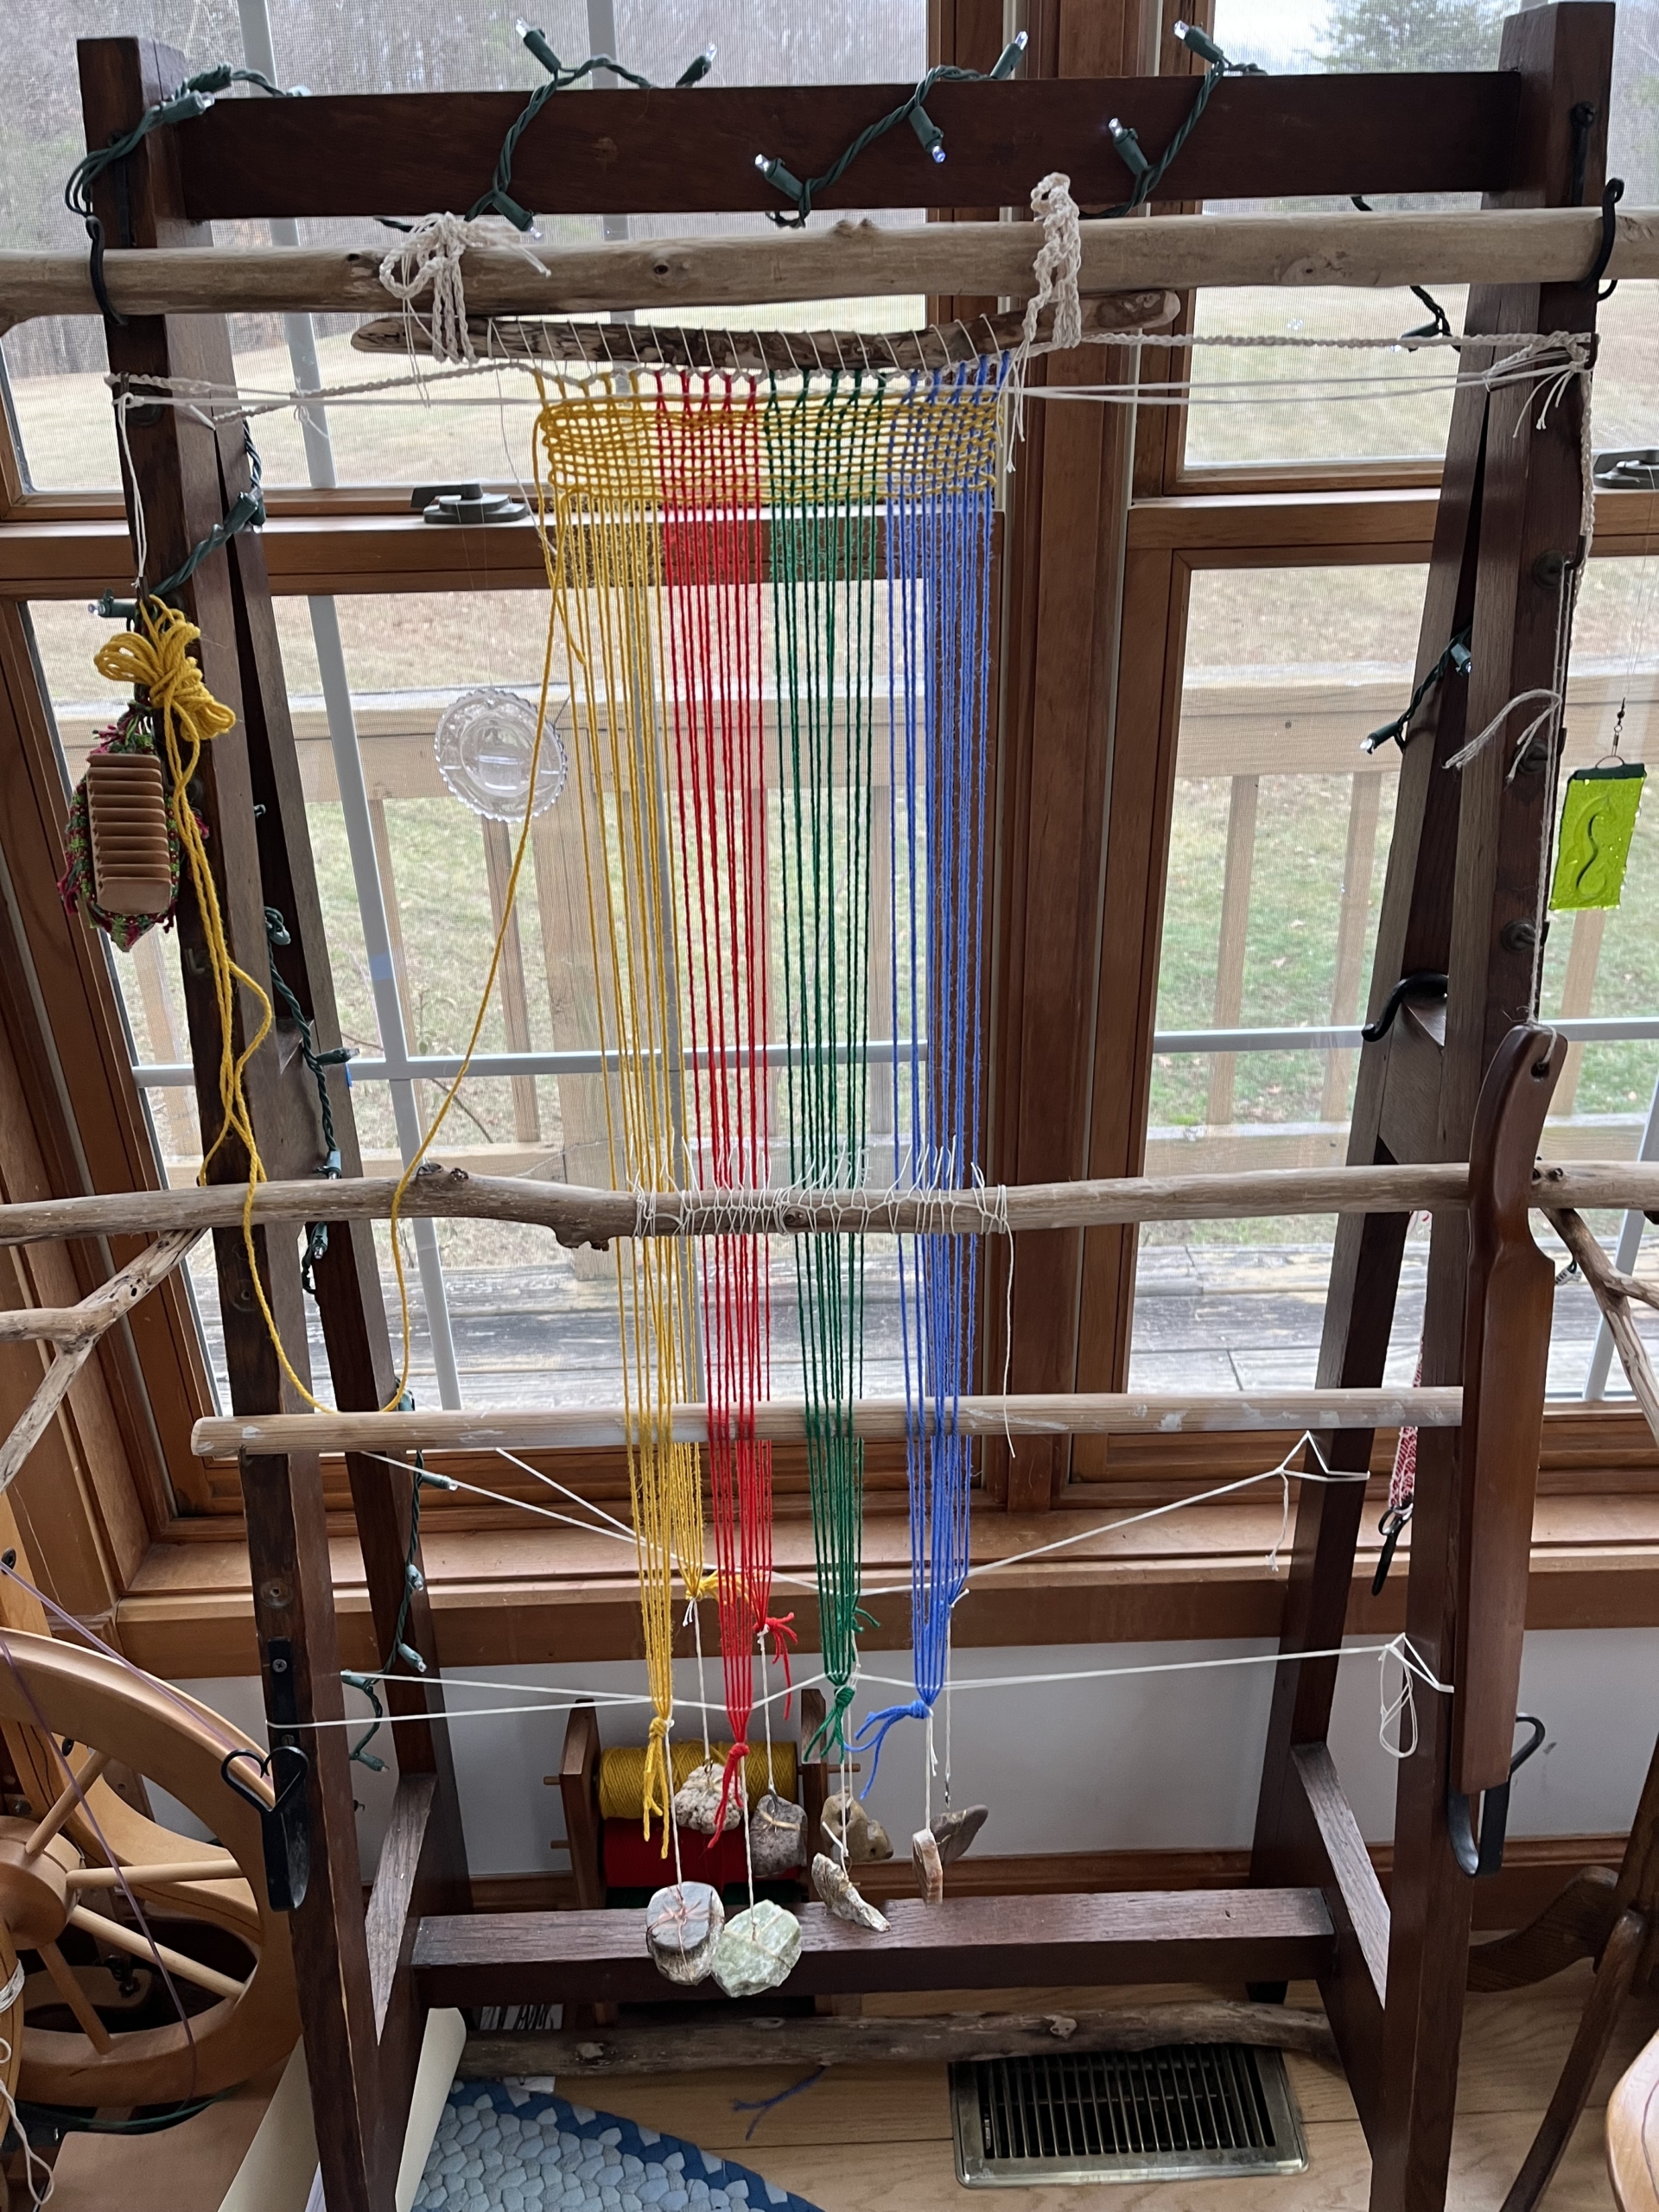
Now that I had the basics of this traditional weaving method under my belt, I started foraging for fallen wood and trees so I could build a full-size loom. Over the winter of 2022–2023, I gathered pieces of Tulip Poplar that had come down in wind storms. I like Poplar as the bark peels easily and the wood underneath is a gorgeous light color and naturally very smooth.
In April at one of our local fiber events, a silent auction was being held to help raise money for the event. I was volunteering doing a flax demo in the same building as the auction – which is dangerous. One item caught my eye: a freestanding Navajo loom made of local Sassafras wood. The donation came from a retired professor whose wife had become interested in Navajo weaving while living in the southwestern U.S. They were downsizing, and it was time for the loom to find a new home. It came home with me. I now had the framework for the freestanding warp-weighted loom. It needed very little modification – heddle bar brackets, which I carved from Poplar notches, a simple brake mechanism on the top beam created with an eyelet and metal stylus, and I was all set.
My first projects
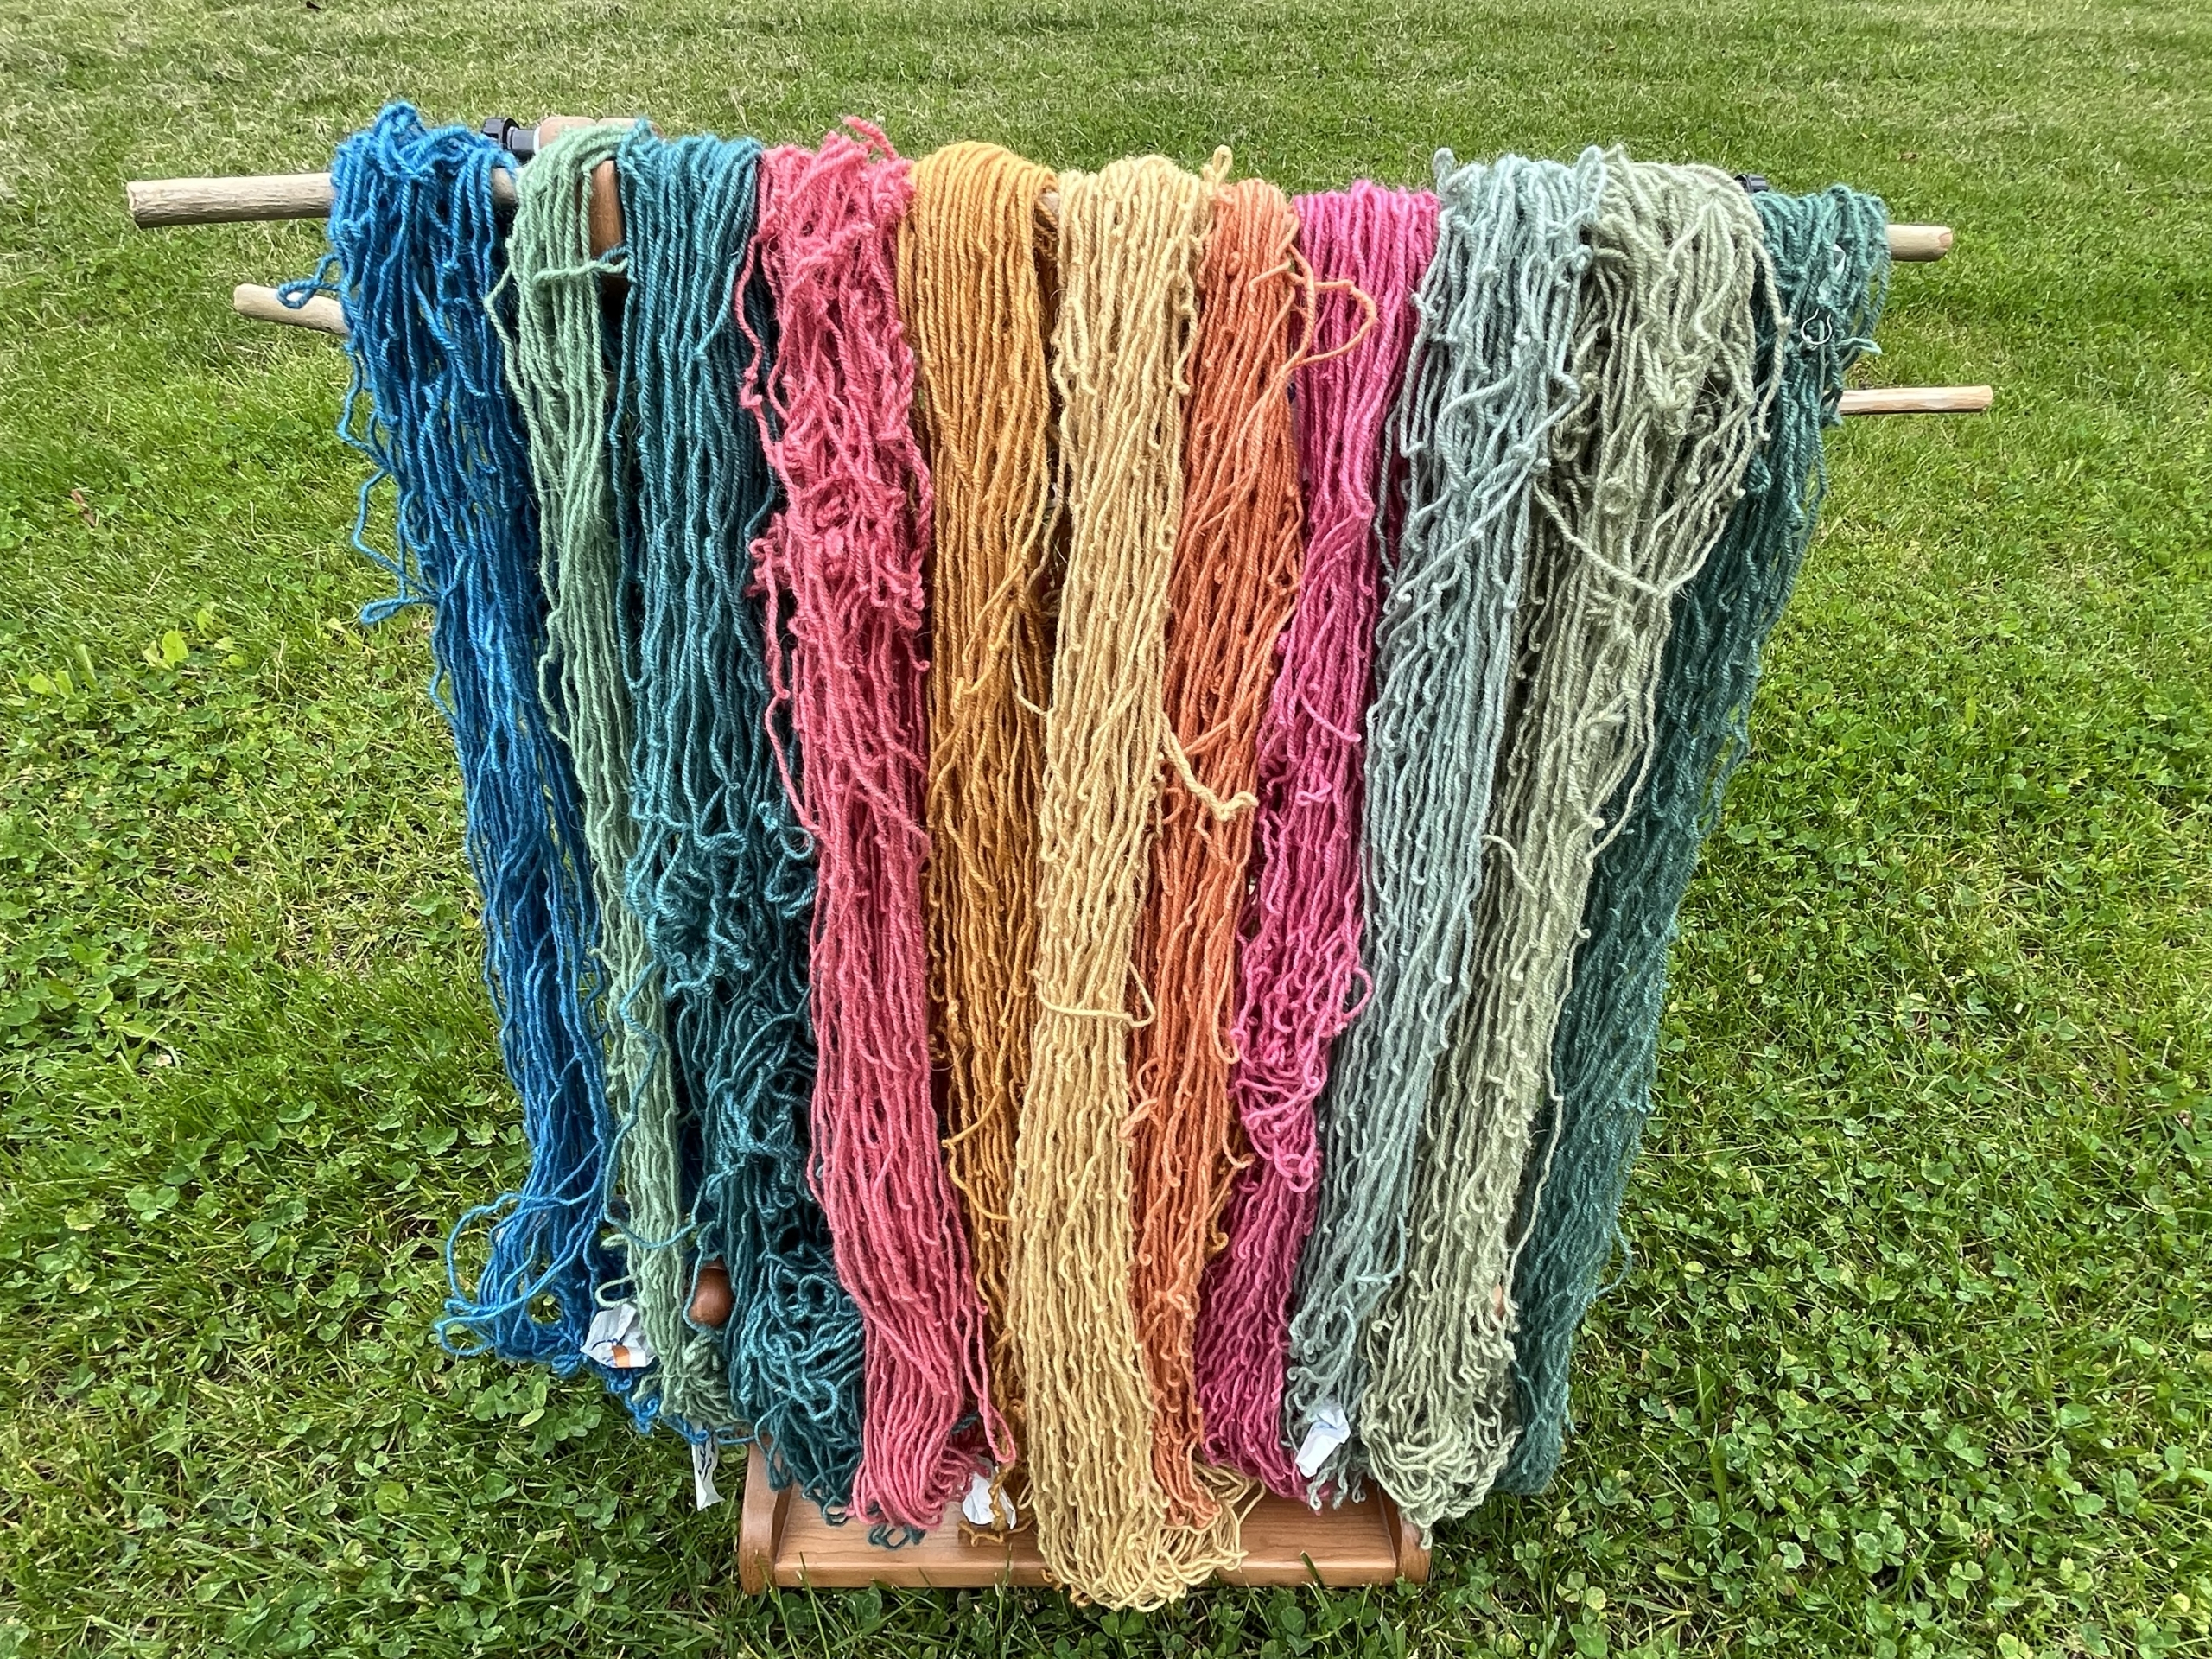
My research continued into traditional weaving methods on this style of loom, and I decided for the first project on the freestanding loom, I would weave a traditional card or tablet woven band, which would serve as the “top” selvage for the fabric, incorporating the warp threads in the woven band. Being a natural dyer and spinner, I wanted to use some special yarns for this project as it was going to be a what I call a “legacy piece” for one of my grandsons. The warp was a combination of commercially spun BFL, dyed with natural dyes (some foraged from my property and some from historic sources), and a handspun, 2-ply BFL/Border Leicester and Shropshire combination, 16 WPI, that I picked up in England on my travels.
There was only one problem – card weaving and I have rarely seen eye to eye. Back I went to YouTube and Sally Pointer’s instruction. With her help, I was able to successfully weave the Herringbone band, but because I wanted a striped warp, I had to be extremely organized with the warp threads to create the pattern I was hoping for (that’s a whole different story). The dyed yarn and the naturally colored handspun had very different twists – the commercial a tighter finish to the yarn, the handspun softer and less twist. I was getting closer to weaving on Big Bertha (the freestanding loom)!
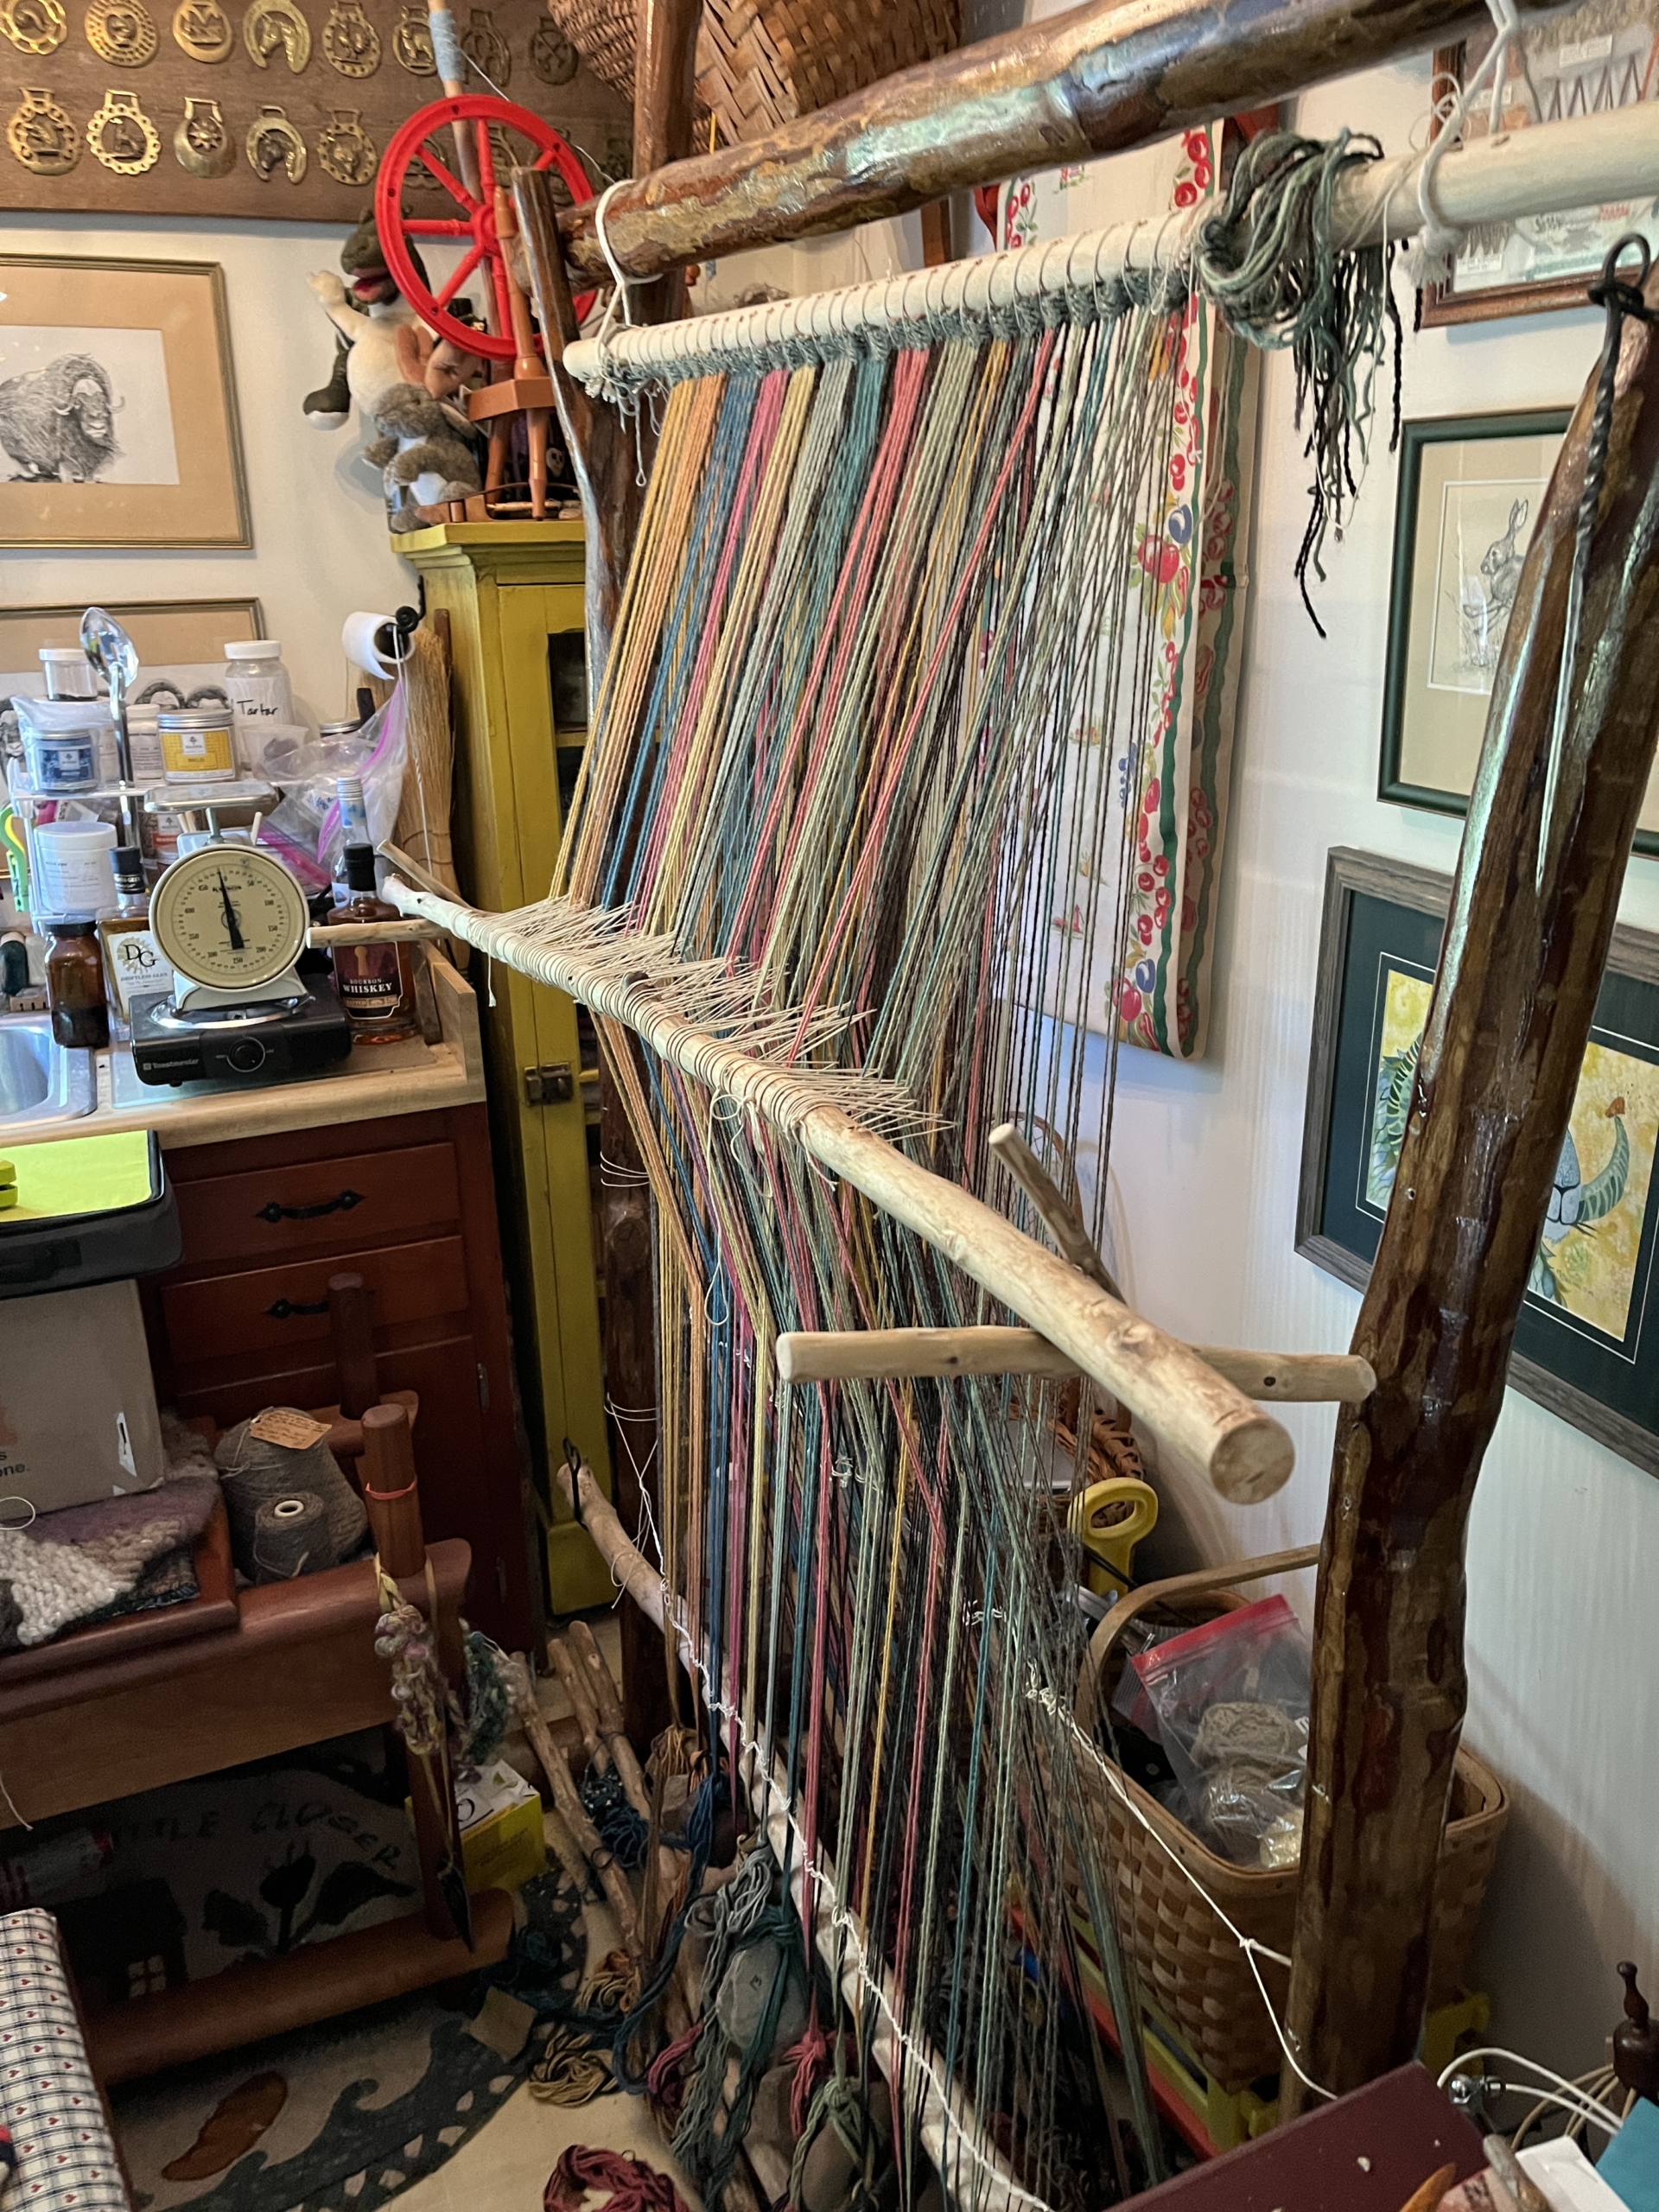
In August I had the opportunity to take a workshop on how to build a warp-weighted loom and weave at North House Folk School in Grand Marais, MN. The workshop provided a lot of insight into loom mechanics and planted yet another seed in my brain as to what direction to go with my future weaving on this style of loom. Not only was the workshop located in a gorgeous venue, the shores of Lake Superior, but I was able to gather rocks which could serve as weights for Big Bertha. The short version is that I did weigh out each rock, mark its weight on it with a Sharpie, and then make sure I had pairs of rocks which would span the entire width of the warp. I learned several traditional weaving design techniques, which expanded the possibilities for my upcoming project.
The woven band was lashed to the top beam, the warp threads divided into front and back sets, the loom weights tied on the bundles of warps, the heddles stitched onto the heddle rod – once again watching and rewatching Sally’s excellent YouTube instruction – and the weft wound onto a stick shuttle. Let the weaving begin!
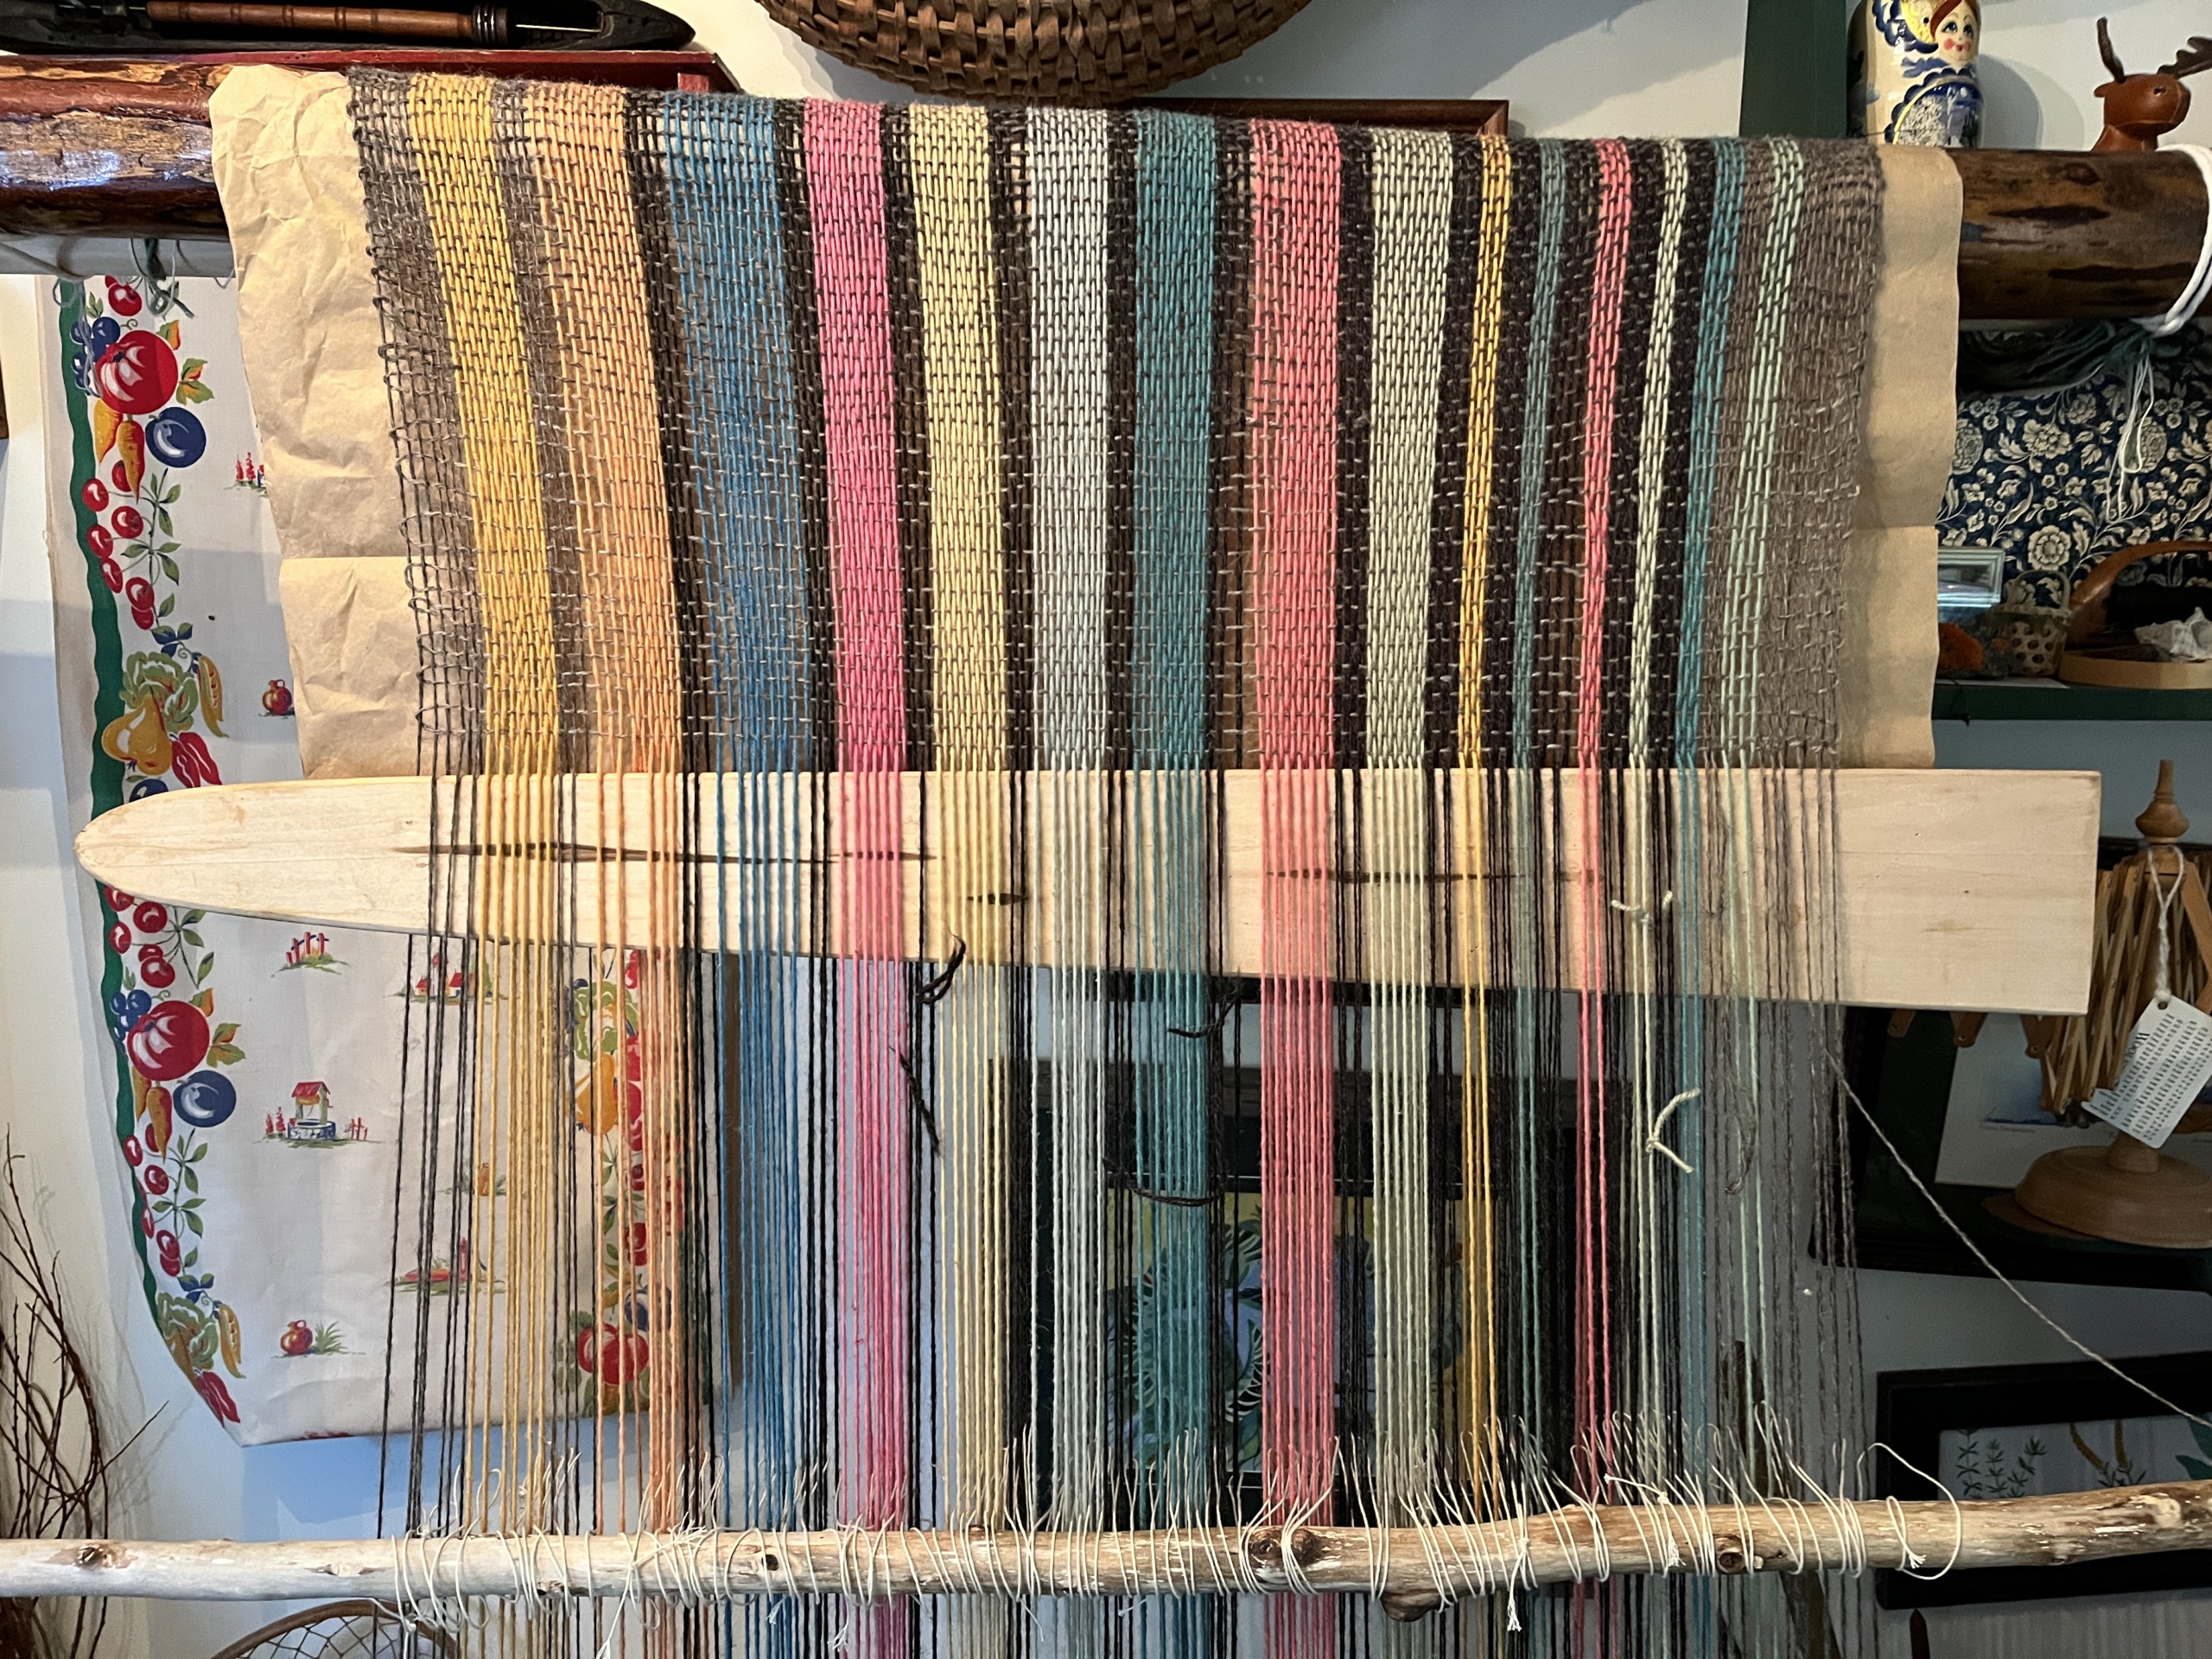
Warp-weighted loom weaving is a slow process. Each weaving shot is carefully placed, beat into position, and warp threads manipulated to help form the weave structure. It’s very calming and meditative. It is an opportunity that forces one to slow down and embrace the rich history and traditions that have been passed from one generation to the next, from one culture to another and enables weavers today to be reminded of just what it took to provide clothing for not only their families, but cloth which served as tax or tithe payments (vadmal) and perhaps even to serve as a sail for a community sailing ship. My project is a blanket, woven in one long length to be seamed to create a wider piece of fabric. A second woven band will be created and incorporated so the entire width will have the same finished edge. Once the cloth is finished, it will be lightly fulled. Time to start a fire in my cottage studio wood stove and get back to weaving.
 Kathy Sparks has devoted her life to researching traditional fiber arts, especially natural dyes. She can often be found foraging for plants to add to her dyepot or sitting at her wheel or loom.


Good on ya!
My challenge is the tablet weaving at the top braids into its own miracle and stumps my topper length. What to do… what to do..