

I’m of the generation whose mothers and grandmothers prided themselves on setting a beautiful table. And it all started with a cherished linen tablecloth. Often the tablecloth was a wedding gift, an heirloom passed down from one generation to the next, or in some cases a remembrance of a country and family left behind when settling in a new place. My love and appreciation of linen started when I was in high school, attending school in Antwerp, Belgium, while my father was working overseas. My mother always provided opportunities for our family to learn just about anything, and in this case the lessons included learning about Belgian linen and why it was so special.
Fast forward about ten years (early 1980s), while on a visit to my in-laws, my father-in-law, who was a wine maker, had decided to plant flax. He was interested in Early American History and customs, so it was natural for him to investigate whether flax could be grown in South Central Indiana. I was already a spinner and weaver, as well as a natural dyer by then, but living in the Pacific Northwest. And of course I really had no idea what was involved with the growing, processing, and preparation of flax in order to successfully spin yarn from this crop.
I retired from my professional teaching career around 2014, moved back to the family property that once served as the vineyard for the mom and pop winery my in-laws ran, and found myself with a little more free time on my hands. Outside of the fiber-related workshops I teach, I decided it was time to revisit the idea of whether flax could be grown and what it would take to turn this field crop into fabric and clothing. Boy was I in for a surprise!
First, let me say, if I was solely in charge of providing linen clothing and textiles for my family, well, we’d all be wearing our birthday suits. It is a time-consuming process, with many steps and phases, and there is a lot of waste. We live on a ridge top in the rolling hills, so our soil is not ideal. But with amendments (bunny and horse manure) and the use of a tractor with a PTO Rototiller, I soon had a patch of ground ready for planting. I researched the different varieties of available flax seed and decided on a couple of varieties to try: Avian, Nathalie, and Marilyn.
My planting time was before mid-March as flax can withstand some chilly weather and even snow. I spread the seeds by hand, gently raking them with a flexible rake and covering with a thin layer of straw to reduce the number of weeds later in the season. My flax sprouted within two weeks. Since we have good rainfall most of the spring and into the summer, there really was no need to provide extra water.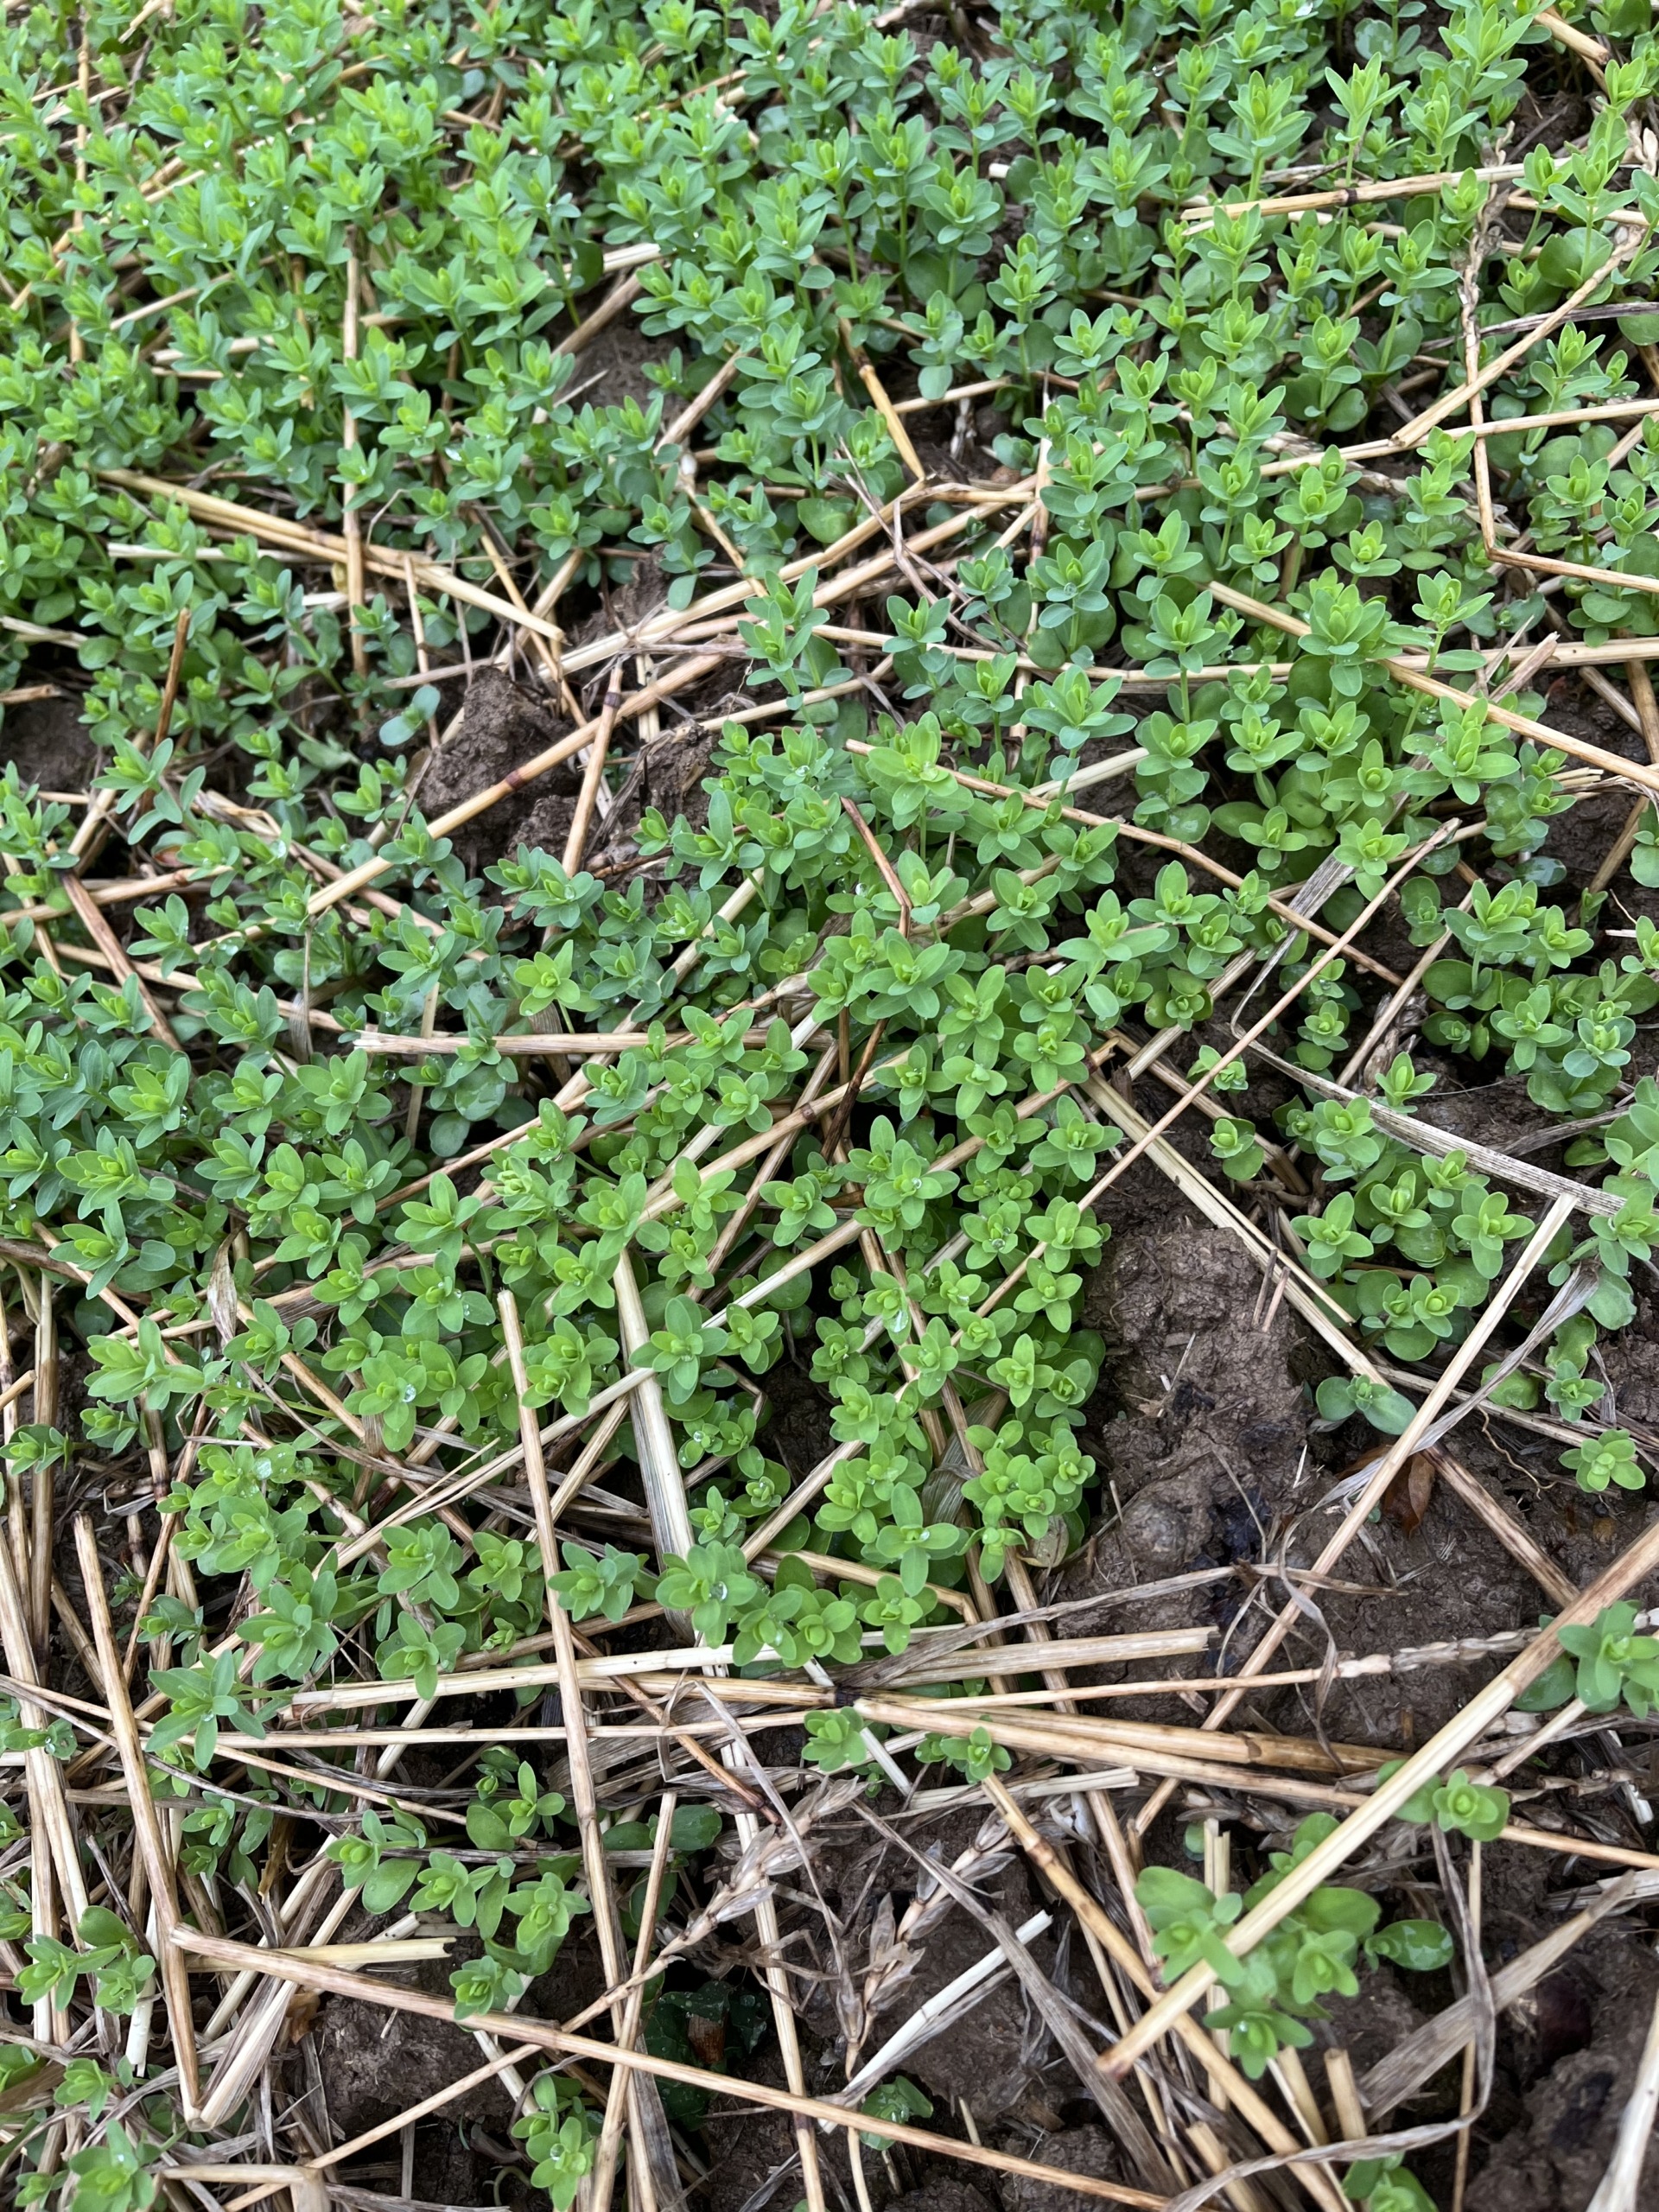 The straw barrier worked well to keep down the weeds. I did need to fence the patch as it appeared that I sited it in a deer “trace” or the normal route the deer used to walk across my property. Flax is not bothered by insects and is rarely munched on by critters. It is, however, subject to lodging, which is when the tall erect growing flax is knocked down by rain or hail and doesn’t have the strength to stand back up. Lodging can also be due to planting the flax plants too close together; by doing so, the individual plants are thin and don’t have the strength to support their upright growth.
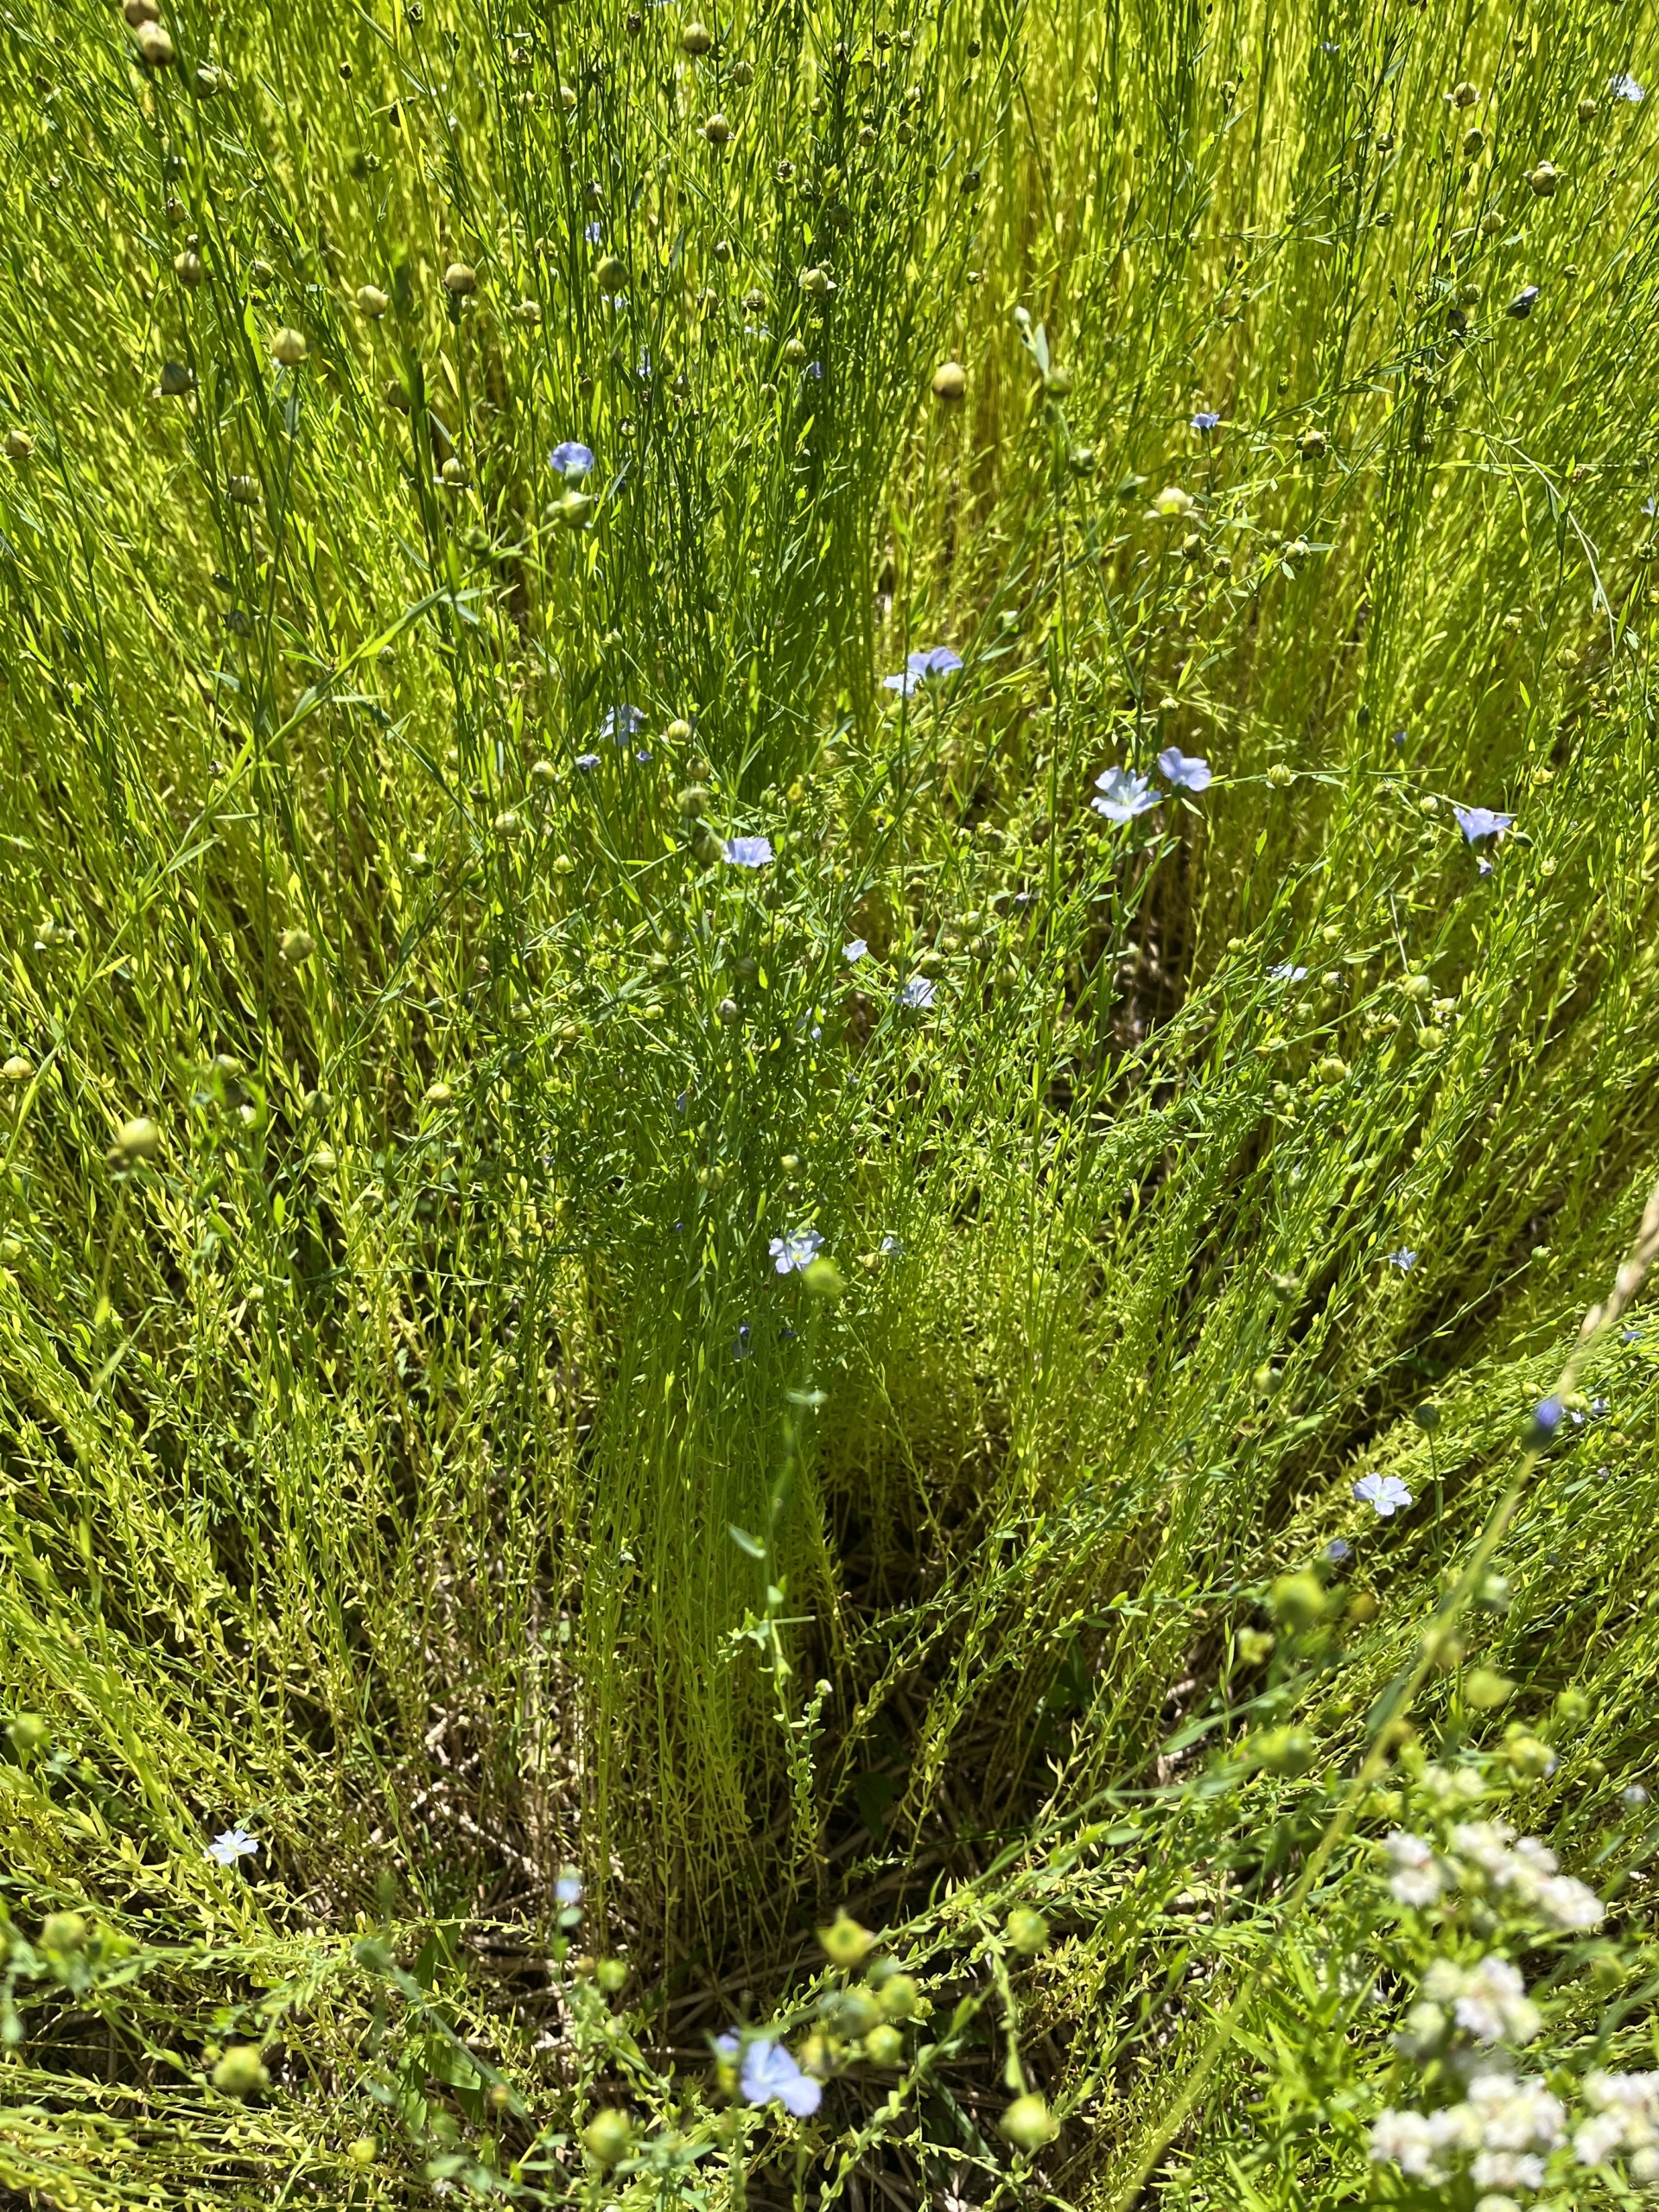 From planting to harvest, flax is ready to be pulled from the ground in about 110 days. By this time, the beautiful blue flowers have appeared and the seed bolls are forming, the stalks are about 36 inches tall and the bottom leaves are starting to turn yellow to brown. Not all flax plants mature at the exact same time, so when I harvest the flax, some have flowers still present and some have seed bolls but most of the plants do have the lower third of their leaves turning yellow.
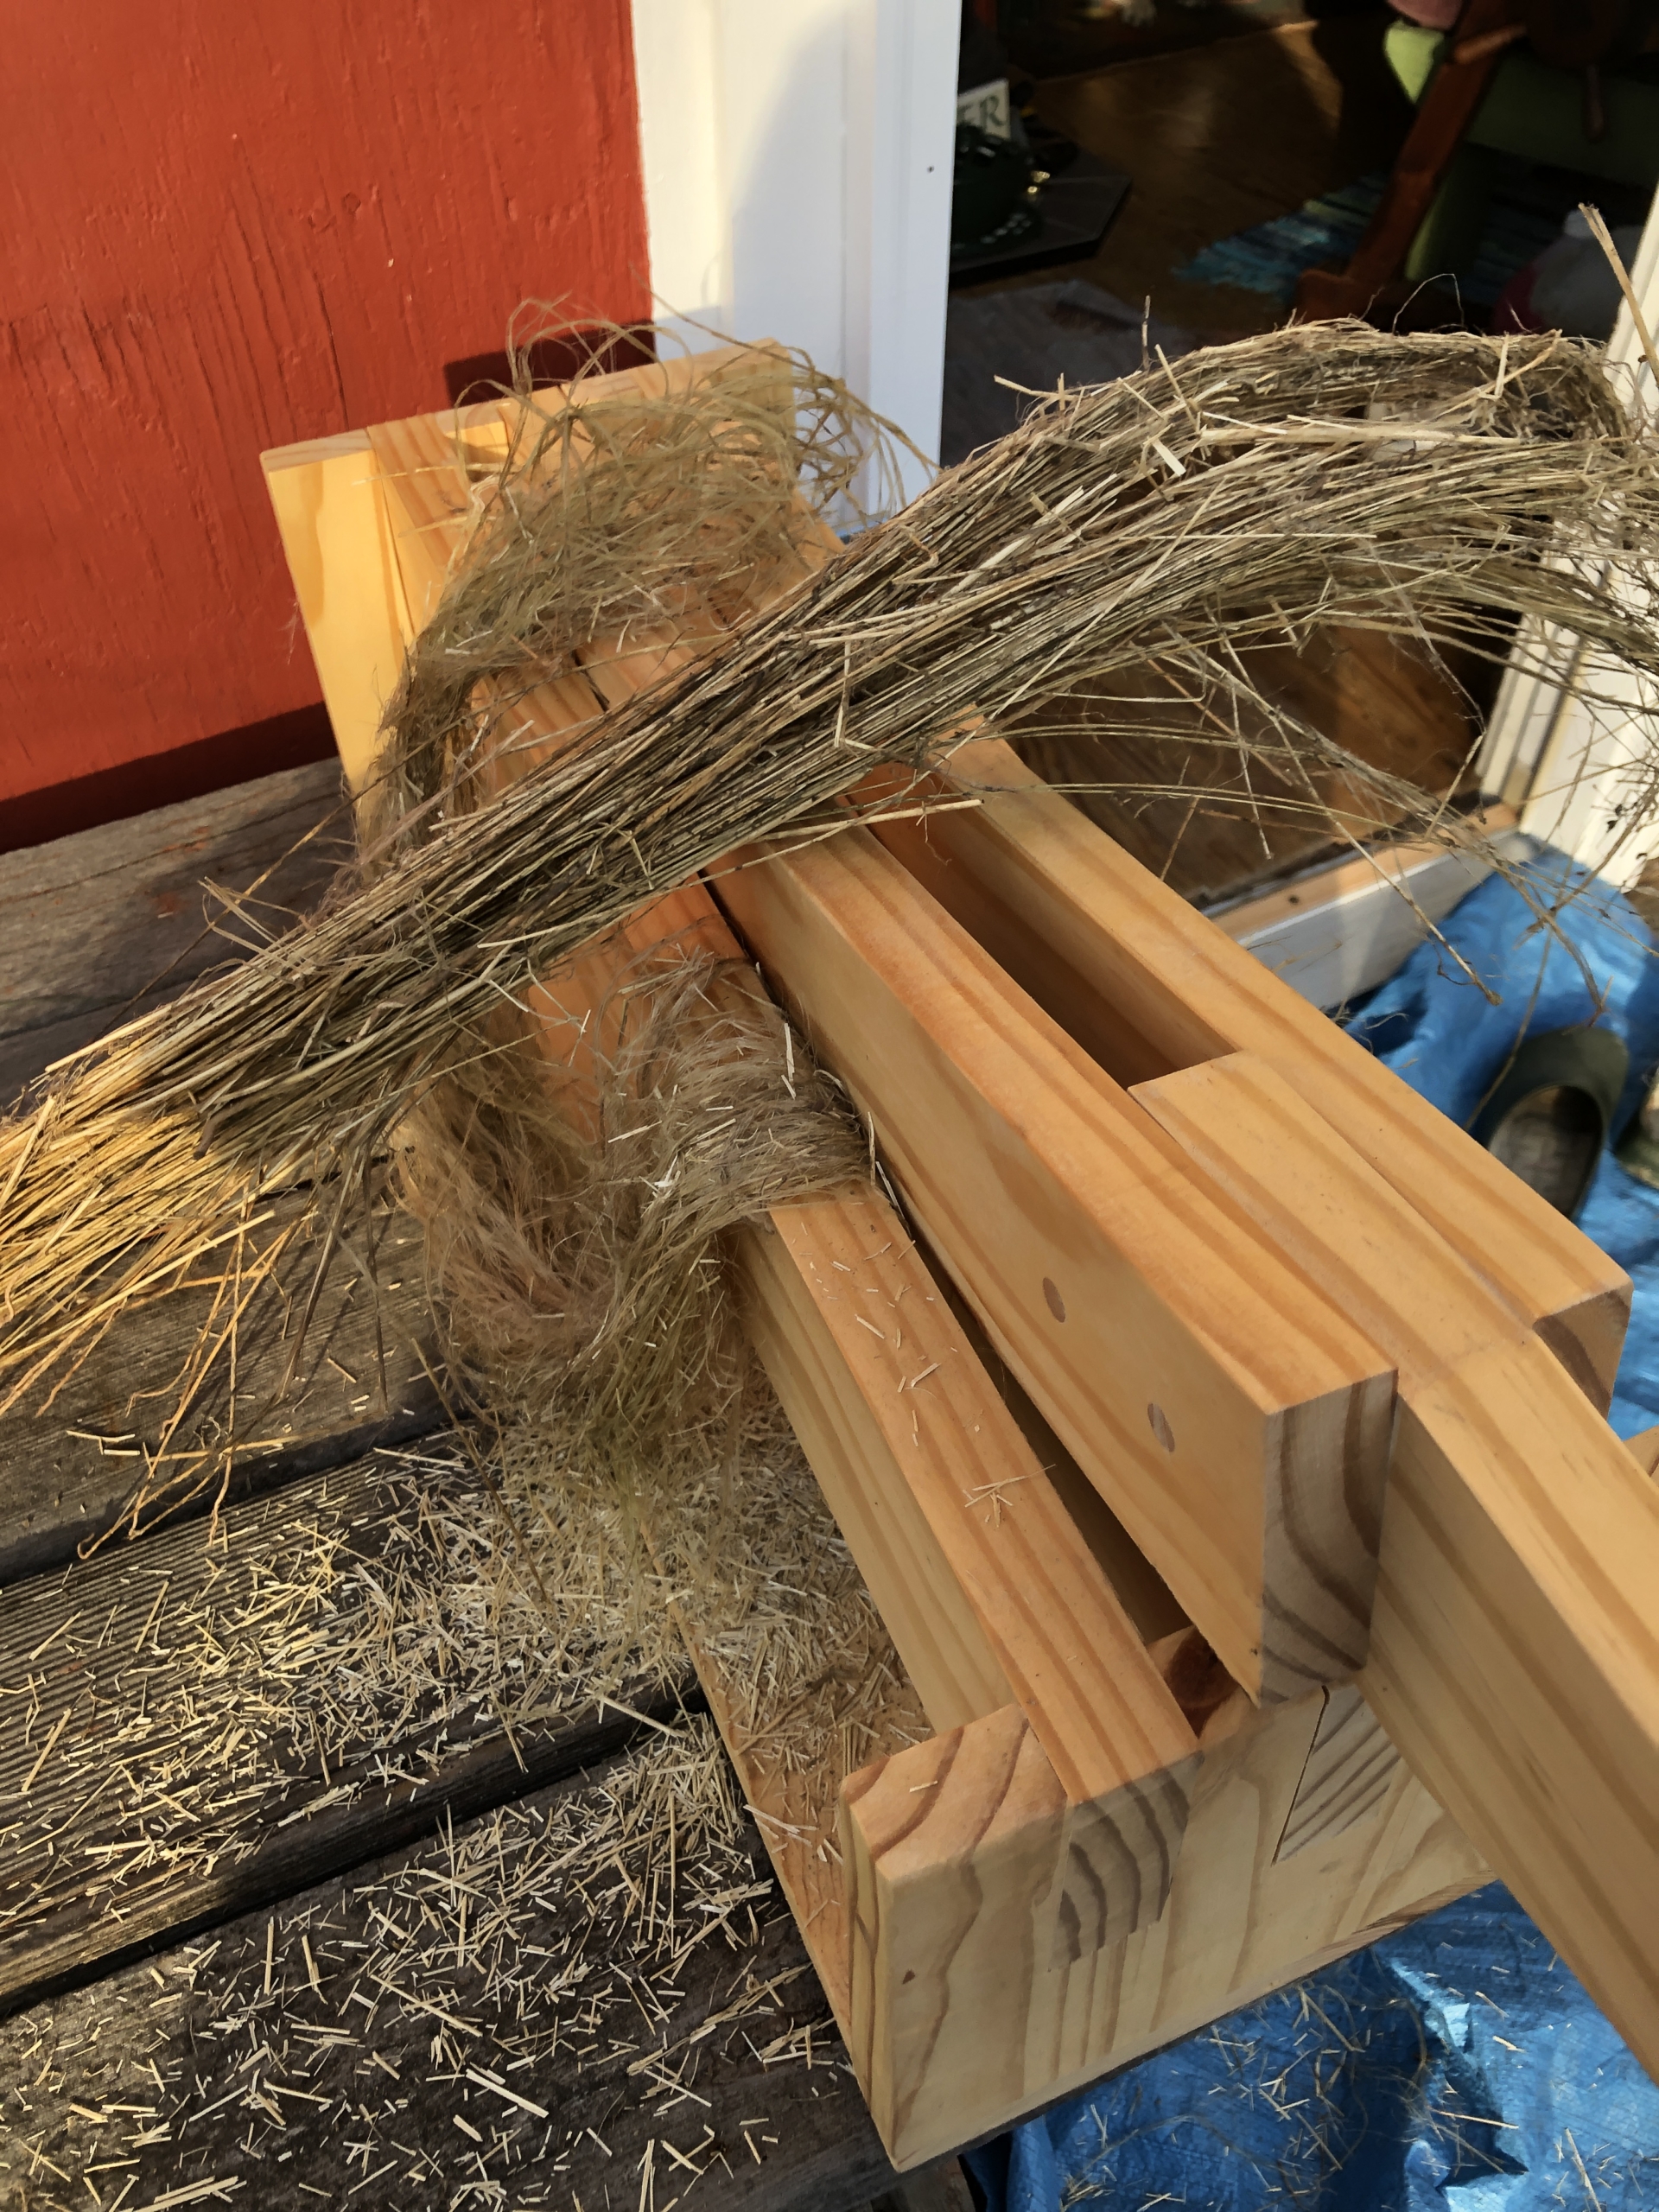
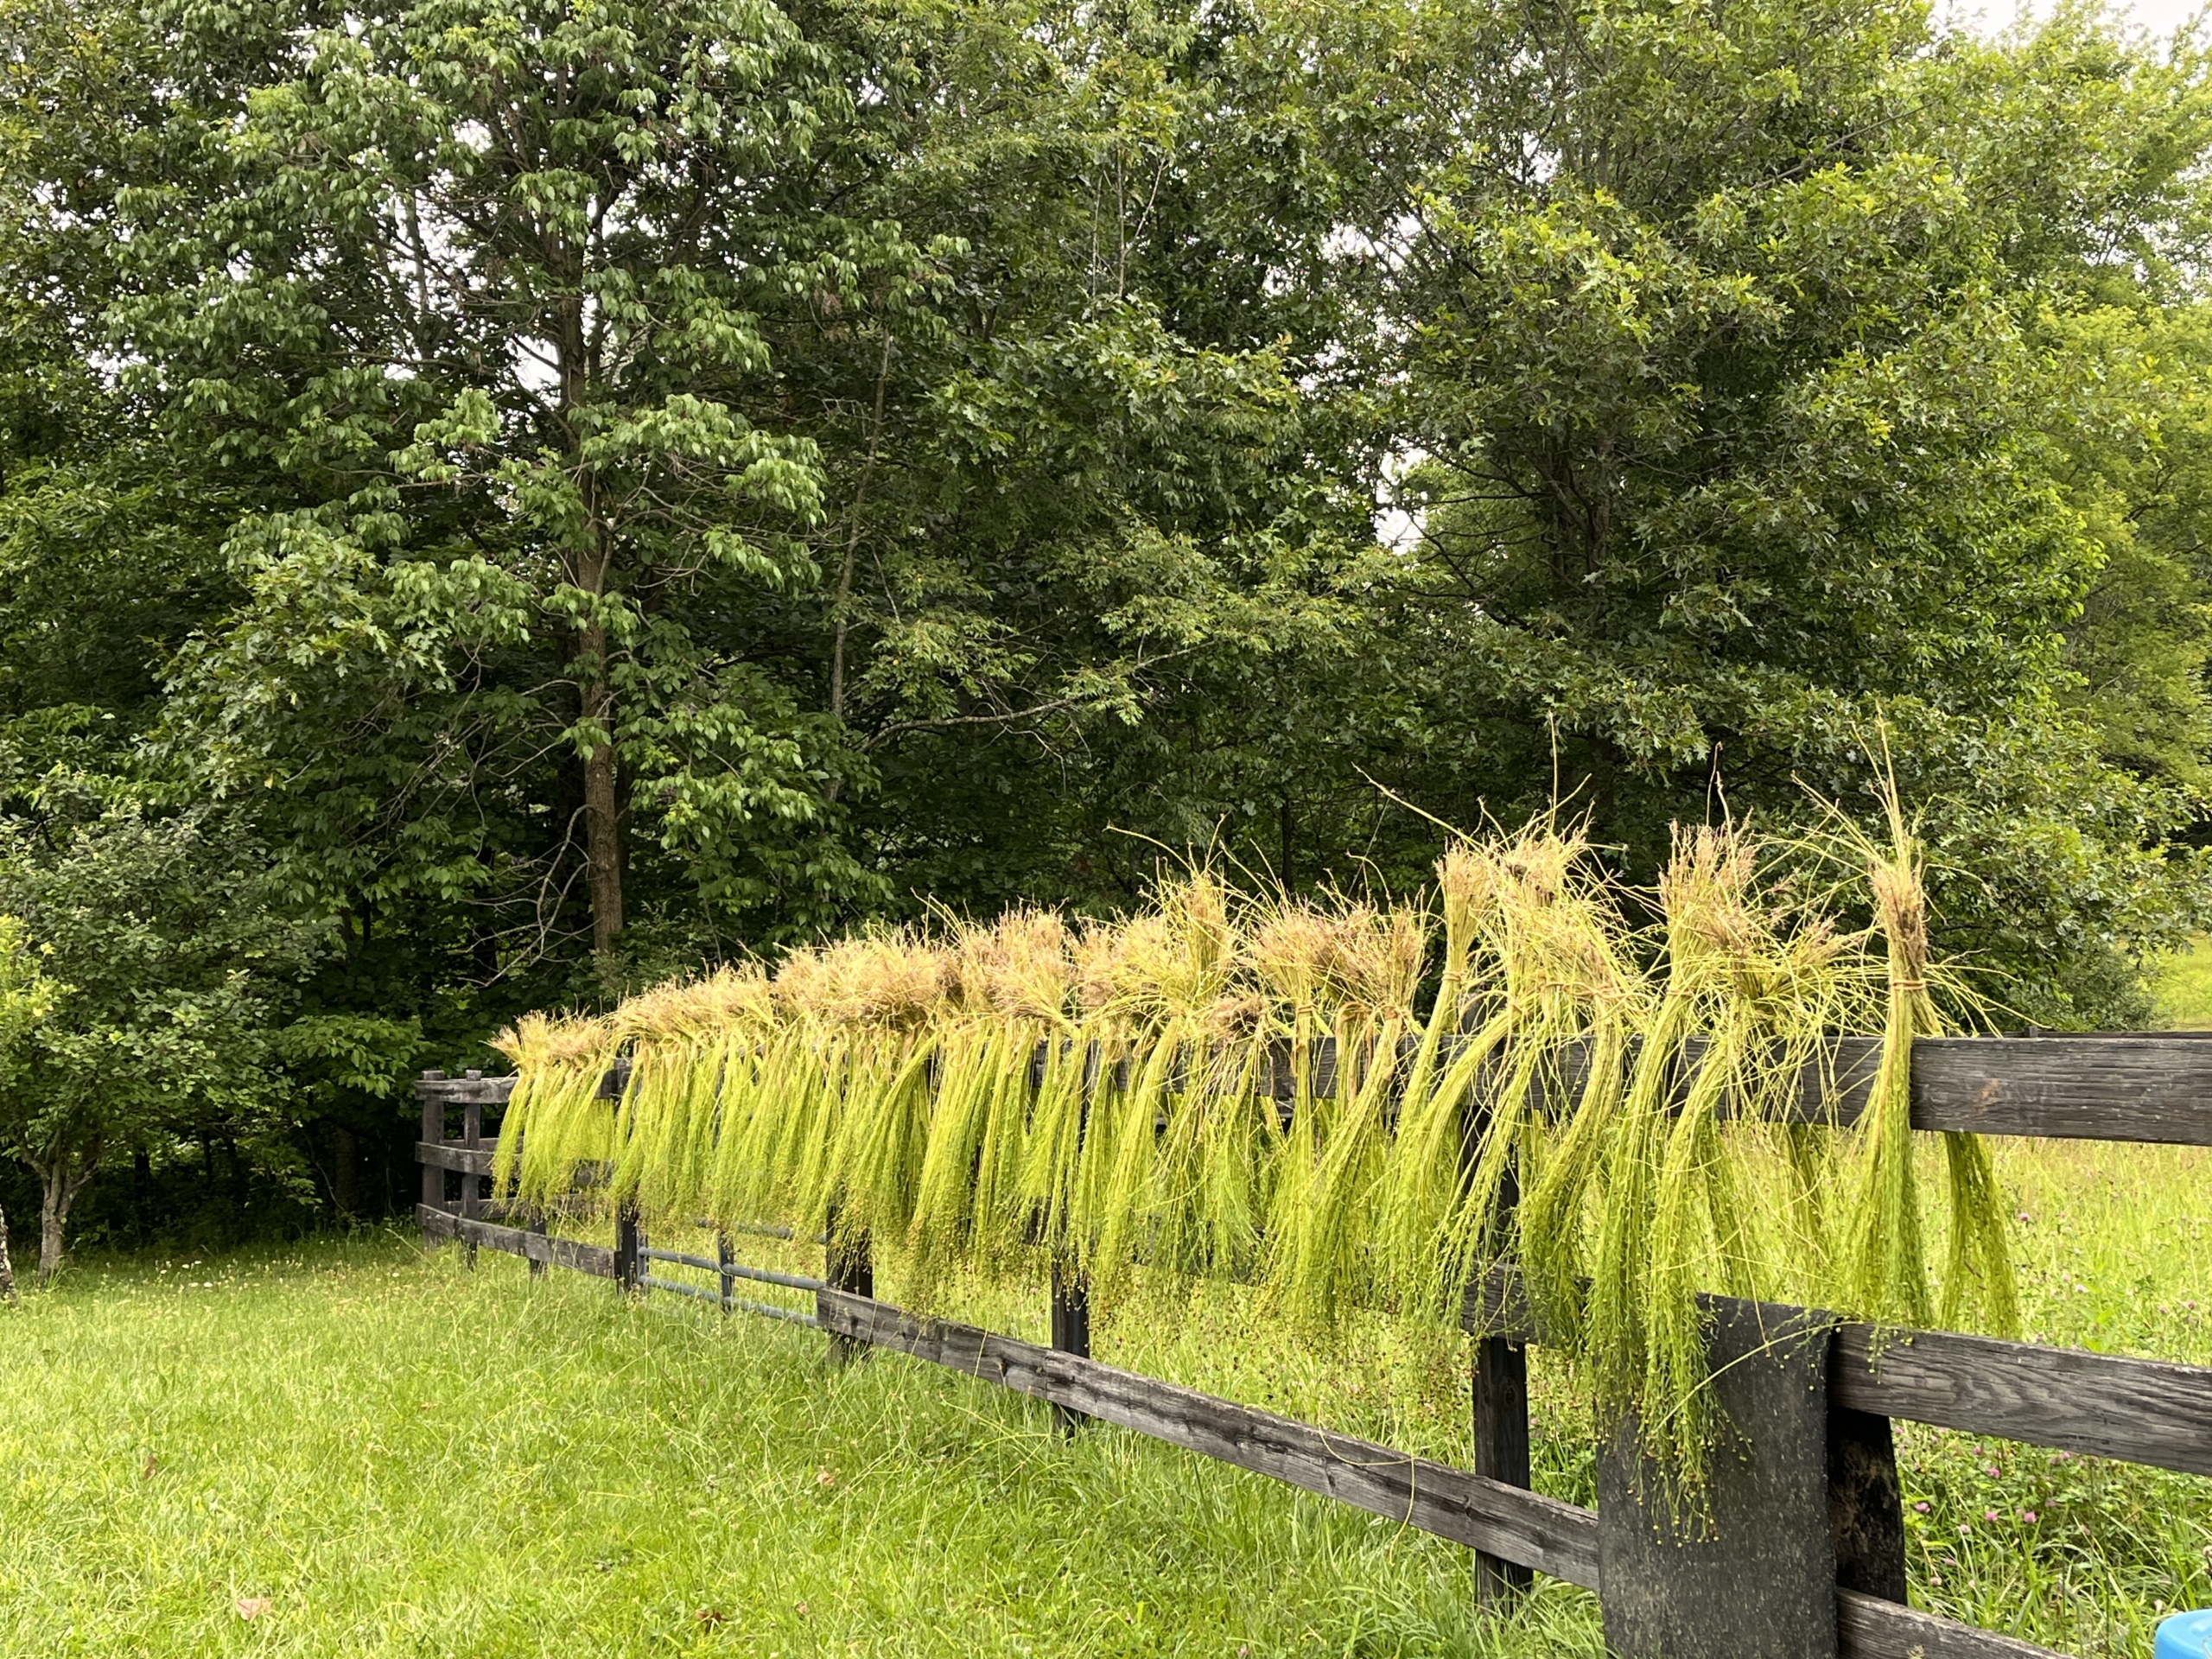 After pulling the plants from the ground, I tie them in bundles in groups that I can comfortably hold in my hand. They then hang on a fence to dry, if the weather is good, or inside my barn. Once dry, I remove the seed heads and save the seeds for next year’s crop.
The next step for the bundles is to go into the retting bath. Using a shallow water trough and weighting the bundles with some thin concrete pavers, I add water to cover and let the retting bath work its magic for about 7–10 days, depending on the air temperature (shorter if hot weather, longer if cool).
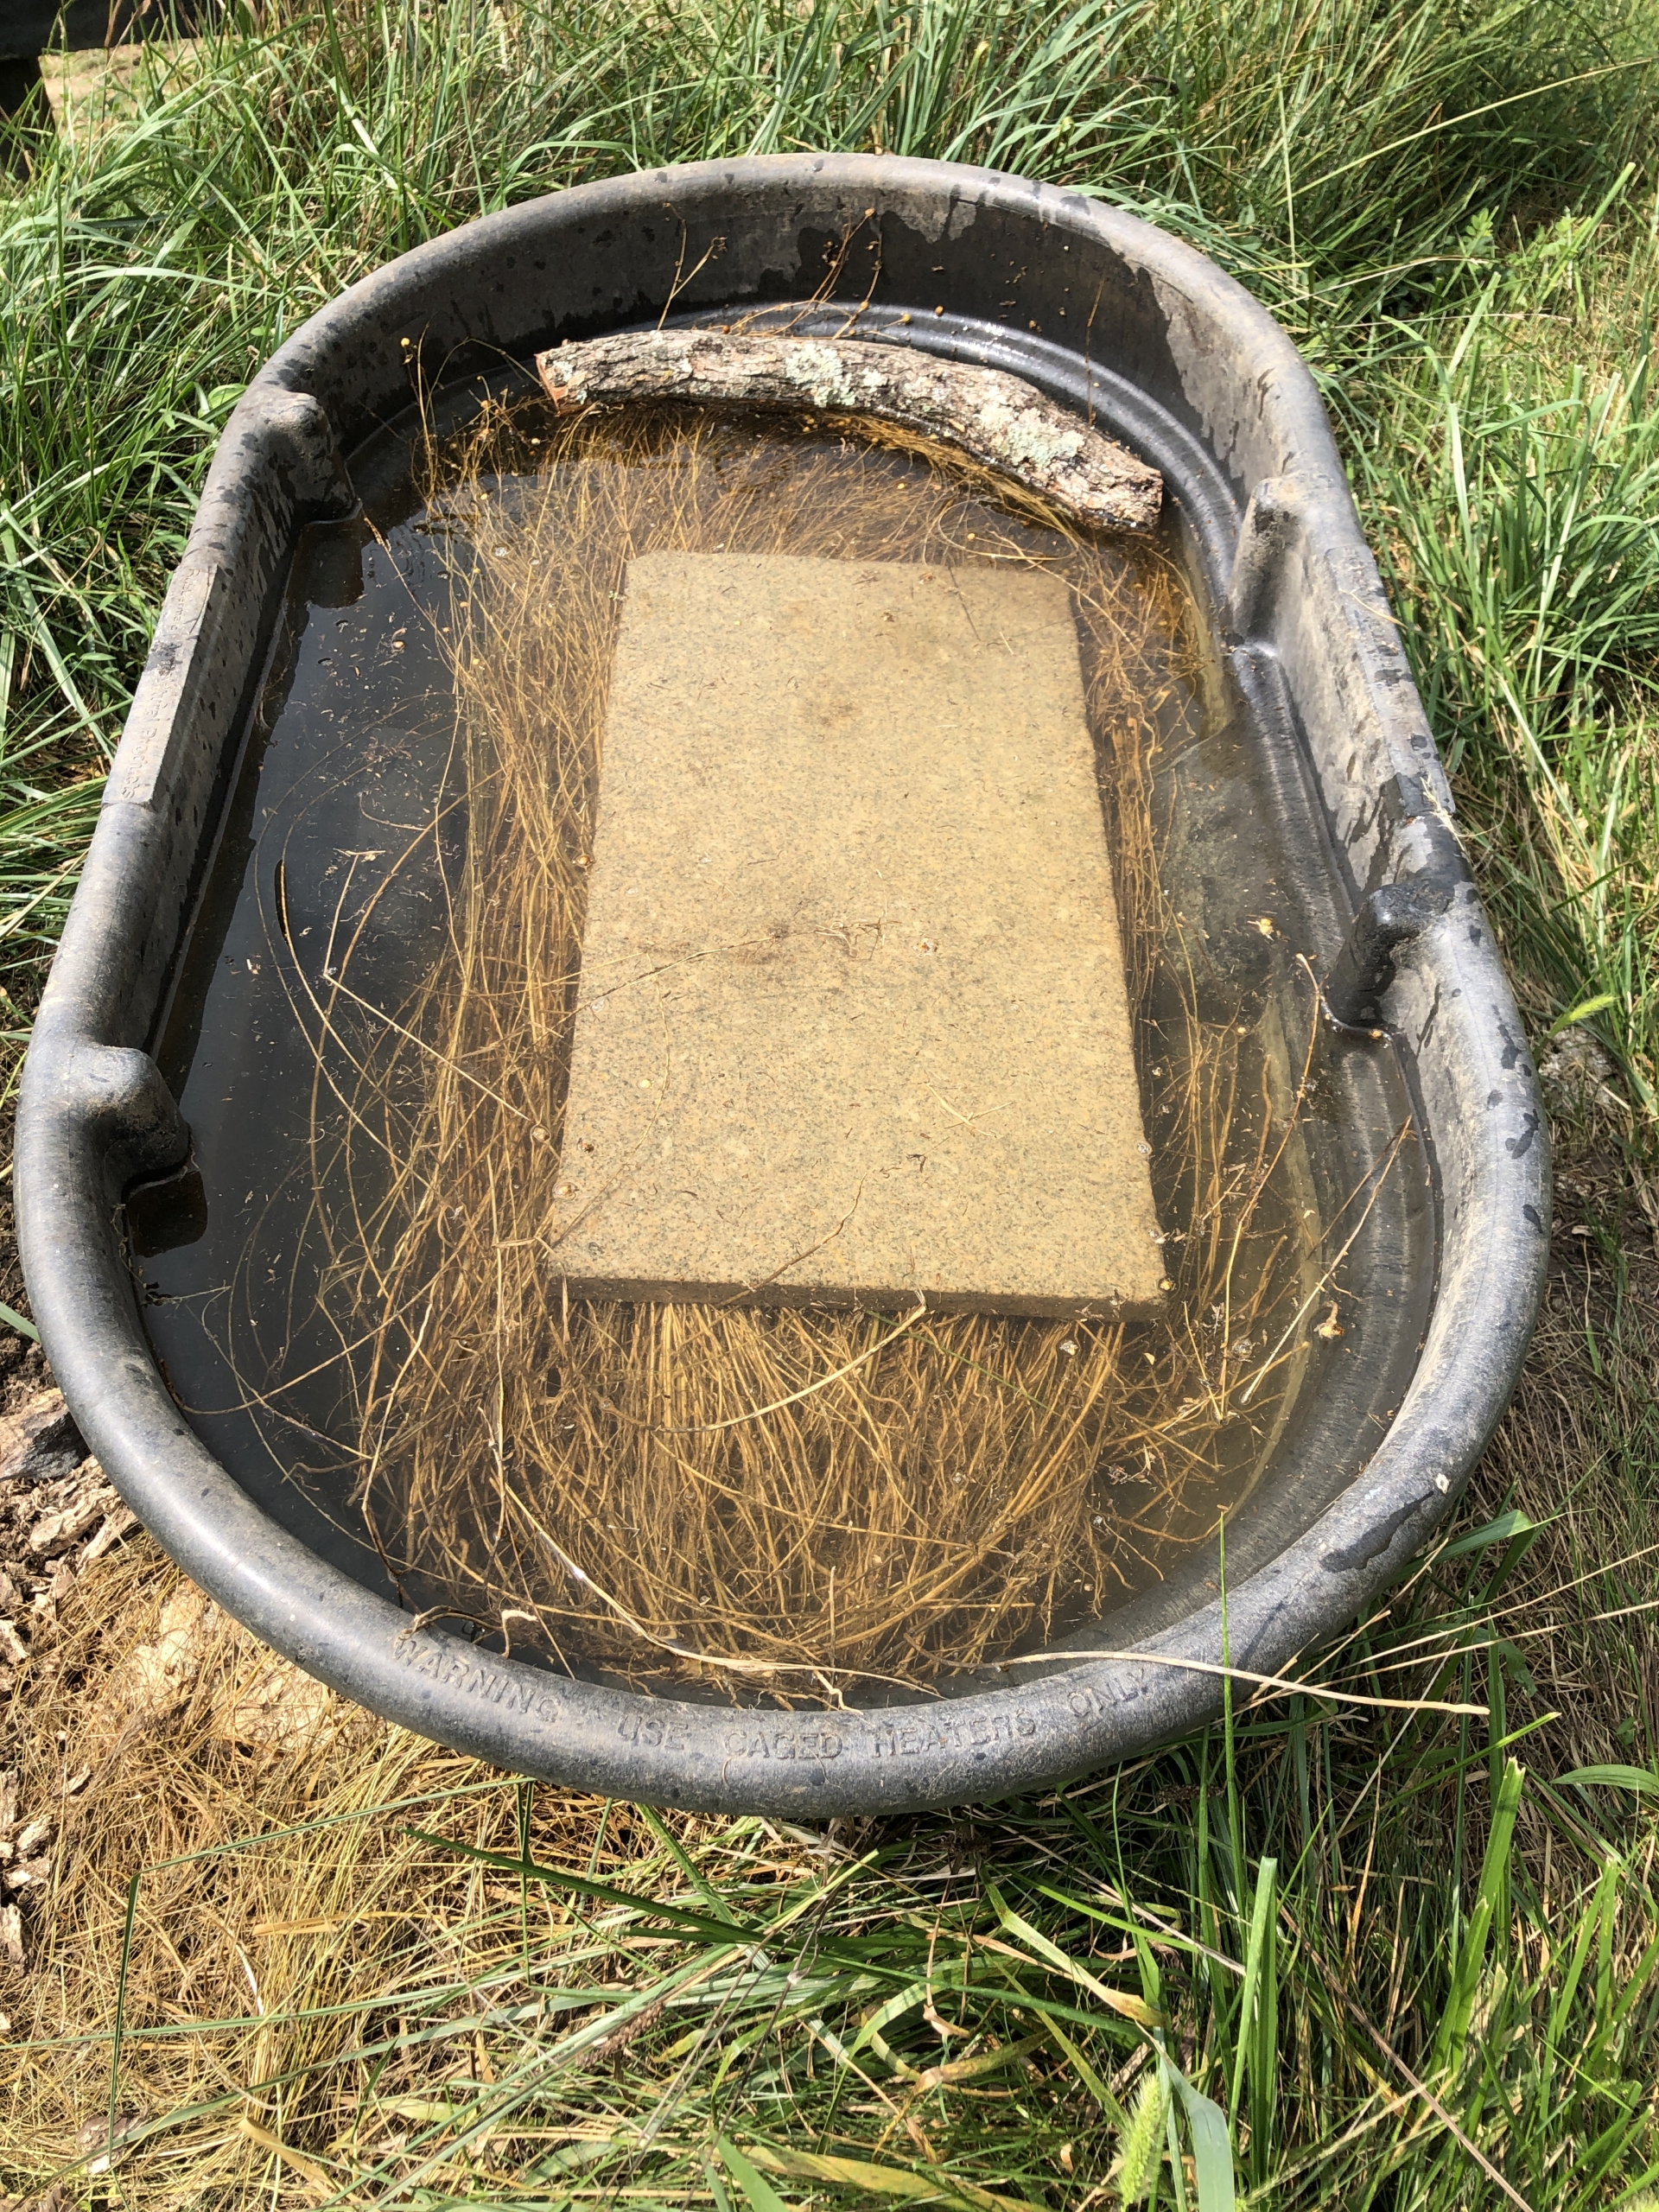 During the retting, bacteria begin the breakdown of the outer plant covering, enabling access to the inner fibers which we prefer for spinning. Some sources recommend that you replace part of the water in the retting bath partway through the process, which helps to remove any waste products generated by the bacteria and helps to keep the bath active. You can be as scientific or as casual as you want with retting. You can monitor the pH of the retting bath carefully and observe when there is a change, which can indicate when the process is nearing completion. If the fiber is under retted, it can be returned to a retting bath, but it is easy to go too far, letting the fiber stay too long in the bath, which results in fragile fiber. It is best if the retting bath is located well away from your dwelling as it does produce a smell which can be unpleasant.
 After retting, the bundles are dried again, and then it is on to the breaking, scutching, and hackling of the fiber. Breaking mechanically “breaks” the outer covering further so it falls, and by scutching, any remaining bits are removed as well. Hackling is the process by which the long fibers (line flax) are combed out and separated from the shorter fibers (tow). Both fiber lengths can be spun and historically had different end uses in textiles. Hackles, the series of sharp metal teeth used to produce the prime flax for spinning, can come in different densities – coarse, medium and fine. When working through the flax, there is about 80–90 percent waste, sadly.
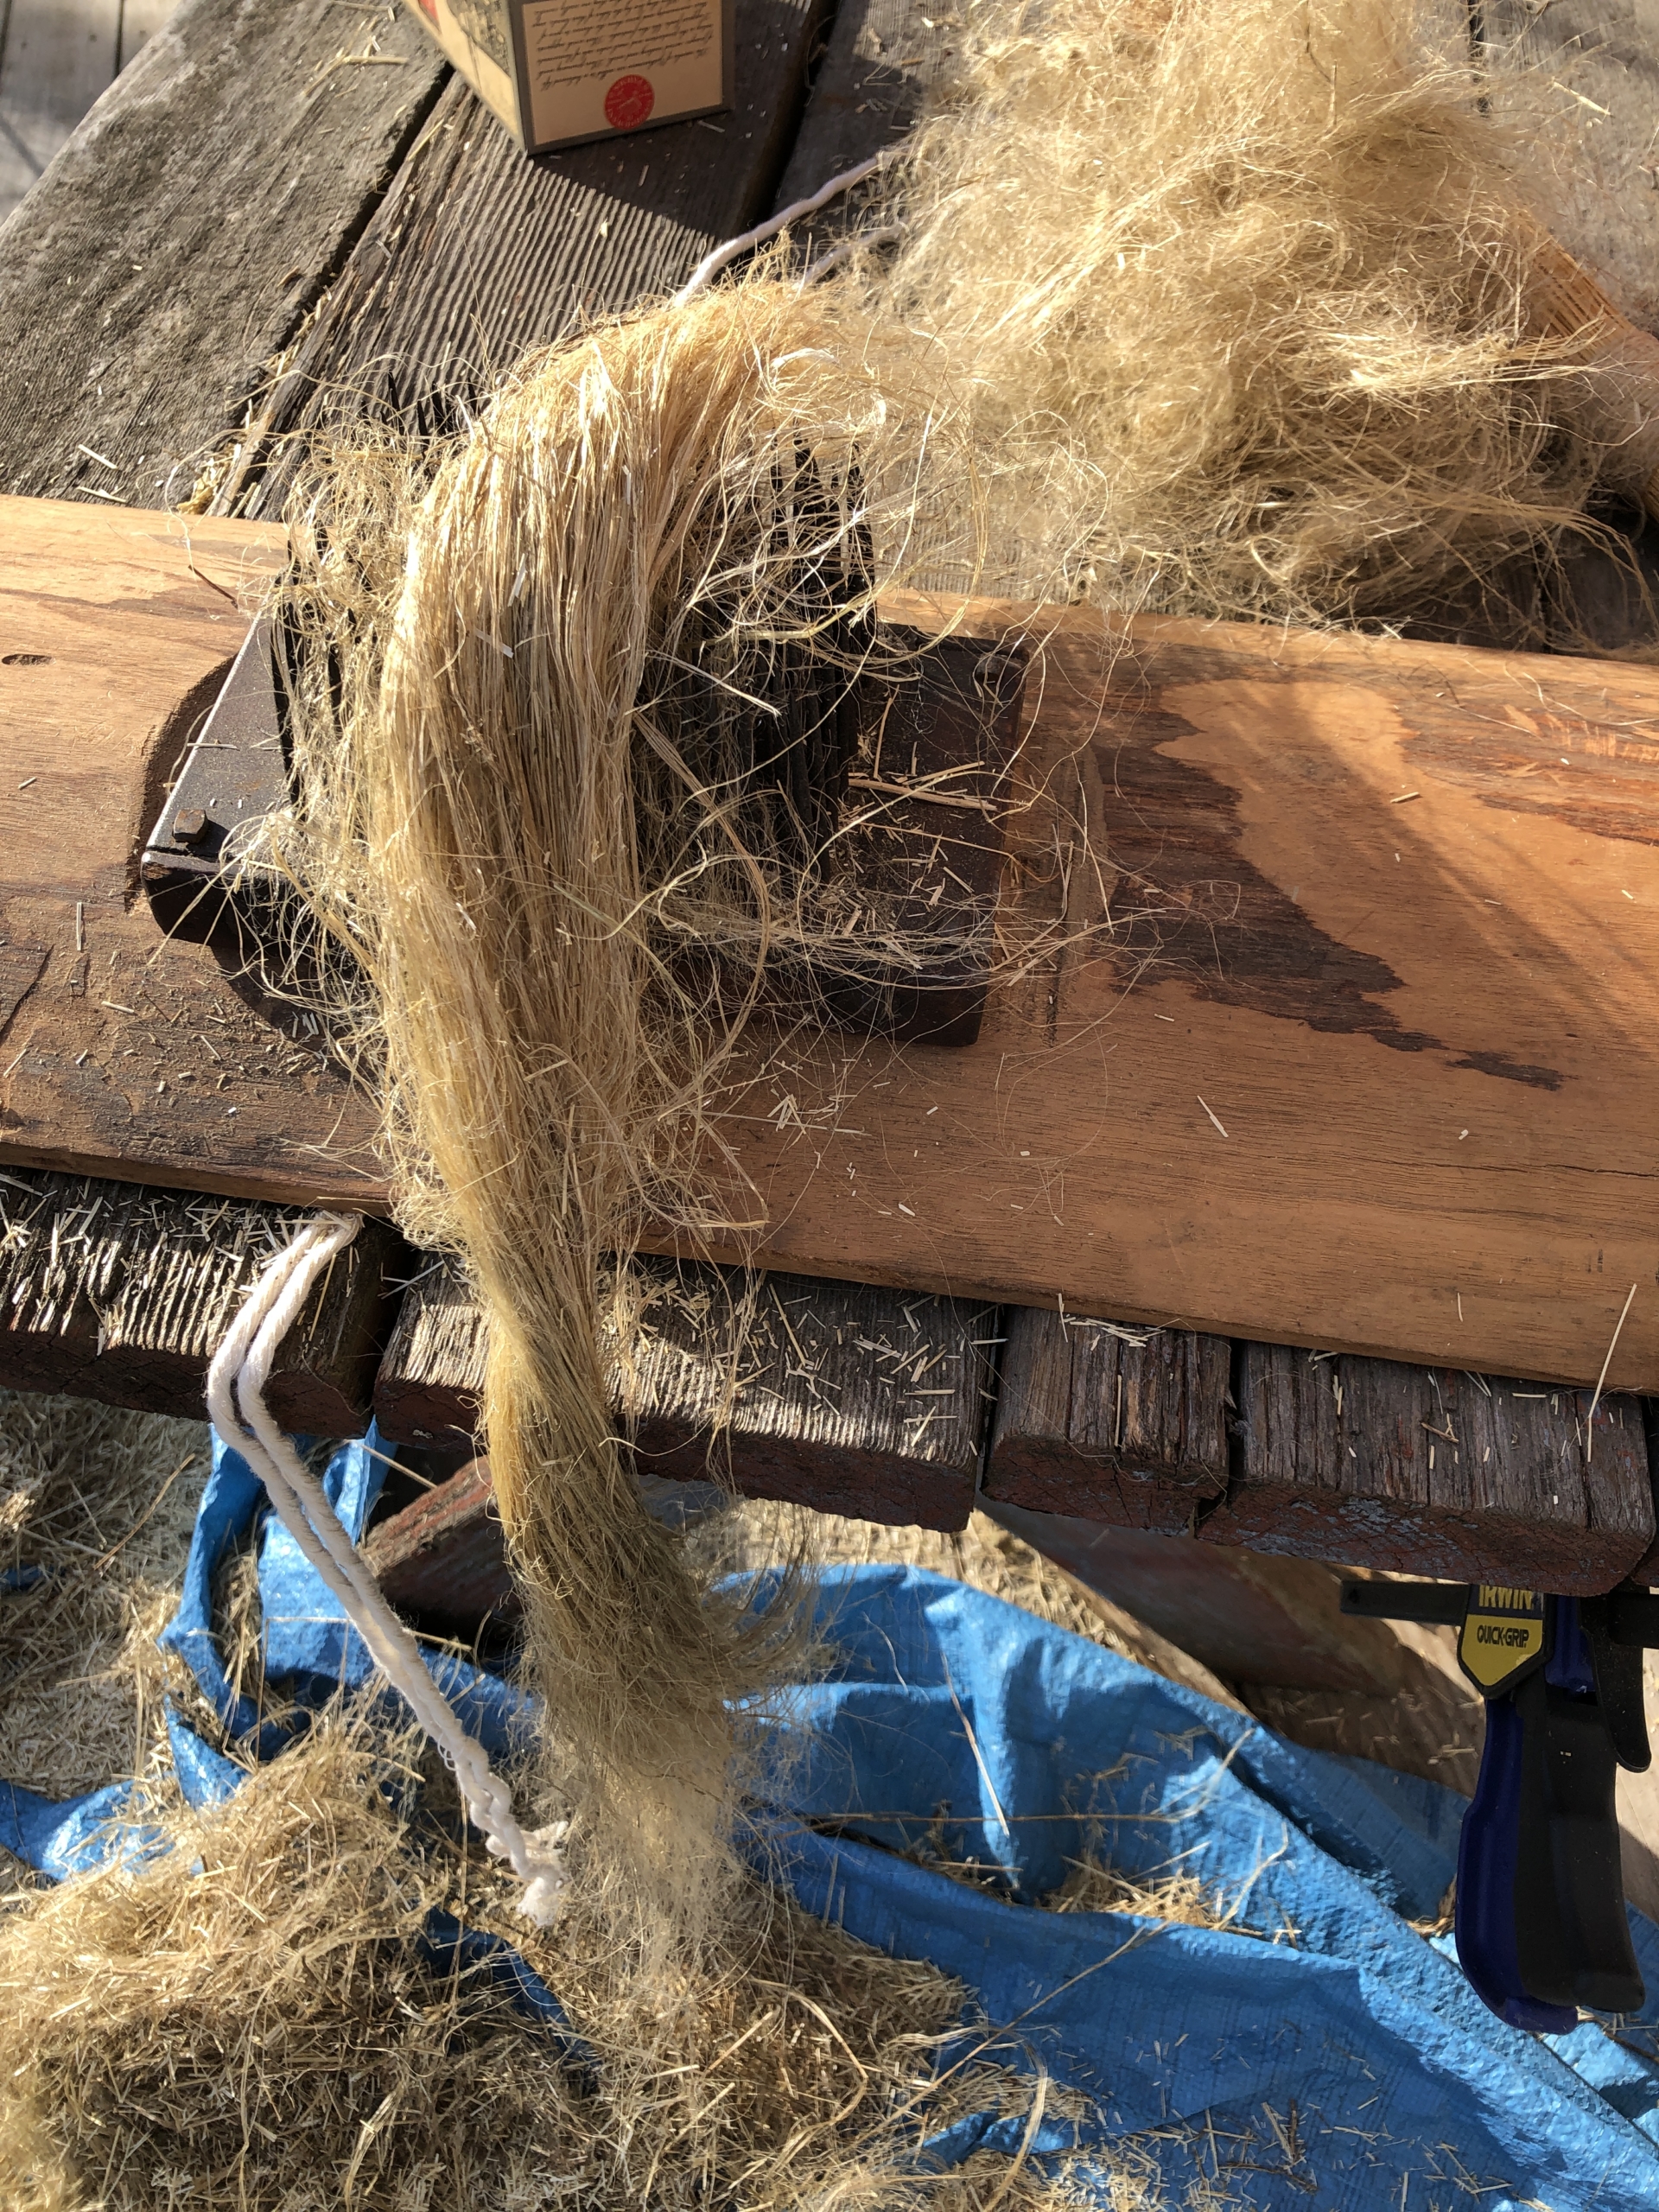
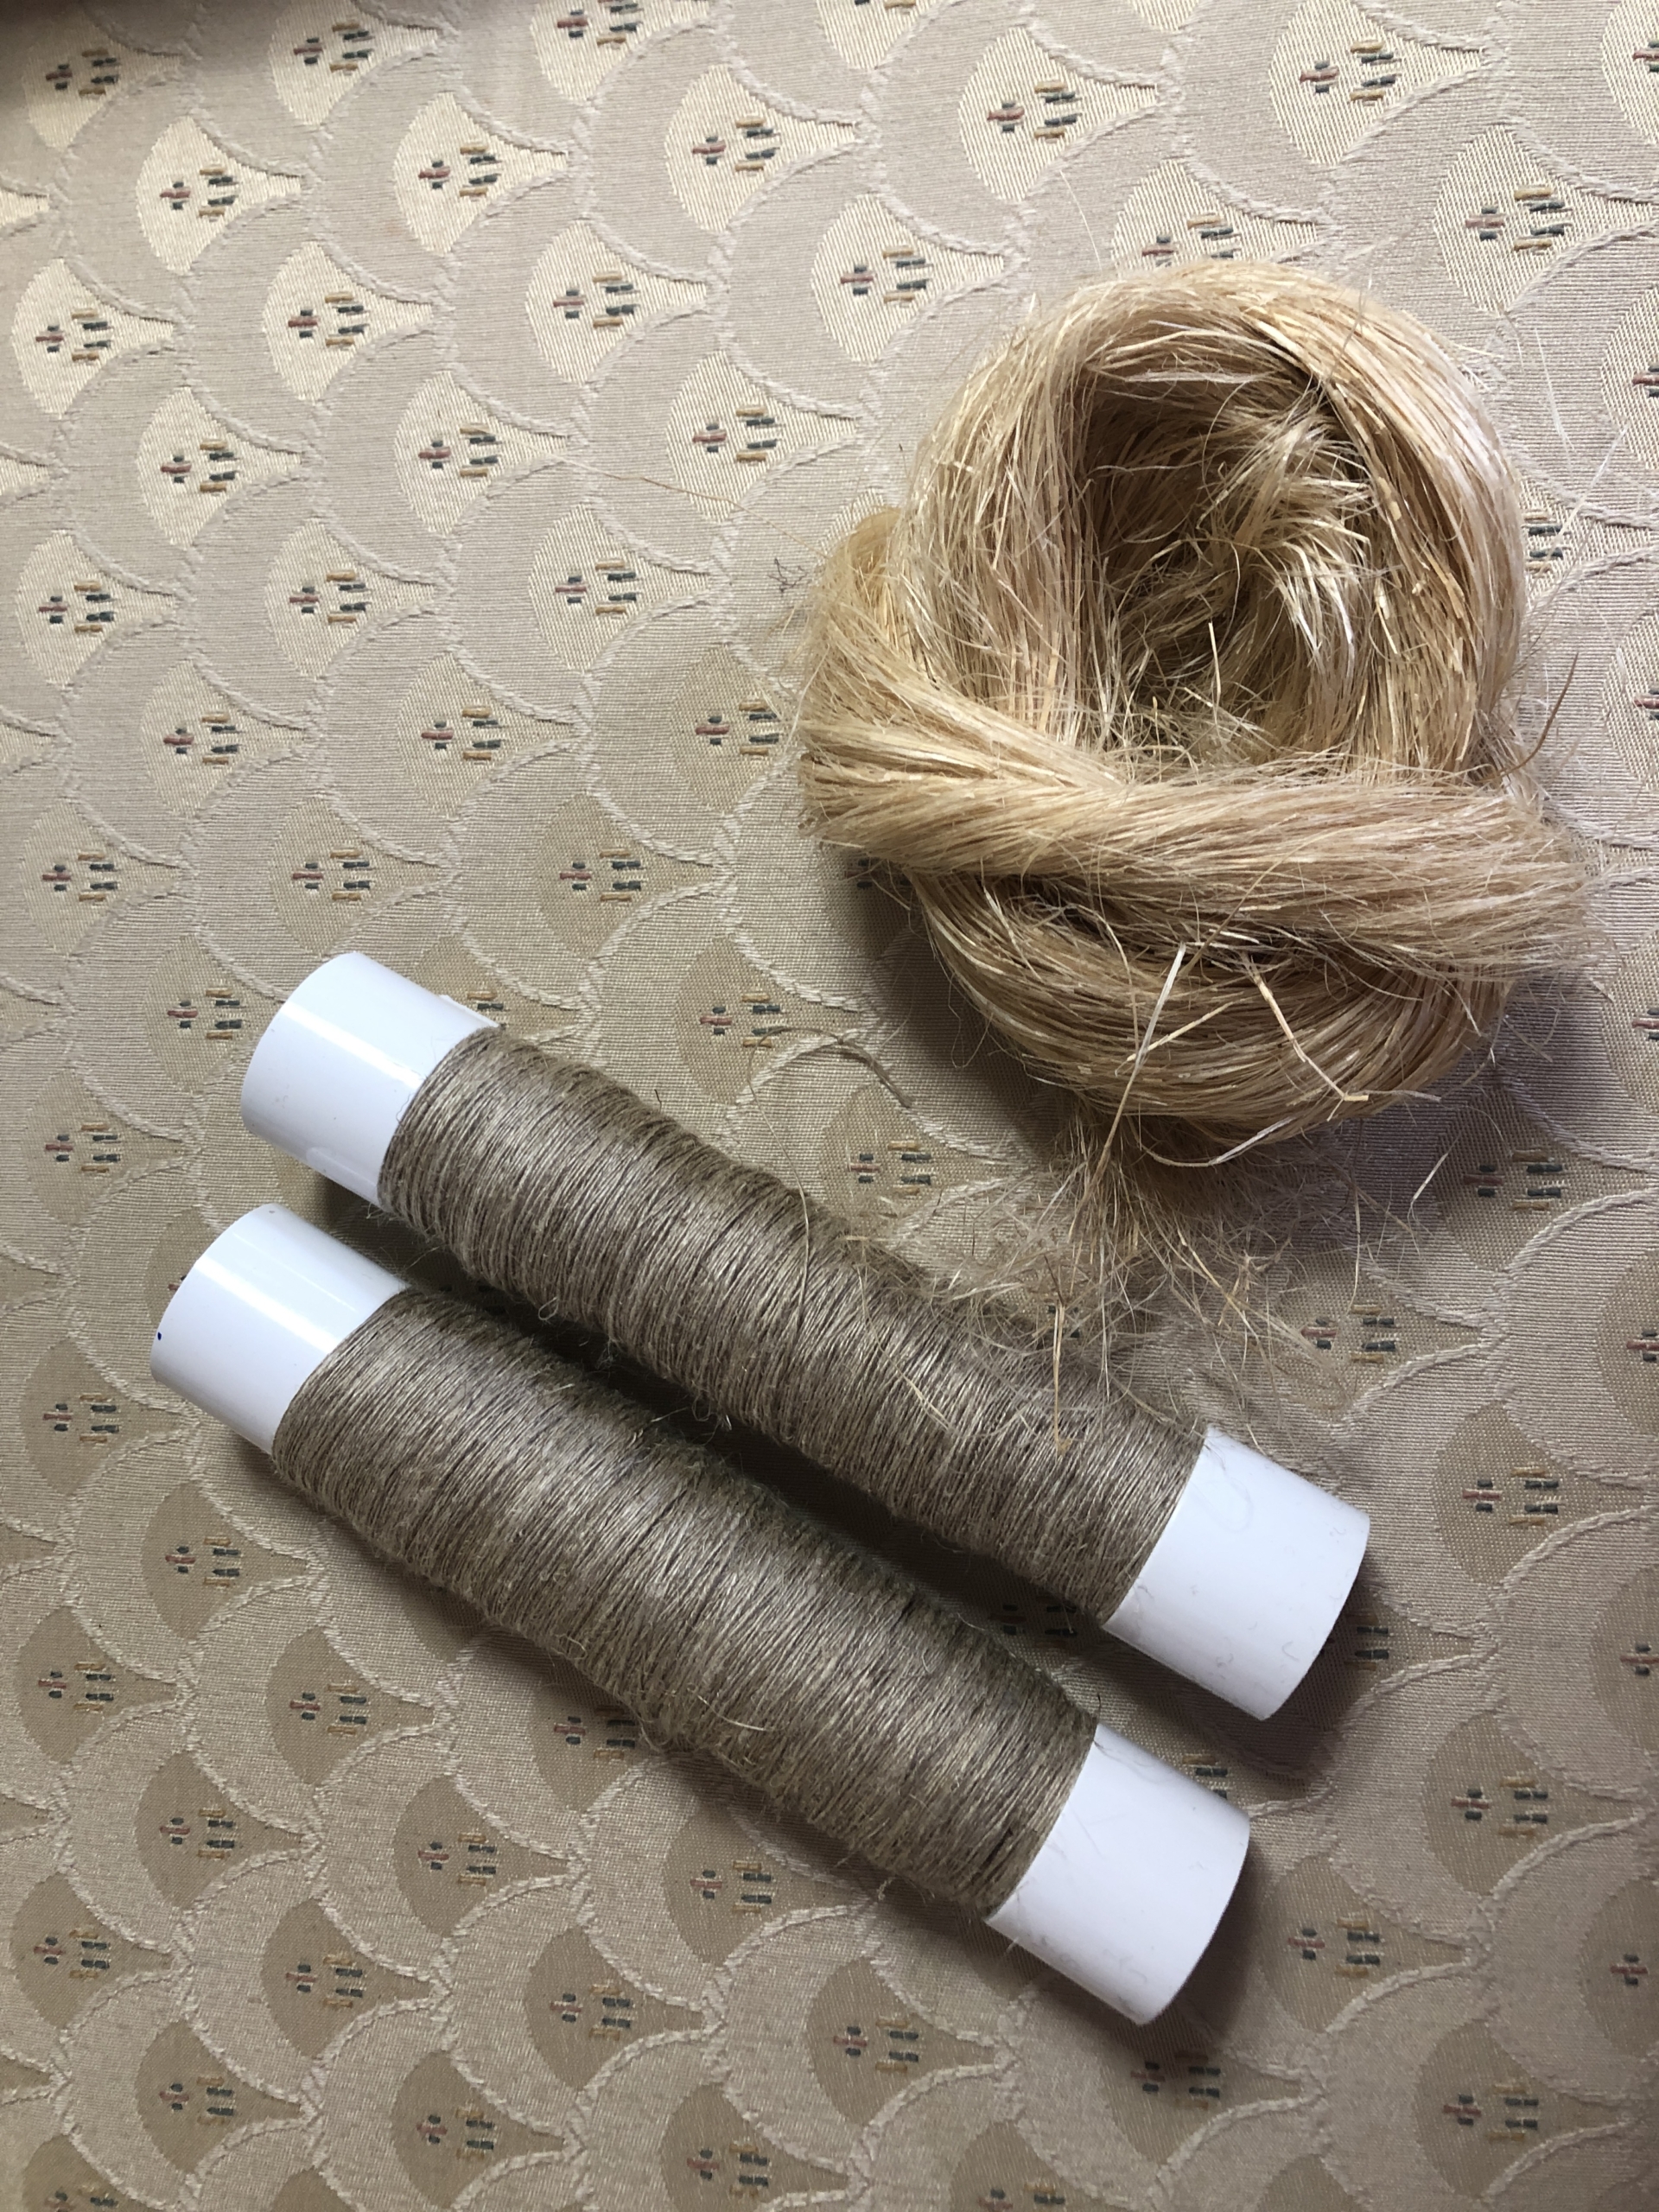
Many spinners will give their hackled flax fibers one last comb before they sit down at their wheels. To do this, I either use an old set of wool cards which have very loose teeth; another option is to use a traditional flax brush made from horse hair. A mushroom brush is a good substitute for the traditional brush. Now on to spinning!
Spinning results in the flax being renamed linen once the yarn is produced. There are all kinds of traditions and suggestions for spinning flax, everything from it must be spun with your wheel rotating in a counterclockwise direction as that’s “the way the flax plant grows” to it can only be spun wet, preferably with moisture coming from your own saliva. I have spun flax wet, I’ve spun it dry. I prefer not to use spit or lick my fingers to moisten it as there is still a bacterial component on the fiber from the retting process. I’ve had my wheel turn in both directions as well, and I’ve spun singles and plied my linen yarns too. The best suggestion is to read the many excellent books available on flax and linen or take a workshop and arrive at your own conclusions.
 The use of a distaff to organize the long line flax fibers can be helpful during the spinning process. Distaffs come in all sizes and shapes, and each culture appears to have its own unique style. A simple distaff can be made using a tree branch, but even simpler yet, the long fibers can be rolled up in a tea towel and laid across the spinner’s lap. Regardless of how the fiber is organized, I have found that during the spinning, the towel will need to opened and rerolled as the fibers are spun into yarn, or if the fiber is on a distaff and secured with a ribbon, the ribbon will need to be loosened and retied to secure the fiber after awhile.
To finish the yarn after spinning, I skein the yarn, using many skein ties (flax likes to cling to itself). Into a mild soda ash bath it goes to help remove any remaining pectins and bacteria from the retting process. It is critical that the linen yarn be rinsed while still hot as the pectins will stick back onto the yarn, and they are very hard to remove at that point.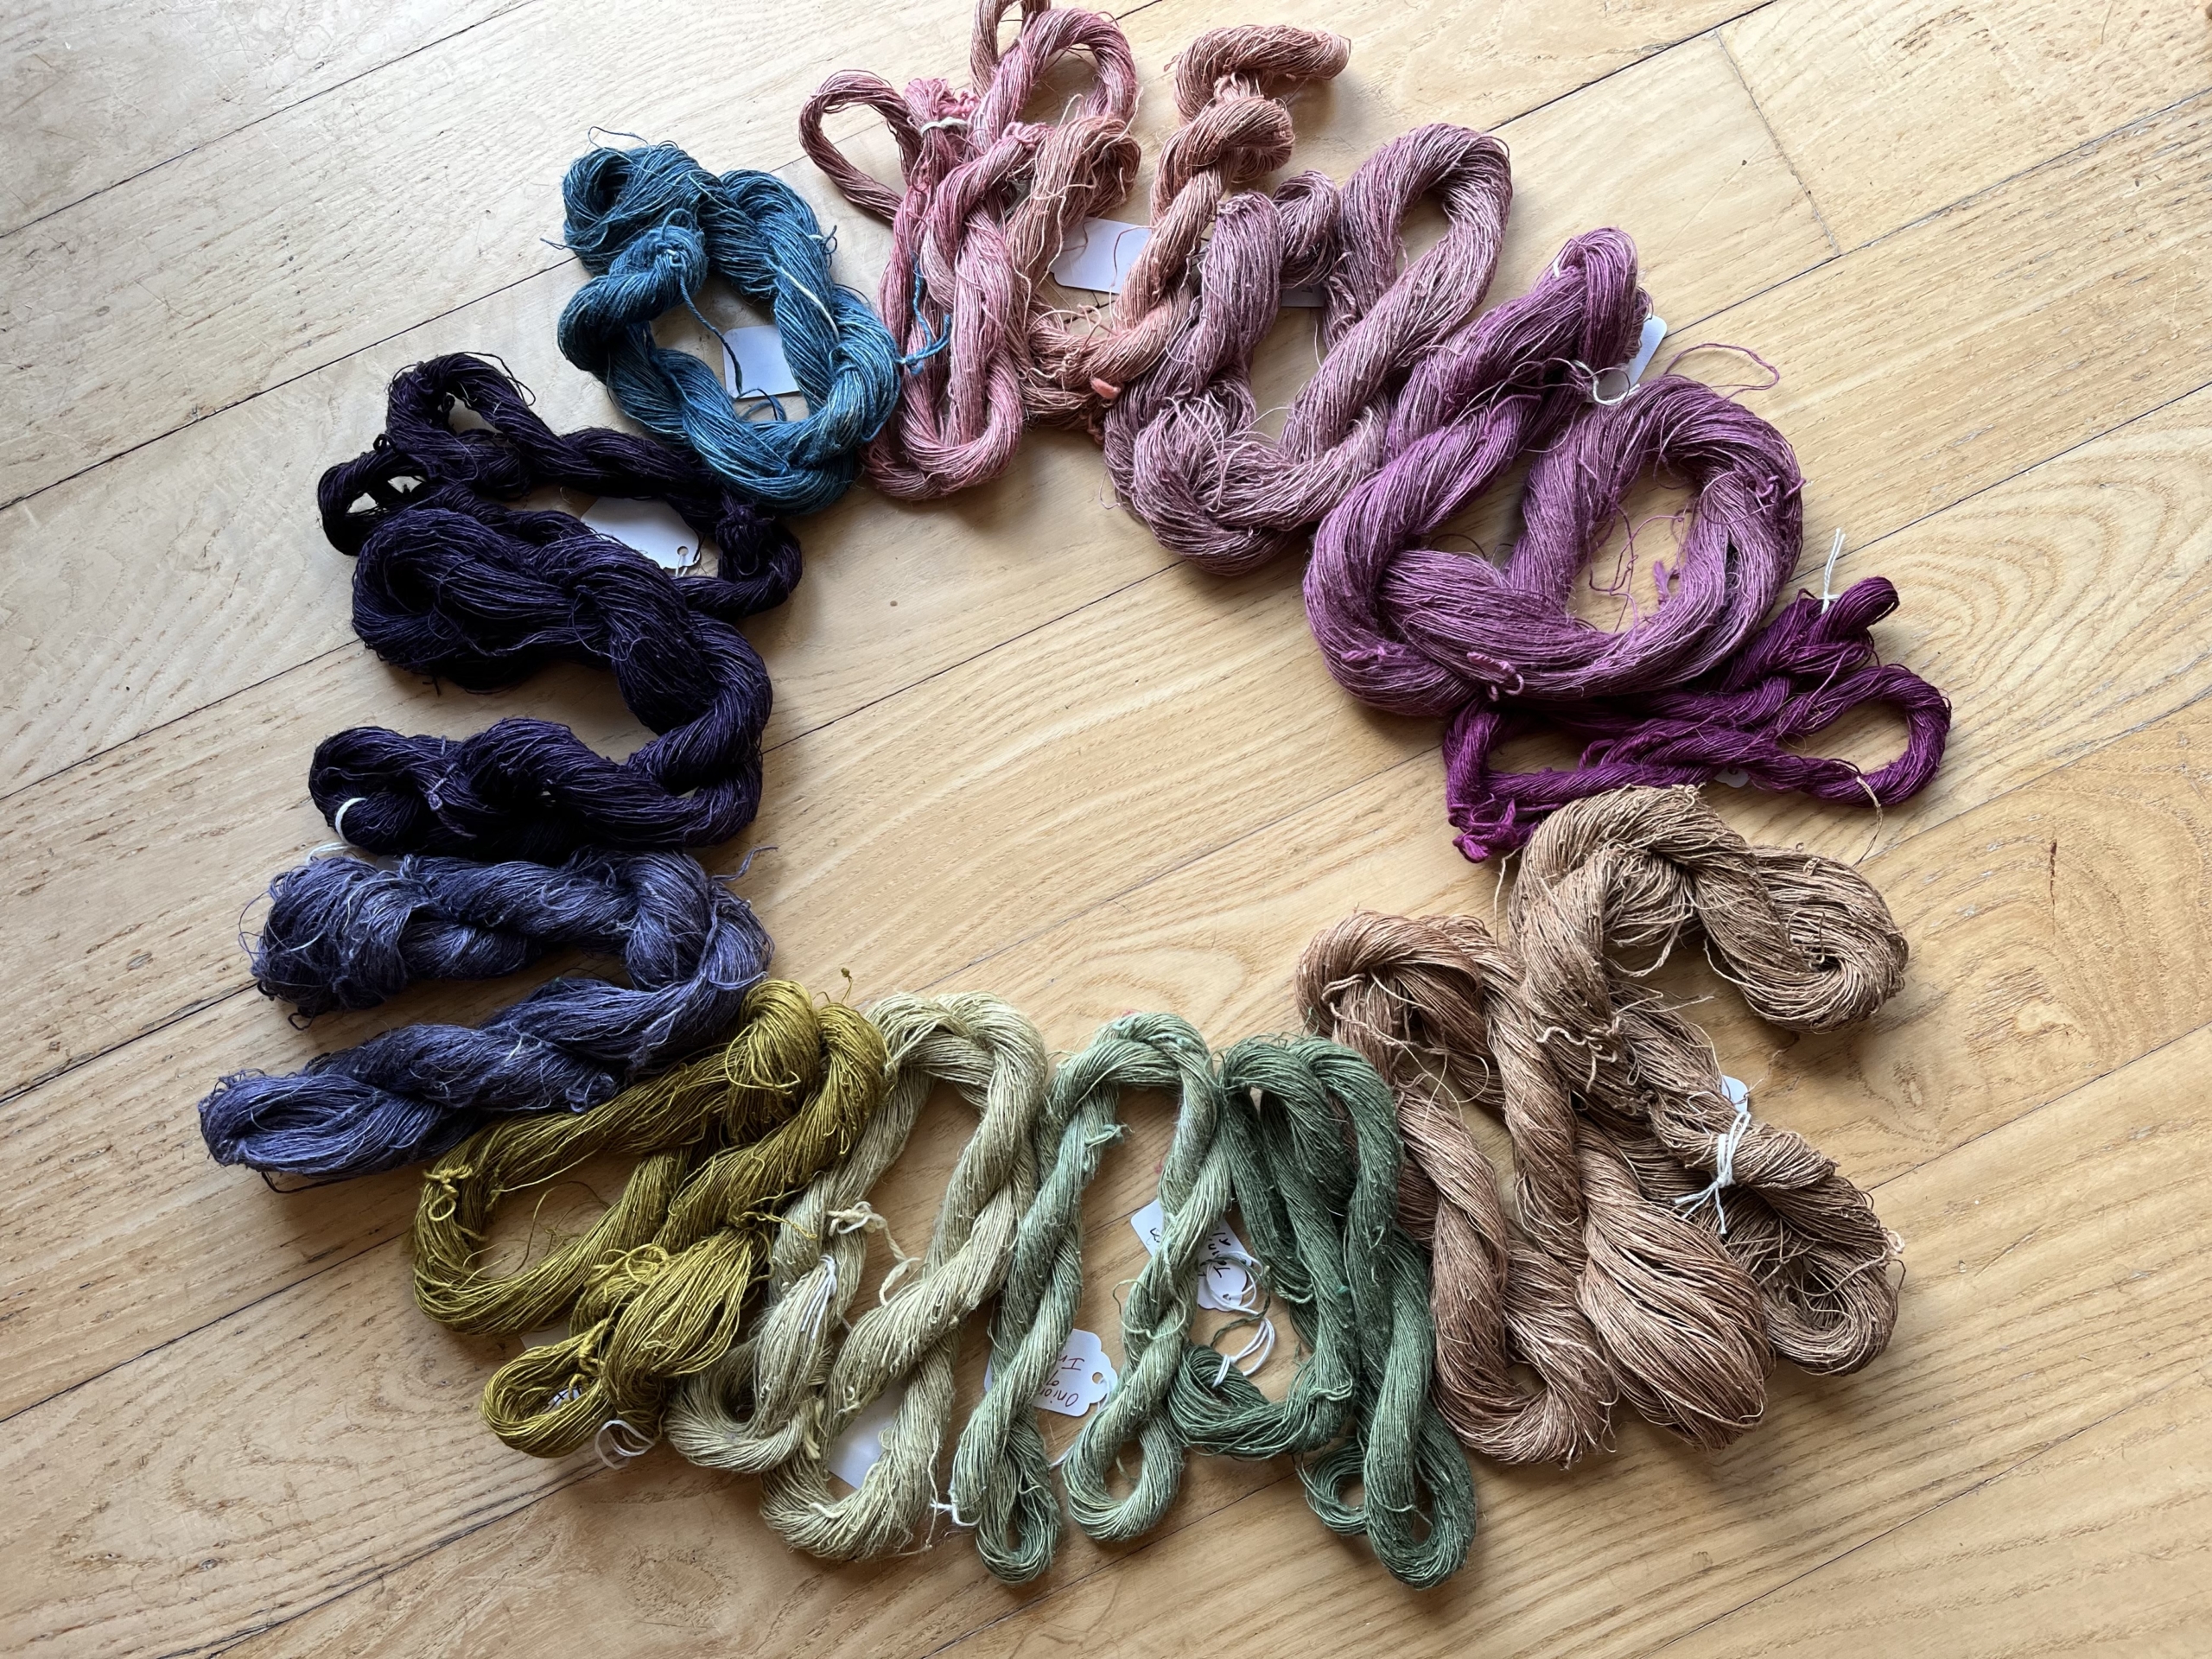
Being a natural dyer, I love to explore the color I can add to the yarns I’ve spun. As a cellulose fiber, linen needs a little extra preparation before one can achieve good results. Scouring and then applying a tannin and the mordant will add to your successful application of color from natural sources. Colors often are subdued due to the natural color of the linen and can be quite beautiful.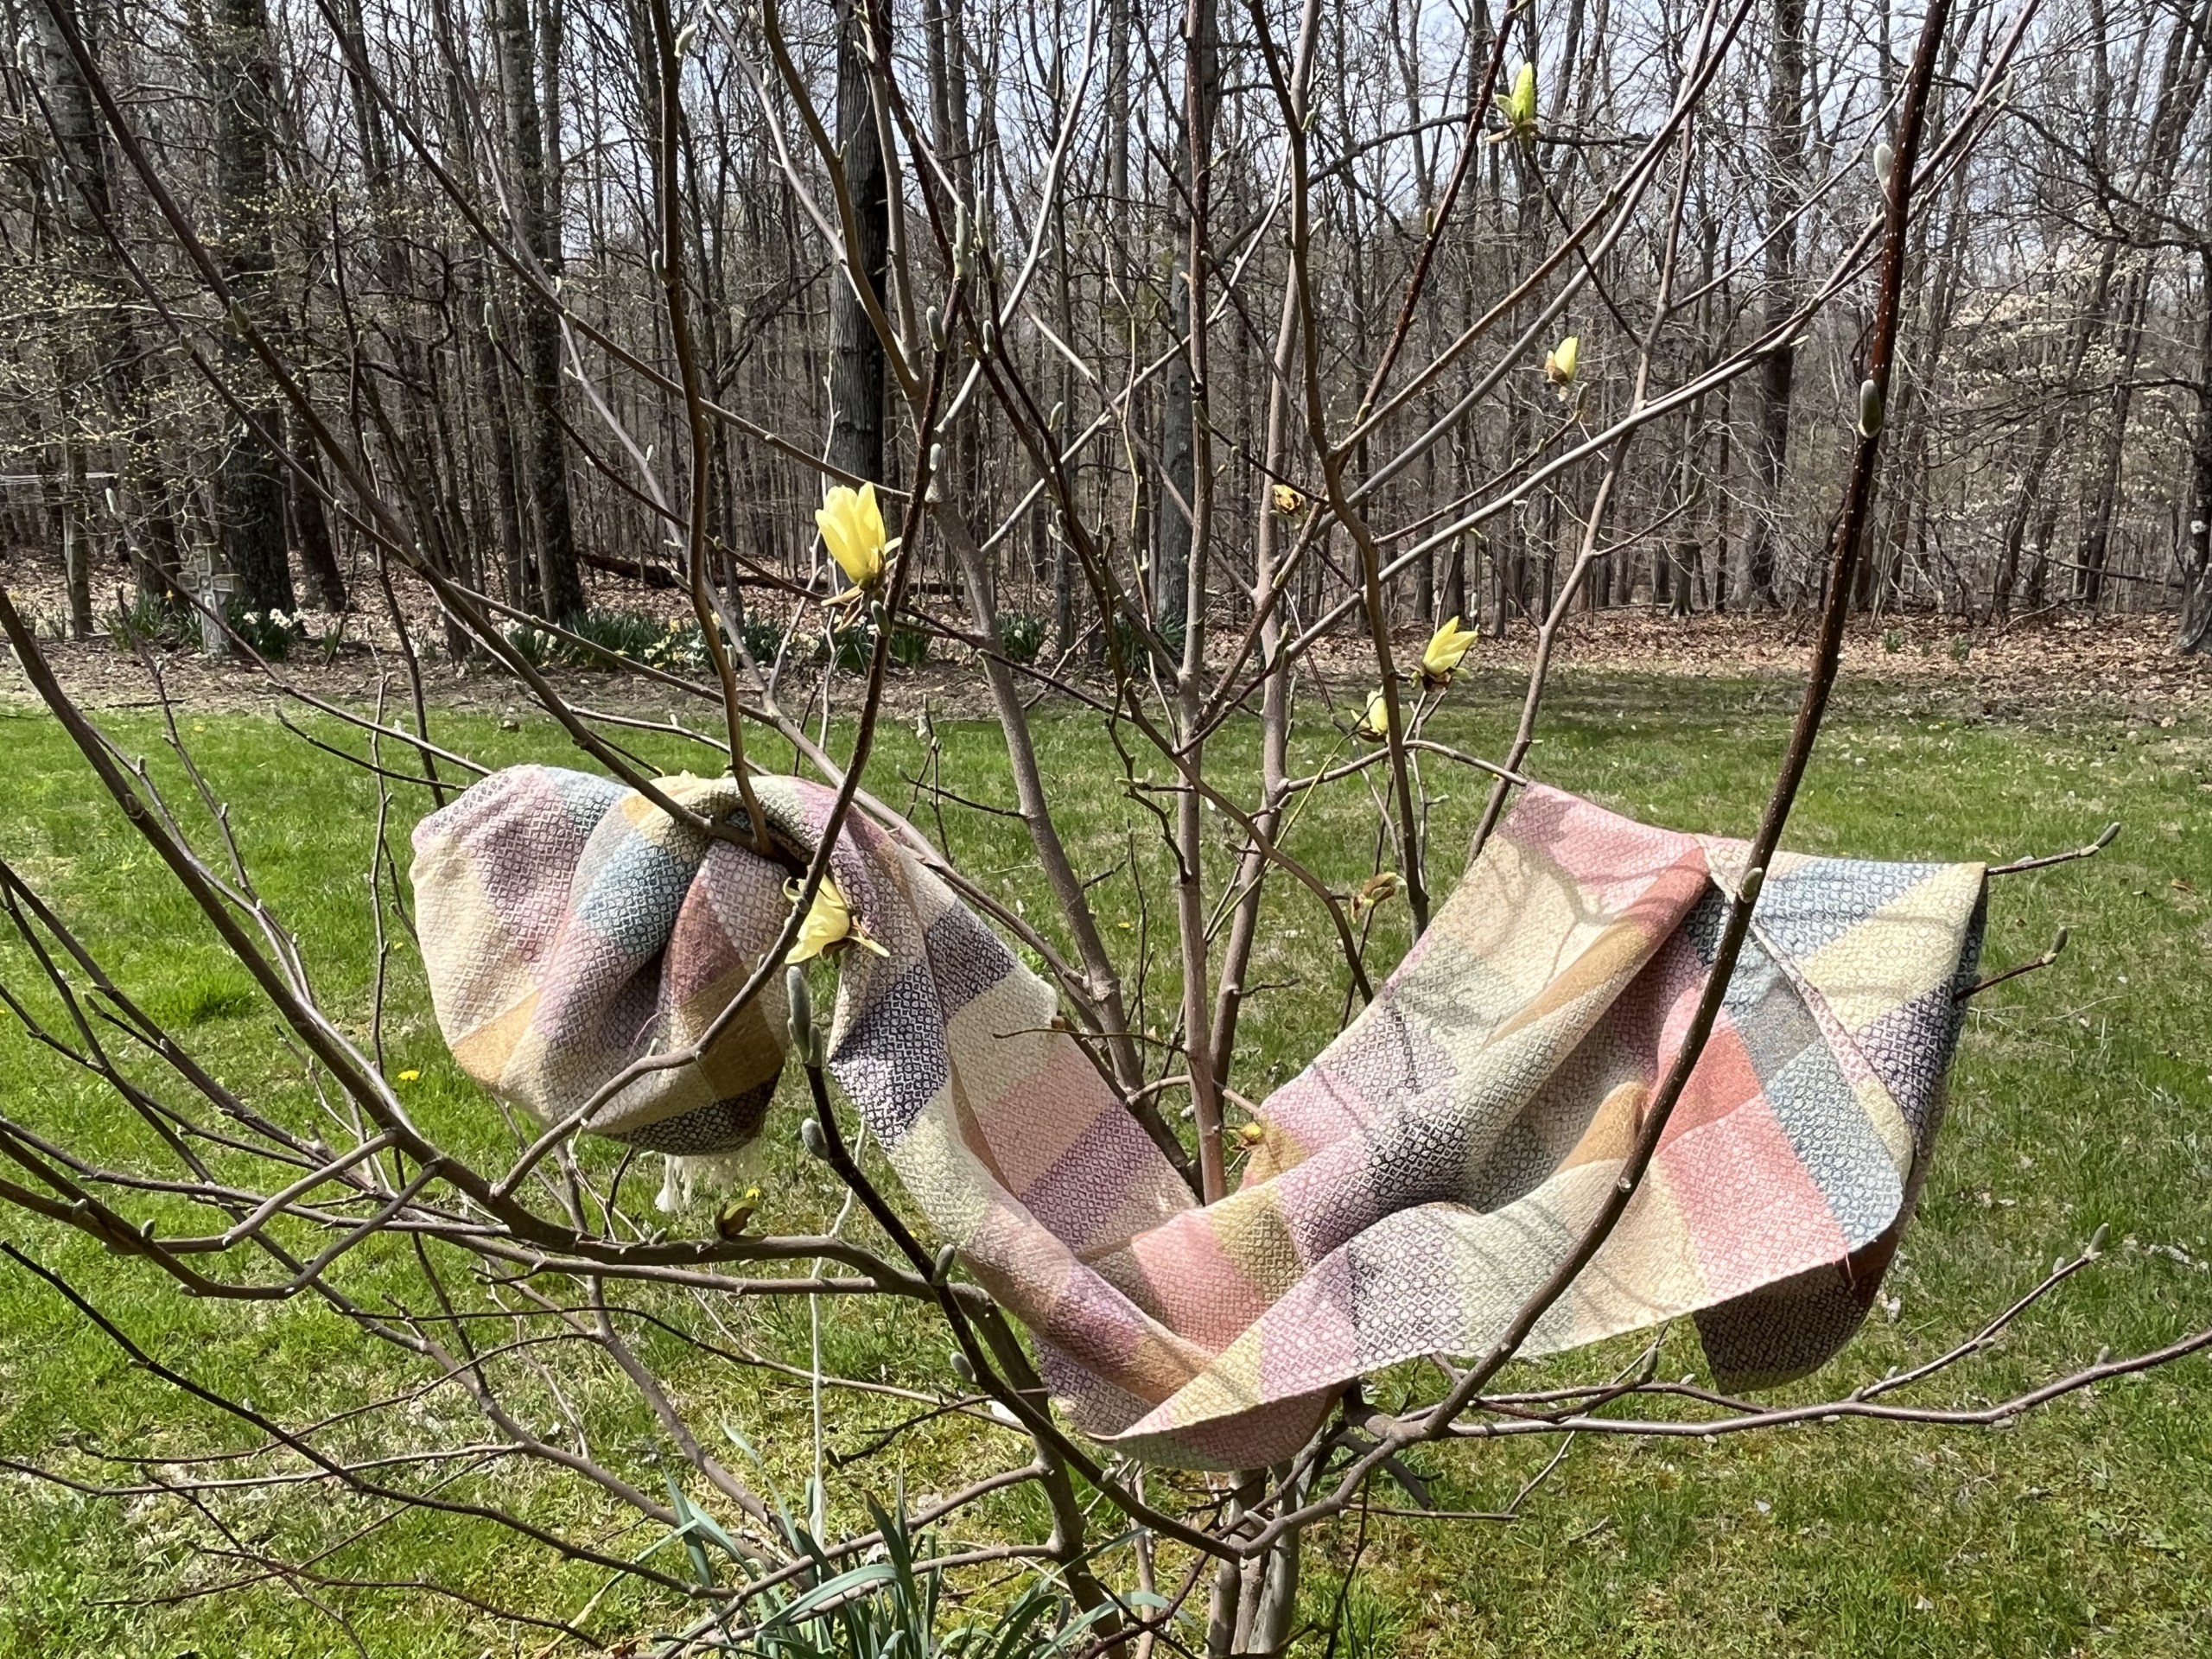
Woven cloth using home grown, handspun, naturally dyed linen yarns was the end goal of my quest. I chose an organic, naturally colored 8/2 cotton as warp (linen can be a challenge as a warp – going back to why so many skein ties were recommended when skeining due to its clingy nature. The weft was my naturally dyed linen singles. The pattern I had threaded on my loom, using four harnesses, was Weavers Fancy. The sett was 20 EPI. The finished length of my fabric was 5 yards and 22 inches wide. The fabric was washed on delicate and air dried. The final step is to sew a jacket for myself. There is nothing more gratifying than making and wearing a garment you have planted and nurtured along the way.
 Kathy Sparks has devoted her life to researching traditional fiber arts, especially natural dyes. She can often be found foraging for plants to add to her dyepot or sitting at her wheel or loom.


Leave a Reply
Want to join the discussion?Feel free to contribute!