Posts

Ask Jillian: How Do I Keep My Colors Clear in Chain Ply?

I am so frustrated that the colors in my chain-plied yarn keep combining. I want my yarn to look as close to my hand-dyed braid as possible. Tell me how to keep my colors clear and unmarled. ~Donna, Harrisville, NH

Hi Donna,

I hate when that happens! The number one reason that I chain ply is to keep my hand-dyed braid color clear and unmixed with others. Last month Jacey got us started with chain plying; now let’s fine tune for clearer color.
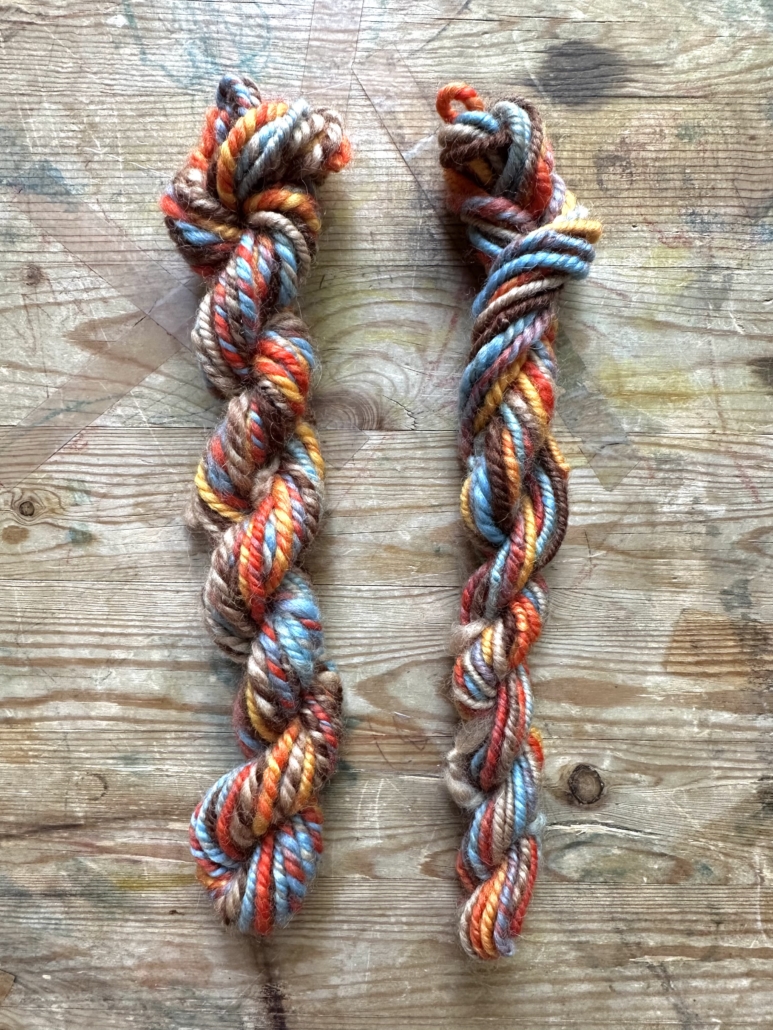
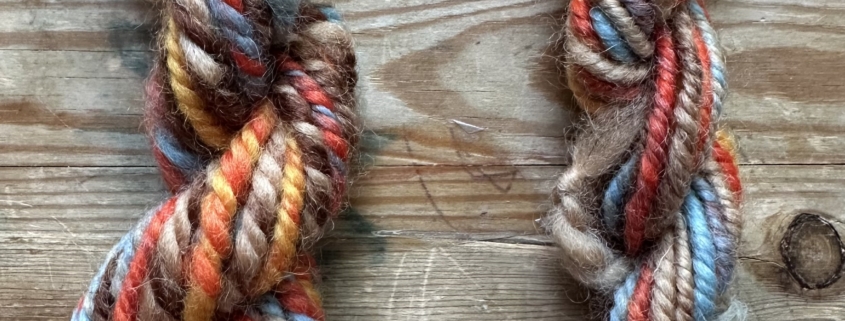
I want my yarns to look more like the small skein on the right than the one on the left.
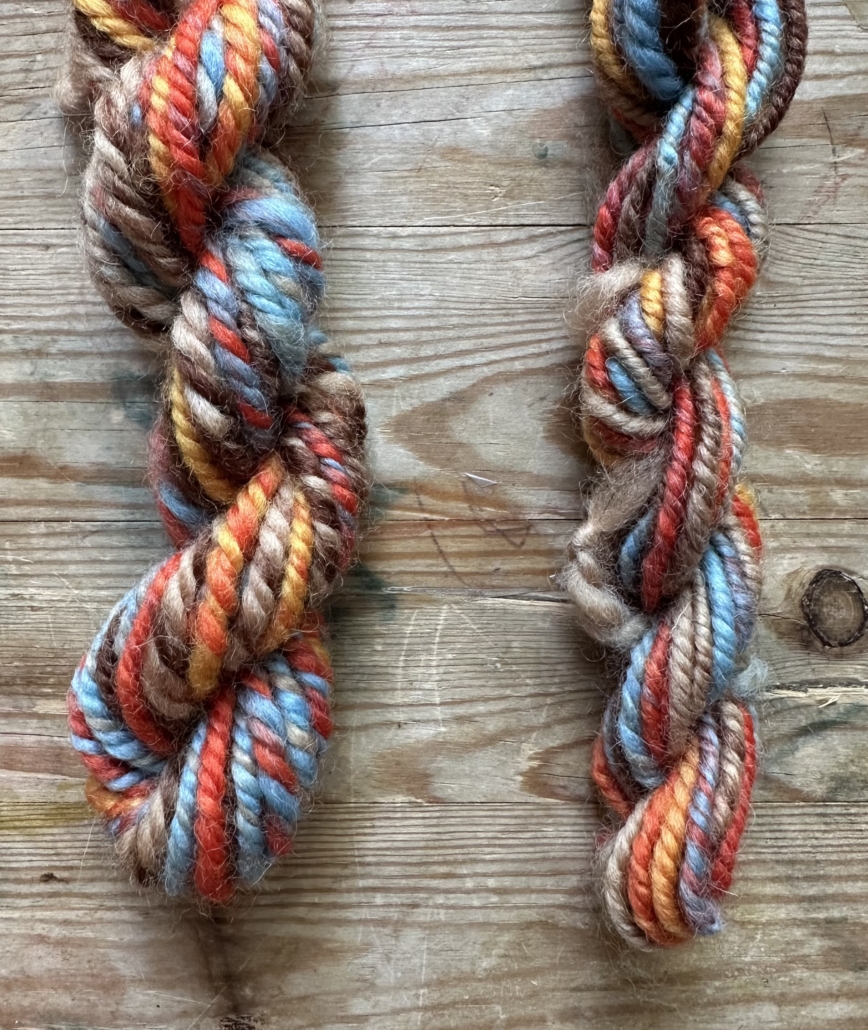
I love the motion of chain plying because it’s so relaxing, but I found if I change a couple of things I get clearer colors.

I slow down, pay attention to where the color changes are, and use a variety of loop sizes while I ply.
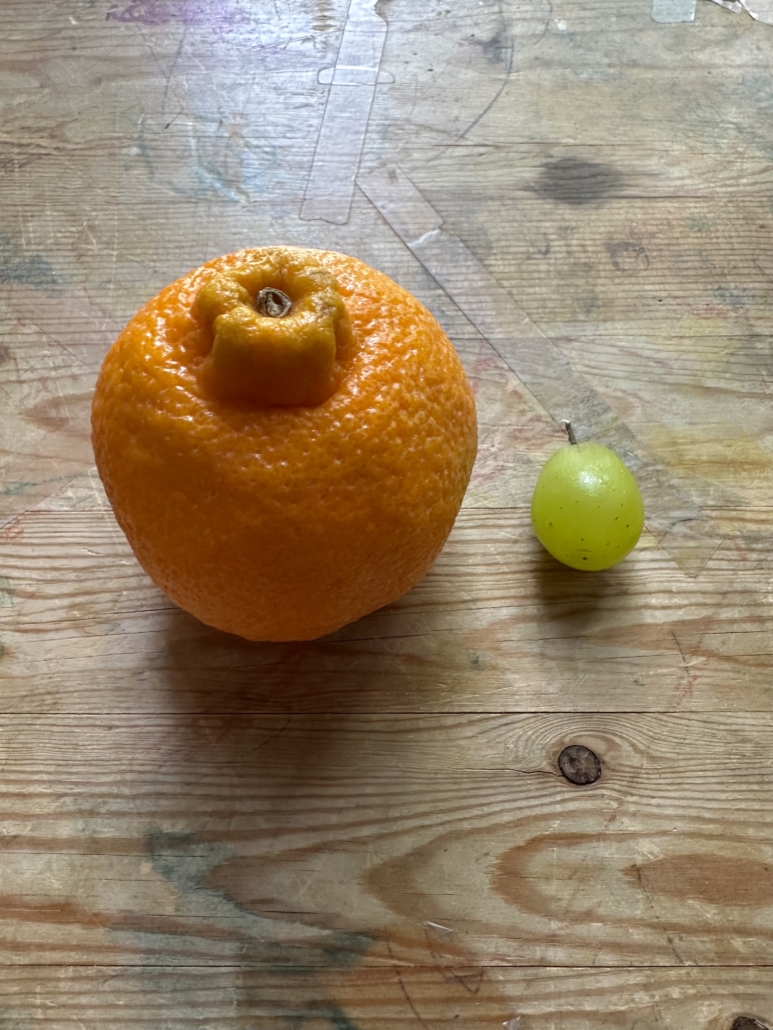
My usual chain-ply loop is the size of an orange, sometimes bigger. I can happily ply along for an entire bobbin with loops of that size. But when I keep my loops the same, on the bigger side, my colors mix and marl when colors transition.

I taught myself to make loops about the size of a chubby grape, and I use those smaller loops when the colors change in my singles. The yarn will still barber pole, but the length of the marled section is much smaller, the size of the smaller loop.

I do have to slow my roll when I treadle and watch my singles to see when the colors change, but that extra time is worth it to me for the colors I want. I usually use two or three smaller loops right before the color change, one at the color change, and two or three after the color change.
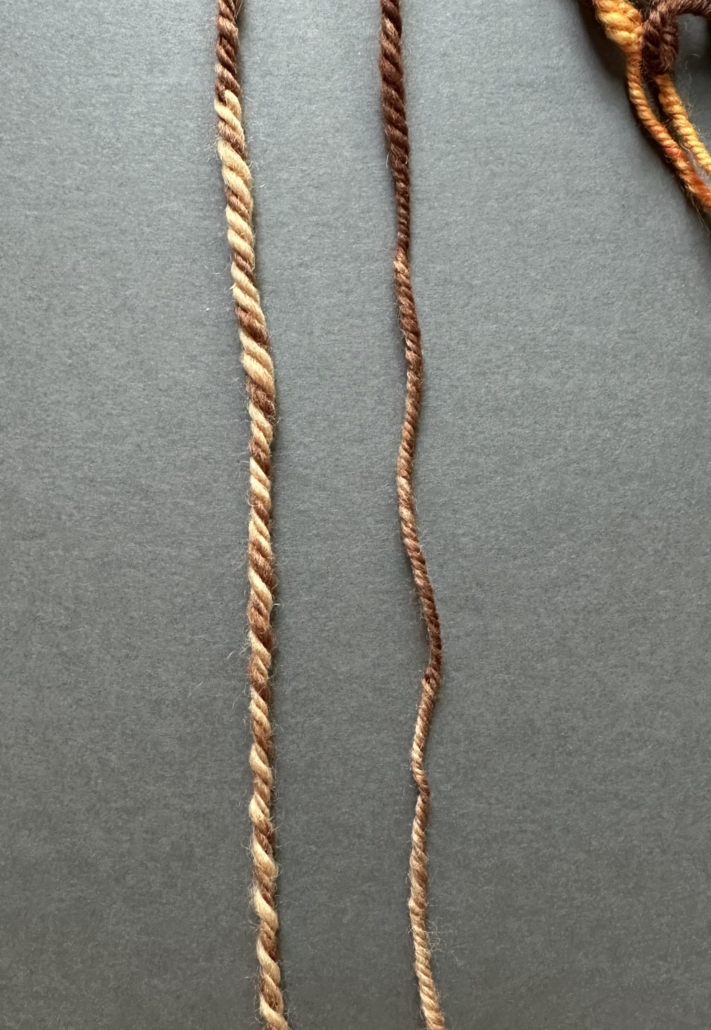
It’s not 100 percent perfect; a lot of the time colors will marl while drafting singles and those will marl in the ply. Comparing the yarn on the left that has large loops and a long stretch of marled colors to the yarn on the right, where I used a combination of loop sizes, I like the flow of the smaller amounts of marled yarn much more.
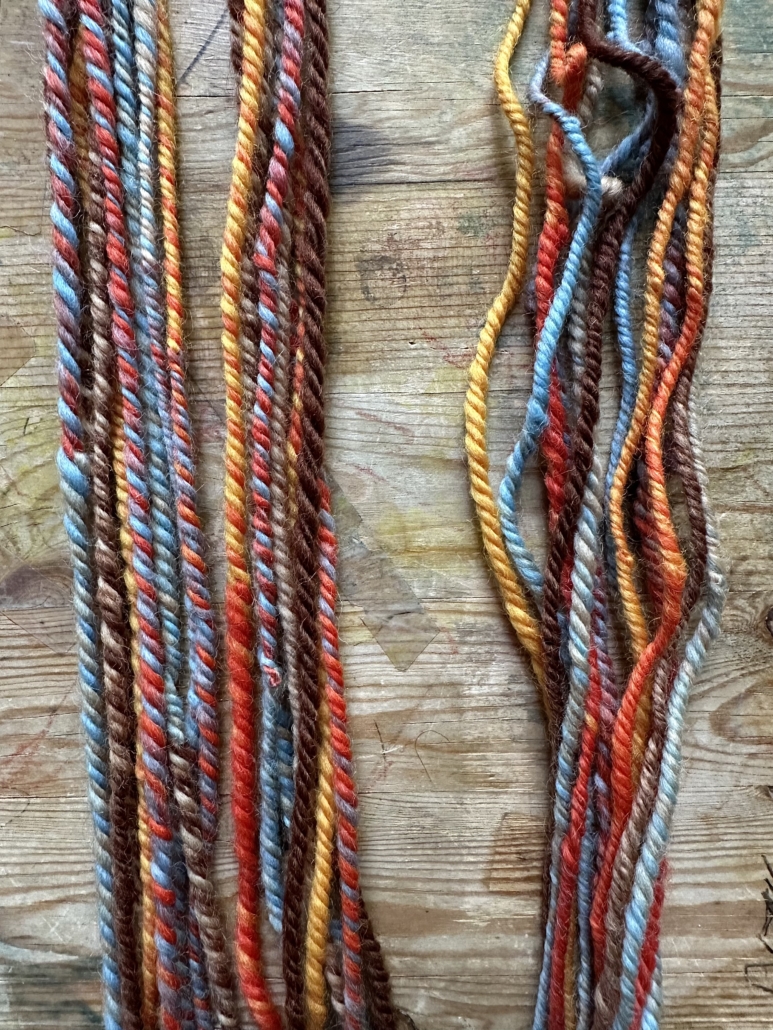
I try not to fet too much about the small parts that do marl. I can see them when I look closely, but when I look at my yarn as a whole skein, the overall look is clear, beautiful color.


Want Jillian or Jacey to take a stab at your question? Tell us what you want to know:

PLY Guild: Second Season Drop – Episode 3

I am thrilled to report that the third episode of the second (worsted) season of the PLY Guild has dropped and is ready for your viewing pleasure! 

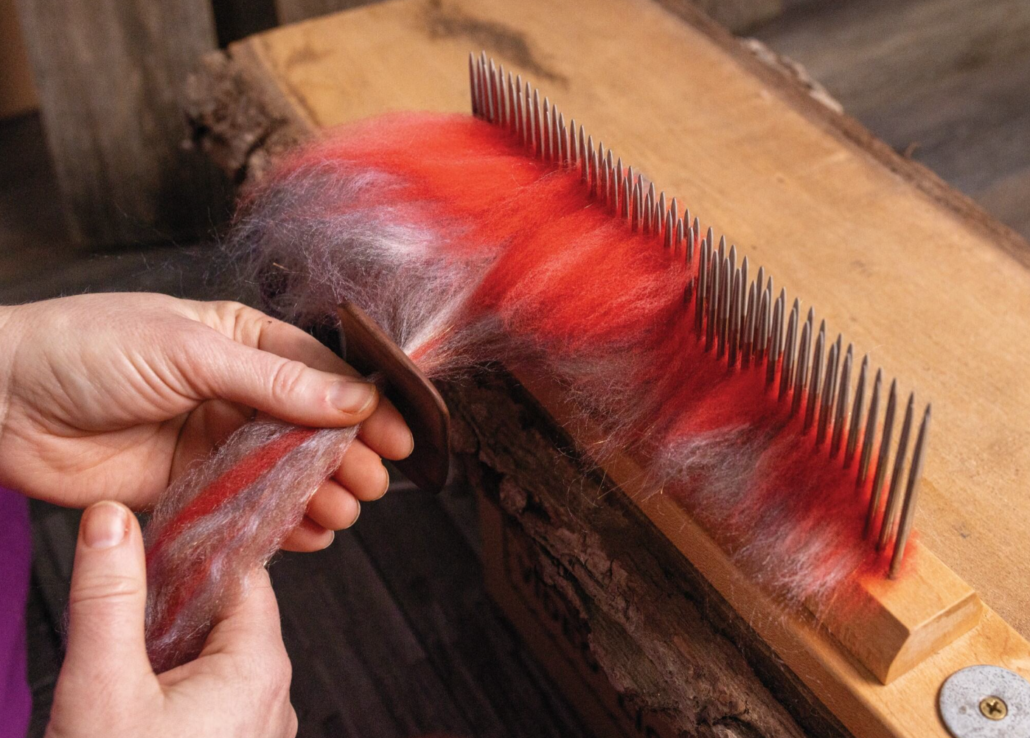
This episode is all about combs! You’ll learn how to choose combs and use combs from some great teachers including: Maggie Casey, Laura Linneman, Michelle Boyd, and Jacey Boggs Faulkner. We’ll cover 2-pitch Viking combs, 4-pitch English combs, 3-d printed combs, combing with clamped combs, combing with unclamped combs, combing with a hackle, dizzing, and planking! It’s a long episode so set aside some time, get out whatever combs you have (or some fiber and a wheel/spindle) and enjoy! If you don’t have combs, don’t worry, the next episode is all about creating worsted preparations without combs! 

Watch the episode now!

We’ll see you again with a new episode in six weeks (but in the meantime, come see us in a spin-in)! If you haven’t already gotten your membership, this is an episode you won’t want to miss! 

Join the PLY Spinners Guild here 

If you’d like to learn more from your favorite fiber instructors, make sure your membership is active! Each month is jam packed with new instructional videos and virtual spin-ins. Membership is cumulative, meaning you get access not only to the current episode, but also to every previous episode and recorded spin-in as well. 

The PLY Spinners Guild (PSG) hosts three 90 minute spin-ins every month: 

  • On the first Sunday of every month, guild members meet and spin at 5 p.m. Pacific.   
  • On the third Sunday of every month, guild members meet and spin at 10 a.m. Pacific. 
  • On the third Thursday of every month, guild members meet and spin at 5 p.m. Pacific. (This is the Building Skills Spin-in for spinners who want a less technical experience than our other spin-ins!)

The guild is priced at $85/year or $12/month. This is a very good deal for the amount of information and community you will get, especially since new video lessons are added every six weeks! This fee allows us to pay for the substantial hosting required by so many high-def videos and the charge per member to access the site, along with fairly compensating the teachers, editors, and everyone involved in making the guild work. 

If you aren’t already a member, we think you’d definitely enjoy it! 

The PLY Spinners Guild is a space for spinners at all levels of spinning. We are an inclusive and diverse community that embraces all spinners and welcomes everyone to create a brave space to question, challenge, and support one another. We strongly believe that the more diverse our community is, the stronger our community is. Our core beliefs of kindness, diversity, and inclusivity inform everything we do. Racism, sexism, and other forms of oppression will not be tolerated. We reserve the right to remove anyone who meaningfully and purposefully disrupts the community or makes other members feel unsafe. 

Breed Development through Upgrading

Many of the sheep breeds found in the United States are being developed through a technique called upgrading. The United States (like many European countries) has strict regulations on the importation and exportation of live animals and particular breeds. As a result, there are many wonderful sheep breeds that can’t be brought into the United States, like Gotland, Teeswater, Herdwick, Bluefaced Leicester, and Black Welsh Mountain. And yet there are American flocks of all these breeds! 

While we can’t import these sheep, we can import semen. A breeder will choose a breed that is close to the breed they want. For example, if a breeder wants Teeswater, they might choose another longwool breed like Leicester Longwool. A Leicester Longwool ewe is inseminated with semen from a Teeswater sheep. The result is a 50/50 genetic blend. This second-generation sheep is then inseminated with Teeswater semen. The resulting lamb is 75/25 Teeswater.  

This process is continued until the sheep being bred have primarily Teeswater genes. An upgraded flock will never be 100 percent genetically the same as the original breed. American Teeswater may be 95–99 percent Teeswater. But chances are you or I would not be able to tell the difference unless one population or the other were heavily modified. 

At this time, Valais Blacknose – the cutest sheep in the world – are being introduced to the United States via upgrading. 

Upgrading is one way we can help preserve breeds and populations that are rare or threatened. Sometimes there aren’t enough sheep left in a population to have sustainable genetic diversity. Upgrading offers a solution for saving threatened breeds. 

Have you ever spun a fleece from an upgraded sheep? If so, what genetic percentages did it have? What qualities did the fleece have? 

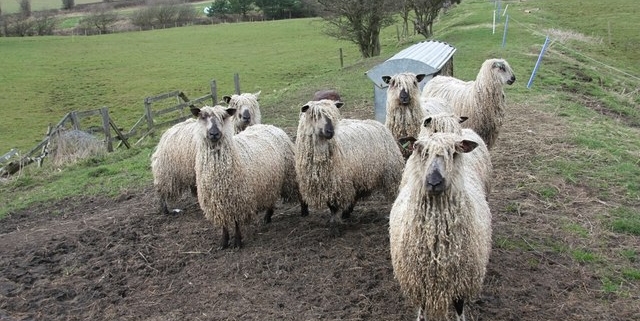
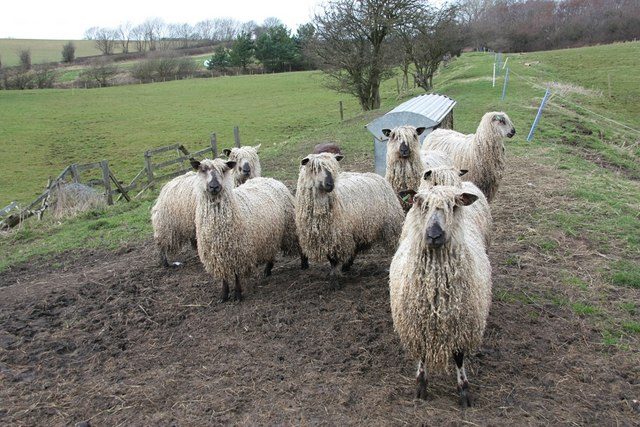
A small flock of Teeswater sheep. © Copyright Paul Buckingham and licensed for reuse under Creative Commons License CC BY-SA 2.0.

Book Review: Swatch Critters by Deb Essen

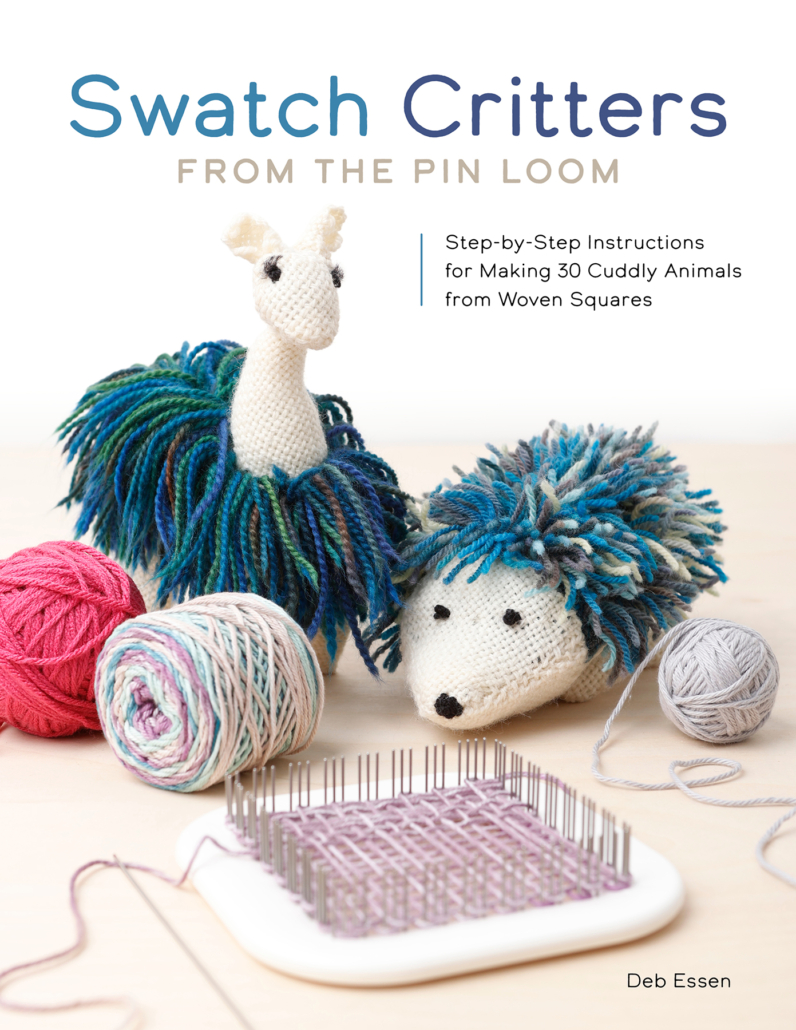
Swatch Critters from the Pin Loom: Step-by-Step Instructions for Making 30 Cuddly Animals from Woven Squares

by Deb Essen
Publisher: Schiffer Craft
US$24.99, 168 pages
Publication date: August 28, 2025
Buy now at Bookshop.org
Review by Meagan Condon

I am usually hesitant to review pattern books, in part because it takes so long to test out the patterns and I sample far more than I do actual projects. However, Essen managed to set the hook (a size G crochet hook, if you were wondering) and reel me in for this one. 

I have always loved pin loom swatches, and I have an ongoing affair with my Schacht Zoom Loom. I could make little woven squares all day. However, like many others who have taken to the pin loom, I have an unruly stack of said squares that spill out of my stash in anxiety-inducing disarray.  

I’ve looked for ways to use them, but I’ve never been terribly impressed by most of the patterns out there. I’ve found that patterns for using pin loom squares tend to be overly simplified and clumsy. And a scrappy swatch blanket just doesn’t appeal to me.  

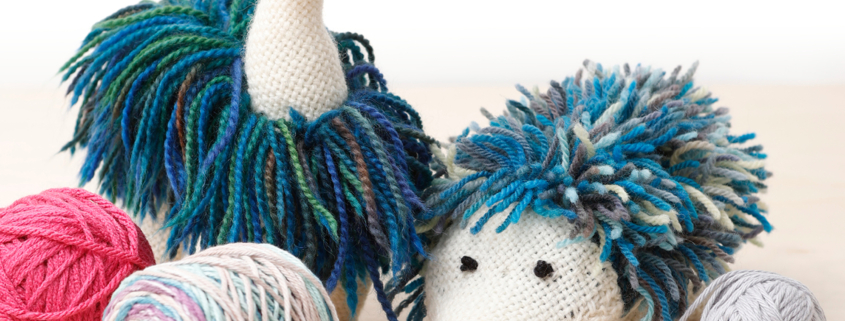
Essen’s work immediately caught my eye. The creativity and complexity of the designs goes beyond what I’ve seen in other pin loom pattern books. From Eureka the Unicorn to Pablo the Peacock, the patterns are all adorable. Critters for the win.  

Essen also does a great job explaining how to use a pin loom. Being a left-handed crafter, I found it particularly useful that she included instructions for using the Zoom Loom both left- and right-handed. All of her instructions are clear and concise and the photos are helpful in visually explaining the text. 

After the critter patterns, Essen includes some weaving patterns to add texture to your swatch squares, a great way to customize your critters. 

If you are looking for a way to use up all the scrappy bits of handspun in your stash quickly, this will do it with flair!  

How Tariffs are Impacting Fiber Arts in the US

In the United States, the president works with Congress to create US tariff policy. A tariff is a tax imposed by a government on goods and products imported from another country. The round of tariffs that was implemented most recently is having an impact on the spinning community, and you may not even realize it yet.  

As of the publishing of this article, in the United States, the US president recently escalated a trade war with China, raising tariffs to 145 percent, then agreed to lower them to 10 percent, though tariffs on most Chinese goods are still over 30 percent due to existing duties. The president has also threatened to impose 50 percent tariffs on the EU, though that action is on pause. Tariffs for Canada and Mexico have been set at 25 percent on most goods. And there is a minimum tariff of 10 percent on most other countries. That means if you import spindles from Canada for $10 each, the tariff raises the price to $12.50.  

Who pays this import tax? Well, the person or company that imports the item pays the tax. However, it doesn’t end there. That importer increases the price they sell the item for to help them maintain their profit margin. The dyer or spinner or yarn store that buys the wholesale products from the importer is then forced to increase their prices so they can make a living off their dyeing or spinning or reselling. Then you, the customer, spend more of your money to get your dyed or carded fiber or that fancy spinning wheel. So ultimately, tariffs come directly out of our pockets. 

Ashford operates out of New Zealand. Louët wheels are manufactured in the Netherlands. A majority of our silk products come from China.  

Why don’t we just buy US products, then? Many of our US producers, like Clemes and Clemes, have already taken steps to make as much of their product as possible in the United States. As a result, their prices have managed to stay relatively stable.  

Very little of what we use is entirely made in the US, though. Wheels and carders and other tools use imported parts, even if they are constructed here. We simply don’t have the infrastructure to produce all of our fiber and tool parts here. We are lucky to have companies that are working to build the infrastructure, but that doesn’t happen overnight and it isn’t necessarily going to make the product cheaper for consumers. Our spinning community primarily operates as a recreational industry. Hobby and recreation are often hit the hardest when prices systematically increase.  

What can you do? 

Buy fiber locally. While silk is sexy, there are a ton of wonderful, underappreciated local wools and plant fibers. There is a revival in commercial flax here in the United States. Small farms across the country produce rare and interesting breeds of sheep.  

Buying new tools is trickier, but luckily, our biggest imported tool names tend to be in places that are impacted less by the tariffs. We also have an amazing number of independent woodworkers here in the United States that produce and repair fiber tools, if you know where to look and who to ask. 

And always, make use of your stash! Every fiber artist has one (or is in the process of building one). I can’t count the number of times I’ve complained that I have too much fiber. This may be a good impetus to use some of it! 

SCENE: Upcoming Events

You are SCENE!  Feast your eyeballs on these upcoming fiber events submitted by our readers! 

July 11 – 13: Wyoming Sheep & Wool Festival, Buffalo, Wyoming 

July 19 – 20: Fiber U, Lebanon, Missouri 

July 25 – 26: Fiber Christmas in July, Kellyville, Oklahoma 

July 26 – 27: Prairie City Fiber Fest, Prairie City, Oregon 


PLY strives to bring together the global spinning community and give a voice to spinners everywhere. Is there an upcoming event you’d like to share? Do you have or know of a new product, fiber, or tool you think the community should know about? If so, fill out this form

Once a month, we’ll feature SCENE content on the blog and social media. 

What are you waiting for? Let us know what’s cool, hep, lit, fire in your fiber world!  

What’s in this issue? Summer 2025 – Tension!

Tension is one of those elements we use all the time while we spin. We’ve got a whole issue packed full of great information on how tension figures into and impacts your spinning! 

Wheel tension and wheel systems: How do they work and which works best for what type of yarn? James Perry and Heavenly Bresser teach us about break bands and drive bands respectively. Maggie Casey has broken down how tension operates in different wheel drive systems.  

Tensile strength is all about how much tension a fiber can be put under before it breaks. Jill Duarte treats us to a look at how she accomplishes no-nep carding on the drum carder. 

How about visual tension? Why do some colors seem to vibrate and explode when they are next to each other? Dia Patrece Robinson and Emily Wohlscheid have our backs when it comes to color. They talk about different methods to obtain a swirled colorway. 

Tension can be good for yarn, but bad for our bodies. Andrea Deck talks to us about the science of stress relief and Andrea Lui has us covered for hand care with an article focused on proactive care and avoiding hand strain. 

Guys, there is all this and so, so much more and so many AMAZING writers! If you haven’t already gotten your copy, you can order it here.

Third Thursdays Guild Tip

Time to ramp up for tonight’s PLY Spinners Guild Third Thursday foundational spin-in! We’d like to take a moment to feature some tips from one of our wonderful PLY Guild spin-in leaders, Donita Westman. 


The old saying is that “practice makes perfect”; over twenty years ago, my music education mentor challenged me to consider if that was true or if “practice makes permanent” was more accurate. (Spoiler: she was right. She’s always right!) Learning to spin requires practice and the way you spin is a result of that practice. Whether you’re new to the craft or a seasoned spinner looking to try a new technique, what and how you practice will determine the kind of spinner you become. Since we talk about the importance of practicing but often skip over how to practice, I wanted to share a few tips on how to approach practice that will help you become better practicing anything.  

Set the mood 

Practicing a new skill is challenging. If we come into a practice session stressed and anxious, we will be less successful and, over time, associate spinning with stress and anxiety. While we can’t solve the world’s problems before we sit down to spin, taking a few minutes to clear our minds and let those emotions flow through us and go on their way before we start our practice session will make it more enjoyable and successful. Make a mug of your favorite warm beverage, turn on some relaxing music, take as many deep breaths as you need, do some gentle stretches, or do all of the above! Engaging your senses allows you to focus on your spinning. Actively thinking about how you are spinning is necessary to learning that new technique! 

Set a goal for your practice session 

Focus on one aspect of your spinning for this time. Choose a goal that you know is achievable in the time you have and make your goal observable. Ask yourself “How will I know if what I’m doing is working or not?” For example, if I want to work on more consistent drafting distance for a yarn with consistent diameter, I can find reference points for how far my hands are moving, look at how opaque or transparent the fiber in my drafting triangle is, and look at a ply-back sample every so often to see if my yarn has fewer thick and thin spots.  

If I’m not seeing progress toward my goal, I can consult a spinning resource (like PLY, a spinning book, a spinning teacher, or an experienced spinner who creates yarn like what I want to create) to find a strategy that moves me toward this goal, not reinforcing habits that aren’t working. If I find my yarn is becoming more consistent, great! I can continue using those strategies to make this practice permanent.  

Set a timer 

Any time you are building a new skill, you want to set a time limit for your practice session. I recommend 15-minute sessions, with an optional second 15-minute session after a short break. These breaks are good for your body, as you are using your muscles in ways they might not be used to moving or holding them tensely as you focus on your goal. Taking a break to get up, have a sip of water or tea, or look out the window for a minute gives your body a chance to let you know if you have resources to continue or if you’re feeling fatigued and need rest. These breaks are also good for your brain, so you can process what’s working for you and check in with your emotions to see if you’re feeling frustrated. If at the end of 30 minutes, you’re feeling good – that’s the time to step away! Putting your spinning down while you’re feeling positive will bring you back time and again, while quitting when you’re frustrated will discourage you from future practice because you associate spinning with frustration. If you are drawn back to your spinning later in the day, try another 15-minute session, but always remember to get out while the getting’s good! 

Learning to practice takes less time than you think. Once you learn to practice, the skills will come more quickly and easily. The more you learn new things, the more you’ll want to learn more new things. Think of all the possibilities that will open up for your spinning once you master how to practice! 

Ask Jacey: How Do I Start a Chain Ply?

I recently watched you chain ply on an Instagram video. I feel pretty good about my chain plying, but what still gives me trouble is the starting! How do you start chain plying? How do you attach it to your leader? And where do you get your first loop? ~Jenny L.

That’s a great question, Jenny. I struggled with getting started for years before I hit upon a method that is easy and clean and works every time. First, make sure you have a loop at the end of your leader. Because of how I make a leader, I always have a loop and find it helpful for all kinds of reasons. However, if you don’t already have one, just double back the end and tie an overhand knot – now you do! 

Ready for the magic? Take the end of your single and double it back on itself so you have about a 4-inch section of two strands. Now stick that doubled-back bit halfway through the loop on your leader. What you have right now is a looped leader with your doubled-back single threaded through it. When you look at it, you should have four strands of your single in front of you: two on each side of your leader – one that is a loop and one that leads to the rest of your single. The side with the loop that doesn’t lead to your single is going to stand in for your first chain-plied loop. Take the half that leads to the rest of your single and treat it like your single by pulling it through the loop in the other half. There you go! 

I know it seems like a lot of confusing instructions; if you want to see it in action, check out this video.

~jacey


Want Jillian or Jacey to take a stab at your question? Tell us what you want to know: