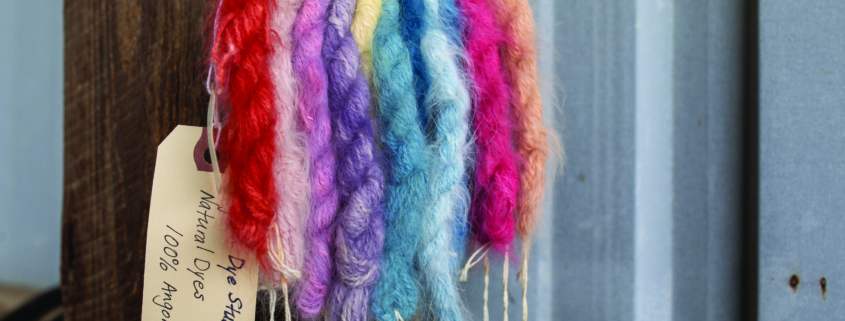
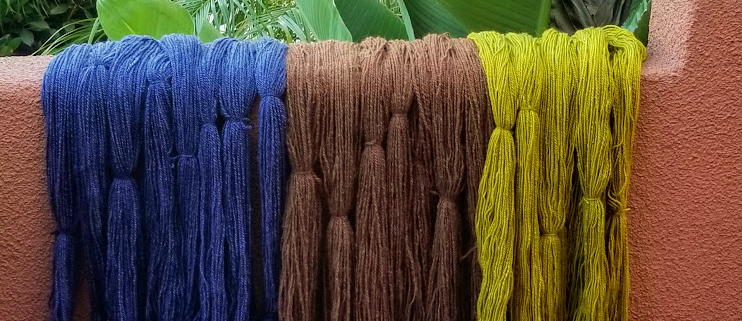
Small Batch Yarn Prep

Words and Photos by Margaret Wright

Three years ago, I went from a Jersey Shore schoolteacher and suburban mom to living in the woods of Western Maine. I purchased my first spinning wheel and joined an amazing group of people in a spinning group out of Cornish, Maine. They insist they love me despite the way I say coffee and dog, and they totally took pity on my lack of fiber knowledge, taking me under their wings. They truly are my fiber angels. It was from them I learned how to prepare small batches of fiber.

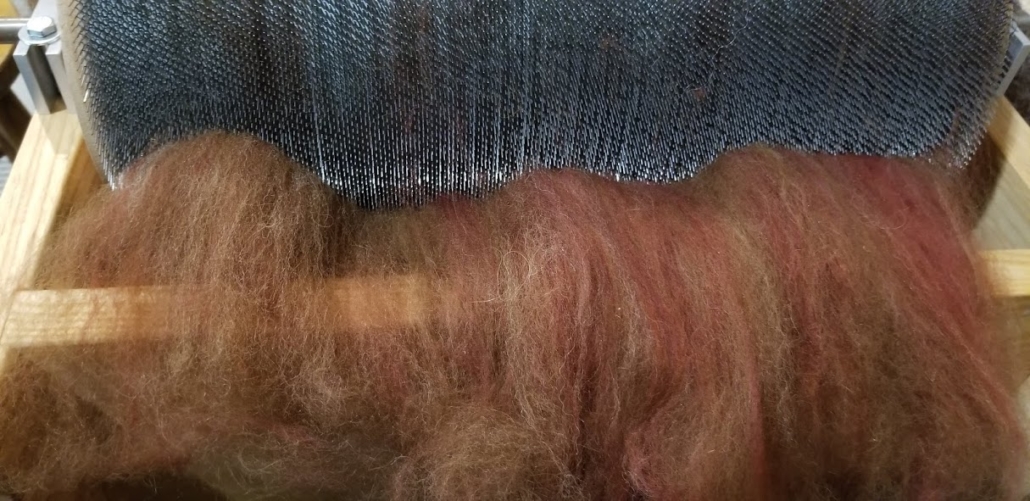
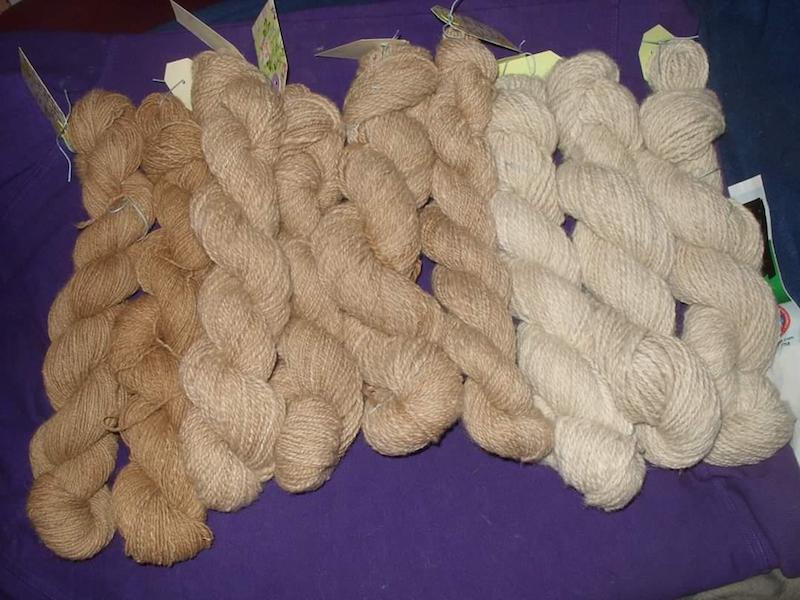
After buying a few really dirty and stinky fleeces, I decided I really hated the whole process of cleaning the poop parts off the fleece, known as skirting. So I now purchase my fleeces at fiber festivals or at reputable fairs as they are usually skirted and much better quality. Although the fleece still has some poop, there’s a whole lot less of it. At the Fryeburg Fair in Fryeburg, Maine, I purchased a very nice Romney fleece. I prepared the fleece in small batches for spinning.

Supplies

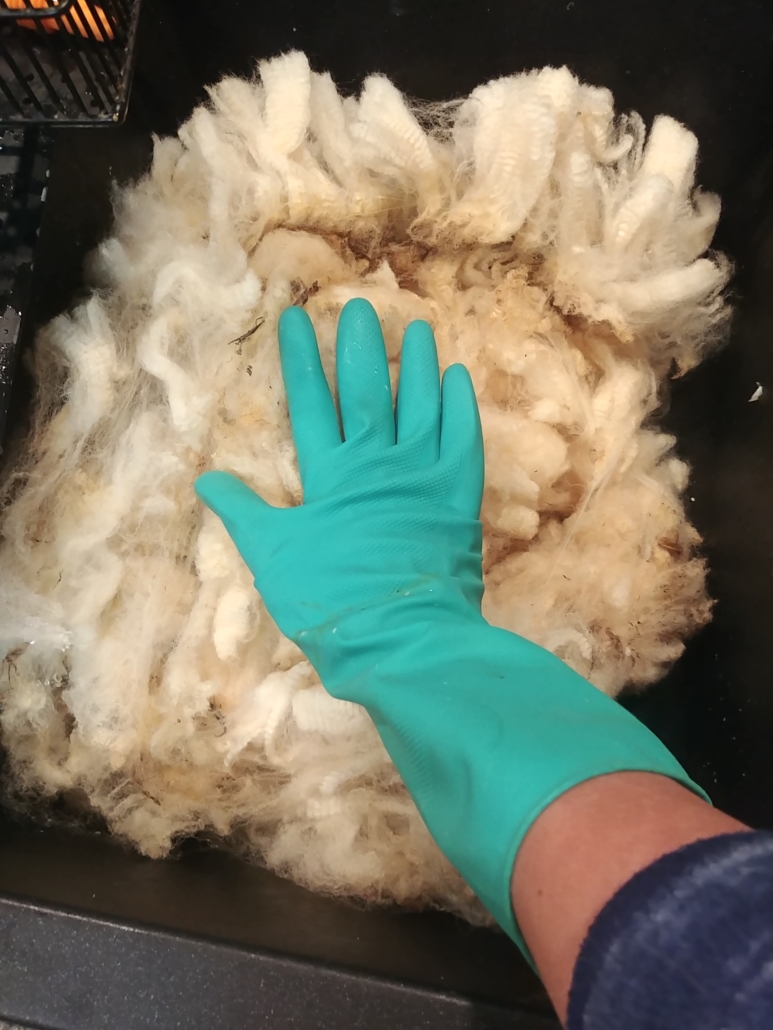
I recommend using a double sink, but you can improvise and use a single sink. You’ll also need Dawn blue dish soap, really hot water, a salad spinner, and some sort of rack to dry your fiber on. I have used a dog crate, a fireplace screen, and lawn chairs! Improvise is my middle name. I also wear gloves as I like really hot water, and, oh yeah, I hate poop.

Process

I squeeze 3 to 4 circles of Dawn into my clean sink after making sure the stopper is in. You do not want too much soap or it will be too sudsy. I then fill the sink about 3/4 full of the hottest water I can get from my tap.

I gently pull a chunk of fiber off the fleece, making sure to remove any straw or poop. Then I gently submerge my fiber into the hot water. Be careful not to agitate it or it will turn into felt like you buy in the craft store.

How much fiber I wash in one batch

I set my timer for 30 minutes. Then I go do whatever. Pet the dog, have a coffee, whatever. After 30 minutes, the water will be dark and nasty looking due to the combination of dirt and lanolin that occurs naturally on wool. I unplug the drain and gently press the water from the fiber. I like to press it against the side of the sink. I know I say gently often, but it really is important to be gentle.

At the same time, I have the second sink filling with clean, very warm water, but not as hot as the first sink was originally. I submerge the fleece gently into the clean water and allow this to sit for 30 minutes also. If you don’t have 2 sinks, put your wet fiber in a bowl or pot while you refill the sink with clean water.

Note: I like my fleece a little greasy, meaning I like to spin it with more of the natural lanolin in it. My friend washes it twice, repeating the first wash, as she likes her fleece really clean. Try both and see what you like best.

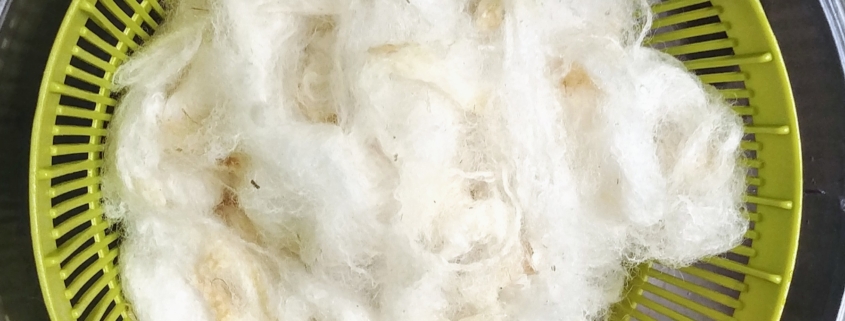
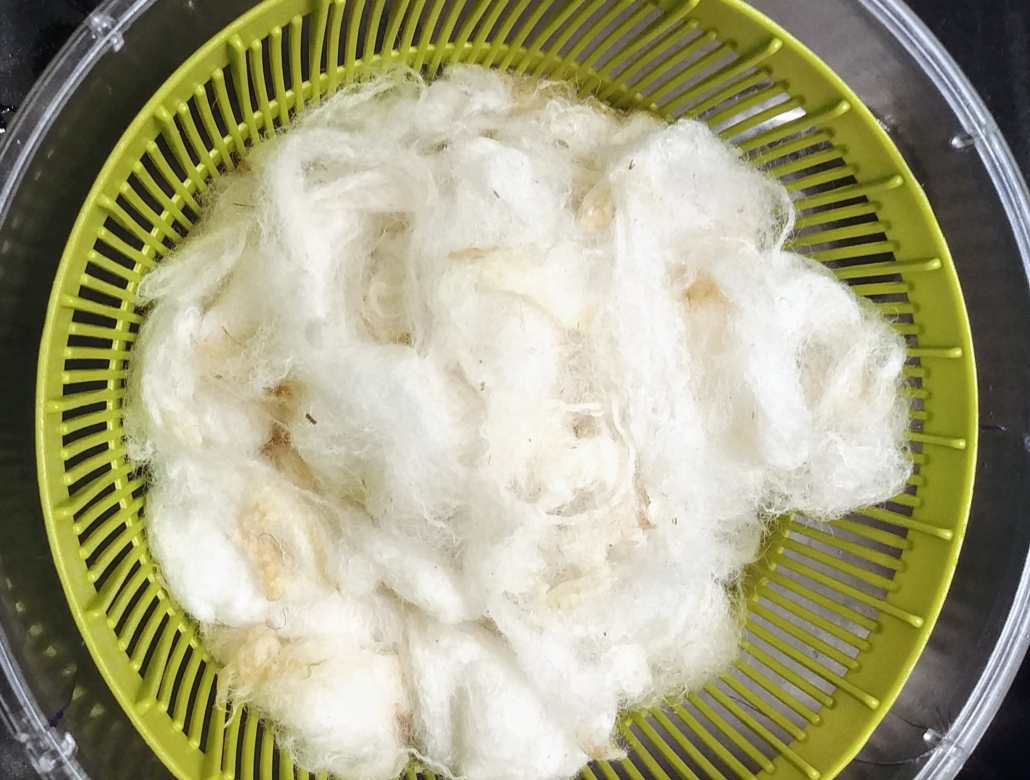
I drain the rinse sink, gently press the water from the fiber, and divide the fiber into smaller batches that can fit in the salad spinner. I place the wet fiber into the salad spinner and spin it twice, one time in one direction and the second time in the other direction, dumping the water out in between spins.

Fiber in the salad spinner
Prep for Spinning

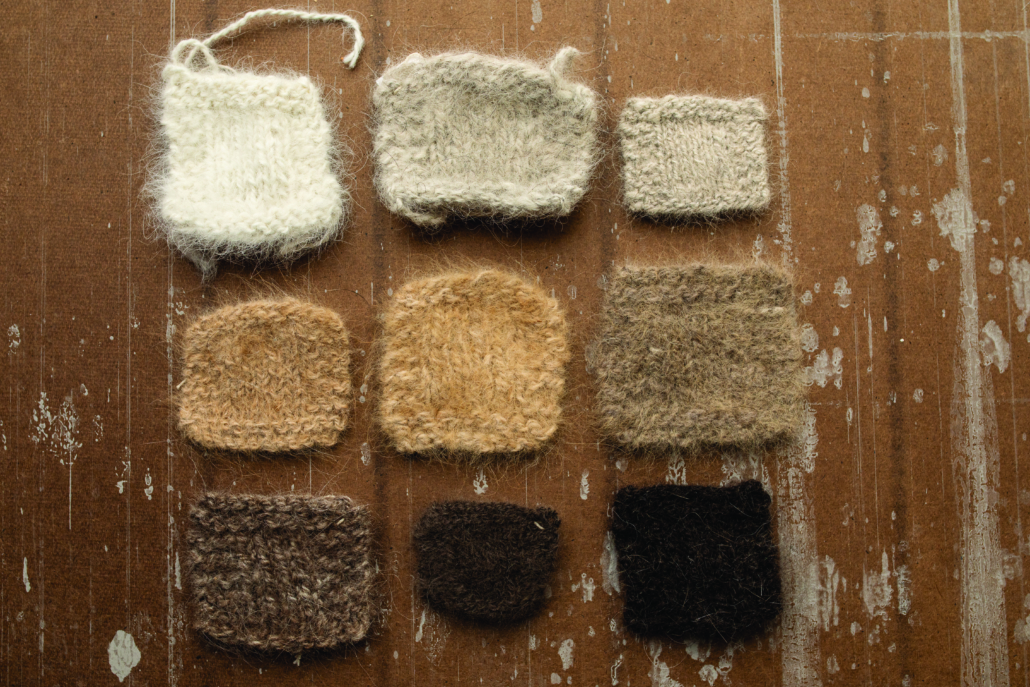
Once your fiber is dry, you can prep it for spinning a variety of ways. As you gain more experience and become more comfortable, you may want to try different methods to prep your fiber.

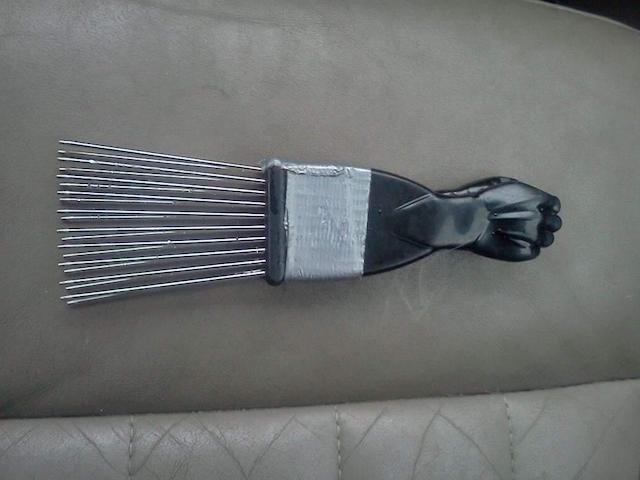
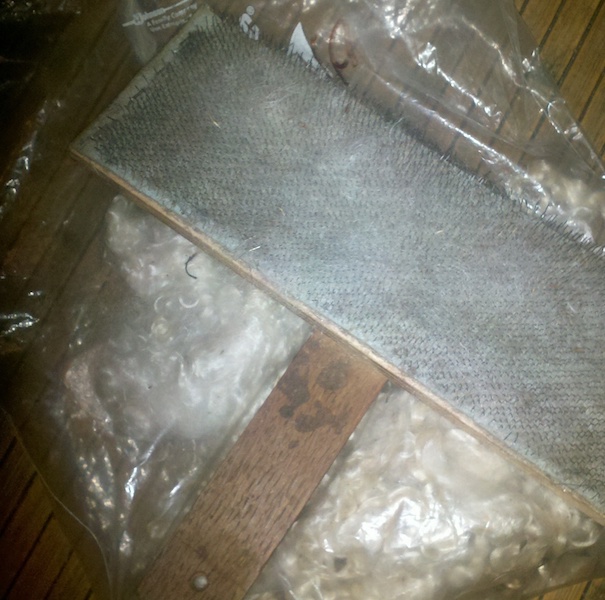
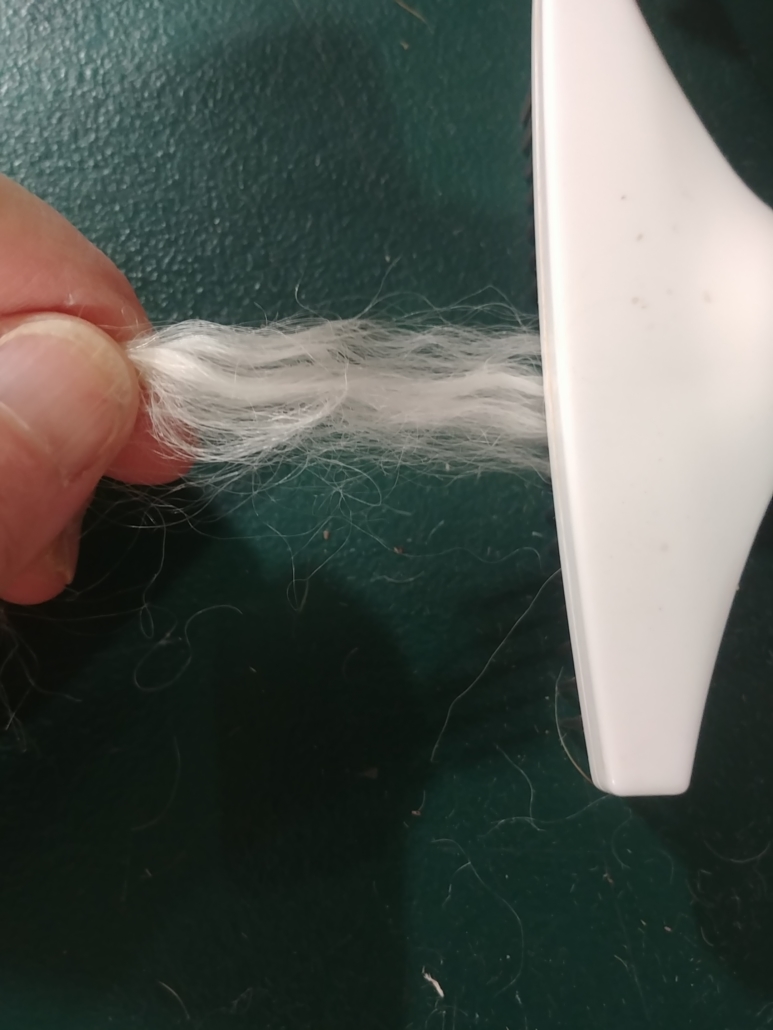
For spinning prep, the easiest way for a newbie like I was just 3 short years ago is to do what is called flicking. I love to sit in the evenings and flick the ends of my fiber locks open using a dog comb. To do this, I firmly hold one end of 1–3 locks, depending on thickness, and gently pull the dog comb over the ends until the tips are nice and fluffy. I then turn the fiber around and repeat the process.

Combing the fiber

You can also use a hand carder or a dog brush to open up the fiber ends. I find this very relaxing in the evening when my husband is mesmerized by his Bigfoot shows and I listen to an audiobook. When we go places, I frequently take fiber with me. I combed enough fiber one night watching our son play lacrosse to spin 75 yards. Plus, it’s a great icebreaker as people will come up to investigate and you end up meeting some great people.

Uncombed Cotswold on the left and combed Cotswold on the right

Margi Wright lives in Maine where she sells baked goods and fiber products at a local farmers market, a switch from her former Jersey Shore life as a teacher. Margi enjoys an active lifestyle completing triathlons, cross country skiing, and traveling with her husband to see her children and grandchildren.

The Fur Issue is coming: sneak peek

Spring is upon us and that means the Fur issue is coming! It’s filled with all the fluffy little animals with fiber so fine and flighty that they delight spinners all over. The issue starts off with wise words from Judith MacKenzie and her take on spinable wild fibers.

From there it delves into exactly how to deal with fur. Stephenie Gaustad, Terri Guerette, and Roy Clemes give you the basics on prepping and spinning these short slick fibers.

Then we get specific with articles about processing, blending, spinning, weaving, and knitting with dog, cat, chinchilla, wolf, and rabbit (along with bits about sea otter, mountain goat, and possum).

There are a couple of great projects and important community news as well. It’s definitely one of PLY’s cutest (and informational) issues yet. Make sure your sub is current by going here. This issue will ship out March 10th (digital issues will be in your account on March 1st).

Prepping Fiber for a Large Project

Words and Photos by Anne Schwarz

I’m making my first sweater from scratch.

This is new for me. Usually I spin a pound of this, a 4-oz braid of that, enjoying the pretty colors or trying my hands at a technique or a yarn design idea, and then I make yet another hat or scarf. In fact, I just finished another 284 yards of a pretty blue and yellow yarn from fiber that caught my eye at a vendor booth, destined to become something, someday. The joy is in the spinning, right?

Well, for a new challenge, I decided a few months ago to try my hand at spinning for a large project. The challenge was consistency – how could I make a couple thousand yards of 2-ply yarn that would look cohesive when knitted up, without disruptive shifts in color, thickness, or texture?

Consistency starts with the fiber prep.

I chose a 70% alpaca/30% Merino blend for my project because I had a lot of alpaca fleece in my stash in a few different colors. Because 100% alpaca yarn is notorious for stretching out over time, I wanted to blend it with some wool to give it some memory. Whenever I think about blending fibers, I consider what traits I’m adding and why. I chose Merino because it’s a fine wool and would not detract from the alpaca’s best quality, its softness.

Planning My Colors

As I washed and picked through about 2 pounds of alpaca fleece, I put it in 2 large piles; one was a mix of white and light beige, and the other was a mix of natural shades of brown.

There are 2 breeds of alpaca: Huacaya, which is a fluffier, crimpier fiber, and Suri, which is smooth and shiny and has a lot of drape but no crimp. I used mostly Huacaya for this project, but I had a bag of luscious dark brown Suri locks, and I couldn’t resist adding a couple of handfuls to the brown mix, as I thought it would add interest to the yarn.

I knew I was going to leave the brown alpaca its natural colors, and eventually dye the white/beige mix. I settled on a sweater pattern that could be made with either 2 or 3 colors.

The Merino I had was white combed top. This would blend in beautifully with my white alpaca blend, and I had the option of dyeing all of the fiber before blending, after blending, or after spinning. What would give me the most consistent color? Probably dyeing all of the fiber before blending because any inconsistencies in color would be blended together. But indecision got the better of me – I wasn’t ready to choose a color yet, so I decided to wait and dye the finished yarn.

The brown alpaca mix was a different story. I didn’t want to blend white Merino with colored alpaca because it would just dull and lighten the rich natural colors. In this case, I decided to dye the Merino before blending, using colors that would complement the alpaca’s shades of brown. I handpainted a length of Merino top with acid dyes in burgundy, a basic red, a rusty red, and golden yellow, plus a bit of brown that was darker than the alpaca and would blend color with color.

Prepping the Fiber Before Blending

While washing and picking my alpaca fleeces, I found my fiber had some variation in staple length (up to an inch difference), and the Merino was similar in length to the longer alpaca fibers. This pointed me towards a carded prep because combs will separate shorter from longer fibers, while carding creates a web of fibers of different lengths, going in different directions. I used a drum carder for both carding and blending.

The first step was carding the alpaca and Merino separately. I’d washed the alpaca and picked out most of the VM, but it needed a couple of passes through the carder to transform the locks into a loose web of fiber that would blend easily. This step also blended the white and beige fleece into an off-white color and the various shades of brown fleece into a gorgeous variegated brown.

I also put the Merino through the carder once on its own, even though it was already processed as combed top. Commercial top can be kind of dense and compressed, and a pass through the carder loosens and opens it up beautifully. In my experience, it blends with other fibers much better that way. However, with my handpainted Merino, this pass blended the colors together more than I wanted, into a sort of reddish brown. It wasn’t bad, but if I had it to do again I would dye the Merino in small single-color batches. I would then run these through the carder separately at this stage, and I would blend in the next step with the brown alpaca.

Brown alpaca and reddish Merino
Blending

Now I had 4 stacks of batts – off-white alpaca, white Merino, brown alpaca, and reddish-dyed Merino. Each stack had several batts. I’d weighed out my fiber ahead of time, so I still had 70% alpaca and 30% Merino in each color group. The next step was to blend them so the fiber ratio was consistent across all my batts.

I put the white batts in one big stack, alternating layers of alpaca and Merino, and then divided the stack into vertical cross-sections that were each about the amount I could comfortably fit on my carder. I put each cross section through the carder and then stacked the batts again and repeated the cross-section process. This method blended the fibers fairly well and evened out any inconsistency.

I used the same method with the colored Merino/brown alpaca. It was all nicely blended and ready to spin.

Blending brown alpaca with dyed Merino
A Few Notes on Spinning and Dyeing

It took me a few weeks to spin the yarn for this project, but I must say the spinning went faster than the fiber prep!

Before spinning, I finalized my pattern choice, selecting Coiled Magenta by Carol Feller of StolenStitches.com. It’s a loose, V-neck sweater that uses 2 colors and some cool color blocking. It calls for 2 colors, but I’m going to use 3 because in the end I divided my white yarn into 2 colors.

I dyed the white yarn 2 different colors for a simple reason – the limited size of my dye pot. I had to dye it in 2 batches, and rather than making 2 dye lots of the same color that might not match, I decided to do a blue and a green. The green dyed a little bit unevenly, and in retrospect it might have been better to have dyed the fiber before blending and spinning, but I think the darker areas are well distributed and will look consistently inconsistent when knitted up.

I had noted the thickness (12 WPI) and grist (approximately 1300 YPP) of the commercial yarn suggested for this pattern. I didn’t achieve the same grist; my brown yarn is the same thickness but is a little heavier, probably because I included some Suri alpaca. Suri just has no loft to it and made for a bit denser yarn. But I made a couple of swatches, and I’m happy with the gauge and the feel of the cloth so I think it will work nicely.

Conclusions

I’m very excited about how my yarn turned out, and I’m really glad I took the time to prep the fiber with quantity and consistency in mind. I also benefitted from studying the yarn suggested for my chosen sweater pattern so my handspun yarn would work as a substitute.

And I learned a few lessons.

First, the addition of Suri alpaca, even though it was probably no more than 10% of my yarn, made a real difference in the grist, producing a heavier, denser yarn than a similar blend without Suri. Second, I wish I’d dyed my Merino in small single-color batches before blending, instead of one long hand-painted piece of top – it would have prevented it from getting over-blended, and I’d have had a bit more color variation in my brown yarn. And last, I have more to learn about dyeing a large batch of yarn with even color, so it might have been wiser to dye the fiber at the beginning of the project, before blending.

Anne Schwarz started spinning 11 years ago after buying a soon-to-be mama alpaca, along with a bag of her prize-winning fleece. She found a beginner spinning class and a world opened up. She no longer owns alpacas, but their wonderful fiber is still her favorite.

Handmaking Spinning Tools

Words and Photos by Denise Williams

Handspinning can be a very expensive craft.

When I decided to start spinning yarn, I had bags of wool but no tools. Internet groups were beginning to spring up, with ample advice encouraging beginners to buy everything under the sun. I’m sure you’ve seen it all: hand carders, drum carders, blending boards, hand combs, hackles… Yes, I wanted every single fiber processing tool there was. However, I had way more time and determination than disposable income. Spinning was not the first nor the only craft in my life, and I know how it is to buy everything out there to find I only use or need a small selection. So I decided to take things slowly and acquire tools as I gained experience and technique dictated.

Maybe when you are starting out, or starting to branch out, you can borrow tools from someone to try out. Unfortunately, at that time, I didn’t know anyone local who was a spinner, so I needed a budget-friendly way to acquire or create what I wanted.

I wish I could remember to credit the place or person where the original idea reached me, with ways to make or repurpose common objects for fiber tools. Surprisingly, I already had the items lying around the house, and I’ll bet you are familiar with these items: pet brushes, horse combs, and afro picks.

I liked to work with smooth, worsted yarns, so my first spinning goal was to reproduce what I used most. For a worsted prep, combs are most appropriate. Wool combs, whether they are viking combs or mini combs, are serious tools, and their price gave me my first taste of sticker shock (well before I bought my wheel).

DIY Combs

My first DIY was trying to find something that could work similarly to the raking action of combs. I started with a long flat hair comb, which isn’t a half-bad idea, except human long combs are not the sturdiest thing. Metal dog combs are sturdy, but the tines are short. So for a while I used a horse comb, made of a heavy enough plastic to rake wool, with longer tines. Still, I couldn’t load much on it. The afro pick became the perfect solution. Now, not all afro picks are created equal. I prefer the metal ones; however, there are a few heavy plastic ones.

My first DIY was trying to find something that could work similarly to the raking action of combs. I started with a long flat hair comb, which isn’t a half-bad idea, except human long combs are not the sturdiest thing. Metal dog combs are sturdy, but the tines are short. So for a while I used a horse comb, made of a heavy enough plastic to rake wool, with longer tines. Still, I couldn’t load much on it. The afro pick became the perfect solution. Now, not all afro picks are created equal. I prefer the metal ones; however, there are a few heavy plastic ones.

DIY Hackle

The very first wool I prepped was medium-stapled Cheviot cross. Using the afro pick worked very well, though as I predicted, my first attempts at spinning didn’t stick, and it was a little more than a year before I would try again. I traded my spindle for a wheel, and that is when the spinning began in earnest. I found I needed a faster way to process more raw wool than a single pair of afro picks could provide. Stringing a group of afro picks together to make my next favorite fiber tool, a hackle, was a very simple build.

All you need is a length of wood, such as a 2×4, a few picks, 2 screws for each pick, and 2 clamps. Set the picks as close as possible to make the gaps even. In some cases, you may have to shave off some of the ends so the picks sit closer. I also found, for the length of the pick, 2 screws hold better than one. Remember to leave room on the ends of the wood for the clamps so they are far enough that they don’t interfere.

DIY Carders

As I explored new fibers, I found I needed to add another tool to my collection: carders.

When it comes to hand carders and flickers, I used pet slickers. Between the German Shepherds and the Angora rabbits, slicker brushes are something I keep, and you bet I’ve tried all kinds of brands to find which will hold up well. Buy the best pet slickers you can afford. Cat brushes seem to have the smallest teeth per inch, but they are also the smallest size. Plastic brushes are less expensive, and I have found those in the largest sizes; I have also found the plastic handles don’t last long, though the cloth holds up pretty well.

Another consideration is buying the carding cloth and building the base and handle. You can purchase a small amount of cloth online for a reasonable price. I bought a quarter inch thick piece of wood from a craft store, glued and then stapled the cloth onto it, and added a handle. Many years later, this is still my go-to large hand carder that I use for all of my flicking preps.

I process 90 percent of my own fibers from raw wool, and while I later bought hackles, carders, and combs, I still find myself reaching for some of my simpler DIY tools. Probably because, just like my handspun yarn, they were handmade to cater to my particular needs. Handspinning is a skill as old as time, with many fine textiles created with simple handmade tools. So don’t let your budget stop you from creating the yarn you want.

Alpaca I processed and spun with homemade combs

Denise Williams, a former school teacher, decided to live her dream and become a writer and artist. Her passion is processing and spinning fibers to knit, crochet, and weave. Denise chronicles her fiber adventures on her YouTube channel, Four Square MicroFarm.