
The Hat Queen
words & photos by Jane Daniels
Hats are often a first knitting project because they can be finished quickly and involve only knitting if done on circular needles with a rolled edge.
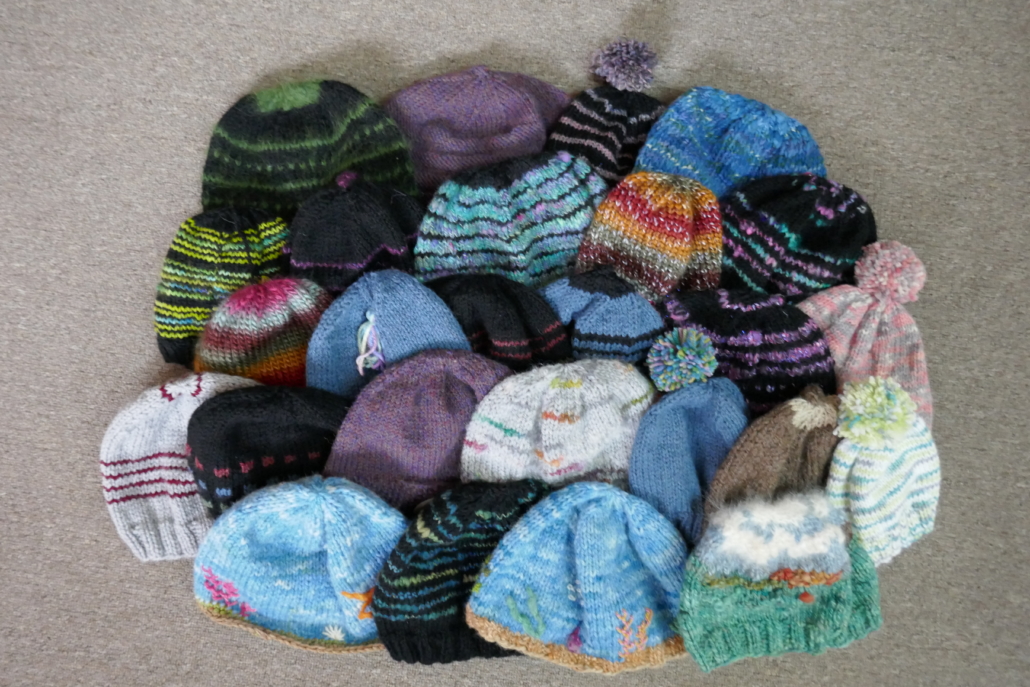
In 2013, I embarked on an adventure to knit 500 hats, as in the Dr. Seuss book The 500 Hats of Bartholomew Cubbins, and decided every hat needed to be unique. Since I had pictures of hats I had made, I figured I had already knit 100 of them, and I understood basic hat construction of several styles.
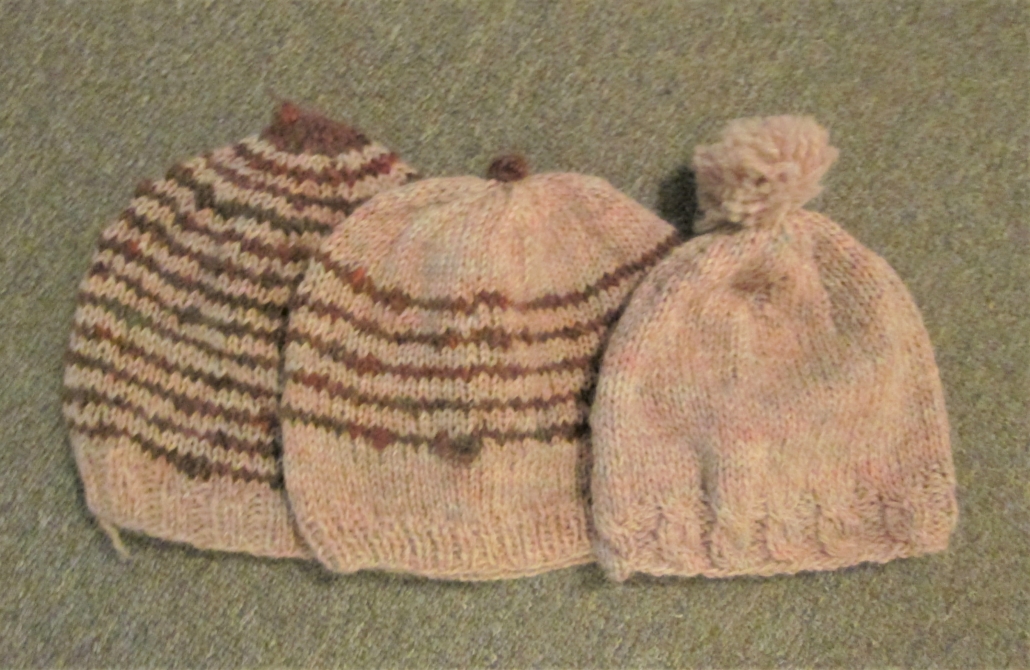
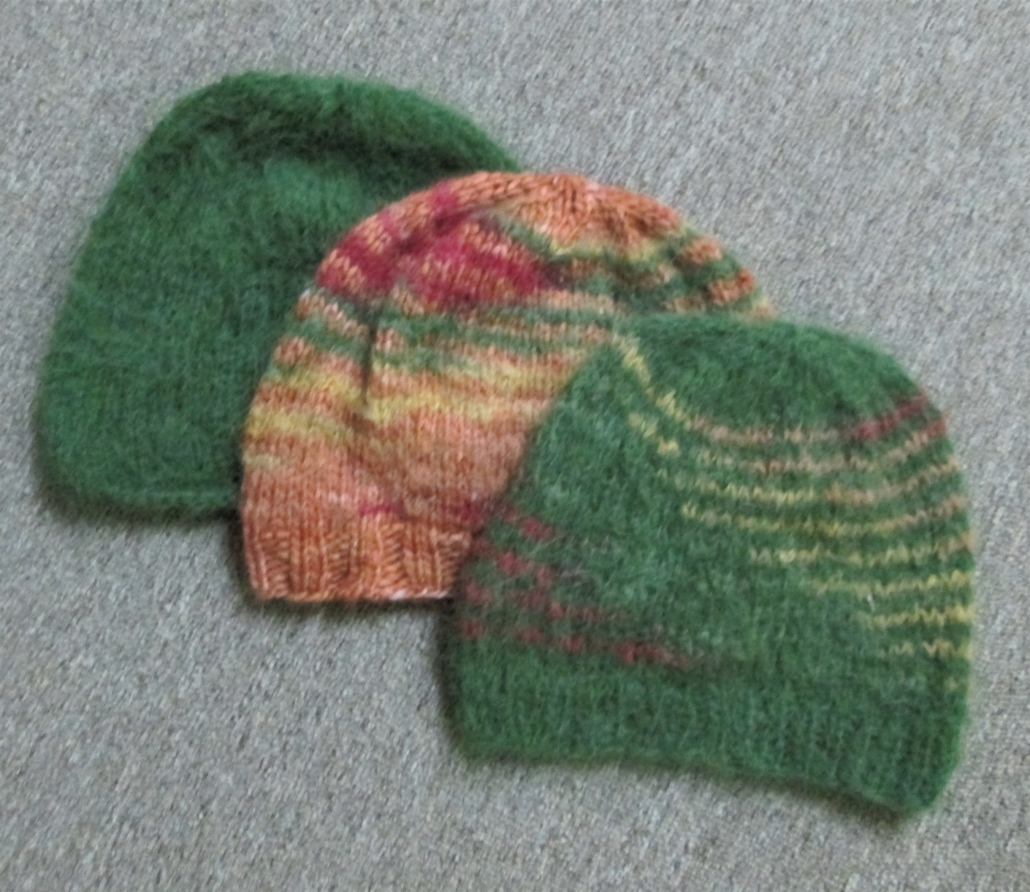
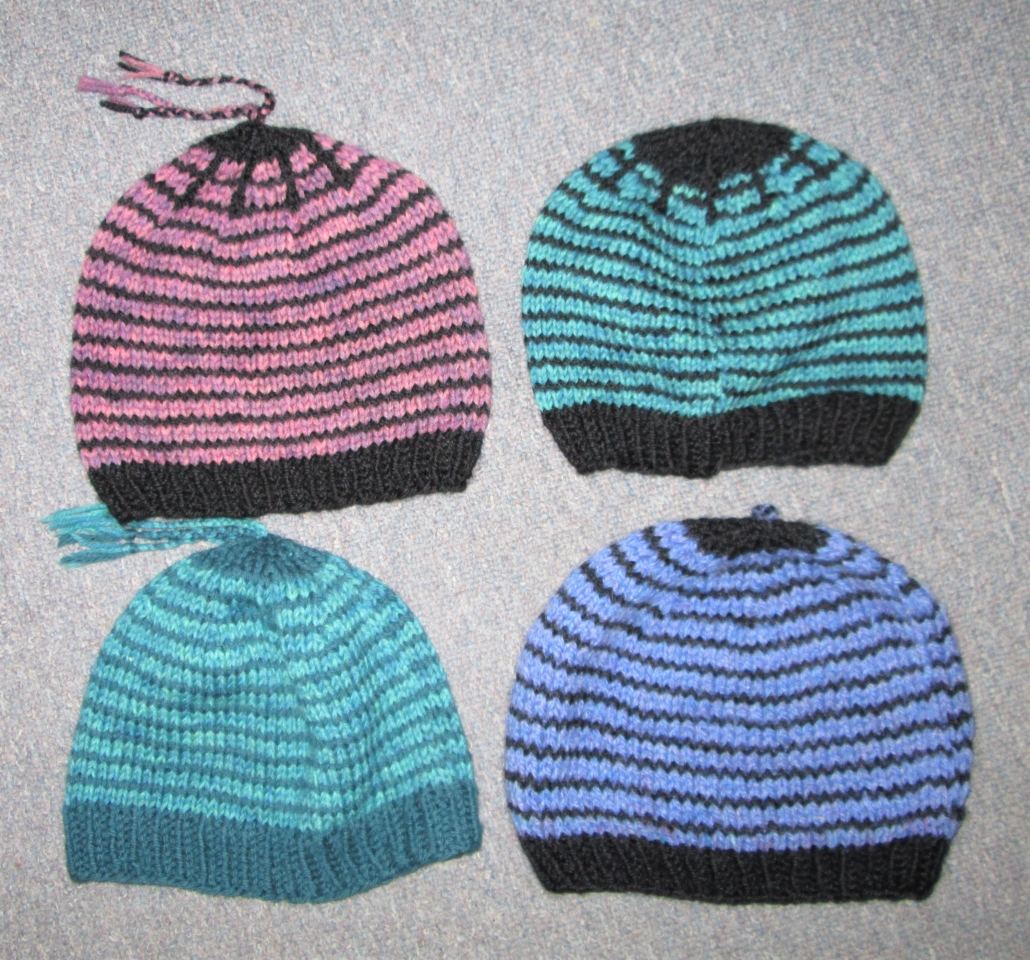
Since I’ve been knitting since 1963, my stash had many small balls. It could have been considered the Fort Knox of tiny wool treasures, and I wanted to eliminate them. So I took seven different yarns (dark, light, textured, multicolored, and 3 coordinated colors) and created stripes as I knit the hat. The ribbing was a neutral color and it separated 3 different yarns. By changing one or two of the yarns, I could create hats that were different yet similar. I learned how colors would interact with each other. When someone wanted a particular color for their hat, by using several shades of that color, I didn’t have to worry about the hat matching a particular outfit.

Some balls didn’t have quite enough yarn for a hat. So as I knit, I added some stripes or intarsia. But those projects didn’t completely solve the problem of too many small balls and sometimes contributed additional ones.
My stash also had yarn that came to my house with a message: “My mother [aunt or neighbor] passed away, and she was a knitter. So here is some yarn.” Another message was “I bought too much yarn for a project, so here are some leftover balls for your hat project.” With multiple balls of the same yarn, I knit different style hats or knit the same style hat but changed the ribbing, size, or how I finished the top or added a rosette to the side.
While I religiously swatch for any knitted garments that follow a pattern, I don’t swatch for hats, scarves, or mittens. Because those items are frequently for charity, I know they will keep someone warm.
As my project progressed, I began knitting series, which were typically done within a short period of time. For the most part, the results were for charity. I gave my series names such White Out, which had different types of stripes on white hats. Another type of series was knitting the same base hat, but adding stripes, using two yarns to make stripes, and then using one of them with another yarn.
To add some variety to my knitting, I took pictures of hats or designs I saw that I liked and asked if I could recreate that design.
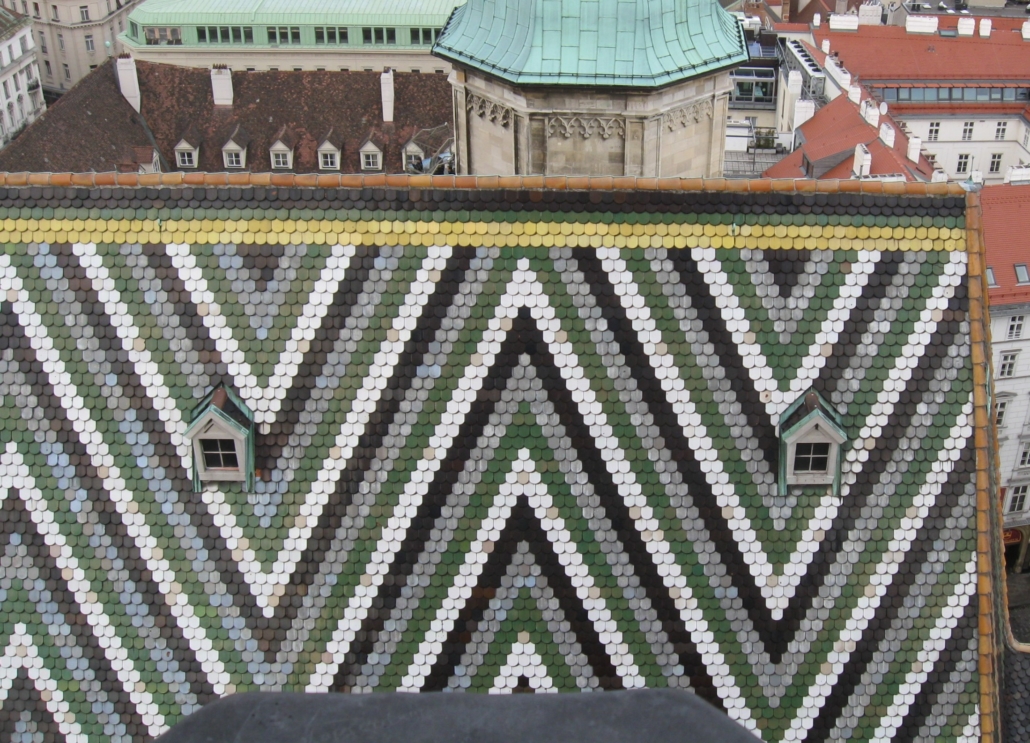
Viennese Roof top
Or I created something that coordinated with a snow suit. When I visited Iceland, the landscapes and the wool inspired me.
Honestly, some attempts produced better results than others. One can learn from duds, and that hat will keep someone warm, everyone has different tastes.
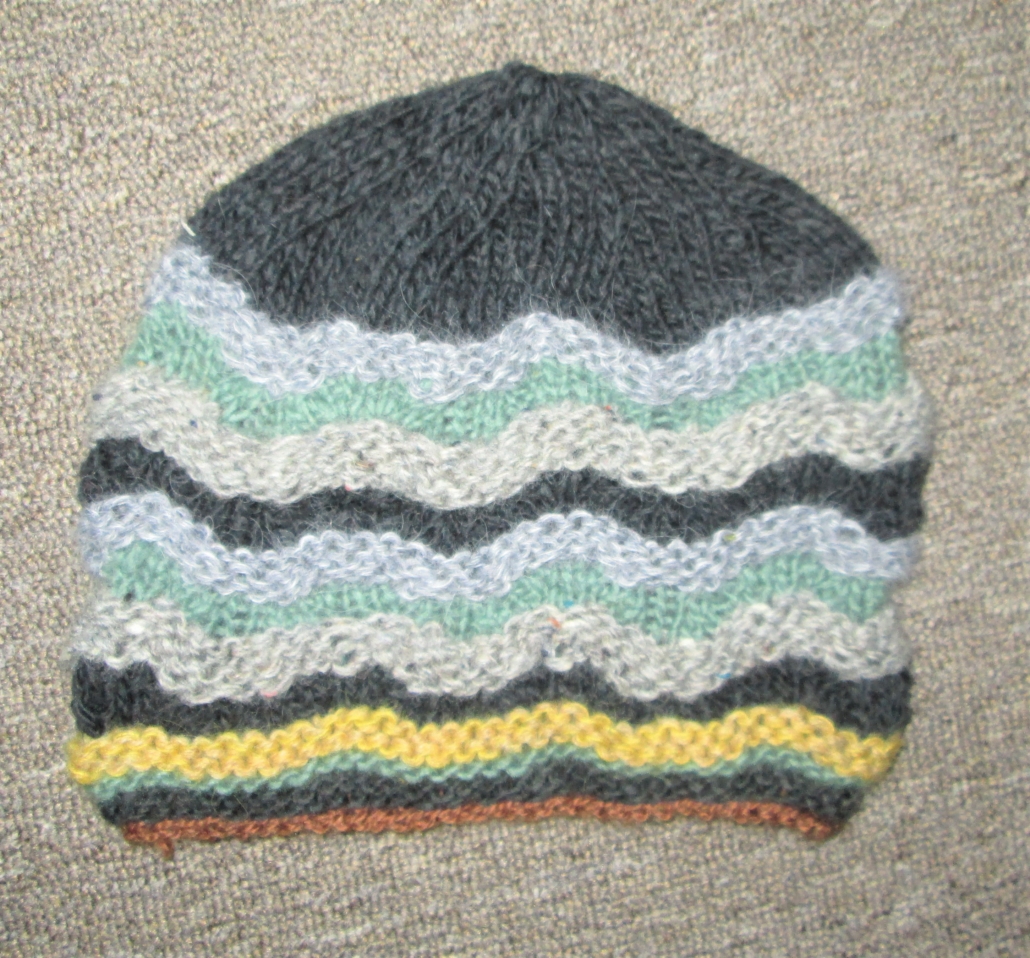
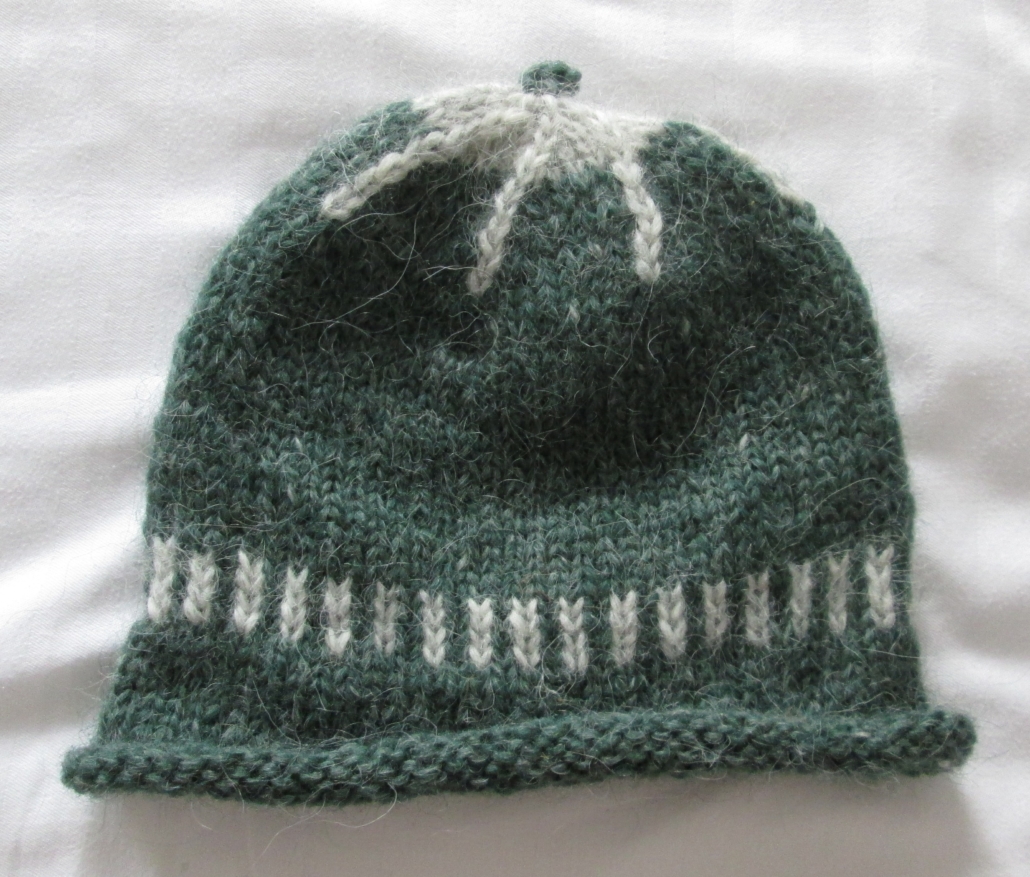
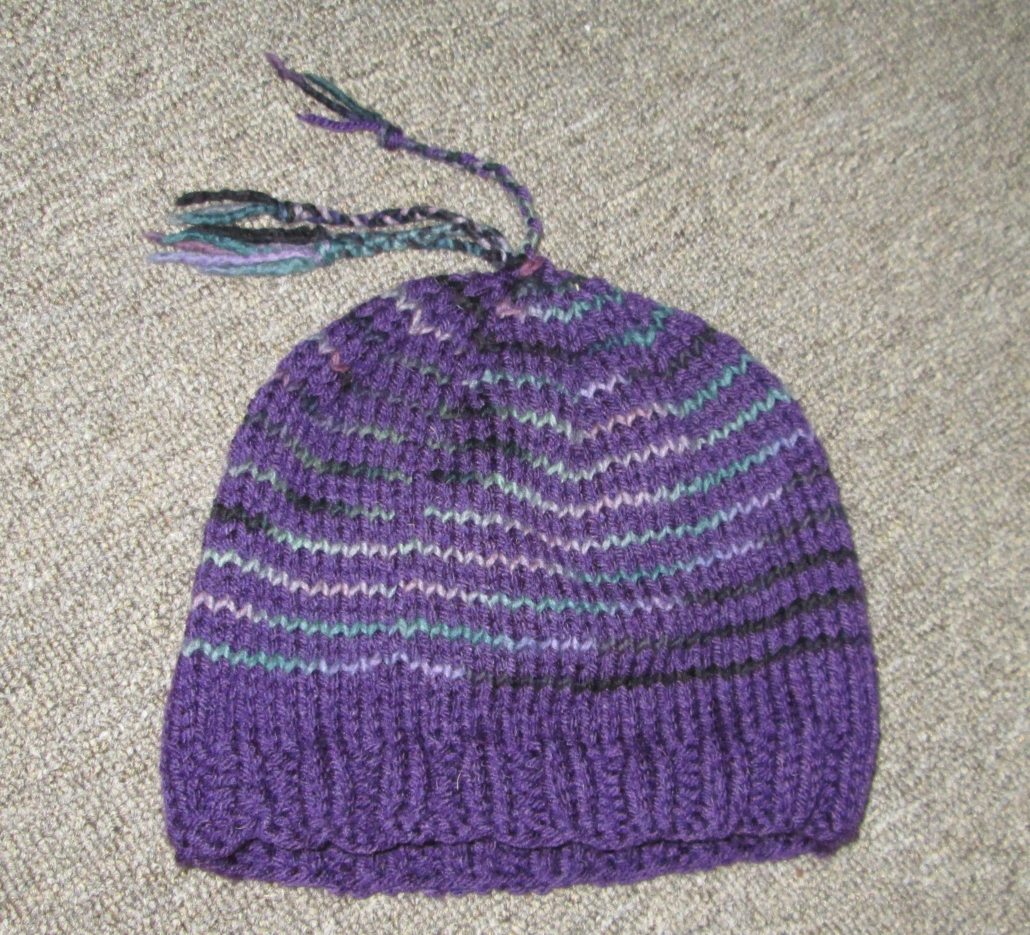
I addressed color pooling on hats several ways. Knitting one row of a color that was in the ombre yarn and then two rows of ombre either tricks the eye and decreases the impact or creates a design spiraling up the hat.
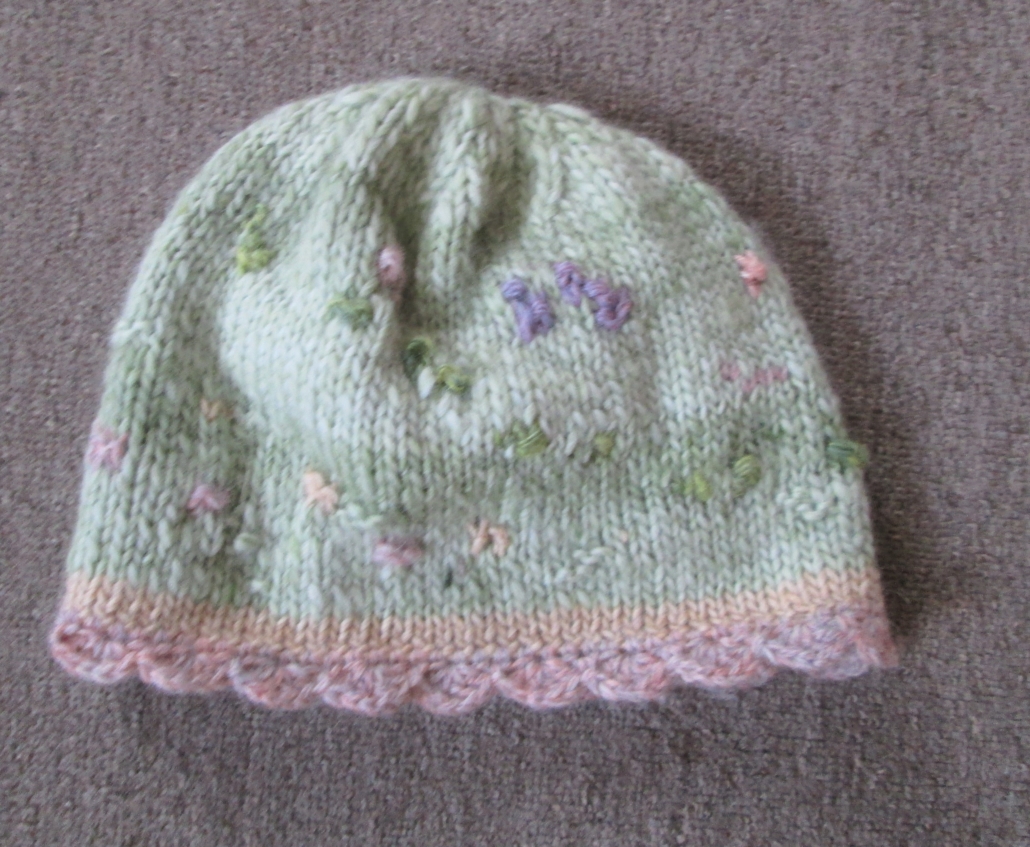
Another way was to randomly purl 1–3 stitches in the body of the hat and on the following round, purl another stitch or two offset from the first stitches purled. Again, it tricks the eye. A third way is to knit first one row and then use another ball or the other end of the same ball on alternate rows. But sometimes, I just let the pooling happen and added embroidery to make a picture.
While I am primarily a knitter, I also spin, but I don’t produce consistent results. So my stash of handspun textured yarns had either limited yardage or were not good enough for a project. Often, limited yardage means stripes.
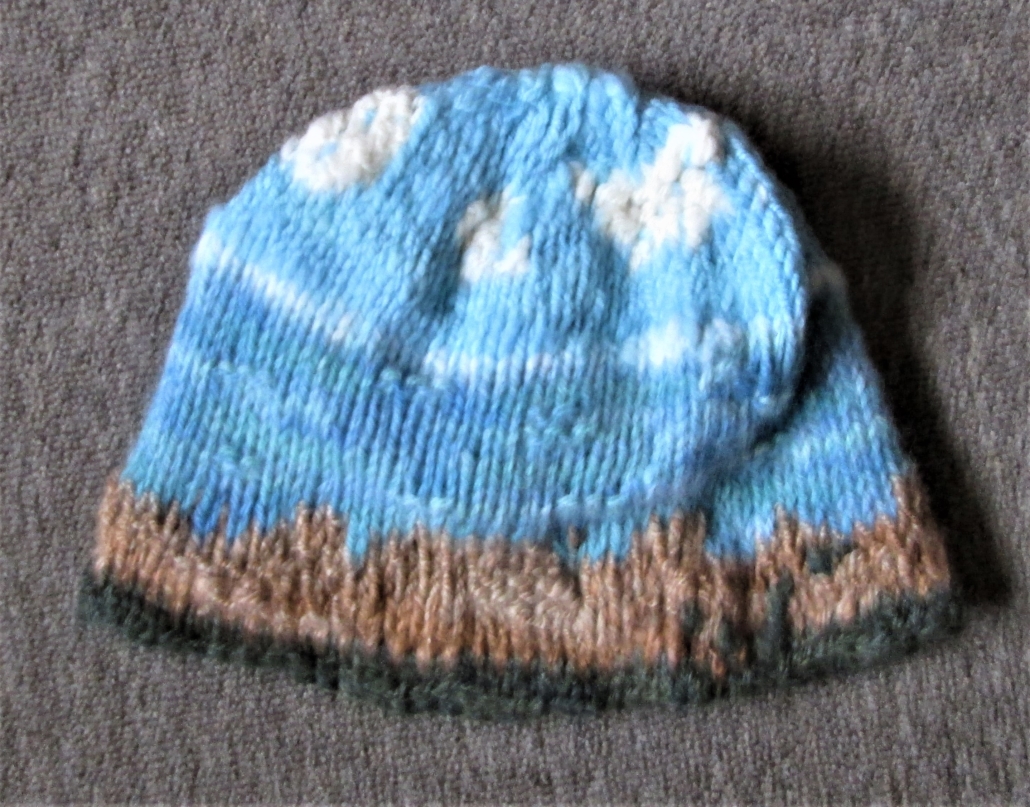
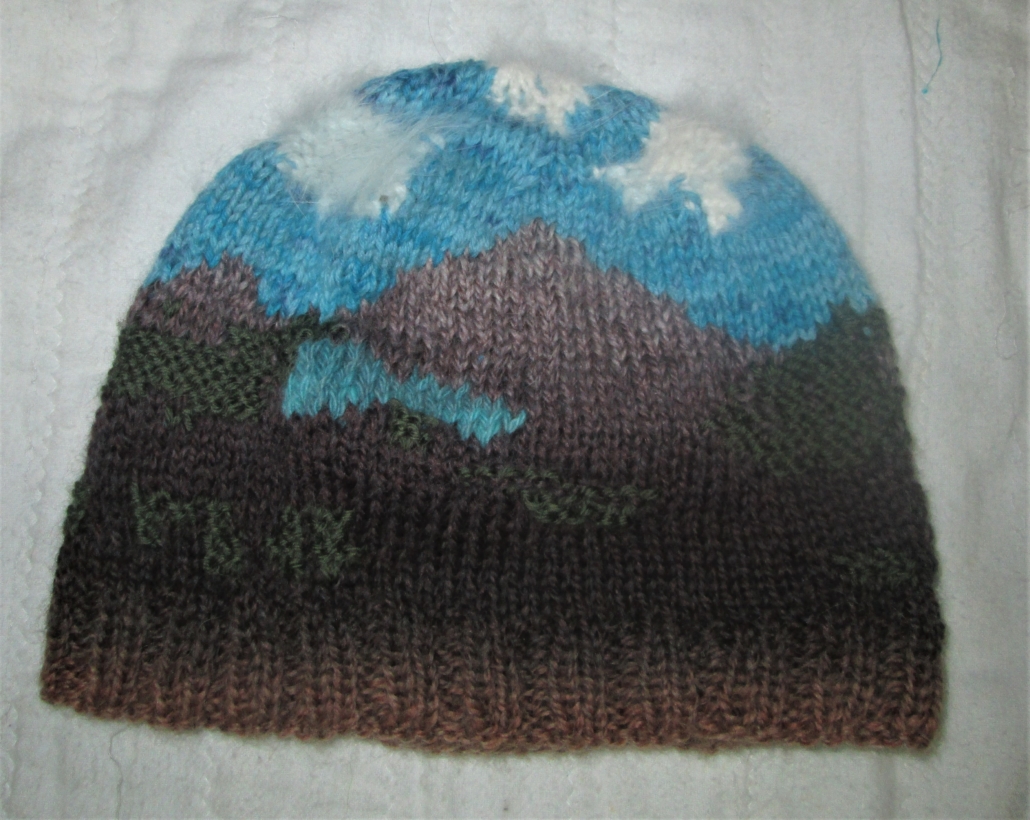
But those textured yarns were ideal for a “picture.” Having knit a landscape on a vest, I decided to try knitting a hat with a landscape. Guessing at a gauge, I cast on and then use intarsia to create the landscape, designing as I knit, adding purl stitches for texture. My landscape hats feature mountains, streams, or even the seashore with vegetation in the foreground and a blue sky with white fluffy clouds. There are lots of ends to sew in, which I do.
What did I do with all the hats? As soon as I had a stack, I primarily gave them as gifts to thank people or to charity. My family and friends benefited as well. My daughters and grandkids always checked the pile of hats when they came to visit to see if they might find one they really liked.
My 500 hats project taught me design, construction, and new techniques, and my knitting friends gave me the moniker “Hat Queen.” Making a hat allows you to experiment with color, use some handspun, try different beginnings and endings, see if you like a new technique, or knit with an expensive yarn. Playing with yarn satisfied my urge to be creative and was like an artist’s sketchbook. I could experiment knowing someone would be able to wear that hat and keep warm.
Basic hat
To knit a medium size hat using either worsted or DK, I cast on 88 stitches with either US size 7 or 8 needles if I wanted k2 p2 ribbing or 90 stitches if I was doing k1 p1 ribbing. The weight of the wool and needle size would determine the size of the hat. I worked the ribbing for about 2 inches and knit until the hat was about 5½ to 6 inches. I chose between 2 styles of decreases: I decreased once every 8 or 9 stiches every other row. Or, when I had used k1 p1 ribbing, I decreased every 10 stitches. At some point, I changed to double pointed needles and decreased stitches until I had 8, 9, or 10 stitches left. I then added one of the finishing touches (see below).
A good beginning
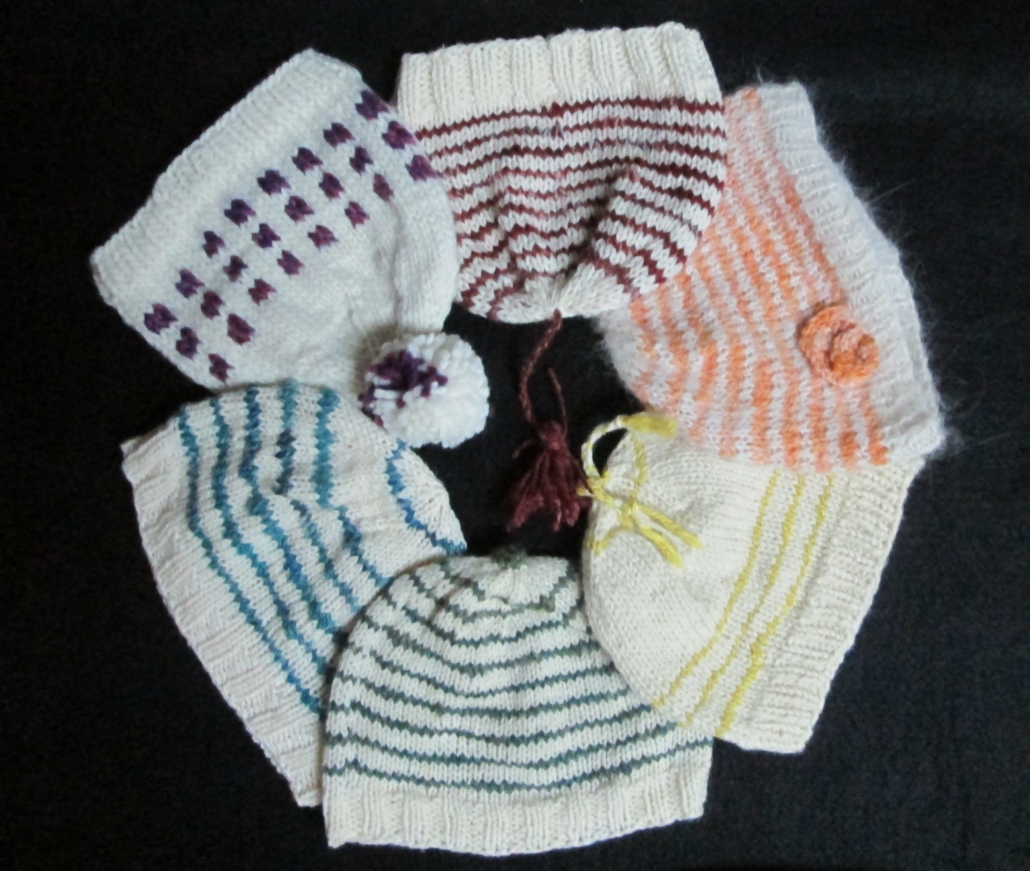
The samples in my photos show a variety of ways to begin a hat.
Ribbing –You never go wrong with k1 p1 or k2 p2 ribbing.
Garter – When knitting in the round, remember to alternate knit and purl rounds.
Rolled edge – The easiest beginning, just keep knitting.
Cables – Cast on a multiple of 6 stitches, k4 p2 for two rounds. On round 3, cable the 4 knit stitches and purl the purls for one round. On rounds 4–6 knit the knit stitches and purl the purls; round 7 repeats round 3; rounds 8 and 9, knit the knits and purl the purls. On round 10, continue to knit the hat.
Lace – Use 8 stitches and an 8-row repeat with 88 stitches in the body.
Finishing touches
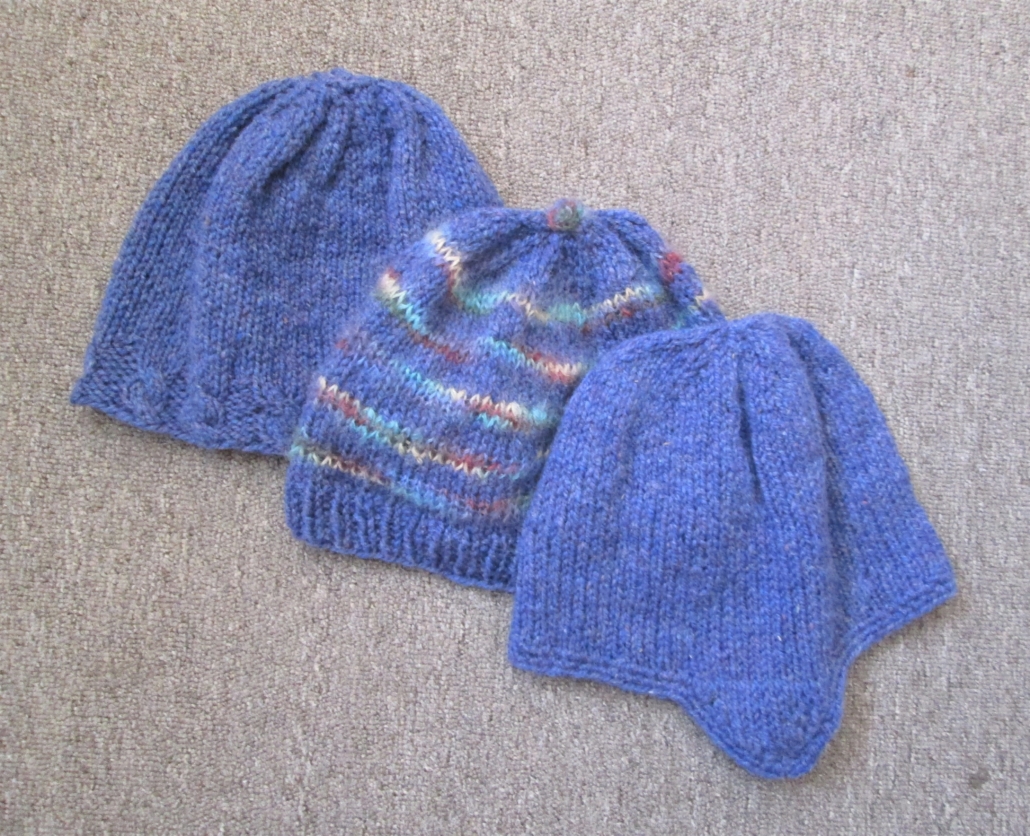
My photos show various ways I finished the top of the hat.
Easy Peasy– Cut yarn, leaving 10 inches; thread yarn needle and draw through stitches remaining on needle.
I-cord point –Continue k2tog until 3 stitches remain. Make a short length of I-cord so it is just a little point (about inches). Cut yarn, leaving 8 inches. Draw through remaining 3 stitches and weave in the end.
I-cord button – Continue k2tog until 3 sts remain. Make enough I-cord so you can form a button or a knot. Cut yarn, leaving about 15 inches and draw through the remaining stitches. Make a knot and sew down with the remaining yarn.
Crocheted Loops – Cut yarn, leaving 24 inches. Crochet a chain, making loops which you fasten down.
Braids – Cut yarn, leaving 8–10 inches. Thread yarn needle and draw through stitches remaining on needle; bring any excess yarn up through gap in the circle of stitches or supplement as needed. Make small braids using the excess yarn. Make a knot at the end, leaving a small tassel.
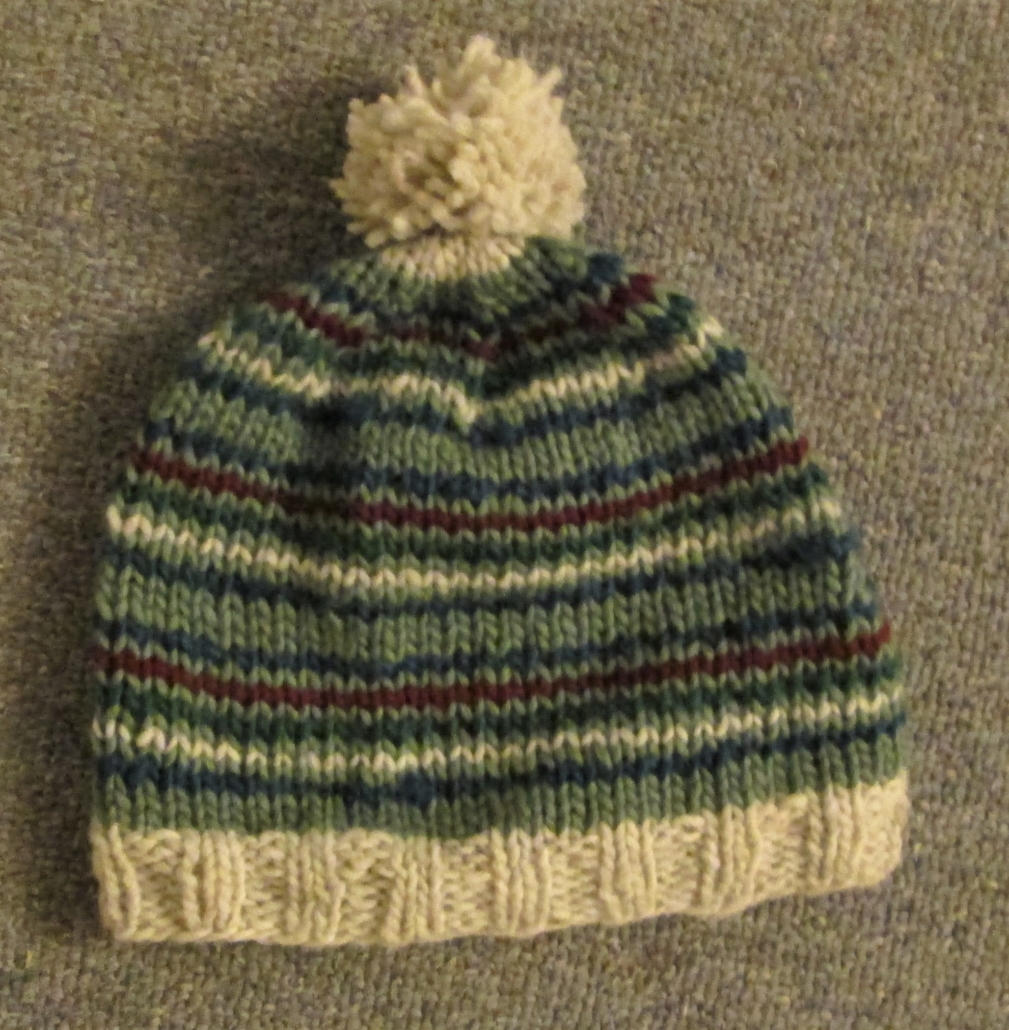
Pompom – Cut yarn, leaving 8–10 inches. Follow instructions on a pompom maker. Once you have formed the pompom and secured it, thread the end of the yarn mentioned above through the yarn which had drawn in the pompom back through the top of the hat. Repeat and then secure the end.
When Jane Daniels was 10, her mother’s 2 attempts to teach her how to knit failed. But as a college freshman, she tried again and found she loved it. Since then, Jane has designed and knit more sweaters than she can count, including 7 original designed fisherman sweaters. Find her as JDHiker on Ravelry.
PLY Magazine believes that Black lives matter, as well as LBGTQI+ lives. Those most vulnerable and persecuted in our communities deserve our love and support. Please be good to each other.
Did you know we also have a monthly PLY newsletter? Sign up here!
Did you know we also have a monthly PLY newsletter? Sign up here!

You are a wonderful hike leader and a fellow knitter!! Wow..I have been knitting and spinning yarn for a while..love the hats!!
If I would like to send this article to a friend…how would I do this? Is it permissible? My friend, Jessica, is a relatively new knitter branching out to hats and sweaters from scarves
Of course, Ruth, we would love for you to share it with your friend! Just copy the URL at the top of the post and send it to her via text or email, or ask her to visit plymagazine.com and navigate to the blog.