

Mixing Things up for a Sweater
words and photos by: Johanna Carter
I always admire those who are able to spin mountains of yarn for a big project, ready to knit a wonderful sweater or cardigan. It is a satisfying feeling when you finish all that work, especially if you started with washing and combing the wool or even raising your own sheep.
Mixing spinning and knitting
The typical way to work through a larger project is to spin all the singles first and ply them in a particular order so you get the yarn even throughout the whole project. I don’t have so many bobbins, but my bigger problem is that I am quite impatient and want to get on with knitting once I have an idea. And normally, my brain is full of ideas for fibre work and the limit is the time, as I am a musician and teacher. I can’t sit at the spinning wheel for a long time if I’m not on holiday, so during the school year I mostly knit, and during the holidays I can dye, spin, use my drum carder, and do lots of fibre work. The only time I was able to produce bigger quantities of yarn before I knitted them up was during the Tour de Fleece in the two years during the pandemic, when we did not go on holiday at the beginning of July.

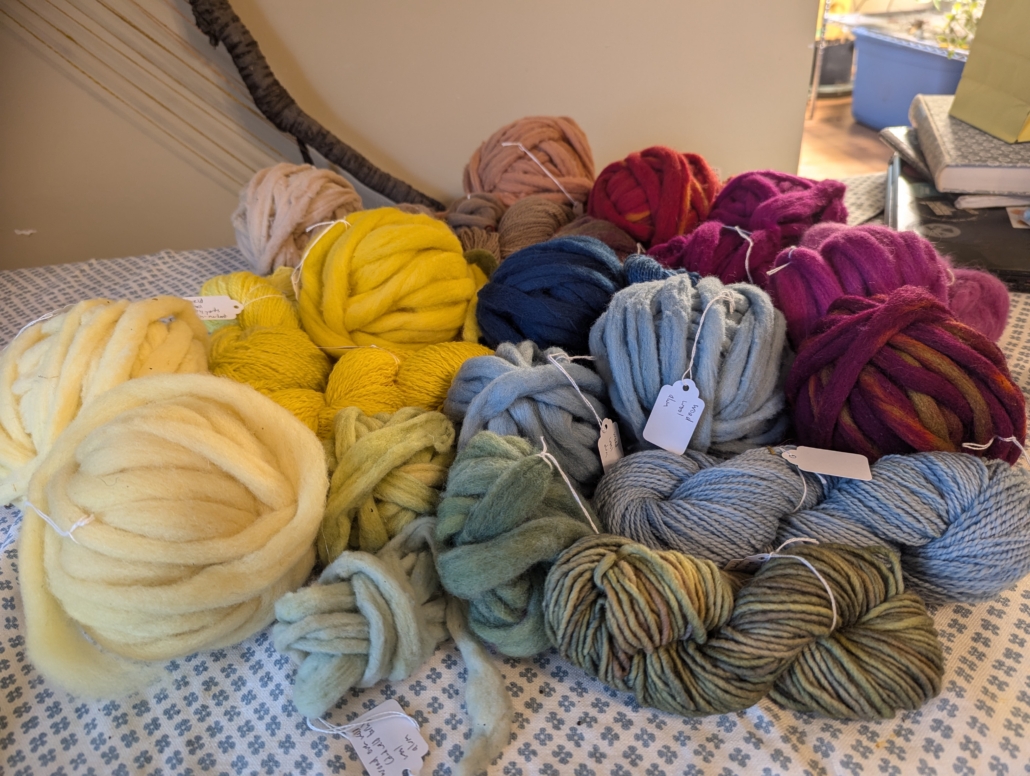
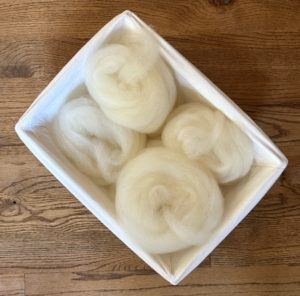
A highly photogenic collection of naturally dyed fibres.
I like to finish knitting one big project like a sweater or cardigan before I start the next one, or at least until I can’t carry it in my bag easily anymore, so I have an excuse to begin the next one. Sometimes it is good to have a second project on the go – I call it mindless knitting, where I don’t have to look very much – which I can keep my hands busy during Zoom or other meetings, which helps me listen.
Mixing colours and fibres
Usually I dye my yarn with plants which I collect in the woods or get from garden flowers. I also use cochineal and indigo, which I buy, to get lots of different colours. I really love the greens and blues I get from dyeing with indigo. I have lots of dyed wool, and all those colours give me inspiration for further projects.

Beautiful greens and blues dyed by the author using indigo and other natural dyes.
Blending the wool on the drum carder I can get even more shades. I like to blend with fibres like silk, alpaca, or plant fibres, and I love sari silk, to get those little bits of colour in my yarn.
Fibres of different types and colours are blended on a drum carder for elegant results.
When I have an idea for the next sweater, I start carding, and then I can begin to spin. Once I have spun enough yarn – say, for one day – I cast on and start knitting, usually top down, so I don’t have to decide too much in advance about length and width.

An idea for the author’s next sweater in the gathering stages.
When I spin on my wheel, I have to sit at home, but while spinning I can read a book or talk to others during online meetings. I also like to spin on my spindles, and that works on a walk, or a museum visit. I take them on holiday as they don’t need much space, and when I spin for a lace shawl, I don’t even need much wool either. At home there are spindles all over the place; I can spin when I am waiting for the kettle to boil, when the computer is slow, when I am cooking. Like that I can make good use of a short time and the yarn still grows.

Knitting as soon as the yarn is spun helps the author complete sweater projects in a timely manner.
I can take my knitting almost everywhere, which is why I don’t want to wait to get started until I have spun all the yarn for a whole sweater. I knit at home, on the bus or train. The only thing I have to make sure of is to be one step ahead with the yarn.
I love to knit Fair Isle sweaters. My favourite method is to use only one bobbin, which I don’t even fill, because I need smaller quantities of lots of colours. Then I wind a ply ball and ply it on itself. For that I put my thumb through the ball, so I can tension the two singles with my fingers and they don’t get tangled, as long as my thumb (or a cardboard roll or a pencil) stays in the middle. I don’t have any leftovers from plying, and it is quick when I suddenly need more yarn.

Several charming sweaters dyed, spun, and knit by the author.
I have never had problems with the yarn not being consistent enough throughout a project. I just know what yarn I want and my fingers seem to remember what to do. I am sure it is good advice to have a little card tied to the spinning wheel with a bit of the singles you are aiming for, so you can check and make sure you are spinning a consistent yarn.
Mixing breeds
There are so many different breeds, but some of my favourites are Shetland, BFL, and Jämtland – a Swedish breed. After dyeing them, I often forget what I have used, so when I do a new project it often turns out that I have used different breeds and fibres just to get the right colour. For the Fair Isle knitting I want to juggle lots of colours, which is more important to me than making a sweater out of only one breed.
Recently I made a pullover for my husband using about 12 different breeds and colours, even mixing short and long draw. For me it was a breed experiment and a way to use up lots of smaller quantities of wool I had in my stash. For that sweater I used combed top without blending.

Mixing in knitting during the spinning process is a wonderful way for a spinner to avoid being overwhelmed during a sweater project.
My feeling is that some people don’t dare to start spinning for a bigger project because they get overwhelmed by the quantity they have to spin and then all the knitting there is to do, especially when you want to spin the yarn entirely on spindles. Mixing the spinning and knitting for the same project is more interesting; you get more variety and more freedom to choose what you want to do next as long as you don’t run out of yarn. It breaks the project down into smaller, less daunting parts. The only thing you might want to plan is to have enough fibre at the start, but even that is not necessary, there is always a sheep growing more wool.
Dying, Dyeing, and Me
words and photos by Miles Hilton
The first time I visited Shatzi Weisberger’s apartment, she herded me over to an ornately carved wooden box by the window. Gently, she lifted the lid to expose folds of white fabric, fringed with embroidery. A sticky note on top read “Shroud.”
“This is my death shroud,” Shatzi explained in her thick New York accent. And she rattled off, as seamlessly as she might order coffee from a favorite restaurant, the plans she had made for her own death and burial. She was eighty-seven at the time, and had been preparing for her death for decades.
And boy, was she prepared. Every item in Shatzi’s house had a sticky note with someone’s name on it – the person who would inherit that item when she died. Her Do-Not-Resuscitate paperwork was pinned prominently by her headboard, and she kept a running email list of people to be notified when she passed.
Don’t be fooled into thinking Shatzi was depressive or morose – quite the contrary. We met at Dyke March in NYC in 2017, which she attended in her wheelchair. She was a fixture of protest marches in the city until well into her nineties, smoked more weed than any twenty-something I knew, and had a sharp sense of humor. Her knowingness of her death enlivened her, gave texture to her life.
While it may seem theoretical, all this talk about death and dying comes down to a basic, physical question – what to do with the body. Religious traditions often suggest an answer (Shatzi’s plans for her death were informed by her Judaism), but in today’s increasingly impersonal and capitalist world, many people are pressured toward two options: cremation, or embalming and burial.
Shatzi encouraged me to think carefully about whether these were what I wanted for my body, and I decided that, like her, I wanted to be buried somewhere in the Great Northeastern Forest. Forest burials usually involve wrapping the body in a shroud, and most forest cemeteries will provide one. But I’m a handspinner.
So I decided to weave my own shroud.
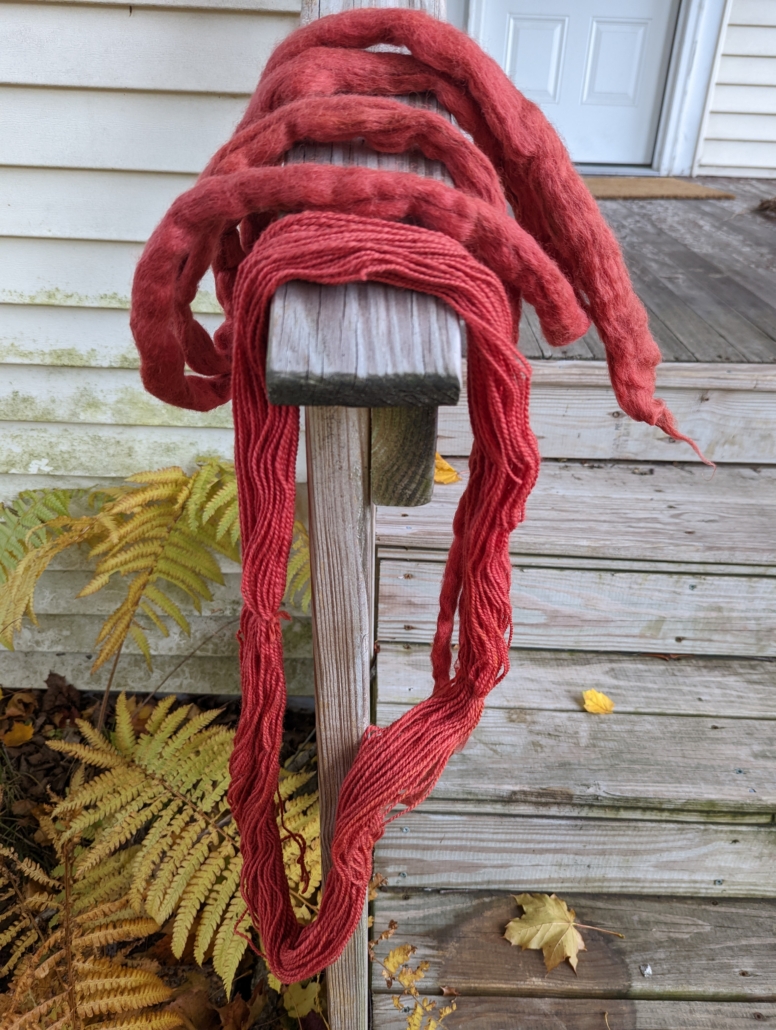
That’s not quite doing it justice – I decided to spin, weave, and dye my own shroud. As a practice in meditating on my own death. As a thank-you to my dearly loved body. As the most important work of art I will ever create, and the most important garment I will ever wear.
Spinning and weaving something meant to decompose comes with its own set of considerations and constraints. Natural fibers only – obviously. I have an affinity for wool, so I sourced lightly processed roving from farmers around Western New York, where I was living at the time. I chose white wool, to make the dyeing process easier. Using a short forward draw, I spun thin worsted singles, fairly tight, on my Ashford Kiwi – my usual singles preparation for weaving. Two-plying these singles gives a balanced yarn that’s strong enough to warp with.
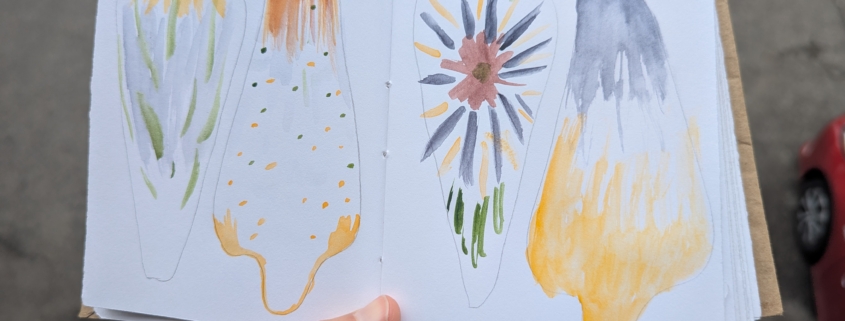
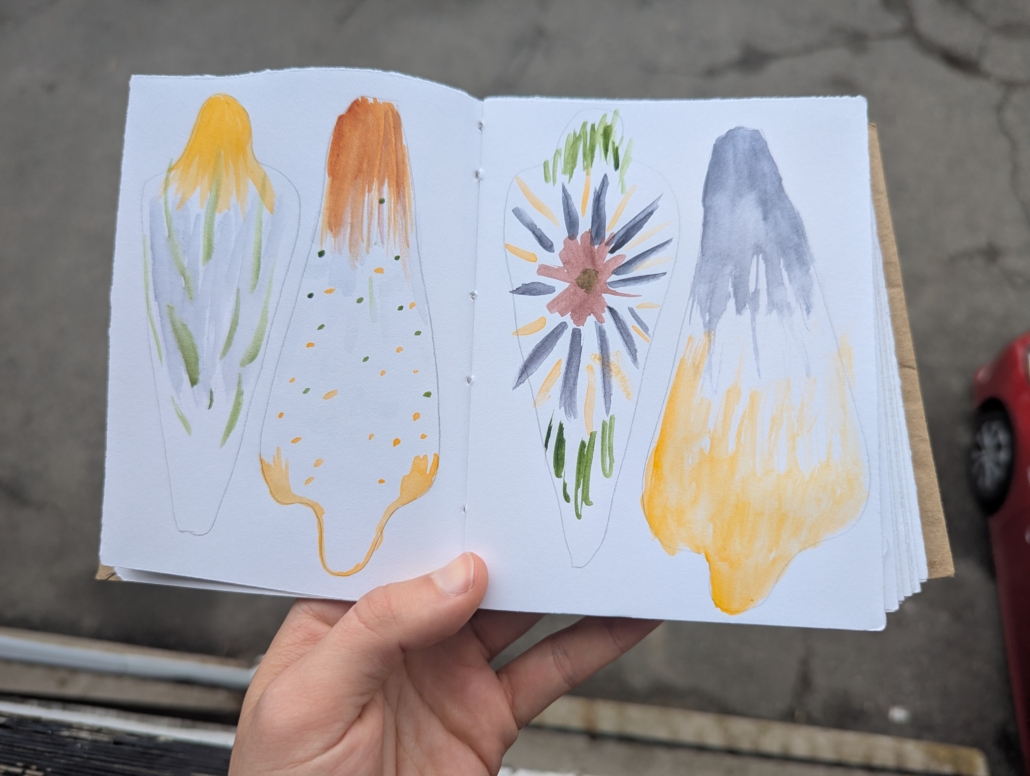
While shrouds are typically white, and mine will be mostly white as well, I want a bit of color in the mix. Gold cascading down the head of the shroud, meeting streaks of pale sky-blue along the body. Greens and browns to decorate the feet, with pops of magenta along the crown and ties. Again, synthetic dyes were off the table, as were heavy metals in the mordanting and dyeing process, so I turned to dye plants. I chose to plant woad, weld, and madder – both because they grow well in Western New York and because they’re important to me ancestrally – and responsibly foraged goldenrod, black walnut, and pokeberry, all of which are indigenous to the area I live in.
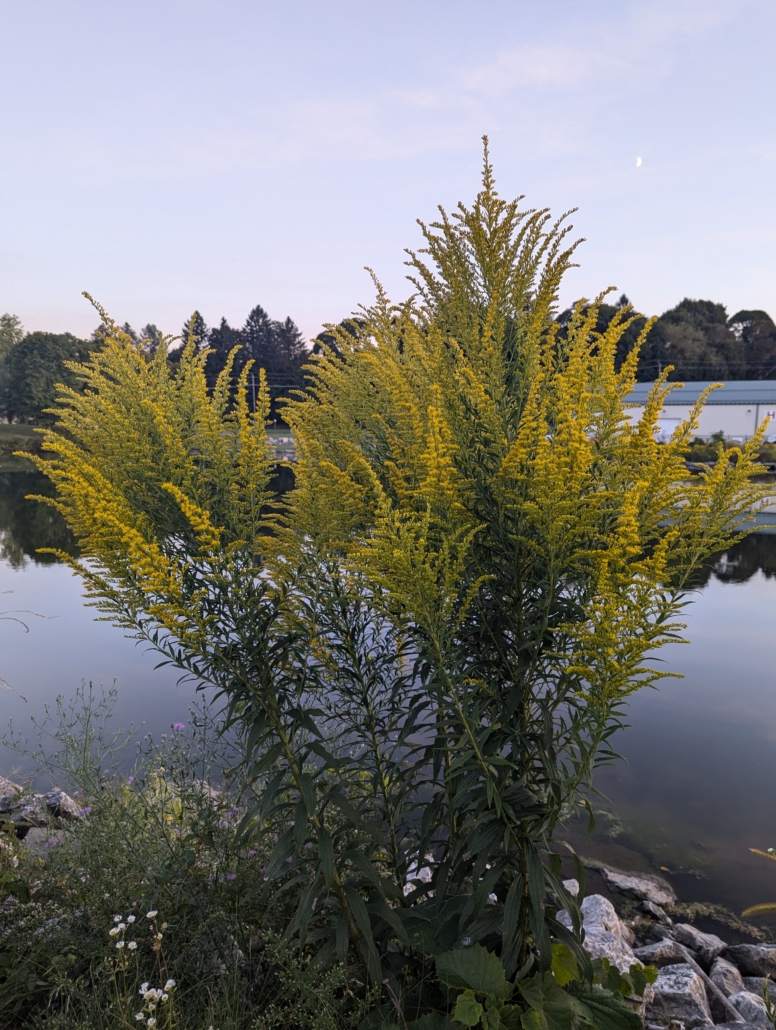
A note on foraging – I took care to forage only plants that were abundant in my area. I cultivated the goldenrod and pokeberry in my own yard, and black walnut is famously generous in showering her nuts on yards, forests, and roadways throughout the Great Lakes region. I foraged according to principles synthesized by Dr. Robin Wall Kimmerer in “The Honorable Harvest,” an essay in her collection Braiding Sweetgrass, and only after several years of attending to the land in all its seasons.
With Carol Leigh Brack-Kaiser’s Nature Provides Dyes for Rainbows as my bible, I set out on a months-long experiment in growing and using these dye plants. Spinning is something you can sit down and do whenever you feel like it, but plant-based dyeing sets its own schedule. You harvest when the plant is ready, and dye soon after. If you don’t go foraging when the berries, leaves, or nuts you need are at their fullest, you won’t get the color you want. My entire late summer and early fall in 2024 went at the pace of the flowers and berries ripening around me. Plans schmans; one weekend was all about goldenrod, the next was all about poke. Getting blues from woad requires a complex, multi-step process that made me feel like a chemist in a lab and took all of a long weekend to fully attend to.
As my dyepots bubbled and skeins of finished yarn simmered in their alum baths, I met these plants, some of whom I had lived around for years, in a whole new way and on their own terms. This is a good practice, I think, for life, but also for death. After all, death comes to us on its own terms.
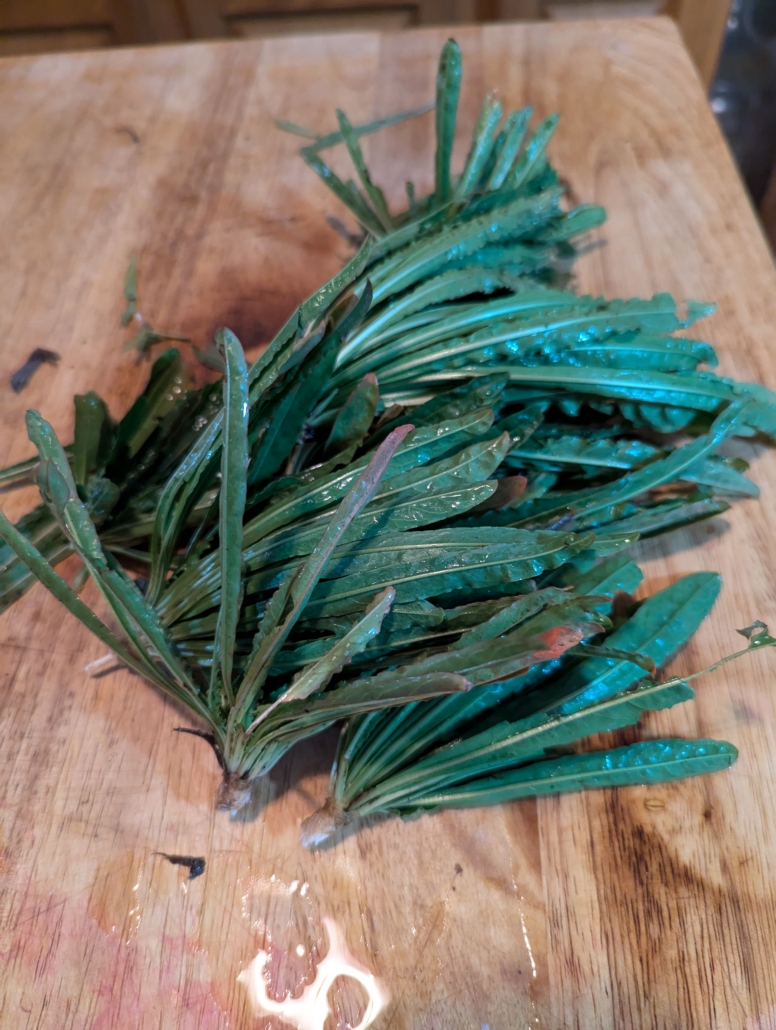
Spinning is deeply tactile, as every handspinner knows. Every inch of fiber goes between your fingers – more than once, if you card or comb your fiber, or ply your finished singles. Dyeing is also tactile. I soaked clumps of leaves, then smooshed their juices out between my fingers. I pressed the juice of berries through sieves and broke nut-pods apart. I dipped skeins into dyebaths over and over again. That whole season, splashes of overlapping color stained my hands.
I’m weaving the shroud on my Kromski Harp rigid heddle loom, letting myself play with pick-up stick patterns drawn from Textures and Patterns for the Rigid Heddle Loom by Betty Linn Davenport. When it comes time to weave the ties – strong woven bands that fasten the shroud round the body – I’ll use tablet weaving. This skill will be new to me, just as plant-based dyeing was a new skill, and just as this is the first time I’m spinning at this volume. Even as this project is helping me relate to my own death, it’s also driving me to expand into my present aliveness, making more time for a craft I love, and learning new ones along the way.
By the time I’ve finished this shroud, how many times will my fingers have handled each square inch? A dozen? More?
This process, as you can tell by now, has been going on for years. But I’m in no rush. I have decades, hopefully, before the shroud will be needed. Decades in which the process of making it will have connected me more deeply to the animals that gift me wool, the plants that gift me color, the human communities that gift me the knowledge and tools of spinning and weaving, and the land that underlies it all. When my body is wrapped in this garment and returned to Earth, all of these relationships of support will go with it.
Years after I first visited her apartment, around the same time that I was learning how to spin, Shatzi died at home, exactly as she had planned. She was buried, exactly as she had planned, in a forest cemetery. Wrapped in that shroud.
I like to think of the shroud she so carefully folded being gently wrapped around her by the loving hands of her community. I like to think of her body, which she used to the fullest for decades, gently melting back into the Earth surrounding it. I like to think of the gratitude of the worms, of the trees and of the mycelium, for so great a gift. And I lovingly and deliberately prepare my own gift – my shroud – for when the time comes to return this body to the Earth.
Miles Hilton (they/them) is a human being from planet Earth who prefers to live in deciduous forests. They are a writer, handspinner, and graduate student at Harvard Divinity School, where they study comparative religion. They live in the Boston area with too many looms for a two-bedroom apartment.
A Sweater Inspired by a Family Photo
Words and photos by Debbie West
It all started with this sweater!
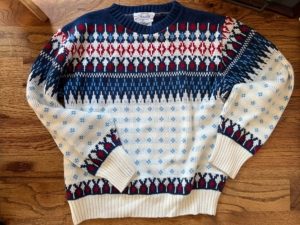
Once upon a time, I had a photo of my mother wearing it in her mid-twenties. The photo did not survive the passage of time, but the sweater did, making it at least sixty years old. I thought this sweater could be an heirloom. Unfortunately, it is not what I would consider heirloom quality – it is machine knit, made with acrylic, and poorly seamed. My idea was to create a true heirloom sweater, inspired by my mother’s 1960s sweater. It would start with raw fleece and be hand-processed, handspun, and handknitted – something my thirty-two-year-old daughter would be proud to wear now and also when she is in her eighties, as my mother is now.
Selecting the perfect fleece
I started with Targhee, a breed I have historically loved. The fleece I purchased turned out to be VERY fine and quite short. The fiber was so fine, in fact, I found it difficult to comb with my large English combs. Though I still love Targhee, I needed a yarn that was rugged and durable, if it is to survive a half century or more.
Backpedal just a bit:At one time I thought I might like to raise sheep. Hubby vetoed that! As we live in the Southeast United States, it is hot and humid and generally not a great climate for sheep. After some research, I found a breed that is supposed to thrive in our environment: Gulf Coast Native Sheep.
I found a farm in North Georgia that raises Gulf Coast Native Sheep. Serendipity, right? The farm is called the The Ornery Shepherd and is owned and operated by Shelly. And when I reached out, I learned she had just finished shearing! She invited me to come look at the fleeces, meet the sheep, and purchase what I wanted. I love it when things just work out!
My mom and I packed up our snacks and went on a road trip to the farm, about two hours north of where we live in central Georgia. When we arrived, Shelly greeted us warmly and took us to her basement where she had bags and bags of fleece, each labeled with the name of the sheep who donated the fleece. Shelly helped me inspect the fleeces and choose just the right one with the characteristics I was looking for. Afterward, she took us to the back of the farmhouse, where she has several acres of land with grazing sheep. As we approached, they all came running to meet her. What a heartwarming sight to see her sheep so excited to see her! And we met Atticus – the previous owner of my fleece.
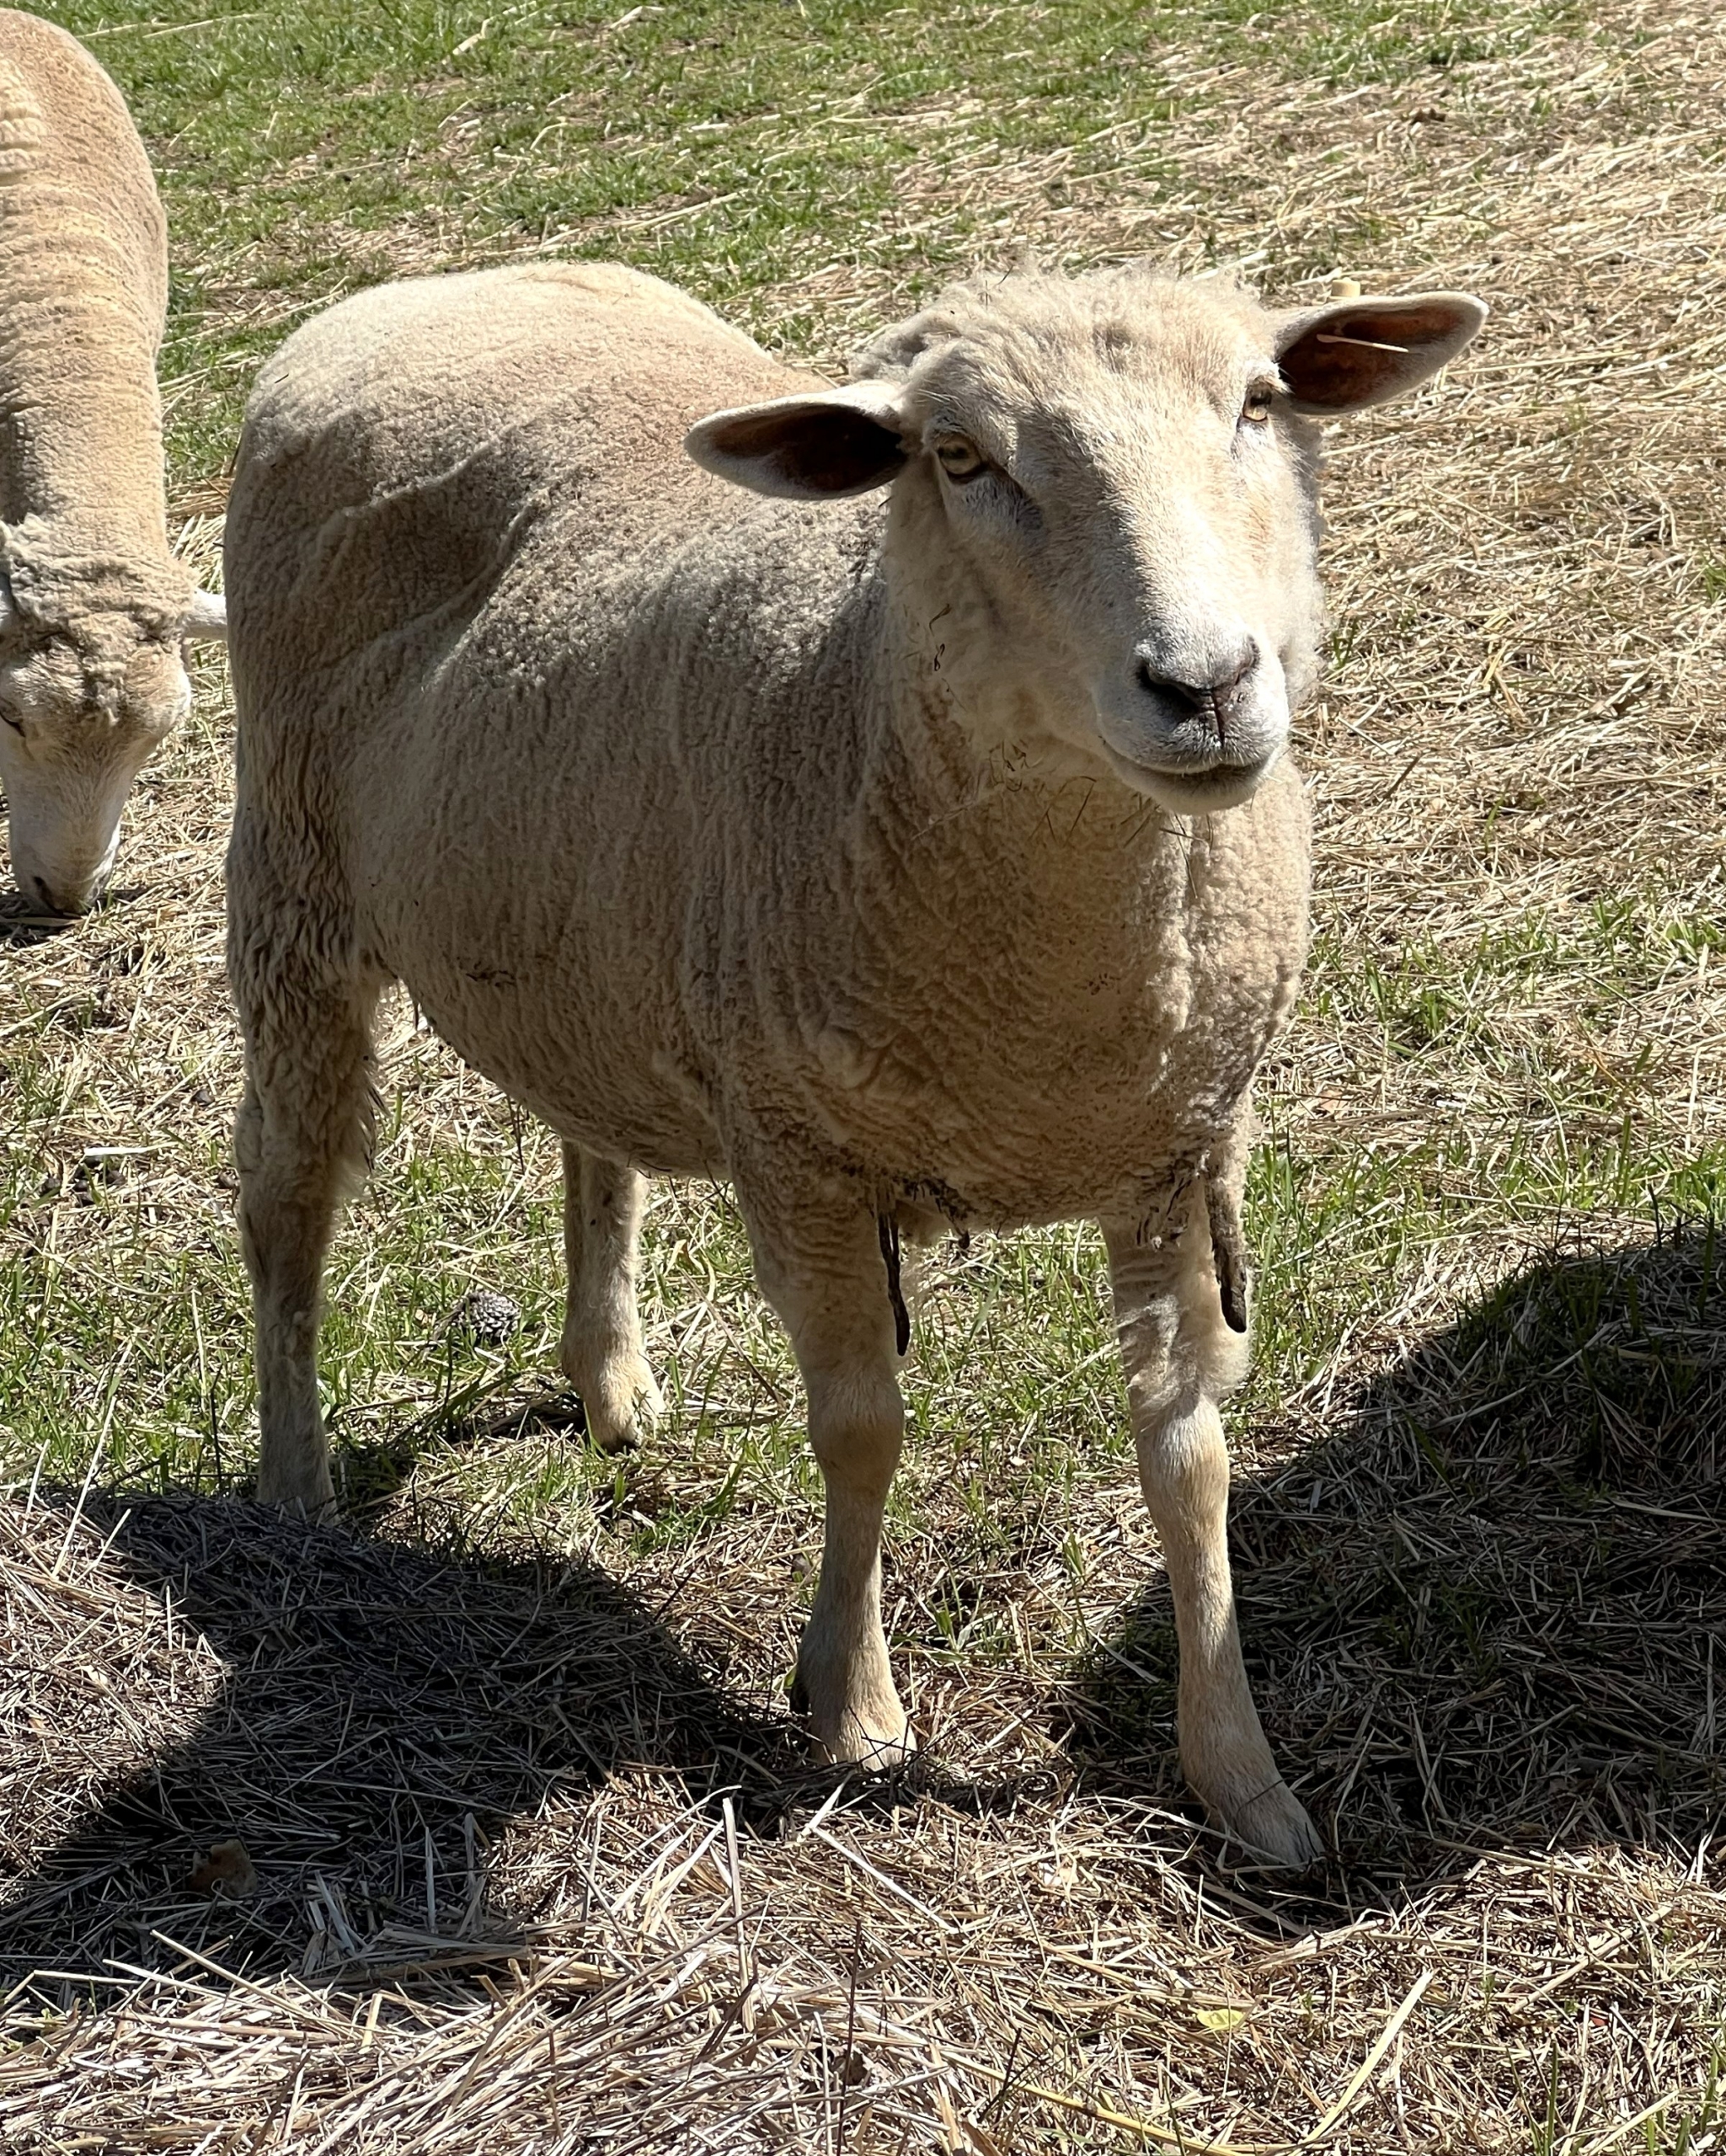
Atticus was not so cooperative for a photo, but this is one of his very cute sisters. They look just alike!
Atticus’s fleece was squishy and bouncy with a fiber length of about 4 inches, a nice crimp that was not too fine, and a lovely amount of lanolin without being gummy; and there was not a lot of vegetable matter. Perfect! I bought 3-1/2 pounds of skirted fleece with the intention of combing the fiber, anticipating having about half “wasted” – to be used for other purposes.

I was not looking for a truly worsted yarn, as I wanted the sweater to be soft, squishy, and cozy – all the things the acrylic prototype is not. I decided to spin the yarn using a backward draft (my favorite) and allowing twist into the drafting zone, a decidedly not-worsted spin.
Spinning
I washed the fleece with a wool scour in hot water with minimal agitation, squeezed the fleece in a towel, and then let the fiber air dry for a few days. I aligned the locks and then used large English combs to comb the fiber into beards. I then used a diz to form nests for spinning.
Funny aside: We have five dogs, and one is a spitfire chihuahua mix. I came downstairs one day with a large wad of dirty fleece in my arms. This little girl went nuts – barking, hair raised, ready to kill whatever creature I was carrying down into her territory. The wad of fleece was bigger than she is!
I experimented with a 3-ply, tight singles and a loose 2-ply, and loose singles with a tight 2-ply. The loose 2-ply did not have enough stitch definition and was dense, while the 3-ply felt a bit stiff and unwieldy. I settled on spinning the singles loosely, rewinding the singles, and making a 2-ply with a tighter twist. The objective was to keep the yarn soft (loose-spun singles) but to have nice stitch definition (a tighter twist in the ply).
I spun the singles at about 3 TPI and then plied at a twist angle of 30 degrees. I ended up with 18.6 ounces of yarn with a “waste” margin of 55 percent. I got about 1,060 yards per pound (YPP) and the final yarn knit to a gauge of DK weight yarn. I finished all the yarn samples and the final yarn in hot water with a gentle wool wash. I snapped each skein several times and then transferred them from cold water to hot water three times. I pressed the skeins in a towel and then hung them without weights to dry naturally.
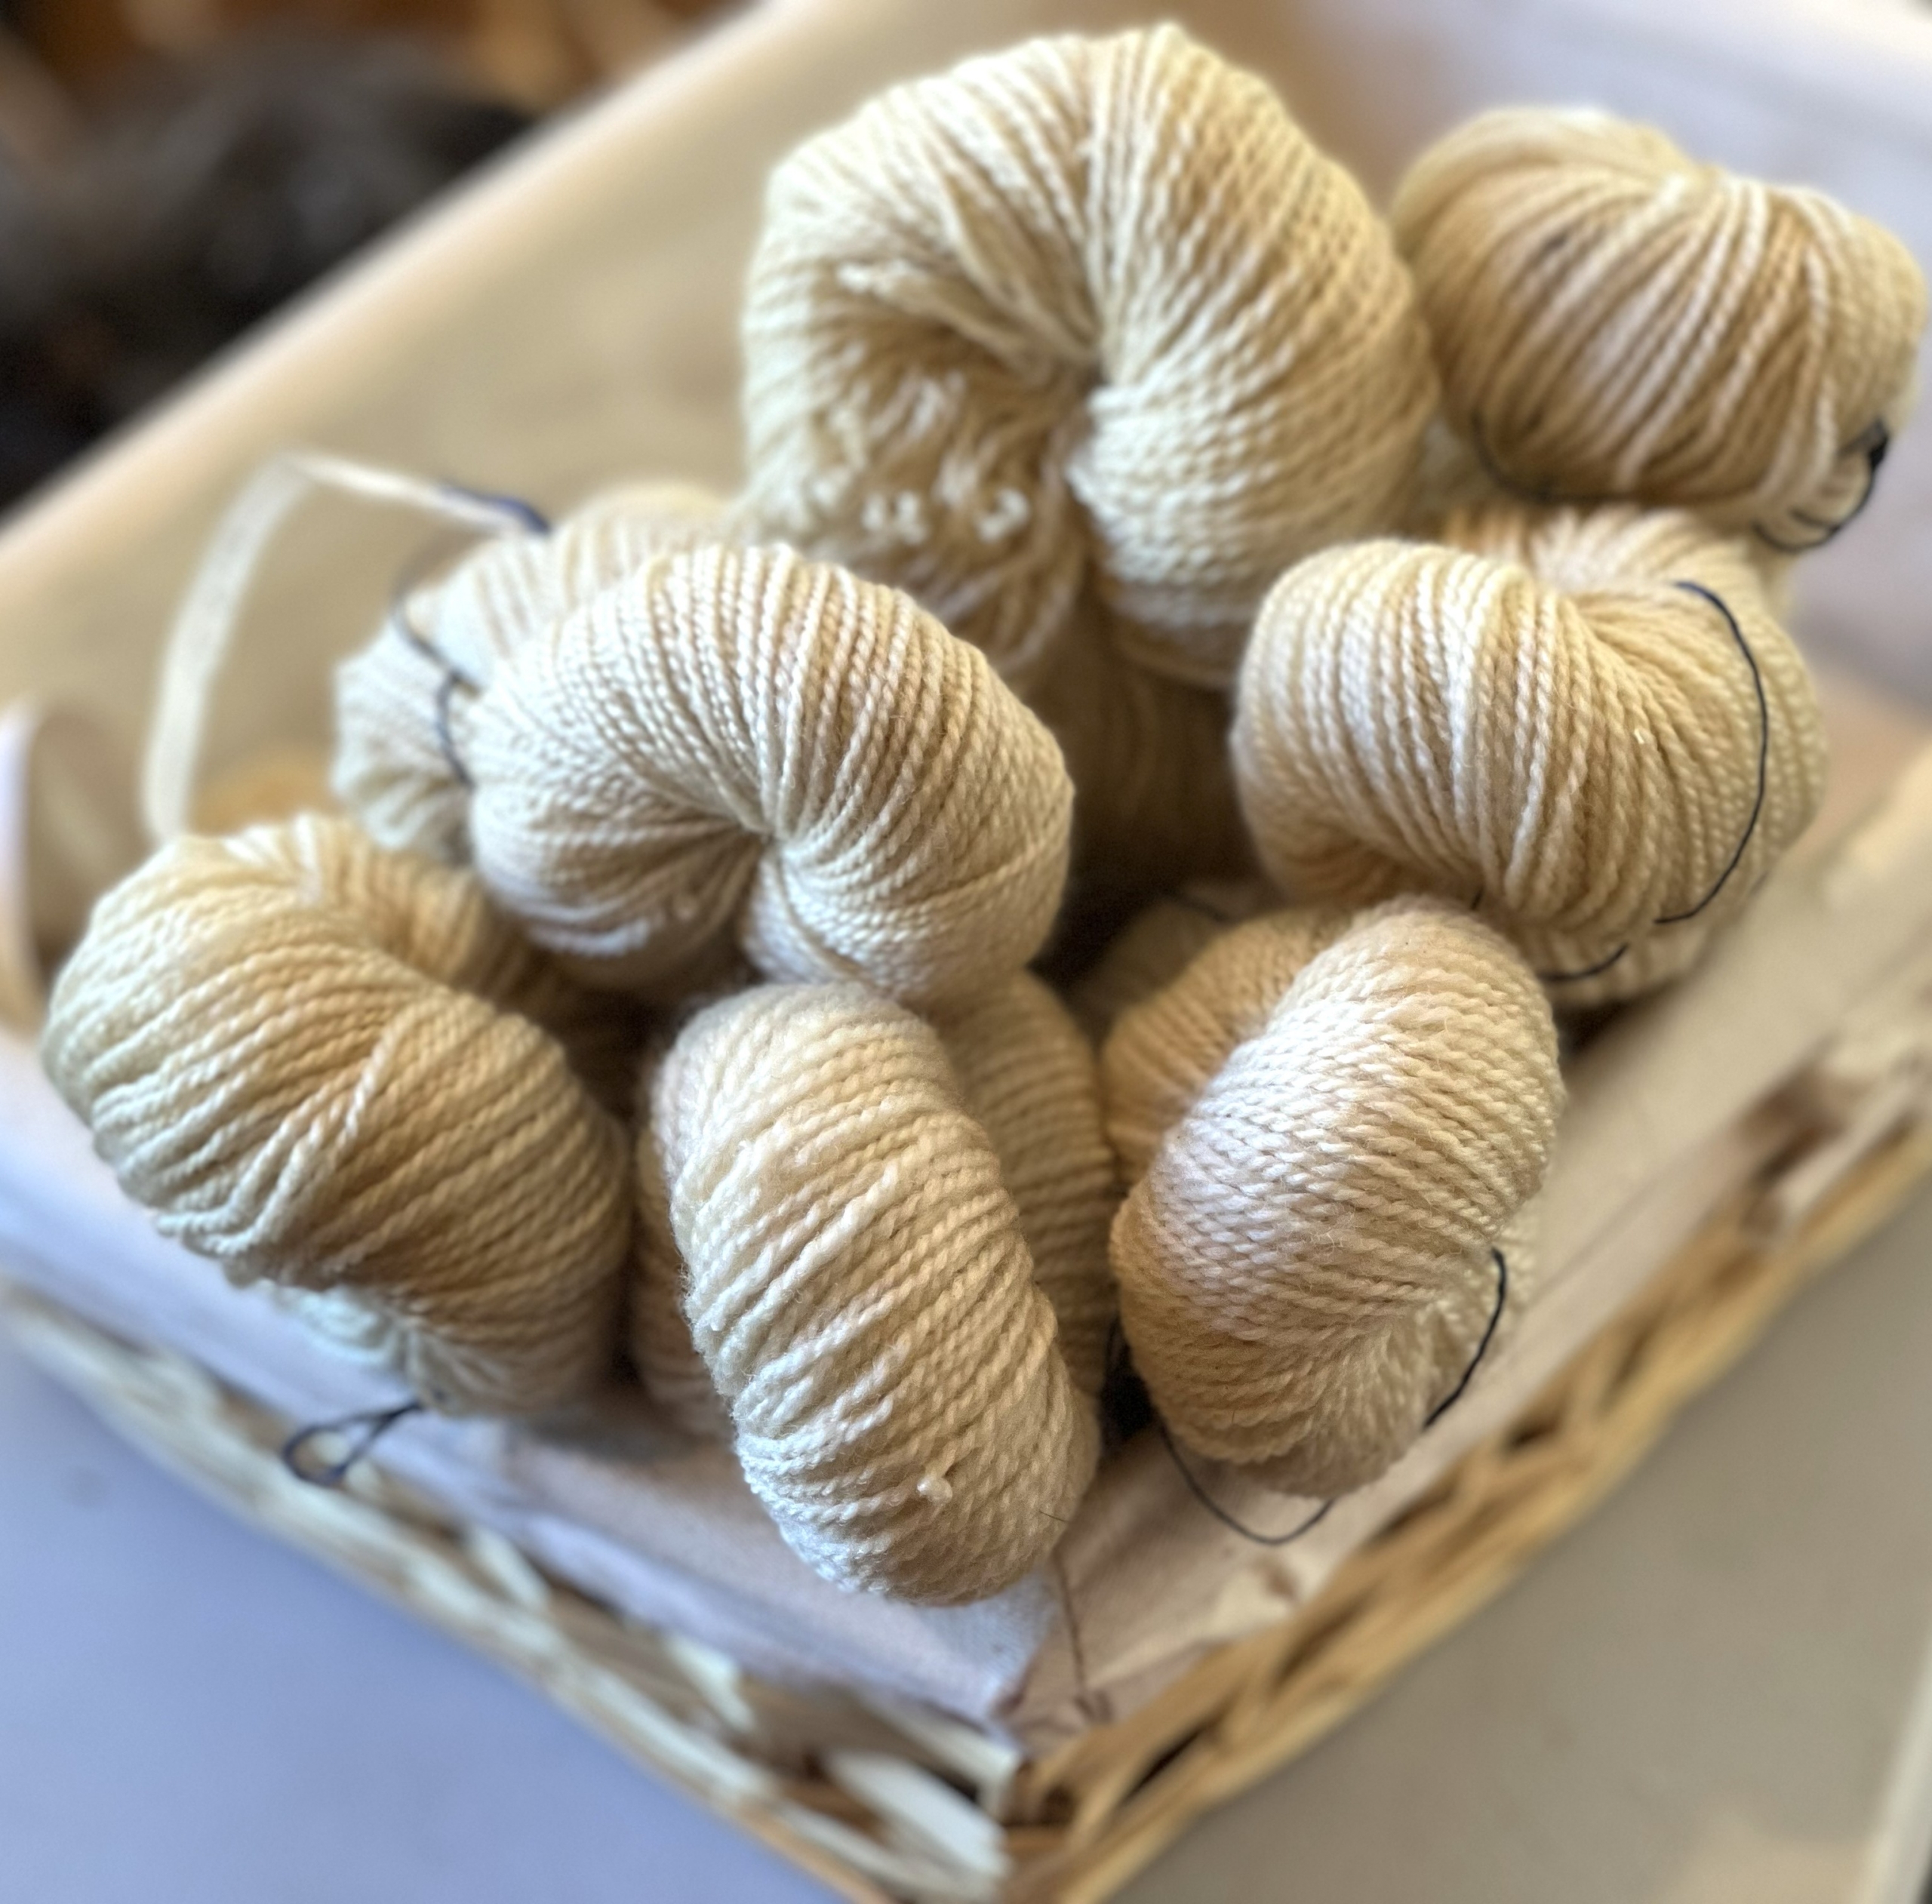
The Gulf Coast Native fleece is soft but not limp and knits into a rugged and springy fabric. I am in love with my yarn!
Dyeing the yarn
Now the terrifying part of the process – dyeing. One cannot knit a color-stranded yolk sweater in one natural (though beautiful) color! Well, I would wonder what the point was. So, time to dye.
I had a revelation when I realized that just because the inspiration sweater was white did not mean my sweater also had to be white. As it turns out, I was in a brown mood, and I’ve always loved brown and blue together. After playing around with several yoke patterns, I chose one that used four colors.
Let’s be clear, I am not a dyer – my method involves putting things in the dye pot and hoping for the best. Absolutely nothing I dye is even remotely reproducible. There would be no dyeing more if I ran out, so I had to decide how much yarn would be needed for each color in advance. Terrifying. I guesstimated my yarn requirements, tested my colors on paper towels, and got to it.
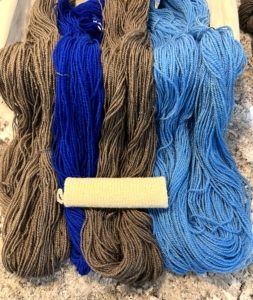
I had hoped for a bit more value difference between the light blue and the brown – the brown came out a little lighter than planned and the light blue came out a bit darker – but I liked what I ended up with, so I decided to leave them. The dark blue was another story. It came out of the pot very bright. To mellow it out, I left it in water for another night and put it into a second dye pot to dull it just a bit.
Once the colors were done, it was time to write the pattern and begin knitting – and hope my calculations for yarn requirements were on point, my gauge was true, and my yoke would fit.
Knitting
On October 30, 2025, I officially cast on, and I finished the sweater on December 27, 2025. I knit the sweater from the top down in the round. The yoke ends with some raglan increases to help with the fit. The sleeves are then continued from the yoke to the cuffs. The stranded knitting is not in the Fair Isle tradition, as the floats in some places are long, three colors were used on several rounds, and even four colors were used for the lower hem pattern. (What was I thinking?)
In the end, my calculations worked! I have 0.2 ounces of white, 1.9 ounces of light blue, 0.2 ounces of dark blue, and 1.1 ounces of brown left. Whew! I overcalculated the light blue quite a bit, but better safe than sorry. Also, I would have liked the sweater to fit a bit looser but certainly would have run out of yarn had I attempted it. All is good in the end!

The finished sweater weighs 1 pound and 4 ounces. It is squishy, very warm, and just as I hoped!
My objective when I began this project was to create a pattern from “sheep to sweater,” something that was beautiful and high quality that could be handed down for generations to come. From the beginning of the spinning process to completing the sweater took about eight months. Not too bad, as long as I am not in the 1800s and don’t have to feed, clothe, and care for a family! My family would freeze to death!
The sweater fits my mother, me, and my daughter. Three generations can wear it already. Purpose fulfilled!
Experimenting with a Range of pH Solutions in Finishing Handspun Linen Yarn
words and photo by Sherri Norland
More than a decade ago I began my spinning journey with a kit that contained wool top and a drop spindle. My craft room was already bursting with cloth and yarn, and the last thing I needed was another hobby. I am a sweater knitter and wanted to learn more about how fiber becomes yarn. My creative space began to fill with fiber braids, books on fiber, fleece, and all manner of plant and animal fiber. Additional drop spindles were obtained, followed by the acquisition of spinning wheels. As more handspun yarns accumulated, a rigid heddle loom was added to the crafting space.
Methods of finishing linen yarn
Spinning has become both a passion and a source of curiosity for me. Usually I spin animal fibers, but plant fibers are a new challenge. Lately I have a fascination with spinning flax. While reading about the history of flax fiber to linen yarn and textiles, I came across numerous techniques employed in the finishing of linen yarn. Most methods involved boiling water and the use of an additive of some kind for cleaning the yarn. The type of additive used to finish linen yarn varied, and my interest began to focus on these solutions.
What is “finishing” regarding linen yarn?According to Linda Heinrich (1), linen yarn finishing is a two-step process which involves setting the twist by presoaking the yarn and scouring with varying chemical treatments to cleanse it. Other finishing techniques for linen yarn can involve bleaching (2) and physically beating the fibers, a practice known as beetling (3). Some techniques combine beetling with temperature shifts: freezing and beating the yarn, then boiling and re-beetling it (4). Finishing linen yarn may include presoaking, scouring, bleaching, beetling, and exposing it to dramatic temperature changes. I’m mainly interested in chemical finishing and scouring solutions.
Spinners typically scour linen yarn with alkali bases instead of acids (5) (6). Strong acidic solutions combined with boiling are generally discouraged, as they may damage bast fibers like flax. According to the authors of the Big Book of Flax (7), linen yarn was traditionally soaked in wood-ash solution baths for several hours or even days. The discussion also suggested using various solutions such as different types of farm animal manure, sour milk, lye baths, or diluted sulfuric acid.
Setting up my experiment
This sparked my curiosity, so I decided to experiment with how linen yarn reacts to different pH levels during the process of scouring.
To begin, I wet spun natural flax commercial roving into 2-ply linen yarn using an antique (circa 1890s) Norwegian flax wheel. I spun singles Z and plied them S. The equipment I used included a digital scale that measures grams, a metal-based measuring tape, a wooden ruler, a McMorran balance, and pH litmus strips. The wraps per inch (WPI) for all pretreatment samples came within a few wraps of each other, ranging from 24–28 WPI, giving a Craft Yarn Council (8) yarn weight of 1 or Super Fine (14–30 WPI). The grist for all pretreatment samples ranged from 1525–2000 yards per pound (YPP). For weaving, that might correspond to a 10/2 wet-spun linen yarn.
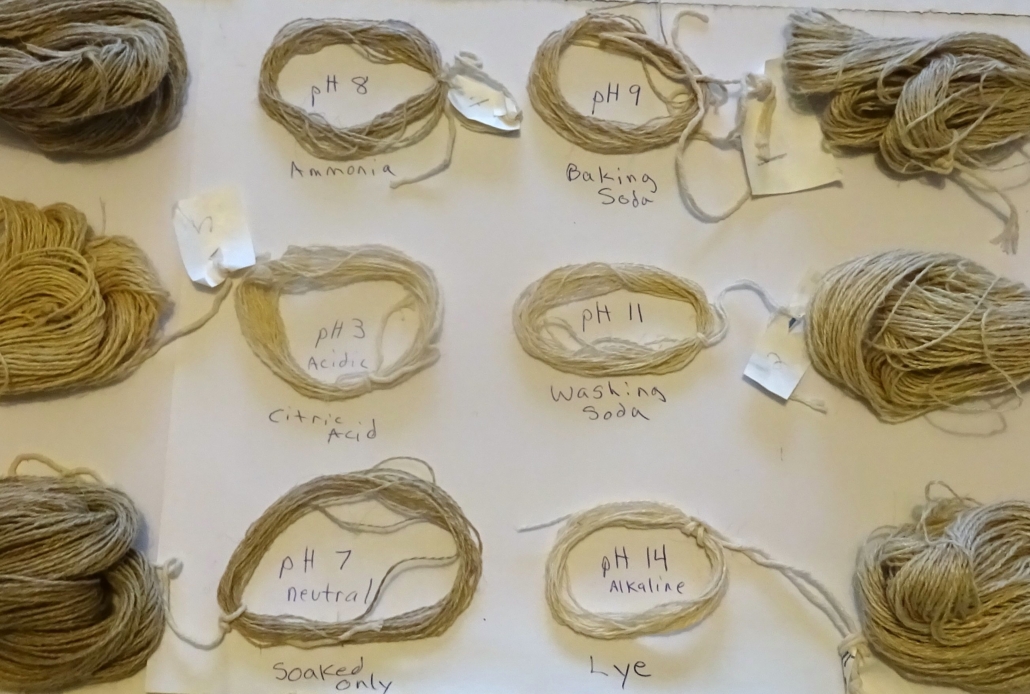
The freshly spun sample skeins of 2-ply linen handspun yarn were ready for the first stage of the finishing process. I weighed the dry yarn samples on a digital scale. To set the twist, every skein except the control (which received no treatment) was soaked in room-temperature tap water for 1 hour. Step two of finishing the yarn involved scouring. For scouring I used 5 drops of dishwashing liquid in 1 gallon of tap water, along with whatever chemical additive was needed to achieve the pH for the solution. My experiment used citric acid, baking soda (sodium bicarbonate), washing soda (sodium carbonate), ammonia, and lye. For each treatment chemical, I added 2 tablespoons (T) per gallon of water. I tested the pH of each solution prior to boiling using pH test strips (litmus paper). I boiled each solution separately with its sample skein for 1 hour (99 degrees C at 960 ft elevation). I rinsed the yarn samples with room-temperature tap water after 30 minutes of cooling and allowed them to dry thoroughly.
Results
The variables I was interested in measuring were weight, length, WPI, grist, strength, and color. The results show that the most weight was lost with the lye treatment. Coming in second for weight loss was the washing soda treatment and third was the citric acid treatment. The ammonia treatment had the least weight loss of all the treatments, which is interesting since just the soaked treatment showed more weight loss.
| Pretreatment (PT) | After treatment (AT) | Percent difference | |
| No treatment | 34.5 | 34.5 | 0% |
| Soaked pH = 7 neutral | 34.5 | 33.5 | -2.9% |
| Citric acid (2 T) pH = 3 | 19 | 18 | -5.3% |
| Baking soda (2 T) pH = 9 | 18.5 | 18 | -2.7% |
| Washing soda (2 T) pH = 11 | 27.5 | 24 | -12.7% |
| Ammonia (2 T) pH = 8 | 30 | 29.5 | -1.7% |
| Lye (2 T) pH = 14 | 30 | 25.5 | -15.0% |
| Weight measured in grams | Percent difference = AT/PT * 100 -100 |
Data for length and WPI showed little to no change. It was harder to discern slight differences in the length and WPI pre- and post-treatment using my handspun yarn, and the yarn did have some stretch, which I did not expect from a linen yarn. The stretch might be because I used commercially prepared roving rather than long line flax. The roving’s shorter fiber staples might result in yarn that has some ability to stretch.
The grist showed an increase in yards per pound after most of the treatments, which I expected, but the washing soda sample showed a decrease in yards per pound. The only explanation that I have is the inconsistent nature of my handspun yarn. The McMorran balance assumes that the yarn is consistent throughout, and mine was not, however hard I tried. Repeated scours for each sample might show different results. It would be interesting to repeat this experiment using commercially spun linen yarn and compare the results.
I was also interested in variables such as strength and color. To evaluate strength, I used the standard weaver’s test for yarns used in warp, which is to take a strand of yarn (roughly 6–8 inches) between your hands and give a sharp tug. None of the samples of yarn seemed different from one another as far as breakage and all took more than one tug to break the yarn. I was surprised the citric acid solution did not weaken the bast fibers more than the other solutions, despite many sources suggesting acids do so. More testing with a lower pH of 1 or 2 might show a different result. The most obvious change to the samples pre- and post-treatment was color. In my observation of the color of the treatment samples, the citric acid sample seemed slightly more yellow than the washing soda or lye solutions. Digital photographs show the differences in color I observed in the samples (see photo). The stronger the pH of the solution, the more change occurred in both the color and weight of the samples.
Conclusions
There were so many variables to consider when conducting this experiment. The variables of weight, length, WPI, grist, strength, and color very much affect the appearance and drape of the final product. It became clear to me that methods for finishing handspun linen yarn should vary depending on the intended use of the final product. If you want a very light and soft final fabric, then you might subject the linen yarn to relatively harsh finishing treatments. If a crisp fabric is desired, then a less harsh finishing treatment would be required. My conclusion for finishing my linen handspun yarn seems to agree with most sources that use a strong scouring solution with a pH between 11–14 plus dishwashing liquid. A single scouring treatment is sufficient, as excessive scouring prior to weaving could compromise the strength of the yarn. This consideration is particularly important for yarn intended for use as warp, which is subject to higher tension and friction than the weft. I plan to use my handspun linen yarn in weaving and to scour the linen cloth again when it comes off the loom. My goal is to weave enough linen cloth from my handspun linen yarn to sew a blouse.
Resources and reading list
- Linda Heinrich, “An Introduction to Spinning Line Flax,” in A Guide to Spinning Flax: Linen Spun from Flax Fibers, ed. Amy Clarke Moore (Spin Off ebook, 2011).
- Laura Loewen and Sylvia Smith, “Myth Busting: Bleaching Linen,” PLY Magazine, Autumn 2025 (Plants).
- Bette Hochberg, Fibre Facts (pub. by author, sixth printing, 1993).
- Stephenie Gaustad, The Practical Spinner’s Guide: Cotton, Flax, Hemp (Interweave, 2014).
- Joybilee Farm, “Finishing Handspun Linen Yarn,” blog post.
- PLY Magazine, Spring 2018 (Flax).
- Christian and Johannes Zinzendorf, The Big Book of Flax: A Compendium of Flax Facts, Art, Lore, Projects and Song (Schiffer Publishing, 2011).
- Yarn weights, Craft Yarn Council.
Sherri Norland uses her science background to learn more about her hobbies of spinning, sewing, knitting, and weaving. Curiosity, love of reading, and a drive to learn fuel her crafting passion. She believes that handmade should equal well-made. Sherri is retired and lives with her husband.


Leave a Reply
Want to join the discussion?Feel free to contribute!