

Mixing Things up for a Sweater
words and photos by: Johanna Carter
I always admire those who are able to spin mountains of yarn for a big project, ready to knit a wonderful sweater or cardigan. It is a satisfying feeling when you finish all that work, especially if you started with washing and combing the wool or even raising your own sheep.
Mixing spinning and knitting
The typical way to work through a larger project is to spin all the singles first and ply them in a particular order so you get the yarn even throughout the whole project. I don’t have so many bobbins, but my bigger problem is that I am quite impatient and want to get on with knitting once I have an idea. And normally, my brain is full of ideas for fibre work and the limit is the time, as I am a musician and teacher. I can’t sit at the spinning wheel for a long time if I’m not on holiday, so during the school year I mostly knit, and during the holidays I can dye, spin, use my drum carder, and do lots of fibre work. The only time I was able to produce bigger quantities of yarn before I knitted them up was during the Tour de Fleece in the two years during the pandemic, when we did not go on holiday at the beginning of July.

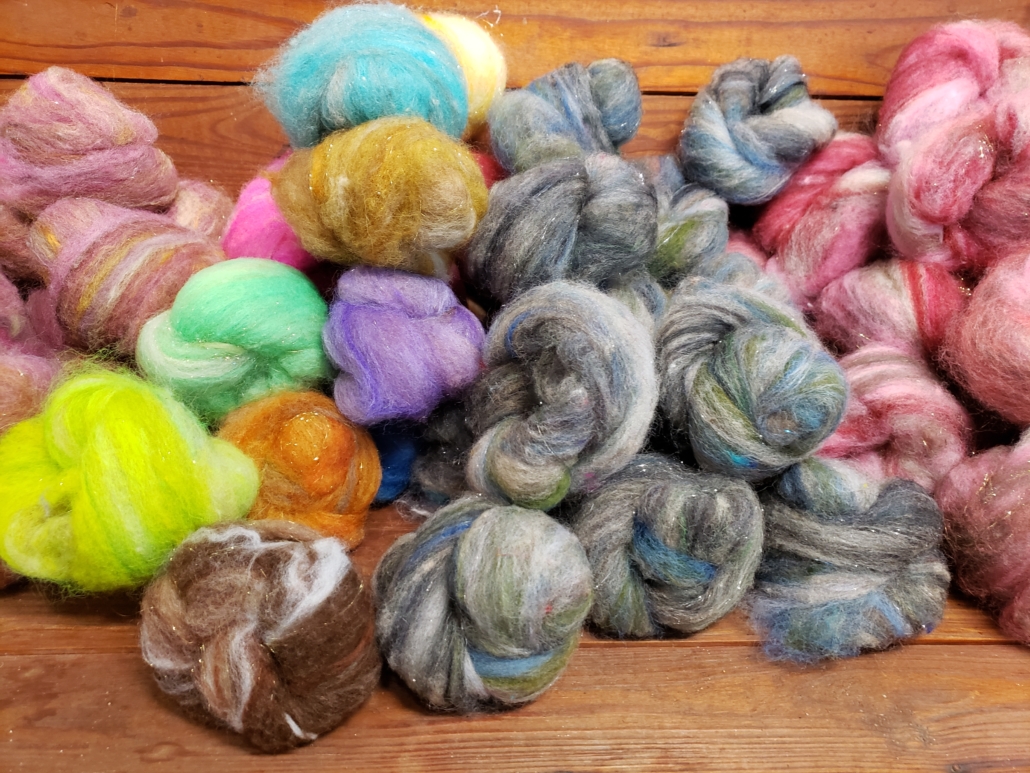
A highly photogenic collection of naturally dyed fibres.
I like to finish knitting one big project like a sweater or cardigan before I start the next one, or at least until I can’t carry it in my bag easily anymore, so I have an excuse to begin the next one. Sometimes it is good to have a second project on the go – I call it mindless knitting, where I don’t have to look very much – which I can keep my hands busy during Zoom or other meetings, which helps me listen.
Mixing colours and fibres
Usually I dye my yarn with plants which I collect in the woods or get from garden flowers. I also use cochineal and indigo, which I buy, to get lots of different colours. I really love the greens and blues I get from dyeing with indigo. I have lots of dyed wool, and all those colours give me inspiration for further projects.

Beautiful greens and blues dyed by the author using indigo and other natural dyes.
Blending the wool on the drum carder I can get even more shades. I like to blend with fibres like silk, alpaca, or plant fibres, and I love sari silk, to get those little bits of colour in my yarn.
Fibres of different types and colours are blended on a drum carder for elegant results.
When I have an idea for the next sweater, I start carding, and then I can begin to spin. Once I have spun enough yarn – say, for one day – I cast on and start knitting, usually top down, so I don’t have to decide too much in advance about length and width.

An idea for the author’s next sweater in the gathering stages.
When I spin on my wheel, I have to sit at home, but while spinning I can read a book or talk to others during online meetings. I also like to spin on my spindles, and that works on a walk, or a museum visit. I take them on holiday as they don’t need much space, and when I spin for a lace shawl, I don’t even need much wool either. At home there are spindles all over the place; I can spin when I am waiting for the kettle to boil, when the computer is slow, when I am cooking. Like that I can make good use of a short time and the yarn still grows.

Knitting as soon as the yarn is spun helps the author complete sweater projects in a timely manner.
I can take my knitting almost everywhere, which is why I don’t want to wait to get started until I have spun all the yarn for a whole sweater. I knit at home, on the bus or train. The only thing I have to make sure of is to be one step ahead with the yarn.
I love to knit Fair Isle sweaters. My favourite method is to use only one bobbin, which I don’t even fill, because I need smaller quantities of lots of colours. Then I wind a ply ball and ply it on itself. For that I put my thumb through the ball, so I can tension the two singles with my fingers and they don’t get tangled, as long as my thumb (or a cardboard roll or a pencil) stays in the middle. I don’t have any leftovers from plying, and it is quick when I suddenly need more yarn.

Several charming sweaters dyed, spun, and knit by the author.
I have never had problems with the yarn not being consistent enough throughout a project. I just know what yarn I want and my fingers seem to remember what to do. I am sure it is good advice to have a little card tied to the spinning wheel with a bit of the singles you are aiming for, so you can check and make sure you are spinning a consistent yarn.
Mixing breeds
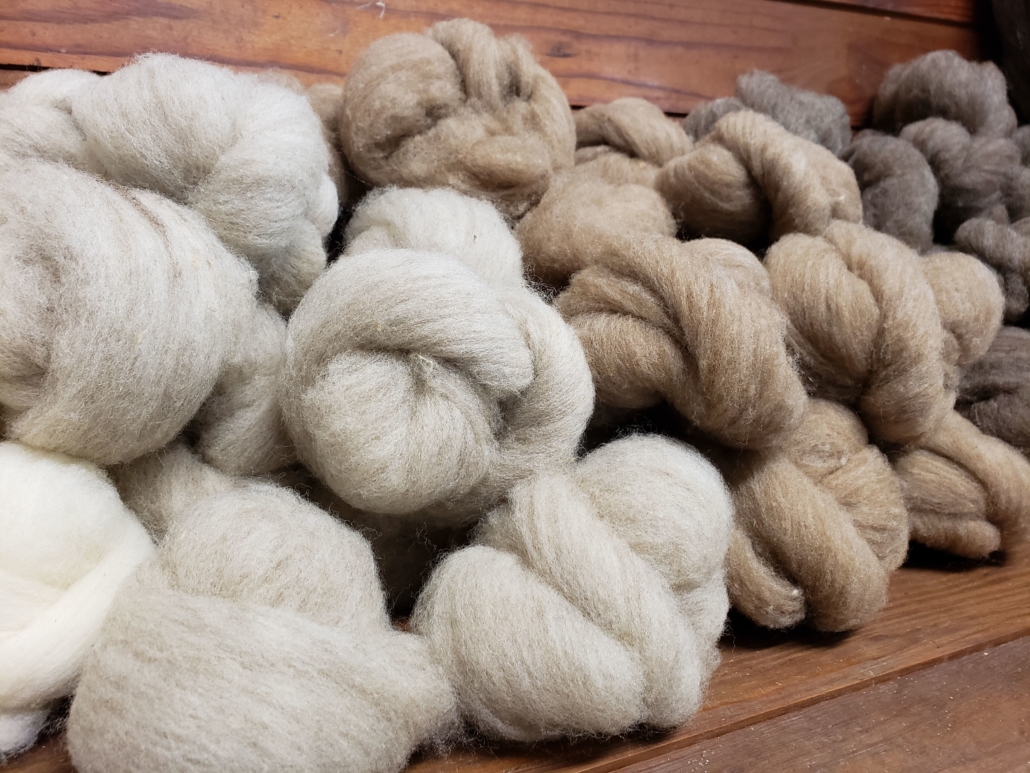
There are so many different breeds, but some of my favourites are Shetland, BFL, and Jämtland – a Swedish breed. After dyeing them, I often forget what I have used, so when I do a new project it often turns out that I have used different breeds and fibres just to get the right colour. For the Fair Isle knitting I want to juggle lots of colours, which is more important to me than making a sweater out of only one breed.
Recently I made a pullover for my husband using about 12 different breeds and colours, even mixing short and long draw. For me it was a breed experiment and a way to use up lots of smaller quantities of wool I had in my stash. For that sweater I used combed top without blending.

Mixing in knitting during the spinning process is a wonderful way for a spinner to avoid being overwhelmed during a sweater project.
My feeling is that some people don’t dare to start spinning for a bigger project because they get overwhelmed by the quantity they have to spin and then all the knitting there is to do, especially when you want to spin the yarn entirely on spindles. Mixing the spinning and knitting for the same project is more interesting; you get more variety and more freedom to choose what you want to do next as long as you don’t run out of yarn. It breaks the project down into smaller, less daunting parts. The only thing you might want to plan is to have enough fibre at the start, but even that is not necessary, there is always a sheep growing more wool.
How to Navigate a Rut in Your Creative Life
words by Jess Cook
As I type this, my spinning wheel sits in a corner of my home office, gathering dust. I can’t tell you the last time I spun anything at all, let alone a whole skein – and I work for PLY! I’m surrounded by inspiration from all of you, and our amazing contributors, every single week. Yet for some reason, my own enthusiasm for the craft has waned, and I’m really not sure why.
If you find yourself in a similar situation, now or in the future, here are some tips I’ve been gathering for how to handle a rut in your creative life.
Follow your enthusiasm
Enthusiasm is a fickle muse, and sometimes it leads us to unexpected places. If you’ve found yourself not making time for spinning, but you want to make that time, maybe you need to mix things up a little bit. Is there a new fiber type, prep, or dyer you’ve been dying to try? A new technique you want to experiment with at the wheel? Maybe you even hear a new tool calling your name. Whatever sparks that enthusiasm inside of you, follow it. You may just find a path right out of your rut.
On the other side, it may be time for you to fall back into what feels natural and comfortable. A familiar fiber, a favorite color combination, or a go-to technique might get you back into the groove again, like reuniting with an old friend. Whatever your enthusiasm is telling you, it’s best to listen to that inner voice.
Remove unnecessary restrictions
A wise woman once told me that I was inventing timelines in my head for things that didn’t need to be restricted that way, and she was absolutely right. What restrictions have you placed on your life as a spinner or creative that simply don’t need to be there? If you’ve been telling yourself that you have to finish Project A before starting Project B, or that you can only make time for spinning once your hallway closet has been reorganized, or that you can’t start a project if you won’t be able to finish it by next week – stop doing that! You’re giving yourself limits that don’t need to exist.
For me, this tends to be a problem when I agree to complete a project for someone else. I love to use my creative skills to make things for people I care about, but as soon as someone asks me to make something for them and I agree to it – I immediately don’t want to do that project. (As an example, I’ve been crocheting a bed-sized blanket for my best friend for over a year, because I can barely pull together the enthusiasm to make a single row most weeks.) If you’ve put yourself into a situation like that, it may help to give yourself deadlines, but also build in time to work on other projects that are more exciting so you don’t lose the creative spark altogether. For everything else, the timeline you’ve invented for yourself should only be allowed to persist if it motivates and helps you, not if it makes you feel boxed in and resentful.
Stash with intention
Stashing is another hobby altogether, and for me it comes in seasons. Sometimes I like having a large, varied stash so I know there will always be something to inspire me when I open the closet where it’s stored. Other times, having a large stash feels like a To Do list that’s hanging over my head, with an imaginary project for every braid and skein, weighing down on me and making me feel like I’ve buried myself under the weight of unfinished projects.
If your stash inspires you, put it somewhere you can see it, and visit it often. If it makes you feel overwhelmed or obligated, give it away or sell it! The sheep are growing new wool every day, so you can always get more. I have done this several times with all of my creative hobbies, and I always manage to get more supplies when I need them. Sometimes clearing out my stash to make room for something new is all the enthusiasm boost I need to get back into my hobbies again.
Go easy on yourself
The most important tip is to give yourself grace and peace in all things. If spinning isn’t calling to you right now, maybe it’s because your inner voice is trying to tell you to make room for something new, and that’s going to be just the thing you need in this season of your life. Time is a finite resource, and we’re under no obligation to parcel it out to every creative hobby at all times. If this needs to be a season of rest for you, let it be that. If you want to be creative but spinning isn’t calling to you, listen for the call of something else. Taking a break, for however long it lasts, doesn’t mean your life as a spinner is over. Give yourself time to do what you want and need most, and trust that you’ll come back to your wheel or spindle when the season for spinning returns in your life.
Harness the power of community
If you aren’t feeling inspired to spin alone at your house, find a local spinning group or make one yourself if there isn’t one nearby. You can also find a lot of inspiration in an online community – join us for one of PLY’s vlog sessions or use the hashtag #InspiredbyPLY on social media to find folks who are trying new techniques and projects they found in one of our issues. Use Ravelry or another site to find spinners who want to join a challenge together, or just share ideas and photos with other creative spinners around the world. There are so many ways that spinning can bring us together with others, and sometimes seeing the things other people are making is all the inspiration you’ll need to get back to your own projects.
Here’s to a New Year that brings us all creative inspiration, time to rest, and the peace that comes from balancing both.

Jess Cook is a middle school teacher and freelance content marketer, who also works for Team PLY as the head of our wholesale & advertising departments. She lives in the Nashville area with her 3 kids, a menagerie of pets, and a closet full of craft supplies. Find her online at tinyurl.com/jesscookonline.
PLY Magazine believes that Black lives matter, as well as LBGTQI+ lives. Those most vulnerable and persecuted in our communities deserve our love and support. Please be good to each other.
Did you know we also have a monthly PLY newsletter? Sign up here!
Did you know we also have a monthly PLY newsletter? Sign up here!
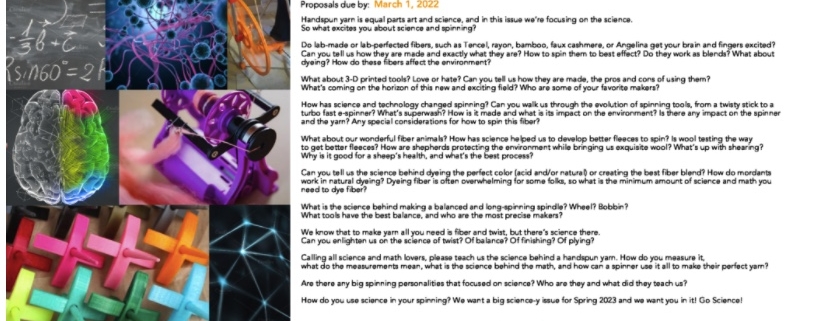
Write for our Spring 2023 Issue!
The Mood Board for our Spring 2023 issue is here: The Science issue!
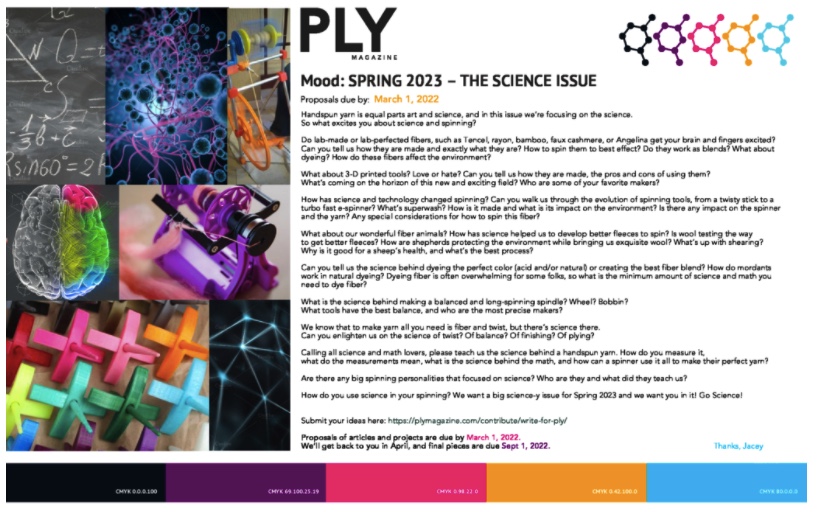
Do lab-made or lab-perfected fibers, such as Tencel, rayon, bamboo, faux cashmere, or Angelina get your brain and fingers excited?
Can you tell us how they are made and exactly what they are? How to spin them to best effect? Do they work as blends? What about dyeing? How do these fibers affect the environment?
What about 3-D printed tools? Love or hate? Can you tell us how they are made, the pros and cons of using them?
What’s coming on the horizon of this new and exciting field? Who are some of your favorite makers?
How has science and technology changed spinning? Can you walk us through the evolution of spinning tools, from a twisty stick to a turbo fast e-spinner? What’s superwash? How is it made and what is its impact on the environment? Is there any impact on the spinner and the yarn? Any special considerations for how to spin this fiber?
What about our wonderful fiber animals? How has science helped us to develop better fleeces to spin? Is wool testing the way to get better fleeces? How are shepherds protecting the environment while bringing us exquisite wool? What’s up with shearing? Why is it good for a sheep’s health, and what’s the best process?
Can you tell us the science behind dyeing the perfect color (acid and/or natural) or creating the best fiber blend? How do mordants work in natural dyeing? Dyeing fiber is often overwhelming for some folks, so what is the minimum amount of science and math you need to dye fiber?
What is the science behind making a balanced and long-spinning spindle? Wheel? Bobbin? What tools have the best balance, and who are the most precise makers?
We know that to make yarn all you need is fiber and twist, but there’s science there. Can you enlighten us on the science of twist? Of balance? Of finishing? Of plying?
Calling all science and math lovers, please teach us the science behind a handspun yarn. How do you measure it, what do the measurements mean, what is the science behind the math, and how can a spinner use it all to make their perfect yarn?
Are there any big spinning personalities that focused on science? Who are they and what did they teach us?
How do you use science in your spinning? We want a big science-y issue for Spring 2023 and we want you in it! Go Science!
Submit your ideas here: https://plymagazine.com/contribute/write-for-ply/
Proposals of articles and projects are due by March 1, 2022. We’ll get back to you in April, and final pieces are due September 1, 2022.
PLY Magazine believes that Black lives matter, as well as LBGTQI+ lives. Those most vulnerable and persecuted in our communities deserve our love and support. Please be good to each other.
Did you know we also have a monthly PLY newsletter? Sign up here!
Did you know we also have a monthly PLY newsletter? Sign up here!
Wild Hair Fiber Farm: Spinning to save sheep one smidgen at a time
interview by Jacqueline Harp | photos by Amanda Roberts
Creativity can come in small packages. Indeed, this is quite evident when you look at the whimsical, artisanal mini-batt called the Smidgen from Wild Hair Fiber Farm and Studio.
Handspinners from all walks of life and levels of handspinning proficiency enjoy spinning small projects that make just enough yarn for lovely fabrics that envelope our heads or hands with warm and fashionable accessories. The Smidgen helps inspire these small but meaningful spin projects, while contributing to the preservation of an endangered heritage breed sheep – the Romeldale/CVM.
Let’s take a look into the working sheep farm from which gorgeous fiber products are generated. Not only can you add Smidgens to your fiber toolbox, but by purchasing these mini-batts directly from the farm, you can also help maintain critical diversity of sheep breeds.
Meet the shepherdess
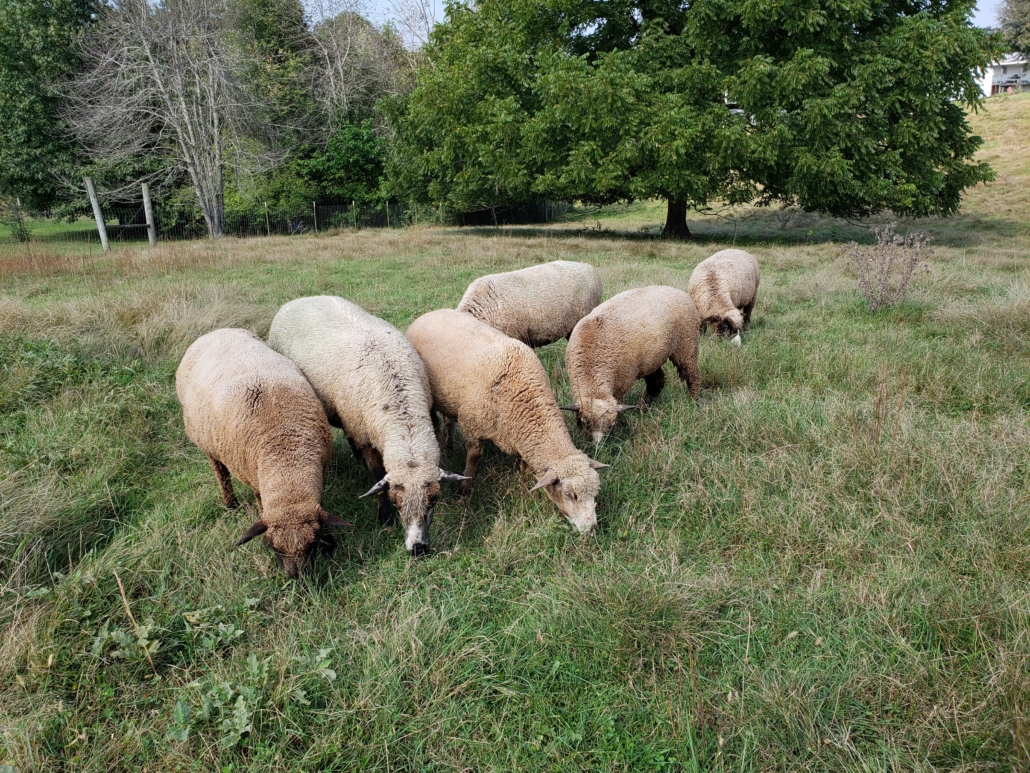
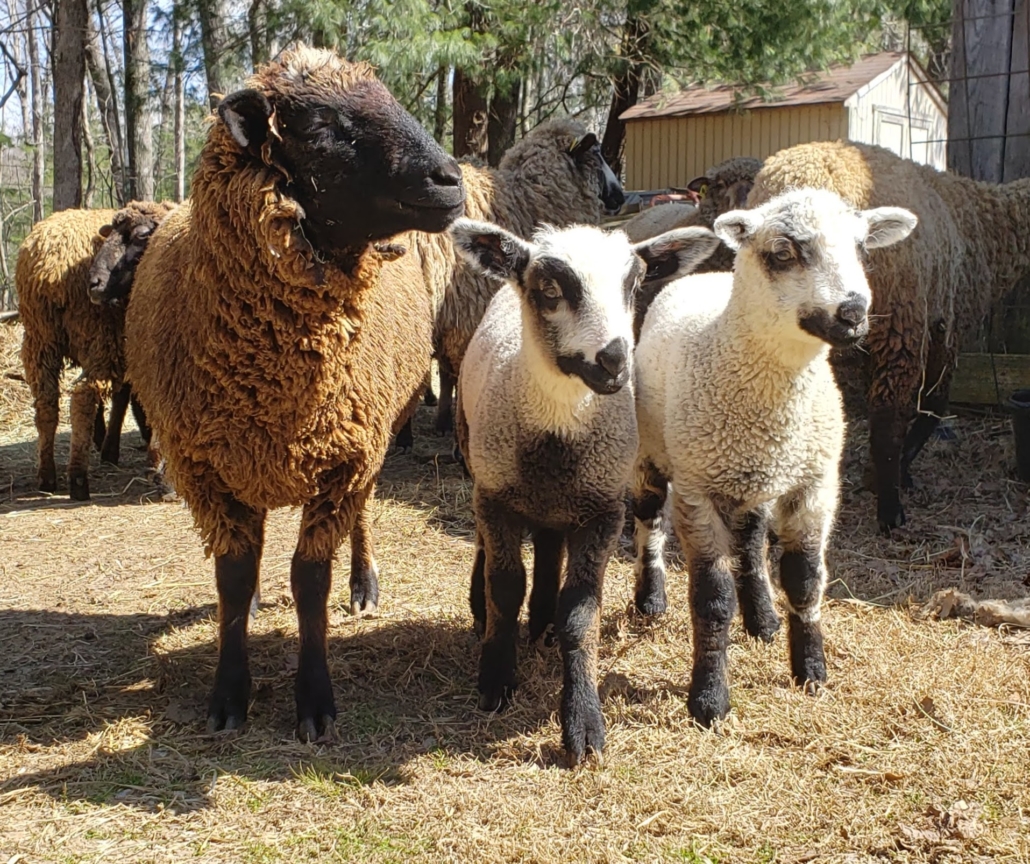
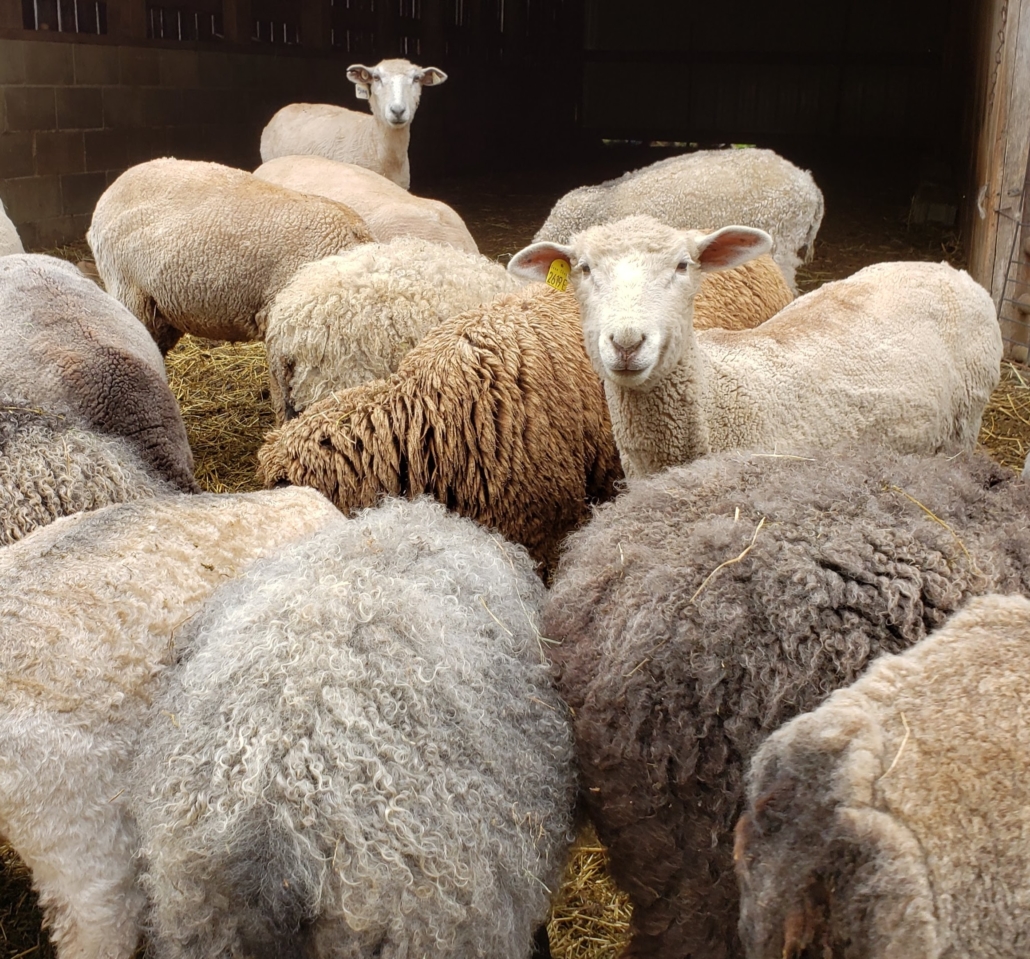
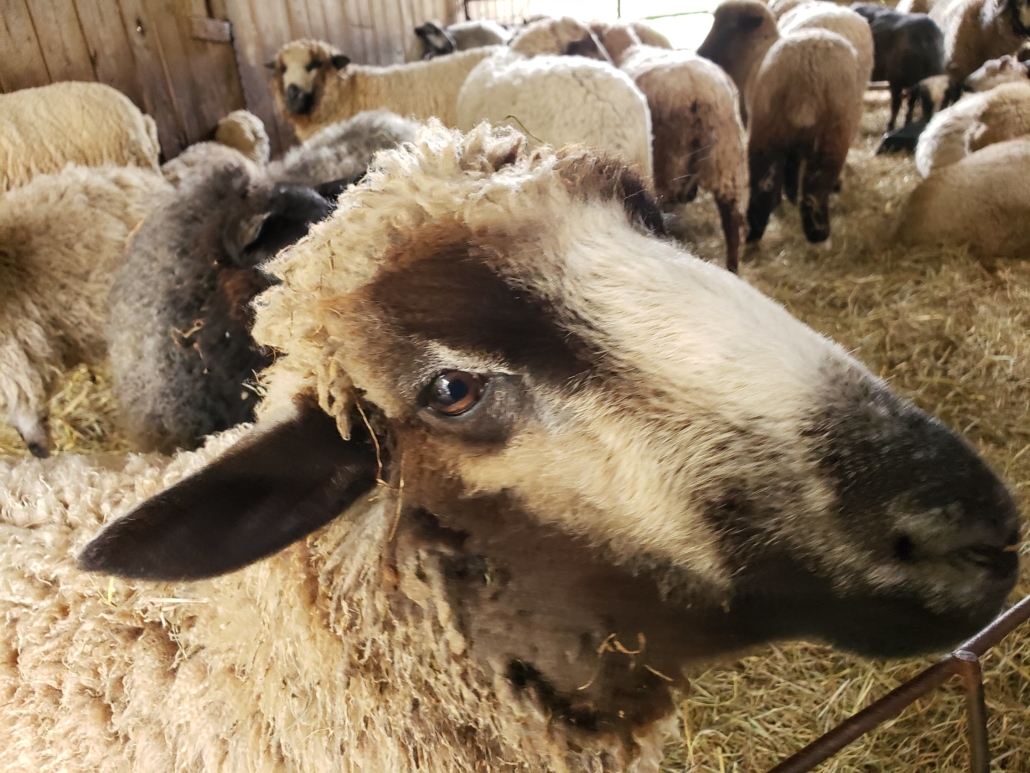
Amanda Roberts is the shepherdess and fiber artist behind Wild Hair Farm and Fiber Studio, located in the scenic countryside of Crossville, Tennessee. She maintains a small flock of two sheep breeds, Romeldale/CVM and Gotland. The Romeldale/CVM is a heritage sheep breed listed by the Livestock Conservancy as “Threatened,” which means a breed with fewer than 1,000 annual registrations in the United States and an estimated global population of less than 5,000.
Amanda: My granddaddy got me my first sheep in 1991 as a 4-H project. I was hooked. I fell in love with the sheep and we have had sheep on the farm ever since. I have always been very hands on and a part of the farm, but after my dad passed away in 2017, I took over as the main farm operator.
The Gotland sheep have been a recent addition to her flock due to her love of their fiber and their sweet dispositions. She notes that the two breeds complement each other by providing two very different fleece types.
Amanda: The Romeldale/CVM sheep fleeces come in every imaginable shade of grey and brown. This provides a fiber artist with a natural color palette. The wool also dyes well and provides rich tones. If I had to choose one thing about the Gotland fleeces, it is the luster. I am always impressed by the luster it adds to a fiber blend.
Care of the sheep
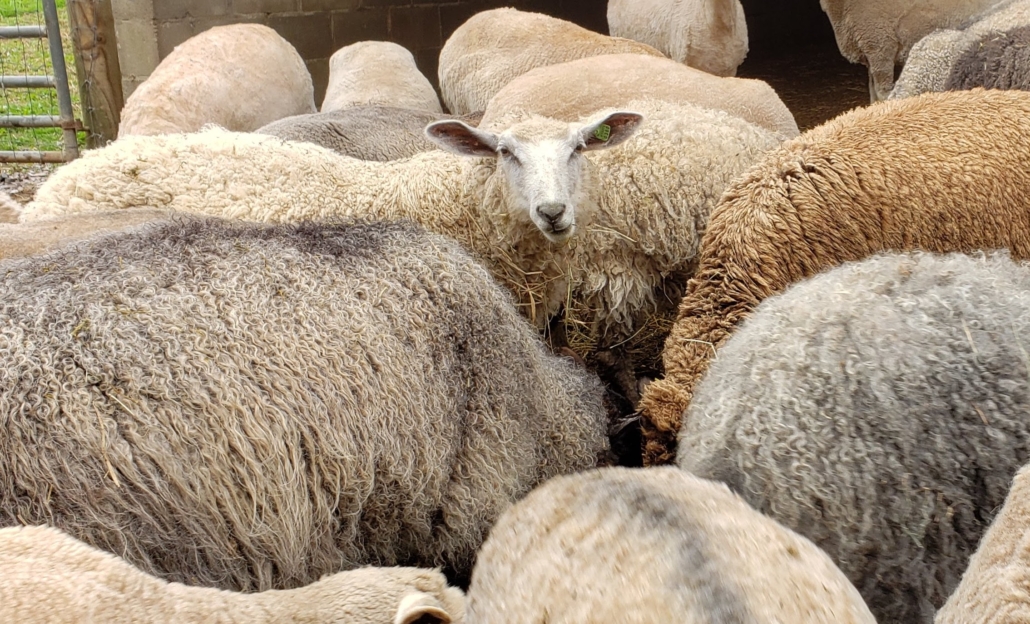
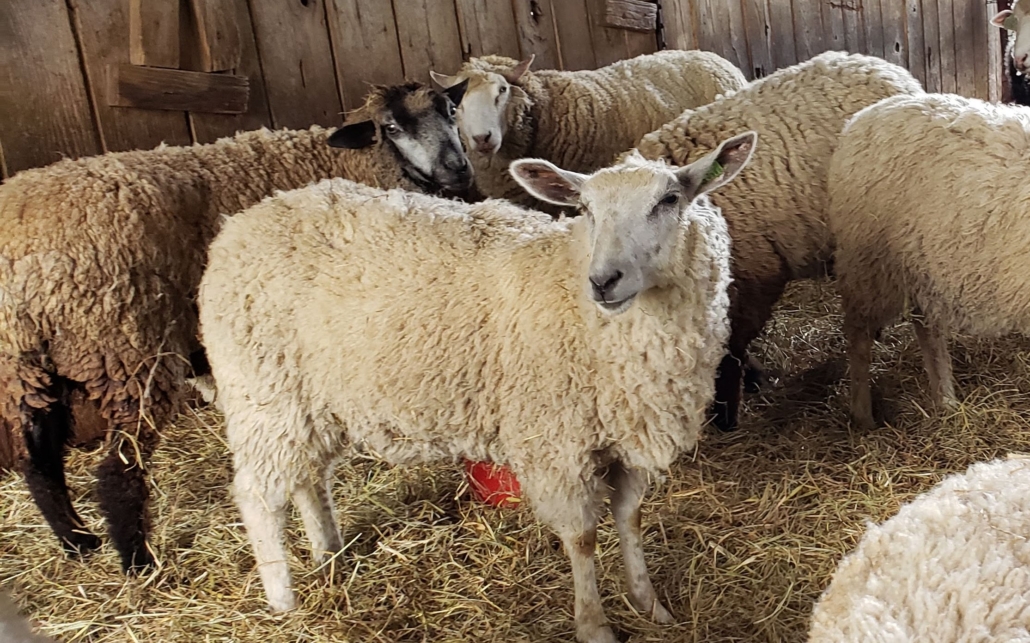
Amanda takes measures to keep her flock’s fleeces as clean as possible, but she does not coat any of her sheep.
Amanda: Keeping the fleeces clean is not perfect. I do skirt fleeces heavily. I have found that the weather plays a role in how much dirt and debris they pick up. Some individuals are just magnets for debris. That is one consideration I use in retaining breeding stock. A good example of this is Mattie. She is one of my older ewes but she consistently gives me a large fleece that is relatively free of vegetable matter and dirt. Her daughters have a tendency to do the same. I can’t explain exactly what fleece trait(s) equal a cleaner fleece, but some bloodlines seem to have ‘it’ and I do consider that when looking at replacement ewes.
Her flock is excellently cared for, and this care is what makes Amanda’s fleece and fiber such a treat to work with.
Amanda: I try to let my sheep be as natural as possible. That doesn’t mean they are out in the field and never see a human. They are seen a minimum of twice per day. I know my girls (and boys) by name and most will let me walk out in the field and walk right up to them. This calm nature or whatever you want to call it makes everything easier for me and less stressful on them. If I need to catch one, it is not a rodeo – although there is always the occasional exception.
The studio
Amanda is not only the gracious shepherdess of her flock, but she is the handspinner and fiber artist who brings life and creativity to her studio. The studio allows Amanda to make rovings, batts, and Smidgens that feature the fiber from her flock. She is also a talented indie dyer of rovings and yarns.
Amanda: I put a lot of time and heart into my fiber preparation, whether on the hoof, on the skirting table, in the dye pot, or on the drum carder. I want to offer fiber that is exceptional and a joy to work with regardless of the project. I view spinning and felting as a tactile art, so how the fiber feels and works is important. My goal has always been to offer fiber that is versatile for spinning on different tools (wheel, drop spindle, or support spindle), lends itself to different spinning techniques or yarn gauges, and produces a finished yarn or item that is striking.
The Smidgens
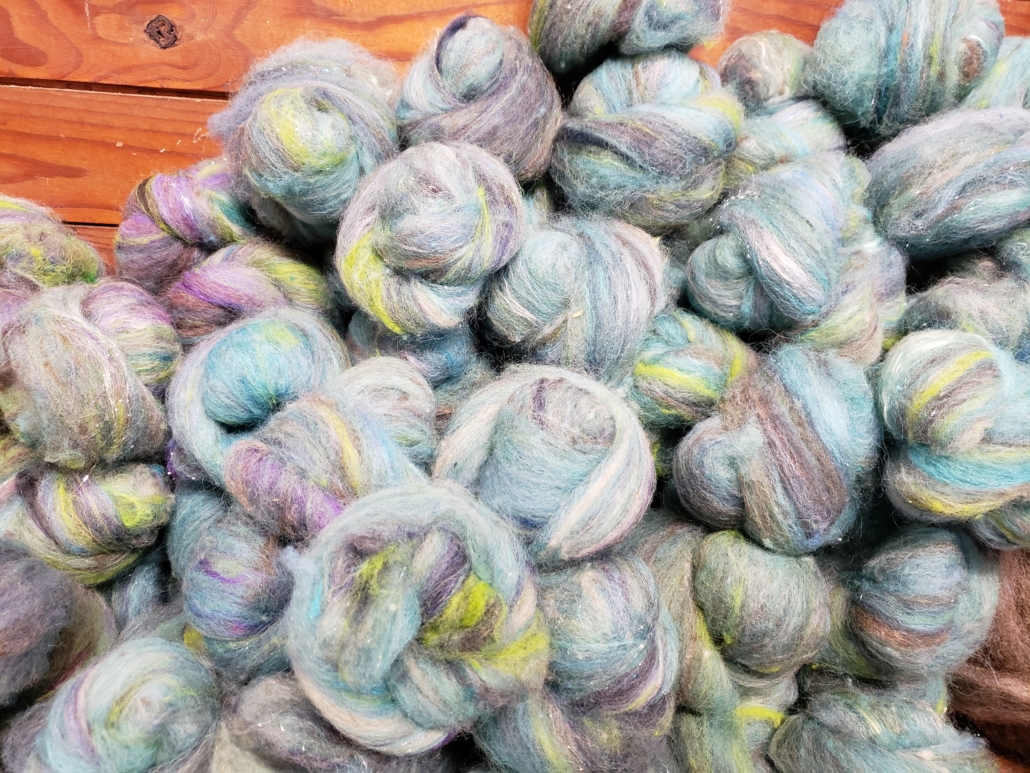
A Smidgen is Amanda’s special version of a mini-batt. It can be described as a little bundle of fluff in a tasteful blend of fibers and hues. It is a woolen prep full of energy and color ready to spin into beautiful yarns.
The birth of a Smidgen begins when Amanda finds inspiration from fantasy themes, books she has read, or a movie or show she has watched. She thinks about the colors and textures that will determine which fibers she uses. Her favorite fiber ingredient for Smidgens is Romeldale/CVM wool from her own flock. She also uses other wools and other types of fiber, such as bamboo or rose fiber. She weighs out her fibers, adjusting the ratios as needed, and cards them on her drum carder. Once Amanda feels that her Smidgens have been carded to just the right consistency, each batch is carefully taken off the drum carder and packaged to be sent to a new home.
I asked Amanda to choose three words to describe her Smidgens, and she happily obliged with the following:
Fun – Smidgens are fun to make and fun to spin or felt.
Versatile – So many things can be done with Smidgens: spinning, felting, or decorating the studio; the list goes on and is limited only by your imagination.
Irresistible – Smidgens hold so much potential, and once you get one, you have to get a second, and a third, and so on!
Conservation mission
To help bring awareness to her Romeldale/CVMs, Amanda and her flock participate in the annual Shave ’em to Save ’em (SE2SE) challenge hosted by the Livestock Conservancy (LC). The LC is a non-profit organization located in North Carolina, dedicated to the protection of livestock and poultry breeds vulnerable to extinction. The SE2SE program educates shepherds of rare sheep breeds on preparing fibers for sale and then connects those shepherds with fiber artists who have been encouraged to use those fibers.
Amanda: I feel that the SE2SE challenge is a great way to get fiber artists to try heritage breed wools. When we had in-person events it was surprising and somewhat discouraging to realize how many people have not heard of Romeldale/CVM sheep in my area.
Amanda provided a parting thought to handspinners looking to start their next head-and-hand spin project: Be willing to try new fibers. I love trying new fibers. I don’t always love them or even want to use them again, but I feel like it broadens my knowledge to try new things.
Bio
Jacqueline Harp is a freelance writer and multimedia fiber artist who spins, felts, weaves, crochets, and knits in every spare moment possible. She is also a certified Master Sorter of Wool Fibers through the State Univ. of N.Y. (Cobleskill) Sorter-Grader-Classer (SGC) Program. Her Instagram handle is @foreverfiberarts.
PLY Magazine believes that Black lives matter, as well as LBGTQI+ lives. Those most vulnerable and persecuted in our communities deserve our love and support. Please be good to each other.
Did you know we also have a monthly PLY newsletter? Sign up here!
Did you know we also have a monthly PLY newsletter? Sign up here!


Leave a Reply
Want to join the discussion?Feel free to contribute!