Mixing Things up for a Sweater

words and photos by: Johanna Carter

I always admire those who are able to spin mountains of yarn for a big project, ready to knit a wonderful sweater or cardigan. It is a satisfying feeling when you finish all that work, especially if you started with washing and combing the wool or even raising your own sheep.

Mixing spinning and knitting

The typical way to work through a larger project is to spin all the singles first and ply them in a particular order so you get the yarn even throughout the whole project. I don’t have so many bobbins, but my bigger problem is that I am quite impatient and want to get on with knitting once I have an idea. And normally, my brain is full of ideas for fibre work and the limit is the time, as I am a musician and teacher. I can’t sit at the spinning wheel for a long time if I’m not on holiday, so during the school year I mostly knit, and during the holidays I can dye, spin, use my drum carder, and do lots of fibre work. The only time I was able to produce bigger quantities of yarn before I knitted them up was during the Tour de Fleece in the two years during the pandemic, when we did not go on holiday at the beginning of July.

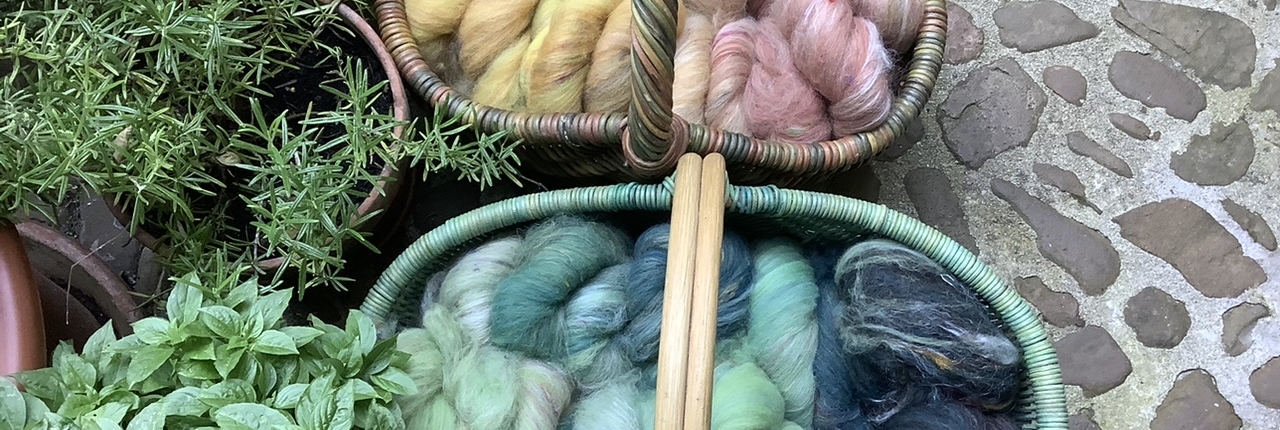
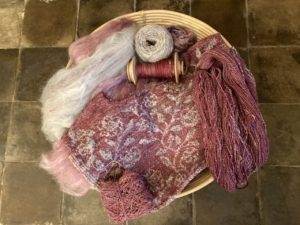
A highly photogenic collection of naturally dyed fibres.

I like to finish knitting one big project like a sweater or cardigan before I start the next one, or at least until I can’t carry it in my bag easily anymore, so I have an excuse to begin the next one. Sometimes it is good to have a second project on the go – I call it mindless knitting, where I don’t have to look very much – which I can keep my hands busy during Zoom or other meetings, which helps me listen.

Mixing colours and fibres

Usually I dye my yarn with plants which I collect in the woods or get from garden flowers. I also use cochineal and indigo, which I buy, to get lots of different colours. I really love the greens and blues I get from dyeing with indigo. I have lots of dyed wool, and all those colours give me inspiration for further projects.

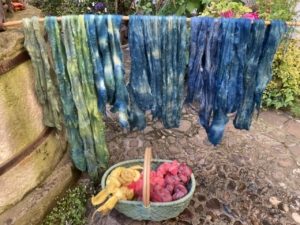
Beautiful greens and blues dyed by the author using indigo and other natural dyes.

Blending the wool on the drum carder I can get even more shades. I like to blend with fibres like silk, alpaca, or plant fibres, and I love sari silk, to get those little bits of colour in my yarn.

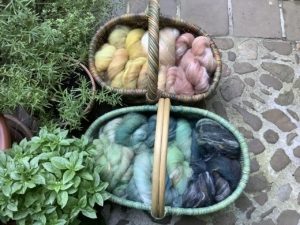
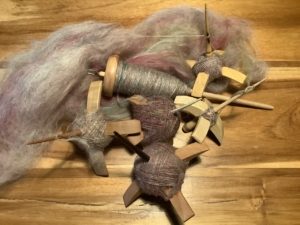
Fibres of different types and colours are blended on a drum carder for elegant results.

When I have an idea for the next sweater, I start carding, and then I can begin to spin. Once I have spun enough yarn – say, for one day – I cast on and start knitting, usually top down, so I don’t have to decide too much in advance about length and width.

An idea for the author’s next sweater in the gathering stages.

When I spin on my wheel, I have to sit at home, but while spinning I can read a book or talk to others during online meetings. I also like to spin on my spindles, and that works on a walk, or a museum visit. I take them on holiday as they don’t need much space, and when I spin for a lace shawl, I don’t even need much wool either. At home there are spindles all over the place; I can spin when I am waiting for the kettle to boil, when the computer is slow, when I am cooking. Like that I can make good use of a short time and the yarn still grows.

Knitting as soon as the yarn is spun helps the author complete sweater projects in a timely manner.

I can take my knitting almost everywhere, which is why I don’t want to wait to get started until I have spun all the yarn for a whole sweater. I knit at home, on the bus or train. The only thing I have to make sure of is to be one step ahead with the yarn.

I love to knit Fair Isle sweaters. My favourite method is to use only one bobbin, which I don’t even fill, because I need smaller quantities of lots of colours. Then I wind a ply ball and ply it on itself. For that I put my thumb through the ball, so I can tension the two singles with my fingers and they don’t get tangled, as long as my thumb (or a cardboard roll or a pencil) stays in the middle. I don’t have any leftovers from plying, and it is quick when I suddenly need more yarn.

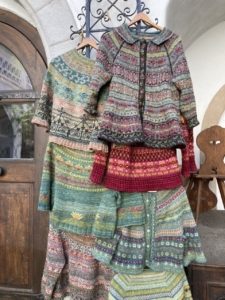
Several charming sweaters dyed, spun, and knit by the author.

I have never had problems with the yarn not being consistent enough throughout a project. I just know what yarn I want and my fingers seem to remember what to do. I am sure it is good advice to have a little card tied to the spinning wheel with a bit of the singles you are aiming for, so you can check and make sure you are spinning a consistent yarn.

Mixing breeds

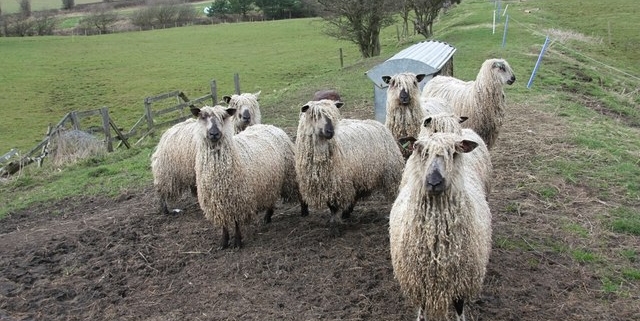
There are so many different breeds, but some of my favourites are Shetland, BFL, and Jämtland – a Swedish breed. After dyeing them, I often forget what I have used, so when I do a new project it often turns out that I have used different breeds and fibres just to get the right colour. For the Fair Isle knitting I want to juggle lots of colours, which is more important to me than making a sweater out of only one breed.

Recently I made a pullover for my husband using about 12 different breeds and colours, even mixing short and long draw. For me it was a breed experiment and a way to use up lots of smaller quantities of wool I had in my stash. For that sweater I used combed top without blending.
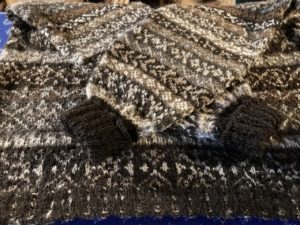
Mixing in knitting during the spinning process is a wonderful way for a spinner to avoid being overwhelmed during a sweater project.

My feeling is that some people don’t dare to start spinning for a bigger project because they get overwhelmed by the quantity they have to spin and then all the knitting there is to do, especially when you want to spin the yarn entirely on spindles. Mixing the spinning and knitting for the same project is more interesting; you get more variety and more freedom to choose what you want to do next as long as you don’t run out of yarn. It breaks the project down into smaller, less daunting parts. The only thing you might want to plan is to have enough fibre at the start, but even that is not necessary, there is always a sheep growing more wool.

0 replies

Leave a Reply

Want to join the discussion?
Feel free to contribute!

Leave a Reply

Your email address will not be published. Required fields are marked *

Ask Jacey: How Much Twist is Right?

Dear Jacey, 

I’ve been learning so much from your reels on Instagram. Recently you did one describing what the different whorls do to the yarn you’re spinning. You show one yarn and then change the whorl to a bigger one and show the other yarn, but you don’t say which of the two plyback samples is the right one. I’m a new spinner and just can’t figure out how much twist is too much or not enough. ~Celena 

Hi Celena, 

I messaged you on Instagram, but I wanted to dig a little deeper and give this a bigger audience since I know that lots of people struggle with these same questions. I’m including a link to the reel that you’re talking about in case others want to check it out for reference [add links to IG, YT]. In the 3-minute video, I spin a little bit of a yarn on the smallest whorl of my wheel (in this case it’s a Schacht Ladybug), show the plyback, then change to the bigger whorl, spin a bit more yarn, and show the two plybacks side by side. 

For each of the two plybacks I did my best to keep everything the same except for changing the whorl on the wheel. 

  • I drafted the same number of fibers (roughly, because I’m not magic) for each draft. 
  • I drafted the same distance for each draft. 
  • I drafted one draft each time I treadled so we could be sure the differing twist amounts was the result of the whorl change and not speedy feet or hands. 

Changing whorls 

When I changed the whorl size from smaller to bigger I changed the amount of twist going into my yarn. With the smaller whorl in action, my yarn got a certain amount of twist. When I switched to the bigger pulley, my yarn got less twist. That’s really what I wanted to demonstrate – that you don’t have to know the ratios of your wheel to know what they do relative to each other. I have lots of wheels, and to be honest, I don’t know what the actual ratios are on most of them. If I want to know the real numbers I either have to run a test or look them up online. 

However, because I know what the different size whorls do, I can make decisions about which whorl groove I want to use. And if the groove I choose doesn’t make the yarn I want, I change it to a bigger or smaller groove based on what change I want. What will help you, even if you don’t know the ratios, is to know what they mean relative to each other: 

Bigger whorl = less twist 

Smaller whorl = more twist 

Which is right? 

But what you’re asking is something else, I think. You’re asking which of those two plybacks is the right one, which one you should see and say “yes, that’s the yarn I want!” And here is where you might not like my answer – it depends. It really does! I didn’t tell you which one was right because they’re both right for something and they’re both wrong for something else. 

If there was just one type of yarn that was “right,” most of us wouldn’t spend so much time spinning, right? We’d go buy the one “right” type of yarn at the store and call it done. But the magic about spinning is that there’s a gazillion kinds of yarn you can spin, and each of them is going to be good for something and bad for something else. 

Comparing the yarns 

Okay, first know that the two plybacks I spun in the video are very similar; the only difference is a little more or a little less twist. Keep in mind that the comparisons I’m about to make about these two yarns would get more dramatic and extreme if we were to add even more (or less) twist to them. 

The one with less twist (bigger whorl, left yarn in the video) 

  • Feels a tad bit fluffier: there’s more air in it since the extra twist I added to the other one isn’t there to bundle it down so tight 
  • Looks a little thicker, again, since it didn’t get bundled down so much with twist 
  • Is loftier: less twist means more air and more air means more loft 
  • Might abrade or pill faster 
  • Would show less stitch definition in knitting 

The one with more twist (smaller whorl, right yarn in the video) 

  • Feels a little firmer: the more twist you add, the firmer the yarn gets 
  • Looks a tad thinner: as you add twist your yarn gets thinner (even though it has the same actual number of fibers) 
  • Is denser: with each bit of twist you bundle the fibers down tighter, replacing the space where air was with tightly bundled fibers 
  • Will hold up a little better over time; the extra twist will help it stand up to abrasion so it’ll be less likely to pill 
  • Would show more stitch definition in knitting 

To know which one of the two plybacks is the right one, we’d need more information. 

  • What craft will the yarn be used for? Knitting, crochet, weaving, something else? 
  •  What kind of project? You’ll want different things from a yarn that’s going to be a hat than you’ll want from one that’s destined to be socks. 
  •  What is the goal of the project? To keep you warm, to drape down your back? To protect your hands? To look stunning and fill your non-spinner friends with awe and envy? 

Let’s assume I want to knit. As a knitter, these two yarns are similar enough that they’d both work for many of the same projects, but those projects would turn out a bit differently. If I only had these two yarns to choose from, I might think through it like this: 

If I wanted to knit a pair of mitts 

I’d choose the one with more twist. Mostly because the one with more twist still isn’t what anyone would call a high-twist yarn, it’s still soft and airy (just not as soft and airy as the other one), so it would make fabric that was warm. The extra bit of twist would help it stand up to the abrasion that gloves/mitts are often subjected to. 

If I wanted to knit a warm, squishy hat 

I’d choose the one with less twist and more air. I’m a naturally cold person, so warm hats help keep my head toasty. The airier the yarn, the more warm air trapped in the fabric, the warmer my head. Since heads encounter less abrasion than hands, I’m not too worried that the yarn has a little less protective twist. 

If I want to knit a sweater 

I’d probably want to do a test swatch of each. A sweater is a bigger time investment, and I want to make sure I know how the yarn is going to act. Will the lighter-twist yarn create the lofty and warm sweater of my dreams? Maybe, but will it pill and abrade immediately? I don’t know. Will the higher-twist yarn feel too hard and dense as a sweater? Or will it make my planned cables pop and sing? Probably, but again, I won’t know until I sample. 

If I want to knit a pair of socks 

I’d spin another yarn but on a much smaller whorl. Socks need more twist than either of these yarns have, a little more in the singles and quite a bit more in the ply. 

More than just twist 

And all of these are just decisions I’m making about the twist of the yarn. There are so many other decisions we could be talking about. Is wool the right fiber for the project I’m envisioning? If it is, is this the right breed? Is there another fiber prep that would give me more of the qualities I want? What about the draft? Should I let some twist between my hands while doing a short forward draft? Would a long draw be more suitable? Is this the ply structure I want or should I explore a 3-ply, 4-ply, cable, or crepe? Should I ply to balance or add extra ply-twist? And on and on. . . 

Don’t stress 

That might all sound overwhelming, like, how will you ever decide about everything? Don’t worry, you don’t have to right now. Just the fact that we have all those choices is why it’s magical to be a spinner – you can make exactly the yarn you want. No yarn is wrong, though it might be wrong for a specific project or use. So experiment, spin all the yarns, figure out what you like and don’t like, trust yourself, and most of all, enjoy the process. 

Don’t let the fact that you’re never going to know everything about spinning stress you out; instead, relish the fact that you’re never going to run out of things to learn and spin and you’re definitely never going to be bored. 

Want Jacey or Jillian to take a stab at your question? Tell us what you want to know: 

Call for Blog Submissions: Tension

While the Tension issue of PLY is already in the works (and it looks like another great one!) we are looking for quality related posts for the blog! Did you have an idea you didn’t submit? Or did you miss the submission window?

The blog process is much simpler than the magazine process (which involves contracts and samples sent in, photographs, tech editing, etc.) Instead, you’ll need to send your own photos, and your post will go through a copy edit but no other part of the magazine article process. If your blog submission is accepted and published, we’ll send you a $50 honorarium via PayPal.

Please submit your blog post proposal by March 15, 2025. If your post proposal is accepted, we’ll need your words and photos by May 1, 2025. We’ll be posting the Tension posts on the blog in June, July, and August 2025.

Find the mood board below! (Note: We’ve changed the colors for the issue from the ones on this mood board to something more “summery” so don’t feel limited to the colors here.)

PLY Summer 2025 – Tension (Blog posts)

Tension is one of those elements we use all the time while we spin. Think about all the ways tension figures into and impacts your spinning. We want to hear about all of them! 

Wheel tension and wheel systems: how do they work and which works best for what type of yarn? Is there a reason spinners might like this one over that one? How about drive bands and brake bands? How often should you change them, and what considerations go into the types of materials that are you favorites? What about e-spinners? 

It’s often confusing to keep track of the amount of tension while spinning. Do you have great tips on notating and measuring your take-up? 

Crosslacing is a fantastic technique for decreasing tension. When do you use it and how do you do it on different wheels. Do you have any other methods to reduce the tension? 

Tensile strength is all about how much tension a fiber can be put under before it breaks. Which fibers are the strongest? Which breeds? When prepping fibers, the amount of tension used often results in unwanted neps. Do you have tips for reducing or eliminating them on hand cards, a blending board, or a drum carder? 

Can the right amount of tension make or break the consistency while plying yarn? Why do we need tension to ply? What tips do you have to use tension to ply a consistent yarn? Is tension the key to reducing bumps in chain-ply yarns? What can you tell us about the different styles of kates and their tensioning systems and when you might use a particular type for both wheels and spindles? When do you apply more tension; when do you just let your bobbins spin? 

What about textured and art yarns? Bouclé, spirals, coils, beehives, core spun, and other textured yarns rely on differential tension while plying. Tell us how you determine how much and how little tension make the best textured yarns. How do you control the mixed tension and still keep a yarn tidy? Is there a yarn that uses no tension? 

How about color? Why do some colors seem to vibrate and explode when they are next to each other? Is there a way to make it happen or lessen the visual tension? 

What about the release of tension? How do you plan, spin, and weave a structure that collapses on itself? What about knitting? Releasing the tension in high-twist singles can create sculptural effects. Can you teach us about it? 

A Spinner’s Toolbox . . . Literally 

Words and photos by Kai Solon 

Every spinner’s most prized possession is most likely their wheel. Our wheels are what enable us spinners to do the thing we love. However, like all pieces of machinery, they have to be cared for and maintained. Now, this is not necessarily a “how to fix a broken wheel” tutorial because every wheel is different and every scenario is different. Today, I would just like to share with you a few essential tools every spinner should have handy to keep a wheel in working condition and fix solutions to tiny problems. 

Why should you keep tools around? 

First off, I am not telling you to start carrying around a woodshop’s worth of tools everywhere your wheel goes. That would be unreasonable. However, our wheels can be unpredictable, and a number of things could happen. A drive band could snap, a screw could come out, a spring could become uncoiled, or something simple like your wheel sounding super creaky and annoying. Having the basic tools around is helpful when your wheel decides to stop working out of the blue. 

For example, at the Junior Spinning Competition MDSW 2024, a contestant’s drive band’s knot suddenly came loose and we needed a quick fix to make it tight again. We were able to fix it in time for the competition, but events like these remind me how important it is to keep spare parts around! 

Of course, not everyone is going to be in a competition every time they spin. However, if you frequently demo, travel with your wheel, or are simply an avid spinner, keeping spare parts to your wheel can be a miracle when your wheel breaks or doesn’t work quite right. 

What exactly should you have? 

Each spinner will have different needs according to their wheel type. Some of these tools might even depend on individual preference. Not every one of these are extremely important. In fact, some of these only need to be used once in a blue moon. This might seem like a long list, but trust me, everything here has a purpose depending on the situation. 

1. Oil 

Oil is the one thing all spinners should keep handy (unless your wheel doesn’t require it). A good spinner should oil their wheel at least once every few times they spin if not every time. Oiling your wheel is quick and easy. You simply squirt a drop on the different moving (metal) parts and bearings (check your manufacturer for recommended oil placement). This will keep the bearings spinning smoothly against each other and will reduce friction that will most likely cause a really annoying squeak when you spin. If you spin frequently, oiling your wheel is key to having a smooth spin every time. 

2. Extra drive bands 

Drive bands can easily and quickly wear out/stretch out if you use your wheel often enough. Synthetic polyurethane can last for a long time, but you never know when the day might come that it will decide it’s served enough time. As for string or cotton bands, knots may easily come loose, and it can be hard to tie them a second time or sometimes they just have to be cut off. Frequent use and friction may also cause abrasion on the string and may cause weak spots, eventually leading to breakage. Your drive band is one of the most important components of your wheel, so ensure that you have a spare lying around your craft room. 

A quick note on drive bands: I suggest that you keep both a polyurethane and a string drive band around, especially if you like collecting antique wheels or you own a vintage brand wheel. In some situations, the drive band may or may not affect the speed and rate at which the yarn winds onto the bobbin. A heavier drive band may cause your bobbin/flyer to wind more yarn than you can spin. You may find yourself fighting the wheel to keep the yarn in your hands. 

This P.S. may not apply to you if you’ve had a wheel for ages with the same drive band. You already know what works and what doesn’t. However, if you’re trying a new-to-you wheel, and you find yourself struggling to spin at the rate your bobbin intakes yarn, try different drive bands to see if that helps you out. 

3. Beeswax 

For those of you with antique wheels, or who have string drive bands in general, beeswax is a must. Beeswax can make your drive band stronger and longer lasting. It also serves the purpose of adding a stronger grip to your drive band so it spins and moves the parts it needs to move with ease. You can easily keep a tiny chunk of beeswax with you and run it on the drive band at least once or twice every time you sit down to spin. The wax wears off, so constant application may be your best bet. 

4. Screwdrivers 

Depending on your wheel, screws might play a key role in certain parts of the wheel. For example, on my wheel, two screws help to keep plastic strips that connect the treadles to the wheel itself. These screws may come loose quickly or need to be removed to access and repair certain parts. For my electric spinners, most of the motors are held in place with screws attaching it to the spinner. Motors can, without a doubt, need replacing as they can be a delicate piece of machinery that can blow out or need to be switched out for a stronger, better one. Screwdrivers are most definitely one of, if not the most, valuable tool to keep on hand. 

5. Extra bits and bobs 

Everyone has different wheel types and styles. Wheels from different companies and wheelmakers may differ in shape, material, size, and parts. This means some parts for your wheel may be hard to come by because they are made specifically for your wheel. Therefore, if and when possible, buy these spare parts so you can replace them when something breaks. 

You never know when a part breaks down or has just served its purpose for long enough. This is why I personally like to keep spare bearings, plastic bits, and screws around for my wheel when possible. Because I often take my wheel out and about for demos, I don’t want to risk not being able to spin any longer because the screw fell out of my right treadle! 

Recommendations from other spinners 

I asked 57 spinners what they think is the most useful thing they keep around and why. Not entirely surprising, spinning wheel oil and spare drive bands tied, with both items each making up 35 percent of the responses – 70 percent of the responses total. 

For James P., oil is most important because “A wheel is a machine which has various bushings and bearings. If the bearings are sealed then that’s easy, no maintenance needed, but invariably most bobbins or flyers sit in either bronze, leather, or plastic bearings. To keep those spinning smoothly, quietly and so as they don’t alter my takeup, they really benefit from very regular oiling. Regular oiling (I oil every 30–45 mins) also cleanses the bearings as well as lubricating them to ensure particulates don’t prematurely wear them down. For me it’s the single most important thing I do to maintain my wheel as I spin.” 

Here’s what Karen B. said about her drive bands: “My Majacraft Rose has a plastic drive band. I am not sure how easy it would be to make a temporary one out of cotton. That being said, if my drive band is broken, I can’t spin. To be prepared, I have a little case with all these items that I keep in my spinning travel box. It goes with me to all guild meetings, demos, or just a spinning day in the park.” 

Screwdrivers also seemed to be a popular choice among the spinners, and Callie W. provided an excellent explanation as to why: “A screwdriver is the only tool that I have used on my wheel. Sometimes the fasteners holding the wheel together get slightly loose, or the screws on the treadles loosen.” 

Conclusion 

Wheel maintenance is key to good spinning. Maintenance will keep your wheel running smoothly and will leave you to worry about your yarn and not what your wheel’s issues are. Again, this is just a general list of tools, but everyone has their own unique preferences and wheels. Like so many other aspects of our craft, find what works for you. When you have a wheel and method that works for you, you’ll be on your path to success. Happy spinning! 


Kai Solon is a young fiber artist who enjoys spending his free time spinning, weaving, and natural dyeing and has also recently dabbled in kilt making. Kai shares his fiber journey on Instagram and YouTube as @FiberByNature. Outside fiber, you’ll find Kai playing his heart out in his high school drumline.