

Mixing Things up for a Sweater
words and photos by: Johanna Carter
I always admire those who are able to spin mountains of yarn for a big project, ready to knit a wonderful sweater or cardigan. It is a satisfying feeling when you finish all that work, especially if you started with washing and combing the wool or even raising your own sheep.
Mixing spinning and knitting
The typical way to work through a larger project is to spin all the singles first and ply them in a particular order so you get the yarn even throughout the whole project. I don’t have so many bobbins, but my bigger problem is that I am quite impatient and want to get on with knitting once I have an idea. And normally, my brain is full of ideas for fibre work and the limit is the time, as I am a musician and teacher. I can’t sit at the spinning wheel for a long time if I’m not on holiday, so during the school year I mostly knit, and during the holidays I can dye, spin, use my drum carder, and do lots of fibre work. The only time I was able to produce bigger quantities of yarn before I knitted them up was during the Tour de Fleece in the two years during the pandemic, when we did not go on holiday at the beginning of July.

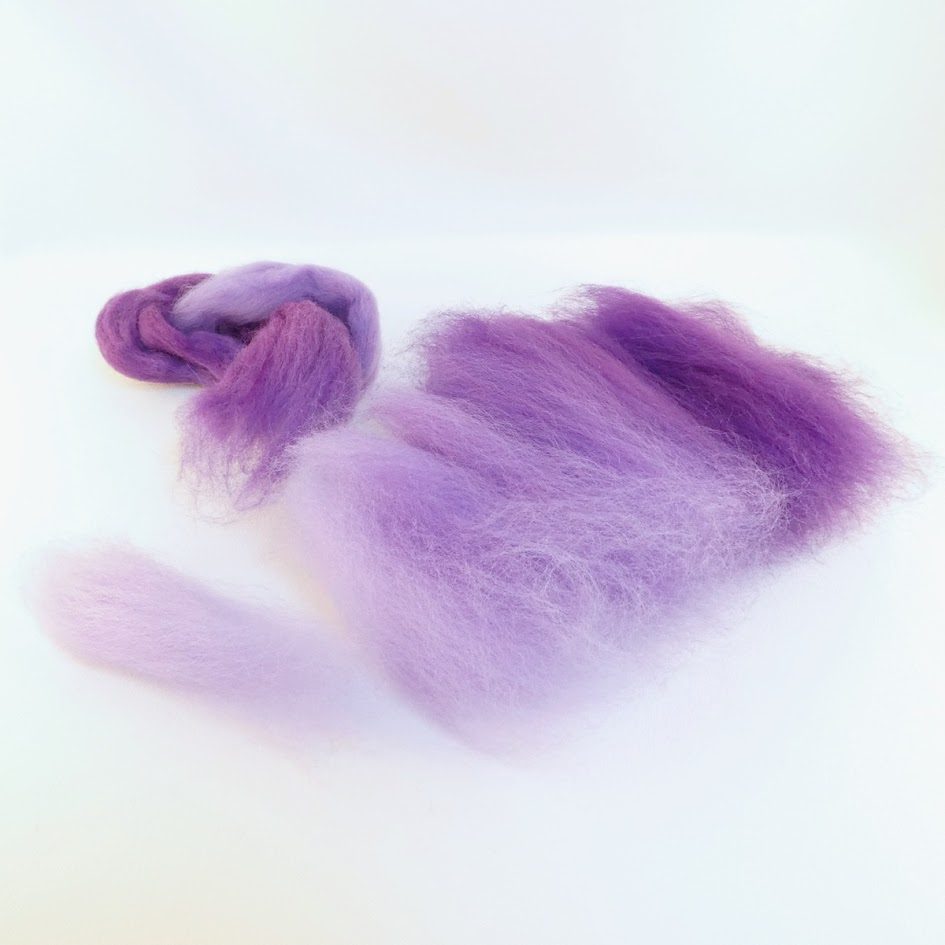
A highly photogenic collection of naturally dyed fibres.
I like to finish knitting one big project like a sweater or cardigan before I start the next one, or at least until I can’t carry it in my bag easily anymore, so I have an excuse to begin the next one. Sometimes it is good to have a second project on the go – I call it mindless knitting, where I don’t have to look very much – which I can keep my hands busy during Zoom or other meetings, which helps me listen.
Mixing colours and fibres
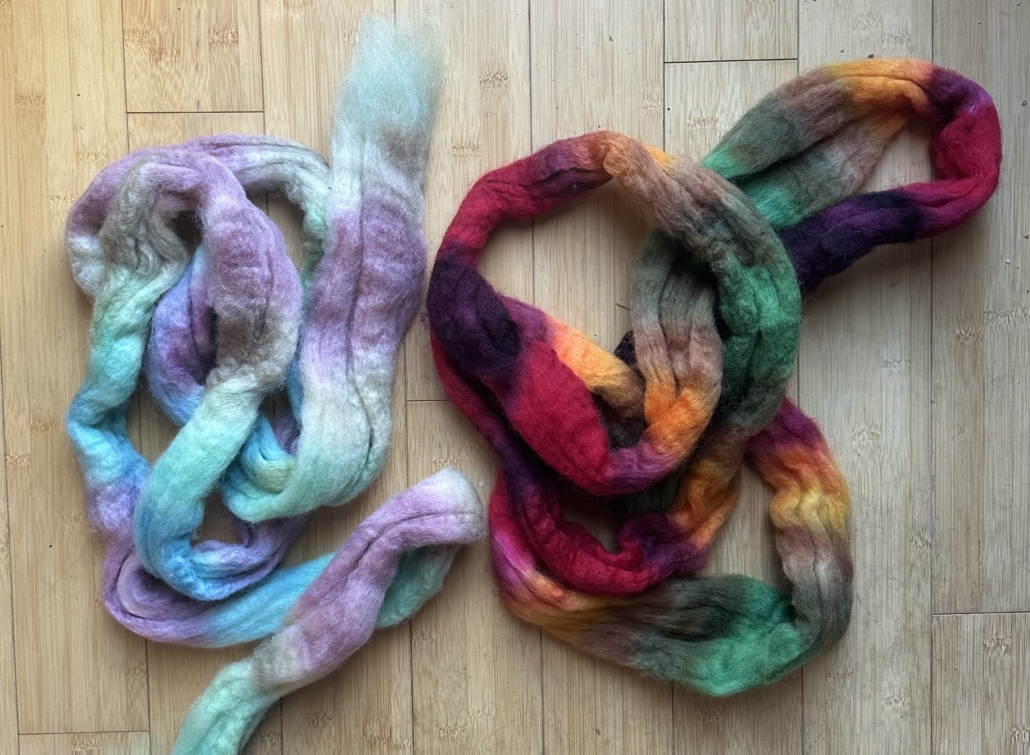
Usually I dye my yarn with plants which I collect in the woods or get from garden flowers. I also use cochineal and indigo, which I buy, to get lots of different colours. I really love the greens and blues I get from dyeing with indigo. I have lots of dyed wool, and all those colours give me inspiration for further projects.

Beautiful greens and blues dyed by the author using indigo and other natural dyes.
Blending the wool on the drum carder I can get even more shades. I like to blend with fibres like silk, alpaca, or plant fibres, and I love sari silk, to get those little bits of colour in my yarn.
Fibres of different types and colours are blended on a drum carder for elegant results.
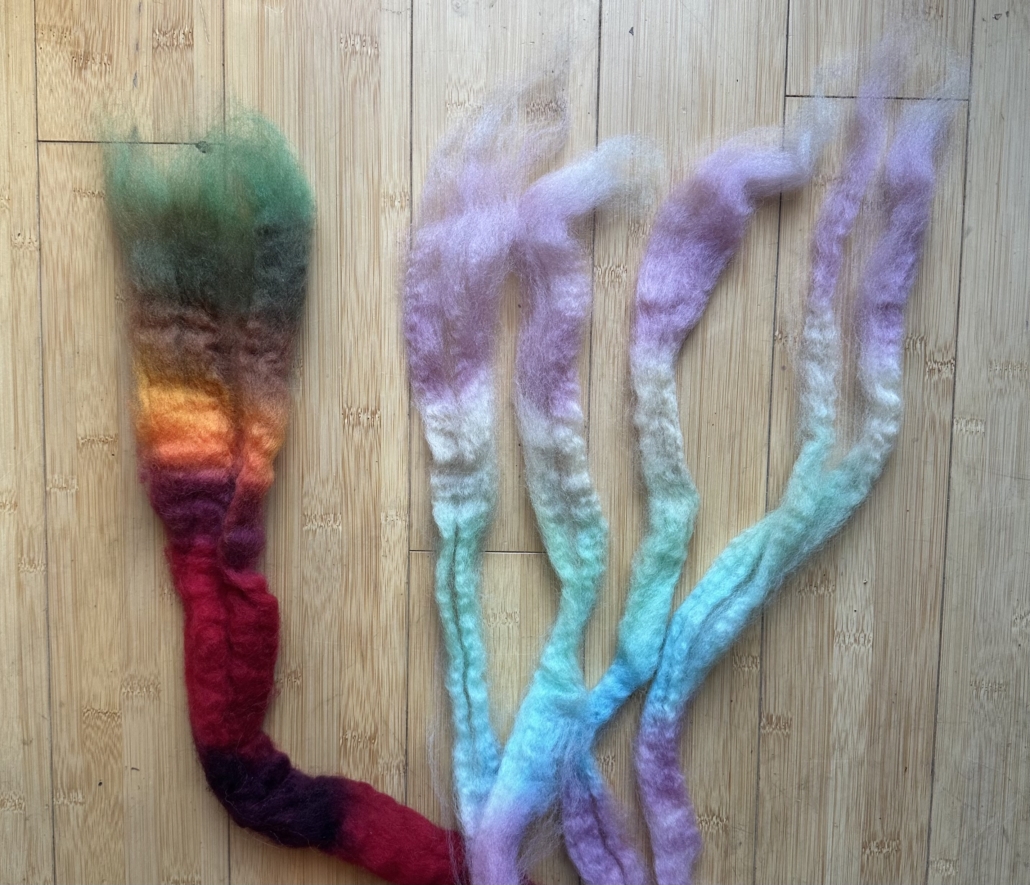
When I have an idea for the next sweater, I start carding, and then I can begin to spin. Once I have spun enough yarn – say, for one day – I cast on and start knitting, usually top down, so I don’t have to decide too much in advance about length and width.

An idea for the author’s next sweater in the gathering stages.
When I spin on my wheel, I have to sit at home, but while spinning I can read a book or talk to others during online meetings. I also like to spin on my spindles, and that works on a walk, or a museum visit. I take them on holiday as they don’t need much space, and when I spin for a lace shawl, I don’t even need much wool either. At home there are spindles all over the place; I can spin when I am waiting for the kettle to boil, when the computer is slow, when I am cooking. Like that I can make good use of a short time and the yarn still grows.

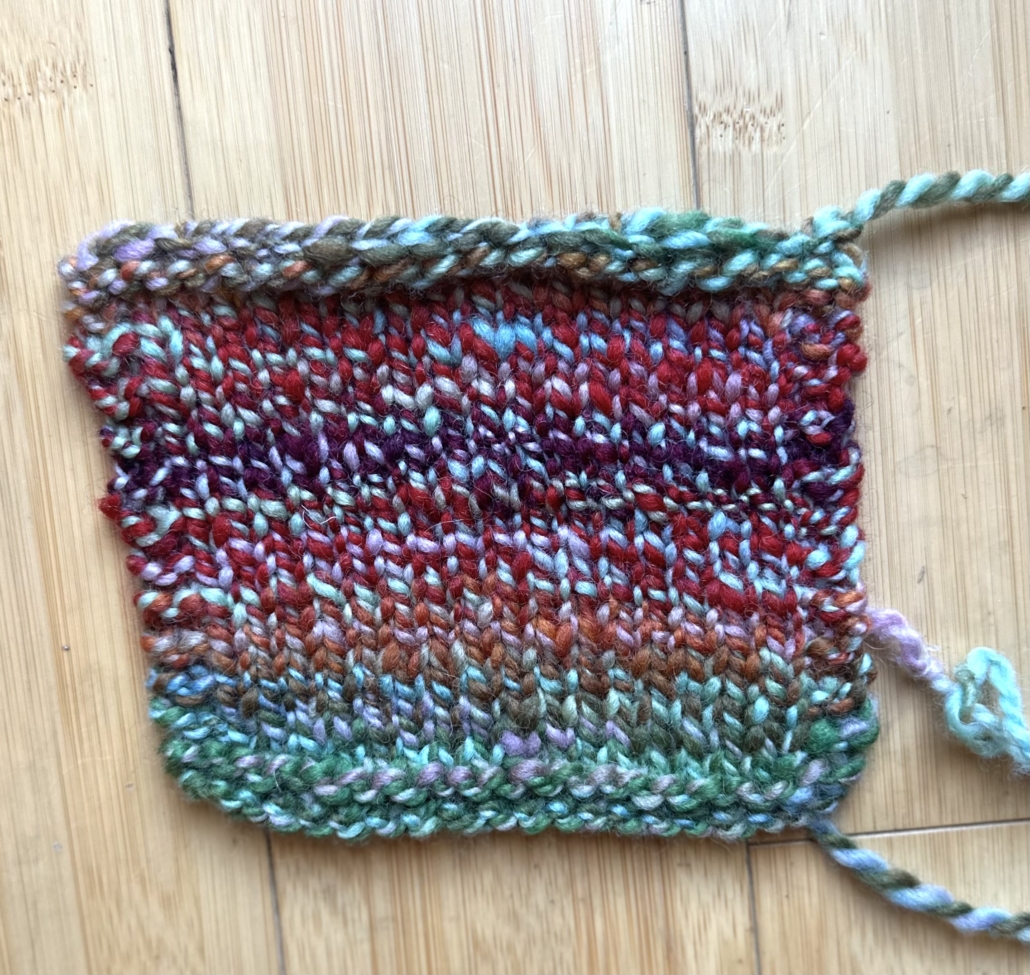
Knitting as soon as the yarn is spun helps the author complete sweater projects in a timely manner.
I can take my knitting almost everywhere, which is why I don’t want to wait to get started until I have spun all the yarn for a whole sweater. I knit at home, on the bus or train. The only thing I have to make sure of is to be one step ahead with the yarn.
I love to knit Fair Isle sweaters. My favourite method is to use only one bobbin, which I don’t even fill, because I need smaller quantities of lots of colours. Then I wind a ply ball and ply it on itself. For that I put my thumb through the ball, so I can tension the two singles with my fingers and they don’t get tangled, as long as my thumb (or a cardboard roll or a pencil) stays in the middle. I don’t have any leftovers from plying, and it is quick when I suddenly need more yarn.

Several charming sweaters dyed, spun, and knit by the author.
I have never had problems with the yarn not being consistent enough throughout a project. I just know what yarn I want and my fingers seem to remember what to do. I am sure it is good advice to have a little card tied to the spinning wheel with a bit of the singles you are aiming for, so you can check and make sure you are spinning a consistent yarn.
Mixing breeds
There are so many different breeds, but some of my favourites are Shetland, BFL, and Jämtland – a Swedish breed. After dyeing them, I often forget what I have used, so when I do a new project it often turns out that I have used different breeds and fibres just to get the right colour. For the Fair Isle knitting I want to juggle lots of colours, which is more important to me than making a sweater out of only one breed.
Recently I made a pullover for my husband using about 12 different breeds and colours, even mixing short and long draw. For me it was a breed experiment and a way to use up lots of smaller quantities of wool I had in my stash. For that sweater I used combed top without blending.

Mixing in knitting during the spinning process is a wonderful way for a spinner to avoid being overwhelmed during a sweater project.
My feeling is that some people don’t dare to start spinning for a bigger project because they get overwhelmed by the quantity they have to spin and then all the knitting there is to do, especially when you want to spin the yarn entirely on spindles. Mixing the spinning and knitting for the same project is more interesting; you get more variety and more freedom to choose what you want to do next as long as you don’t run out of yarn. It breaks the project down into smaller, less daunting parts. The only thing you might want to plan is to have enough fibre at the start, but even that is not necessary, there is always a sheep growing more wool.
Ask Jillian: Playing with Fractal Spinning
Do you ever use the fractal style spinning for anything else besides a single braid?
~Kate, Taos, New Mexico
Hi Kate! I do! I first read about fractal spinning in an article by Janel Laidman way back in 2007. I like to use the technique to break up hard or clear striping in braids that are dyed with a pattern, but I also use it to create more marling in other yarns.
Here’s an example of a fractal spin with a single braid dyed to stripe.

I split a braid in two lengthwise and spun one half on a bobbin. I divided the other half into four parts lengthwise and spun them one after the other on a second bobbin. Then I plied them together.
Each time a braid is stripped narrower, each color is shortened. By plying different-sized divisions together, I’m combining long and short color runs within a colorway. This fractures the stripes so that the colors meet up in some spots, marl in some spots, and meet then marl in some spots. The difference between a matching ply and a fractal ply looks like this:
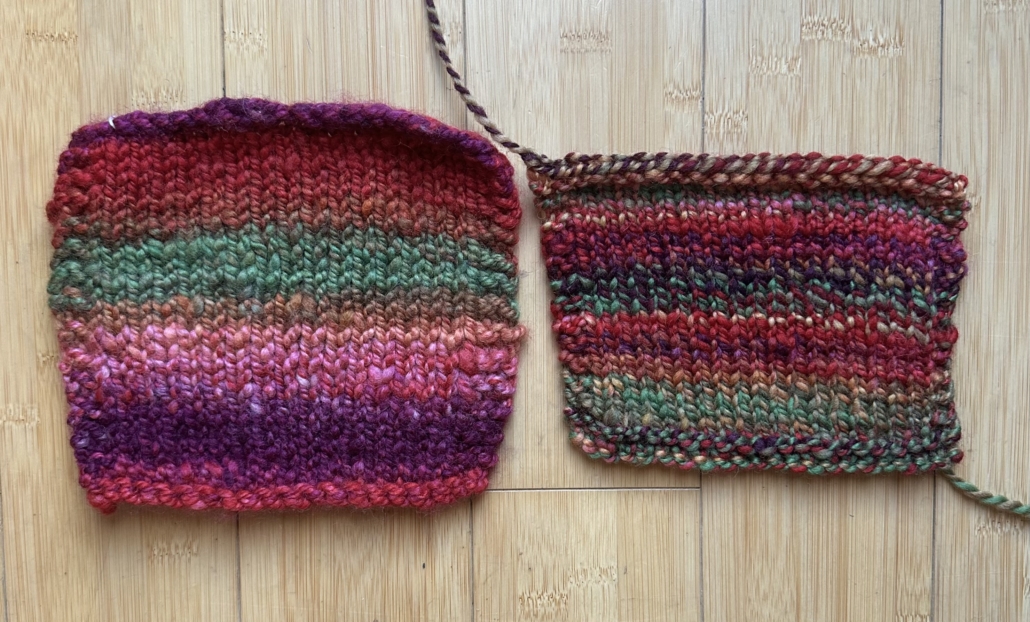
I love the look of the fractal ply because it has motion and visual texture and it’s just more exciting to me than simple stripes. Of course you can play with the numbers of divisions and the order of the colors and the number of plies. It provides endless fun.
I use a fractal-style division anytime I want colors more mixed up. The results are usually pretty subtle, but I like them.
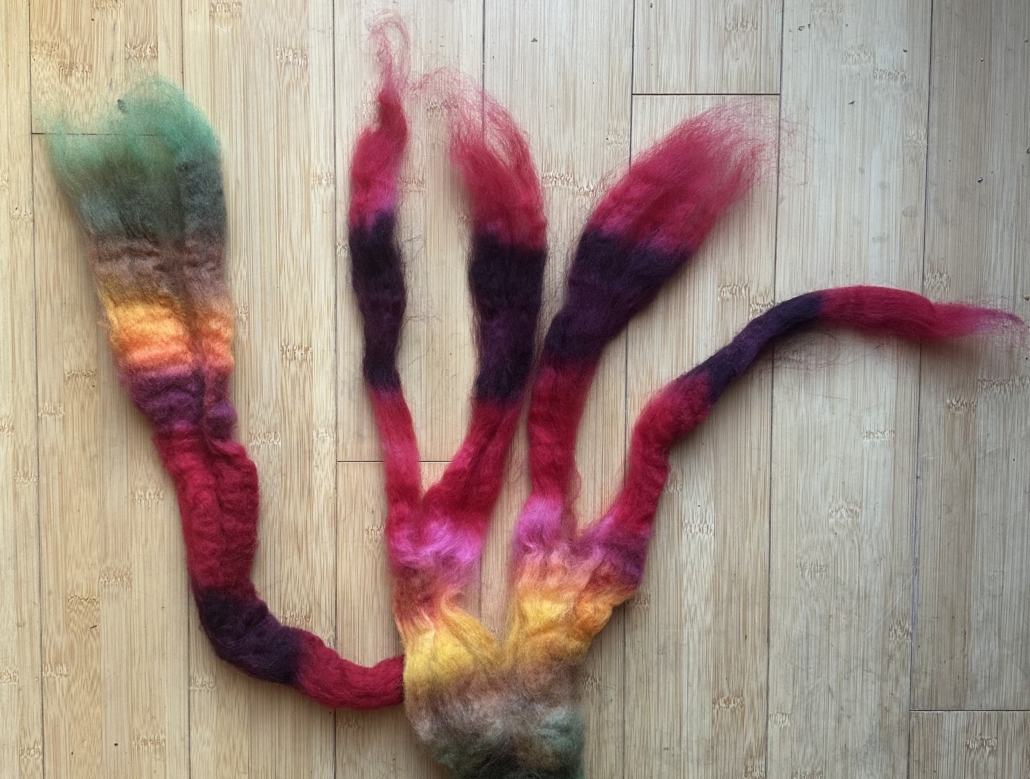
I did it when I combined these two braids:
I used the darker braid as the long color and spun it onto one bobbin. I divided the lighter braid into four pieces and spun them in succession on another bobbin, then plied.
It ended up looking like this:
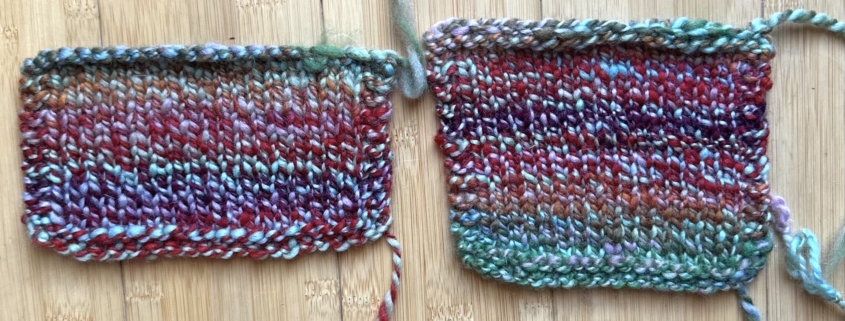
Here’s a comparison between one ply of each: both long color runs (on the left) and the fractal division (on the right).

Like I said, it’s subtle, but I like how the lighter colors seem sprinkled or more dispersed over the darker color braid as it rolls through its color pattern in the fractal division. The 2-ply with equal amounts of color runs looks more like two colorways competing for my attention.
So play with that fractal-style division. You’ll make amazing and sometimes surprising yarns. My next fractal play is going to be combining fractal division with a cable structure.
Want Jillian or Jacey to take a stab at your question? Tell us what you want to know:

Wool Mill Feature: Ewethful Fiber Farm and Mill
by Kira Dulaney
One of the many pleasures of spinning is searching out different breeds of sheep and fiber blends to try. As a bonus, heading down that path means supporting smaller ranches raising heritage breeds and, if you choose not to start with raw fleece, sourcing fiber from small wool mills. I love visiting wool mills and learning what each one specializes in, then spreading the word far and wide to help connect the mills with both fiber producers and spinners. Recently I spent some time with owner Kim Biegler of Ewethful Fiber Farm and Mill in Halsey, Oregon, a rural community just an hour and a half south of Portland.
Ewethful is a mini mill using equipment that can turn out small batches, specializing in making roving from local sheep and alpaca. Incoming fiber is scoured, air-dried, sometimes dyed, picked, and carded, and occasionally blended. The picker, carder, and draw frame are all Belfast Mini Mill machinery manufactured in Canada. Kim operates and maintains all of the machinery as the sole employee.

Kim married into a farming family in the “grass seed capital of the world” in rural Oregon, where along with husband Mitch she also raises Shetland and BFL/East Friesian–cross sheep, alpaca, a Pygora goat, and myriad non-fiber-bearing animals. The mill itself has just one four-legged inhabitant, a calico cat named Wish who eagerly greets guests on the monthly open mill days.
Running a fiber mill is hard work, and I respect that Kim has narrowed the scope of Ewethful to what both she and her equipment are happiest doing. Since the mill’s start in 2016, she’s pared down to focus on creating loose roving perfect for woolen spinning, no longer taking custom orders or spinning yarn. Wool from Kim’s own flock is represented along with fiber from other Pacific Northwest ranches. She shops for fleece at fiber festivals, then contacts ranchers for larger purchases, and sometimes ranchers hear of the mill through word of mouth.
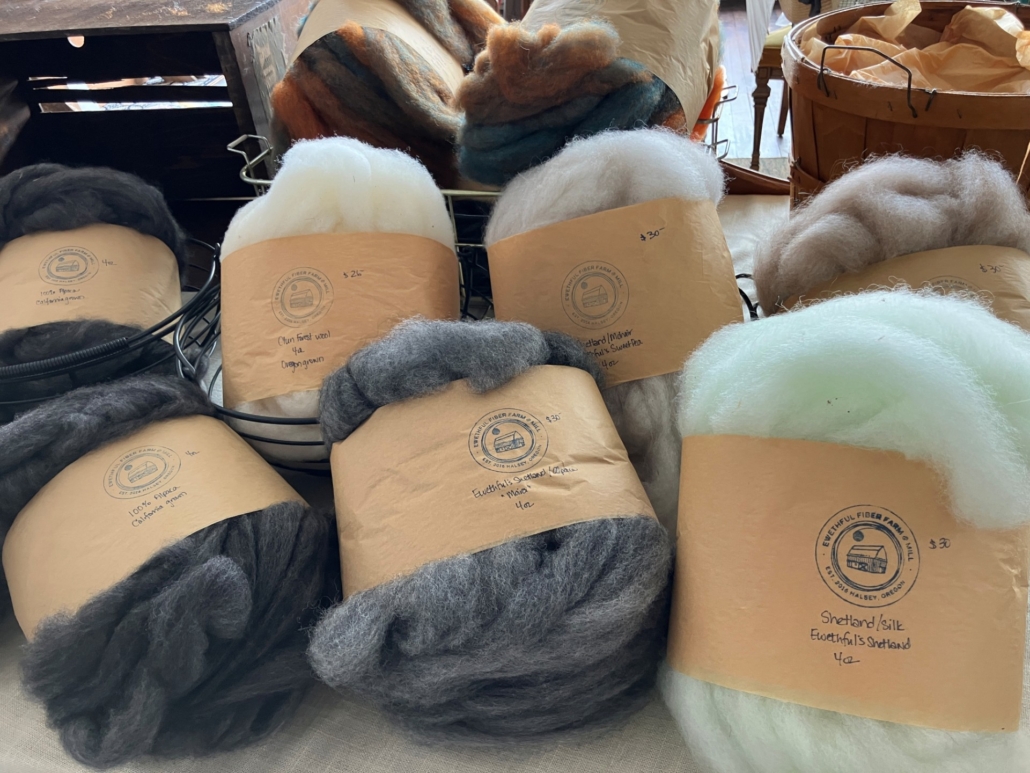
Kim’s carder works well with mid-grade alpaca and heritage breeds of wool, both of which are plentiful in the area. Although it can handle fine wools if they’re high-quality coated fleece, Kim prefers to stick with 20+ micron fiber. Some fibers get dyed before carding, others are blended on the draw frame afterward, and many are left in natural colors. On my visit, I saw Romney in the drying cabinet, turquoise-dyed Clun Forest on the carder, and containers of freshly carded roving including Romney, Jacob, and an intriguing blend of Romney, silk, and camel. In the shop there was also roving from Shetland, alpaca, Shetland/mohair, Shetland/silk, and Shetland/alpaca. I spun up some of Kim’s own Shetland wool and it was a dreamy fluffy roving that was a breeze to draft. Availability varies quite a bit as different fleeces come into the mill and the finished roving gets snapped up by Patreon supporters, then newsletter subscribers, and finally folks browsing the website or visiting the mill shop.
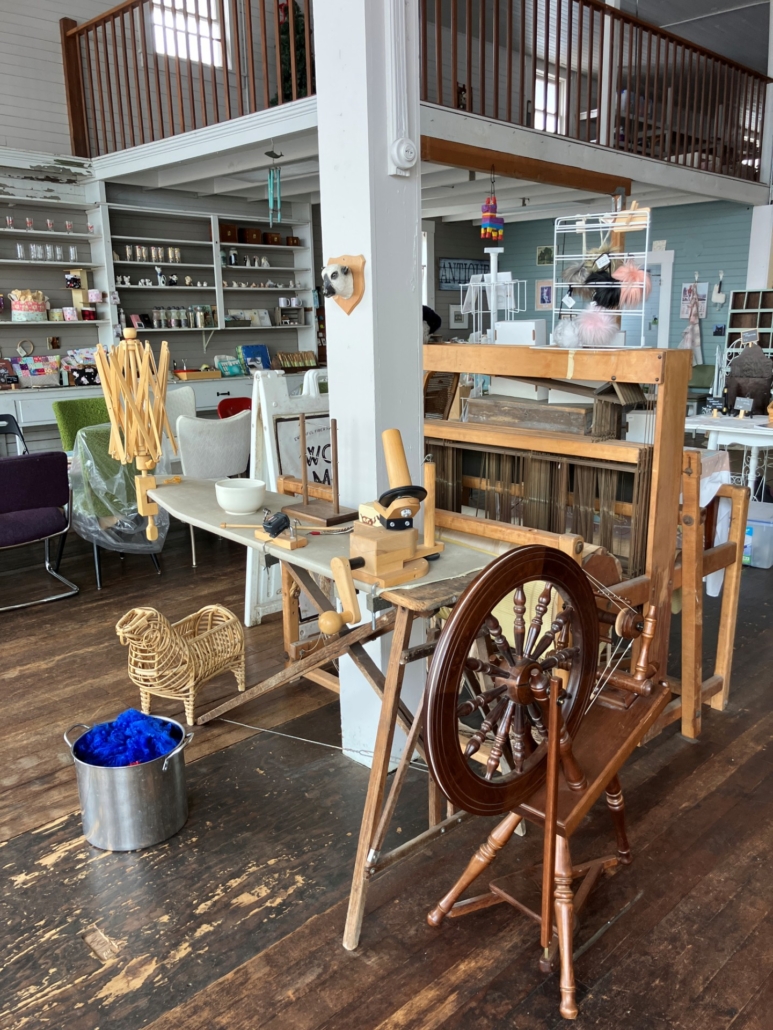
Once a month, Kim hosts a Mill Shop Day and many people come from the surrounding area, some hanging out all day long and even setting up an informal potluck of snacks and drinks. Visitors get to tour the mill, browse the store, and sit crafting and chatting around a large table. Even though the shop is open just once a month, it’s stocked with fiber tools including niddy noddies, knitting needles, hand-carved crochet hooks, and dye. Yarns from small U.S. mills satisfy those who aren’t spinners yet, and the offerings are rounded out with soaps, ceramics, project bags, and candles from local makers. Most of these are also available online along with the mill’s roving. There are spinning wheels and looms throughout the shop, some for sale and others awaiting refurbishing.
A great way to see behind the scenes at the mill and hear about the current fibers in process is to watch Kim’s vlog All the Wool on YouTube. A recent video followed Shetland wool from a cold soak into the washing machine and later the drying cabinet, while earlier batches went through the picker and carder. The video includes a cameo by the two Kunekune pigs on the farm, and a reminder that Kim’s community is inclusive of fiber lovers of all identities and backgrounds. The Ewethful website also has helpful blog articles, downloadable videos, and online courses for spinners to watch at their own pace.
At a time when wool mill closure announcements keep rolling in and tariffs are affecting imported products, it’s important to support our U.S. wool mills of all sizes. That support extends to the ranches that produce the fiber, rare and heritage breeds of fiber-bearing animals, and all the hard-working people involved along the way. I’ll keep sharing my visits with the PLY community, and I encourage you to seek out your local wool mills or chat with those you see at fiber festivals.
Check out Ewethful on their website: https://www.ewethfulfiberfarm.com/
A lifelong crafter, Kira Dulaney has been teaching fiber arts classes since 2002 and travels across the country to share skills in knitting, crochet, embroidery, spinning, weaving, mending, and more. Kira designs knitting and crochet patterns, teaches, and hosts crafty event in the San Francisco Bay Area.
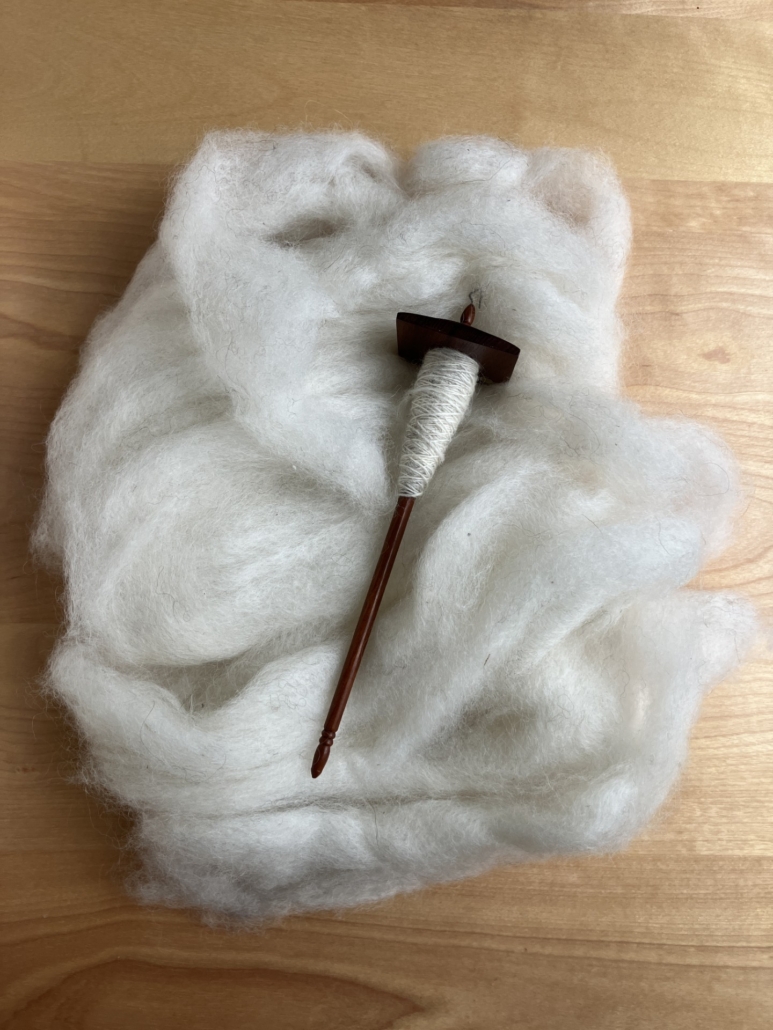
Falling in Love with Bottom Whorl Supported Spindle
Words and photos by Cynthia Haney
I first fell in love with spinning yarn on a top whorl drop spindle, using park-and-draft to build my skills before spinning suspended. I manage the spindle with one hand while the other holds my fiber supply. After setting the spindle in motion, I move my spindle hand to my fiber hand. I pinch on my yarn where it ends, controlling the twist with both hands to keep it out of the fiber. I move my hands apart about a staple length, drafting. I slide my spindle hand smoothly on the drafted fiber as I release twist, forming yarn. This process ensures I am always holding yarn so the spindle does not fall. The spindle descends, drops, as I spin more yarn. I prefer this worsted drafting method, which makes a firm yarn. I enjoy spinning fiber prepared as top for smooth worsted yarn, maximizing any natural luster.
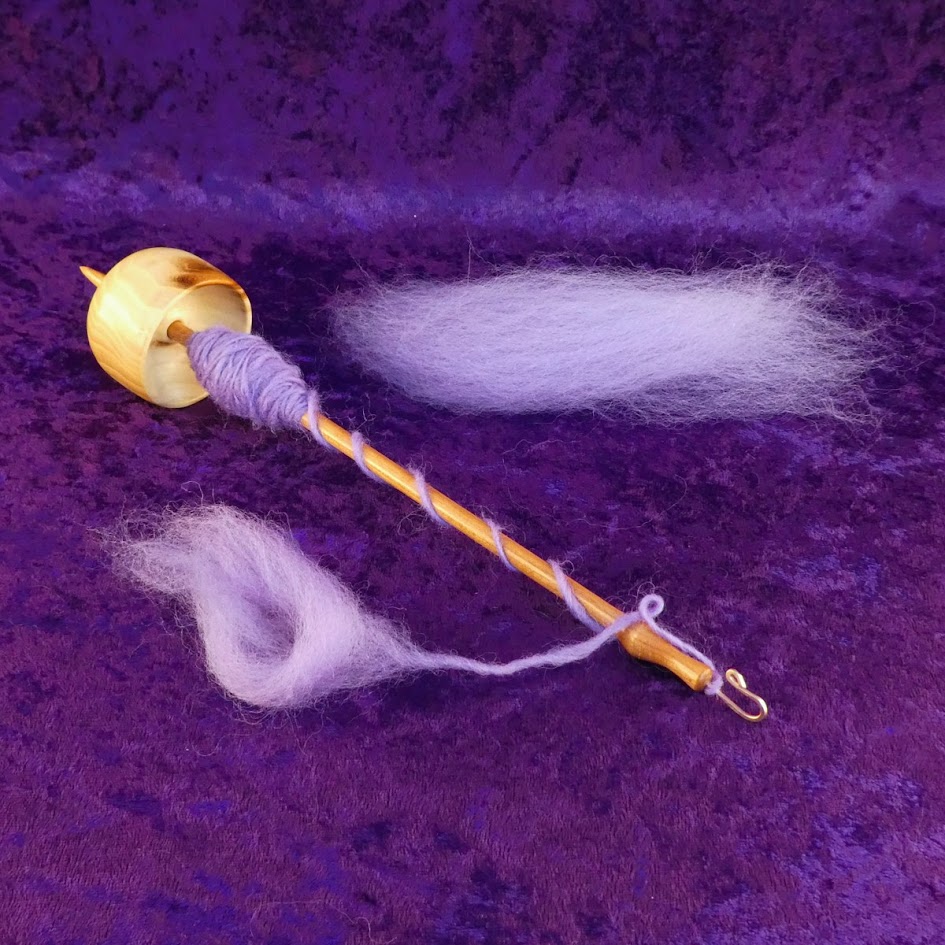
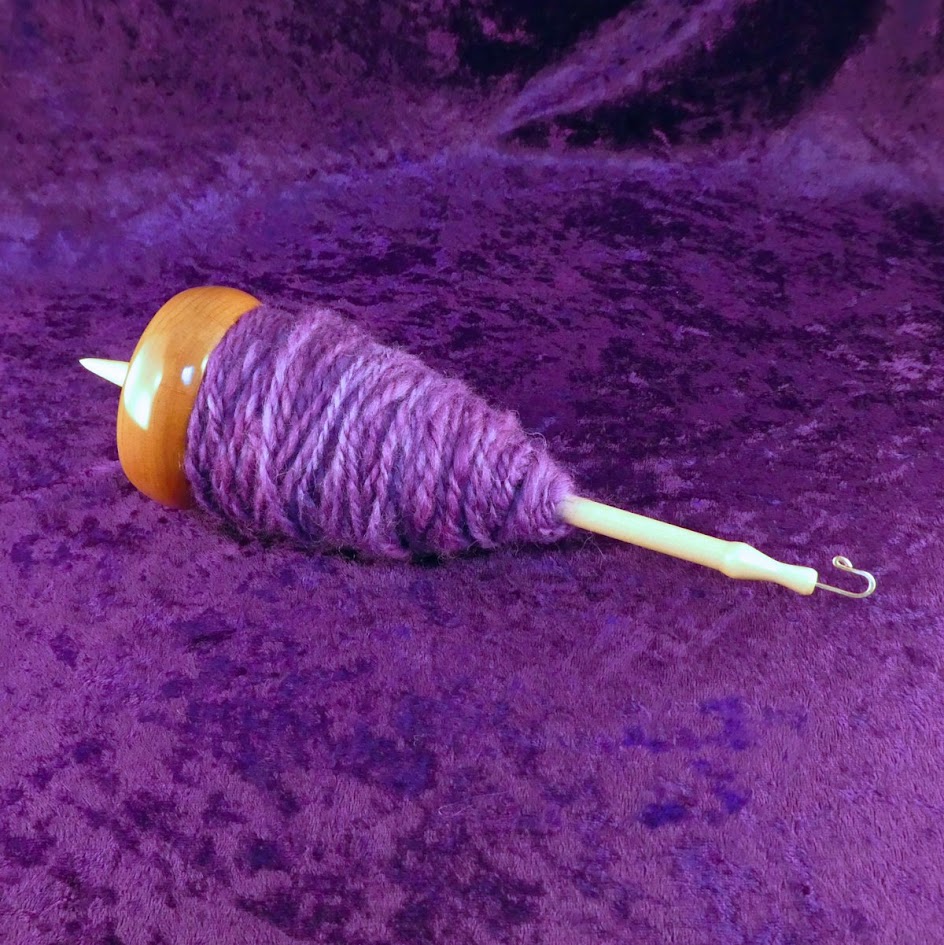
Recently, I tried spinning with a bottom whorl suspended spindle. The whorl crowded the shaft where I expected to put my spindle hand. When I wound onto the shaft, I needed a long yarn leader to reach the hook. Spinning suspended, I could make the same yarns using either spindle type, but the handling differences kept me from enjoying bottom whorl as much as top whorl.
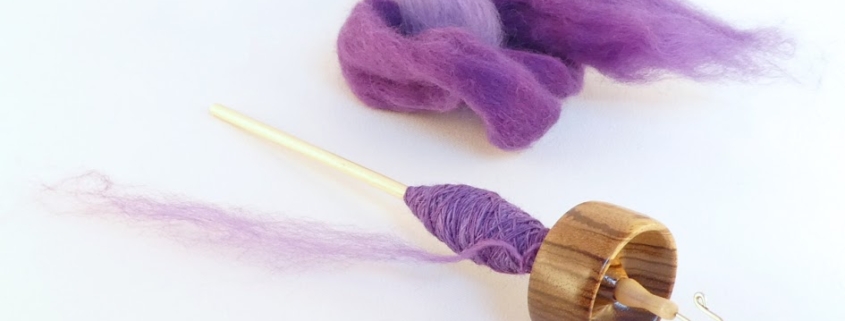
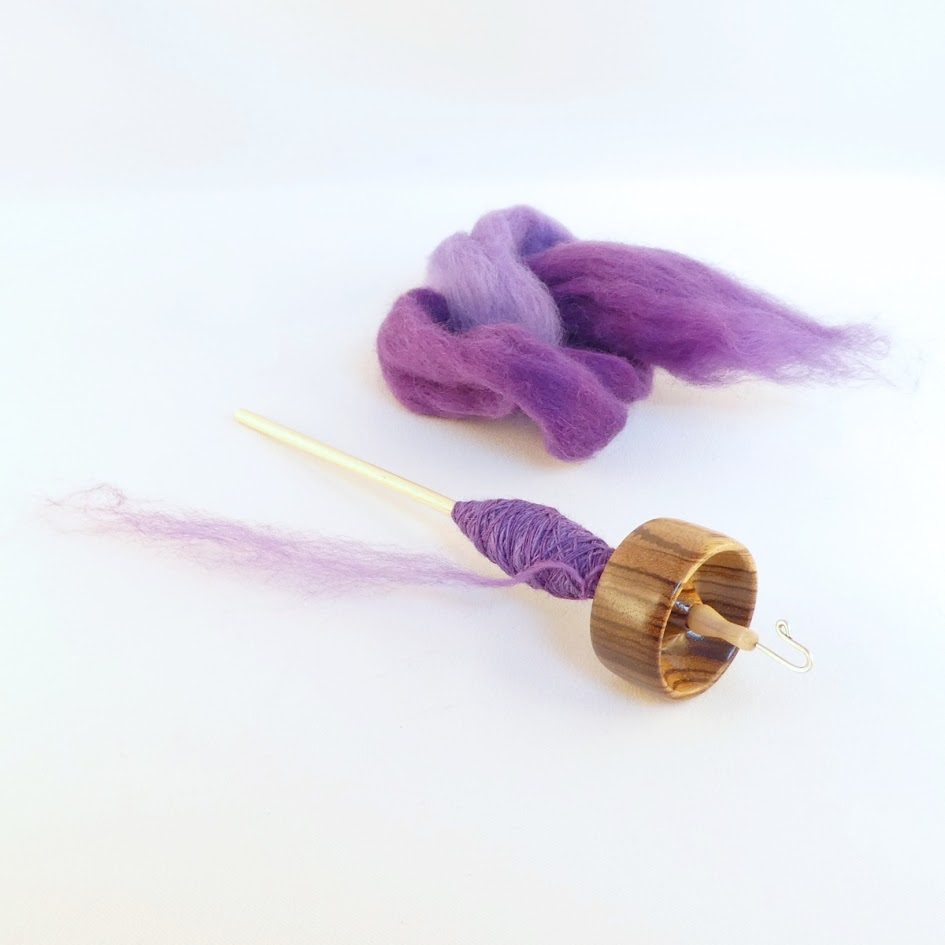
Then I tried bottom whorl with the spindle supported by the shaft’s pointed bottom end. With this method, I flick on the shaft just below the hook with my spindle hand. I curl my fingers around the shaft, allowing the spinning spindle to lean on them. I must allow twist into my drafting without my spindle hand moving to pinch it off. I need a fiber preparation that will draft freely in the presence of twist – I know fiber prepared as top gets locked by twist, resisting drafting.
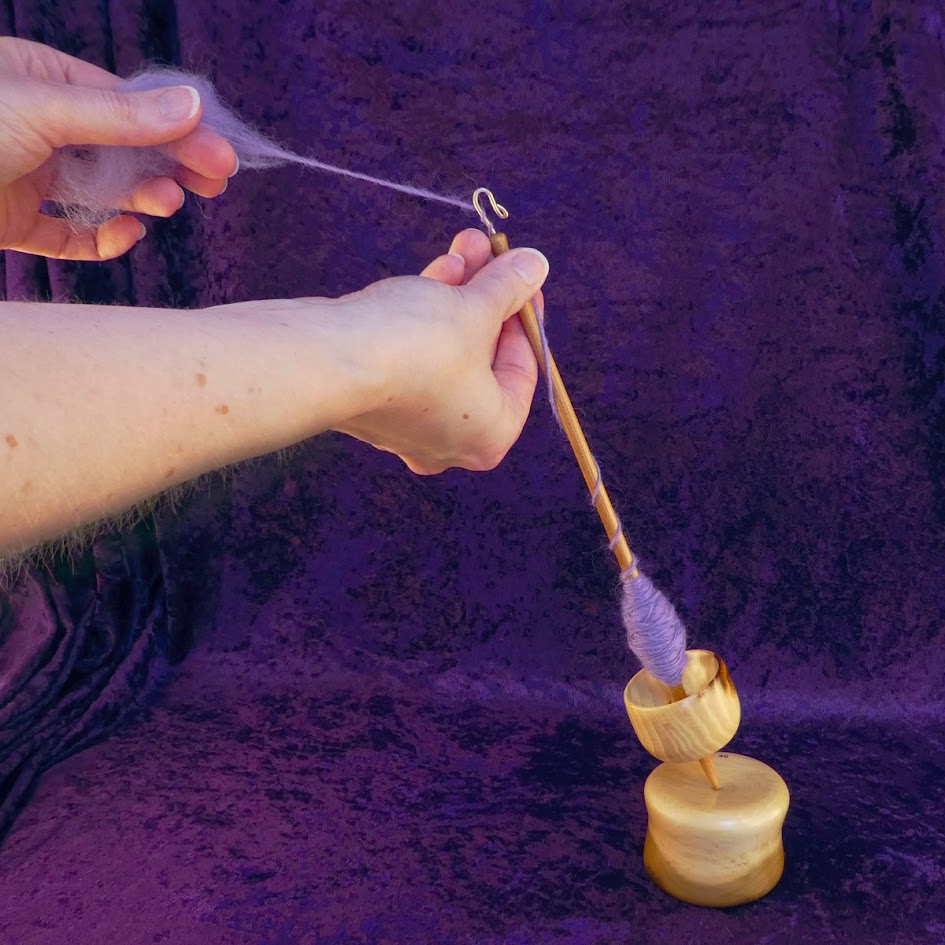
I pull a staple length of wool from prepared top and fold the staple over my fiber hand fingers. I catch the fold with the spindle’s hook. I spin the spindle, providing twist, and pull my fiber hand away from the spindle. Instead of constantly pinching off the twist, I let it flow. I draft using only the twist to grip the fibers, swinging my fiber hand farther away. When I am out of arm reach, I pinch my fiber hand to shut off the supply. I continue to flick my spindle, adding more twist until it locks the drafted fibers into yarn. I am ready to wind onto the spindle shaft. I release my yarn from the hook and start winding above the whorl. I spin the spindle supported as I tension and guide my yarn to shape the cop. I aim my remaining leader up the shaft, spiraling it to the hook.
I spin an airy squishy yarn with a fuzzy matte appearance. I release control and embrace the rhythm of spinning while drafting against the twist. As I develop a steady pace my yarn becomes more uniform.
With my bottom whorl spindle supported on a bowl, the handling differences from top whorl become advantages. The low whorl position grounds the spindle nicely, freeing my yarn and drafting from the spindle’s weight. I draft long draw woolen supported instead of short draw suspended. I wind on faster with the spindle supported than when holding the shaft of a top whorl spindle. I spin roving, rolag, or batt preparations supported, keeping the woolen fuzziness soft. When I draft those preparations worsted, the fuzz on the firm yarn can feel prickly.
I decided to spin the same Romney wool top from alk&me fiber art studio into opposite yarns. With my top whorl spindle suspended, I took full advantage of the linear smooth worsted preparation. I drafted the Romney top worsted, spinning a dense, lustrous single. On my bottom whorl spindle supported, I transformed the top by taking staple lengths and folding the fibers in a U. I drafted long draw woolen to spin a squishy, fuzzy single.
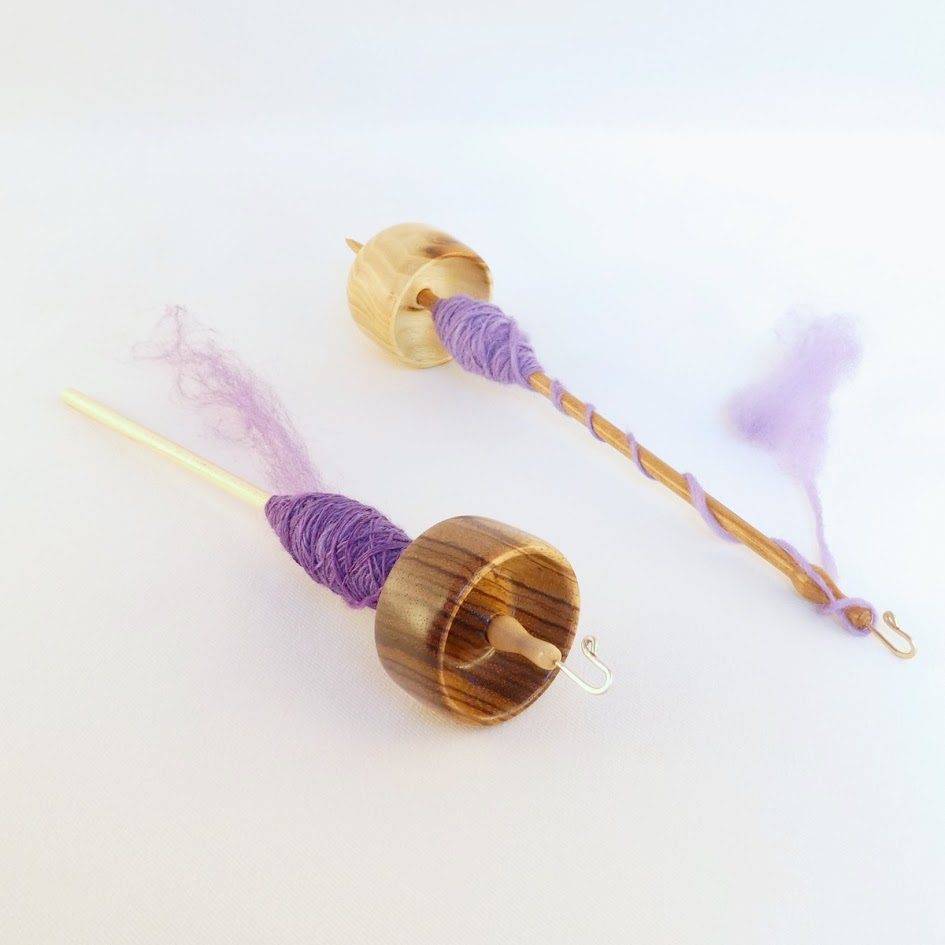
I finished each single into a 2-ply yarn. Using the worsted single, I plied suspended from the top whorl spindle. I fed the singles into the twist while smoothing them with my fingertips. Using the woolen single from the bottom whorl spindle, I plied supported on a larger bottom whorl spindle. I fed the singles into the twist, separated by my fingers. I provided resistance only to keep the rate even, maintaining the air in the singles.
I washed both yarns in hot water with shampoo and rinsed them with cold water. I handled the worsted suspended-spun skein only to squeeze it out. I agitated the woolen support-spun skein in the wash. After rolling both skeins in a towel, I snapped them open with my hands to tidy up the yarn. I hung the skeins to dry under their own weight.
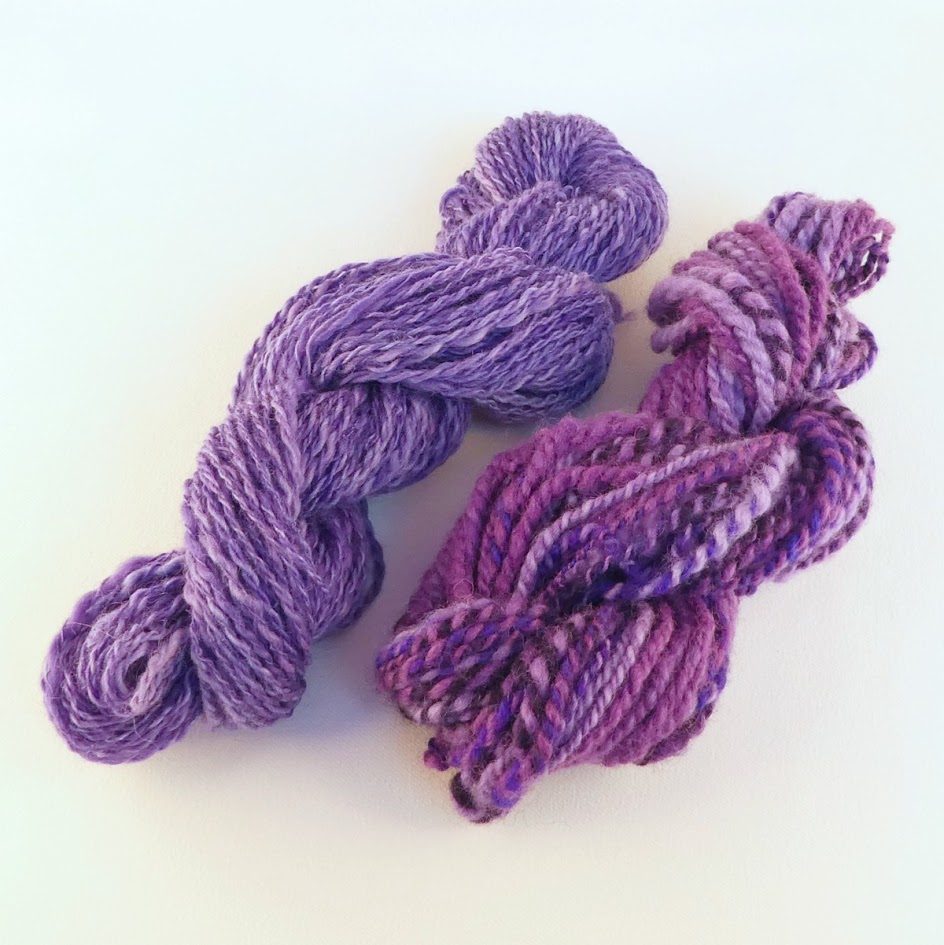
I noticed little change in the worsted suspended-spun skein (on the left). I found the support-spun woolen skein (on the right) improved with agitation. I like the halo it developed. The squishy, fuzzy yarn calls me to make a cozy project.
The totally different method of spinning supported inspires me. I love the easy flow of drafting with the twist acting like a mysterious force to form yarn without my intervention. Now I love spinning my bottom whorl spindles.
Virginia native Cynthia Dianne Haney is passionate about spinning yarn exclusively on spindles. She designs and turns spindles on the lathe, signing each with her interlocking monogram. Cynthia equips her spinning students with spindles that inspire practice. The Cynthia Wood Spinner woodshop and business is nestled in peaceful Nelson County.


Leave a Reply
Want to join the discussion?Feel free to contribute!