

Mixing Things up for a Sweater
words and photos by: Johanna Carter
I always admire those who are able to spin mountains of yarn for a big project, ready to knit a wonderful sweater or cardigan. It is a satisfying feeling when you finish all that work, especially if you started with washing and combing the wool or even raising your own sheep.
Mixing spinning and knitting
The typical way to work through a larger project is to spin all the singles first and ply them in a particular order so you get the yarn even throughout the whole project. I don’t have so many bobbins, but my bigger problem is that I am quite impatient and want to get on with knitting once I have an idea. And normally, my brain is full of ideas for fibre work and the limit is the time, as I am a musician and teacher. I can’t sit at the spinning wheel for a long time if I’m not on holiday, so during the school year I mostly knit, and during the holidays I can dye, spin, use my drum carder, and do lots of fibre work. The only time I was able to produce bigger quantities of yarn before I knitted them up was during the Tour de Fleece in the two years during the pandemic, when we did not go on holiday at the beginning of July.

A highly photogenic collection of naturally dyed fibres.
I like to finish knitting one big project like a sweater or cardigan before I start the next one, or at least until I can’t carry it in my bag easily anymore, so I have an excuse to begin the next one. Sometimes it is good to have a second project on the go – I call it mindless knitting, where I don’t have to look very much – which I can keep my hands busy during Zoom or other meetings, which helps me listen.
Mixing colours and fibres
Usually I dye my yarn with plants which I collect in the woods or get from garden flowers. I also use cochineal and indigo, which I buy, to get lots of different colours. I really love the greens and blues I get from dyeing with indigo. I have lots of dyed wool, and all those colours give me inspiration for further projects.

Beautiful greens and blues dyed by the author using indigo and other natural dyes.
Blending the wool on the drum carder I can get even more shades. I like to blend with fibres like silk, alpaca, or plant fibres, and I love sari silk, to get those little bits of colour in my yarn.
Fibres of different types and colours are blended on a drum carder for elegant results.
When I have an idea for the next sweater, I start carding, and then I can begin to spin. Once I have spun enough yarn – say, for one day – I cast on and start knitting, usually top down, so I don’t have to decide too much in advance about length and width.

An idea for the author’s next sweater in the gathering stages.
When I spin on my wheel, I have to sit at home, but while spinning I can read a book or talk to others during online meetings. I also like to spin on my spindles, and that works on a walk, or a museum visit. I take them on holiday as they don’t need much space, and when I spin for a lace shawl, I don’t even need much wool either. At home there are spindles all over the place; I can spin when I am waiting for the kettle to boil, when the computer is slow, when I am cooking. Like that I can make good use of a short time and the yarn still grows.

Knitting as soon as the yarn is spun helps the author complete sweater projects in a timely manner.
I can take my knitting almost everywhere, which is why I don’t want to wait to get started until I have spun all the yarn for a whole sweater. I knit at home, on the bus or train. The only thing I have to make sure of is to be one step ahead with the yarn.
I love to knit Fair Isle sweaters. My favourite method is to use only one bobbin, which I don’t even fill, because I need smaller quantities of lots of colours. Then I wind a ply ball and ply it on itself. For that I put my thumb through the ball, so I can tension the two singles with my fingers and they don’t get tangled, as long as my thumb (or a cardboard roll or a pencil) stays in the middle. I don’t have any leftovers from plying, and it is quick when I suddenly need more yarn.

Several charming sweaters dyed, spun, and knit by the author.
I have never had problems with the yarn not being consistent enough throughout a project. I just know what yarn I want and my fingers seem to remember what to do. I am sure it is good advice to have a little card tied to the spinning wheel with a bit of the singles you are aiming for, so you can check and make sure you are spinning a consistent yarn.
Mixing breeds
There are so many different breeds, but some of my favourites are Shetland, BFL, and Jämtland – a Swedish breed. After dyeing them, I often forget what I have used, so when I do a new project it often turns out that I have used different breeds and fibres just to get the right colour. For the Fair Isle knitting I want to juggle lots of colours, which is more important to me than making a sweater out of only one breed.
Recently I made a pullover for my husband using about 12 different breeds and colours, even mixing short and long draw. For me it was a breed experiment and a way to use up lots of smaller quantities of wool I had in my stash. For that sweater I used combed top without blending.

Mixing in knitting during the spinning process is a wonderful way for a spinner to avoid being overwhelmed during a sweater project.
My feeling is that some people don’t dare to start spinning for a bigger project because they get overwhelmed by the quantity they have to spin and then all the knitting there is to do, especially when you want to spin the yarn entirely on spindles. Mixing the spinning and knitting for the same project is more interesting; you get more variety and more freedom to choose what you want to do next as long as you don’t run out of yarn. It breaks the project down into smaller, less daunting parts. The only thing you might want to plan is to have enough fibre at the start, but even that is not necessary, there is always a sheep growing more wool.
Scales and Arpeggios Spinning Exercises to Help Make Your Spinning More Consistent
Michelle Boyd
If you’re faithful to your daily practicing,
You will find your progress is encouraging
Do mi so mi do mi fa la, so it goes
Practicing your scales and your arpeggios.
-The Aristocats
When I was a student in Olds College’s Master Spinner Program, I struggled with making consistent singles, just like everyone else who has ever taken that course. I just couldn’t get a good rhythm going and keep my drafting even. Then one day, I had a conversation with my daughter’s piano teacher that gave me an idea.
She said practice makes perfect, but practice works best when it is focussed. She had assigned my daughter a set of specific exercises that seemed simple and repetitive but were intended to teach muscle memory to make her playing easier, almost unconscious. I realized I could do the same with my spinning, and I came up with some simple exercises to focus on my drafting. Just like piano practice, I did these little drills every day for 15 or 20 minutes and before long, I found that my singles were smooth and consistent. Because I was inspired by piano practice, I called it “doing my scales.” And since I’ve always loved the song from Disney’s Aristocats, I came to think of them as my scales and arpeggios.
These exercises are designed to focus your spinning practice on one area at a time to help you build muscle memory and gain consistency in spinning your singles. You may want to try practicing one of these exercises each day for 15 minutes, or you can sit down and run through all of the exercises once a week. These exercises are intended as basic guides to the drafting styles, and with practice and observation, you may find that small adjustments in the rhythm or procedures work better for you and your body mechanics. In time, you will find that you can spin smooth singles with ease.
When you practice spinning, make sure that you are seated in a comfortable chair that supports your back and shoulders. Sit back from the orifice of your spinning wheel, leaving at least 10 cm (4 inches) between your front hand and the orifice.
Exercise 1: Short Forward Draw
This exercise is intended to improve the coordination of your draft and your treadling to help you achieve a more consistent distribution of twist for each draft. With practice, you will learn to make a smoother single and reduce the number of slubs and thin spots.
Using a top or sliver preparation and the largest whorl on your flyer, attach your fibre to a leader. As you treadle downward, draft your fibre forward from the fibre source. As your foot comes back up, draw your drafting hand back to smooth the twist into the attenuated fibre. With the next treadle, use your drafting hand to simultaneously feed your spun singles forward and draft the next length of fibre forward. As your foot comes back up, smooth the twist in. Practice keeping your back hand stationary and only moving your front hand as you draft and smooth to ensure a regular drafting length.
Your rhythm will be foot down/draft forward, foot up/smooth back.
(Note: If you are spinning on a wheel with double treadles, choose one foot as your treadling foot to coordinate the draft with and count only that foot. You can adjust your rhythm to R foot down/draft forward, L foot down/smooth back, or vice versa if you are more comfortable starting with your left foot. This applies to Exercise 2 as well.)
Exercise 2: Short Backward Draw
This exercise it the companion to the Short Forward Draw above, using the same treadling and drafting rhythm, but drafting with your back hand and smoothing with your front hand.
Using a top of sliver preparation and the largest whorl on your flyer, attach your fibre to a leader. As you treadle downward, pinch the fibre at the leader with your front hand and draft a short distance back with your back hand, allowing the fibres between your two hands to thin and straighten. As your foot comes back up, smooth the twist back with your front hand until it meets your back hand. With your next treadle, repeat the process with your back hand moving as you treadle down, front hand moving as your foot comes up. After 3 or 4 drafts backward, you will find that your back hand is a distance from the orifice of your wheel and it is time to feed forward. Pinching the fibre source at the tip of your drafting zone with your back hand, allow the take-up of your wheel to pull the single forward onto the bobbin, smoothing the single with your front hand.
Your rhythm will be foot down/draft back, foot up/smooth back (3-4 times), treadle down/feed forward/treadle up.
Exercise 3: Supported Long Draw
This exercise is designed to make you more comfortable with a long draw drafting style. This is by no means the only way to achieve a long draw but will provide a foundation for the skills that are needed for all long draw drafting styles.
Using a roving or rolag preparation and the largest whorl on your wheel, attach your fibre to the leader. With your front hand, pinch the fibre at the leader. This hand will remain stationary and pinch and open to control the twist as it enters the fibre, so ensure it is in a comfortable position that does not strain your wrist, elbow, or shoulder. Treadle a few times to build up the twist ahead of your front hand. Continue to treadle steadily as you begin to draft – if you are a haphazard treadler, you might want to use a metronome app to help you find a steady rhythm, too.
Starting with your fibre held in your back hand close to your front hand, draw the fibre source back with your back hand to thin and straighten the fibres. Open the fingers of your front hand, allowing the twist to catch and twist the attenuated fibres. When you feel the pull of the twist opposing your draft, use the finger and thumb of your back hand to clamp down near the tip of your drafting triangle and allow the twist to come up to that point. Move your back hand forward to allow the single to be pulled onto the bobbin. Pinch the twisted single with your front hand again, leaving 2–3 inches (2.5–4 cm) of twisted single behind your front hand. Draft the fibre source backward again, and repeat.
Your rhythm will be pinch front, pull back, pinch back, feed forward.
When you feel confident with this drafting method, try removing the front hand (pinch front) from the process. Without that front hand pinching to control the twist as you draft, this becomes an unsupported long draw.
Though at first it seems as though it doesn’t show,
Like a tree, ability will bloom and grow
If you’re smart you’ll learn by heart what every artist knows
You must sing your scales
And your ar-pe-eee-ggios.
~The Aristocats
(Music and lyrics by Richard M. and Robert B. Sherman)
Did you know we also have a monthly PLY newsletter? Sign up here!
PLY Magazine believes that Black lives matter, as well as LBGTQI+ lives. Those most vulnerable and persecuted in our communities deserve our love and support. Please be good to each other.
Virtual Shetland Wool Week 2021
Shetland Wool Week is online this year so you can enjoy the offerings from the comfort of your home. (Though I’m sure we’d all much rather be able to see the sheep and feel the fiber in person!) From their website: “For nine days from 25 September – 3 October, we’ll be bringing Shetland Wool Week to you. There will be films, talks, tours and classes – some pre-recorded and others live, as well as music and a market.”
If you purchase a SWW membership, you’ll gain access to a film series with videos such as the following: Carol Christiansen on “A Guide to Rooing,” Sue Arthur on Preparing Shetland Fleece for Handspinning, and Bunchy Casey on “A Shetland Dye Garden.”
Did you know we also have a monthly PLY newsletter? Sign up here!
PLY Magazine believes that Black lives matter, as well as LBGTQI+ lives. Those most vulnerable and persecuted in our communities deserve our love and support. Please be good to each other.
Tweaking My E-Spinner for Angora
words and photos by Terry Clemo
“I’m not new at this spinning thing,” I think to myself. “Why am I having such a strange beginner experience with my new Ashford E-3 electric spinner?” After setting up my new machine, I start to play with some dyed wool. I didn’t think changing from a manual, foot-driven spinning wheel to a little electric spinner would be such a challenge. But it has been, and not for the reasons one might think. I’m not missing the treadling; in fact, I’m so happy to be able to put my legs up. I’m so much more comfortable now – hey, I can spin in bed!
“So what’s your problem,” you might ask. Well, I’m having trouble getting my spun yarn to wind on, and when I stop, the bobbin keeps turning and the single wraps around the bobbin and is going the wrong way. Ugh, now to unwind and correct the path of my spun single. I’ve not ever had the bobbin on my double treadle Lendrum do that before. “Hmmm, Lendrum bobbins are so little looking compared to the jumbo bobbins that came with the new E-3.” I’m not used to their weight turning around with the flyer either. So I slightly tighten up the Scotch tension to make a bit more resistance on the bobbin and try again. Same thing happens, so I add a tiny bit more tension, and the draw in of the single is starting to work, but just barely. Okay, now maybe I can get somewhere.
At the same time I’m playing with the speed controller of the flyer to see how it reacts with my takeup. It’s adding another variable to my dilemma. In comparison, both spinners are flyer-led and have Scotch tension, but why are they behaving so differently? Time for a cocktail. The DT Lendrum has the drive band on the flyer, and when I press the treadle I get the immediate response of the flyer turning. The E-3 has the centre spindle of the flyer resting in a keyed bushing that is the centre hub of the motor, so I have to turn up the speed dial to get it turning. As I’m playing with the speed control, I find it needs to be turned up almost to 15–20% to get the flyer to move when I have some resistance on the single and so that there is some torque force to be able to pull the single so it wants to wind on.
By now I’m using more flyer speed and more tension, and the bobbin stops after spinning. But now there’s too much pull for my liking and I can’t get the amount of twist into my single that I need before it wants to be swallowed by the orifice. Normally, I would back off the tension, but I can’t really; there doesn’t seem to be a sweet spot. I can’t fine tune this setup with the original heavy, stiff fishing line that came with the machine. And I’m not spinning with a grabby fibre or a short draw, which might help get this spinner working well.
Side journey through angora spinning
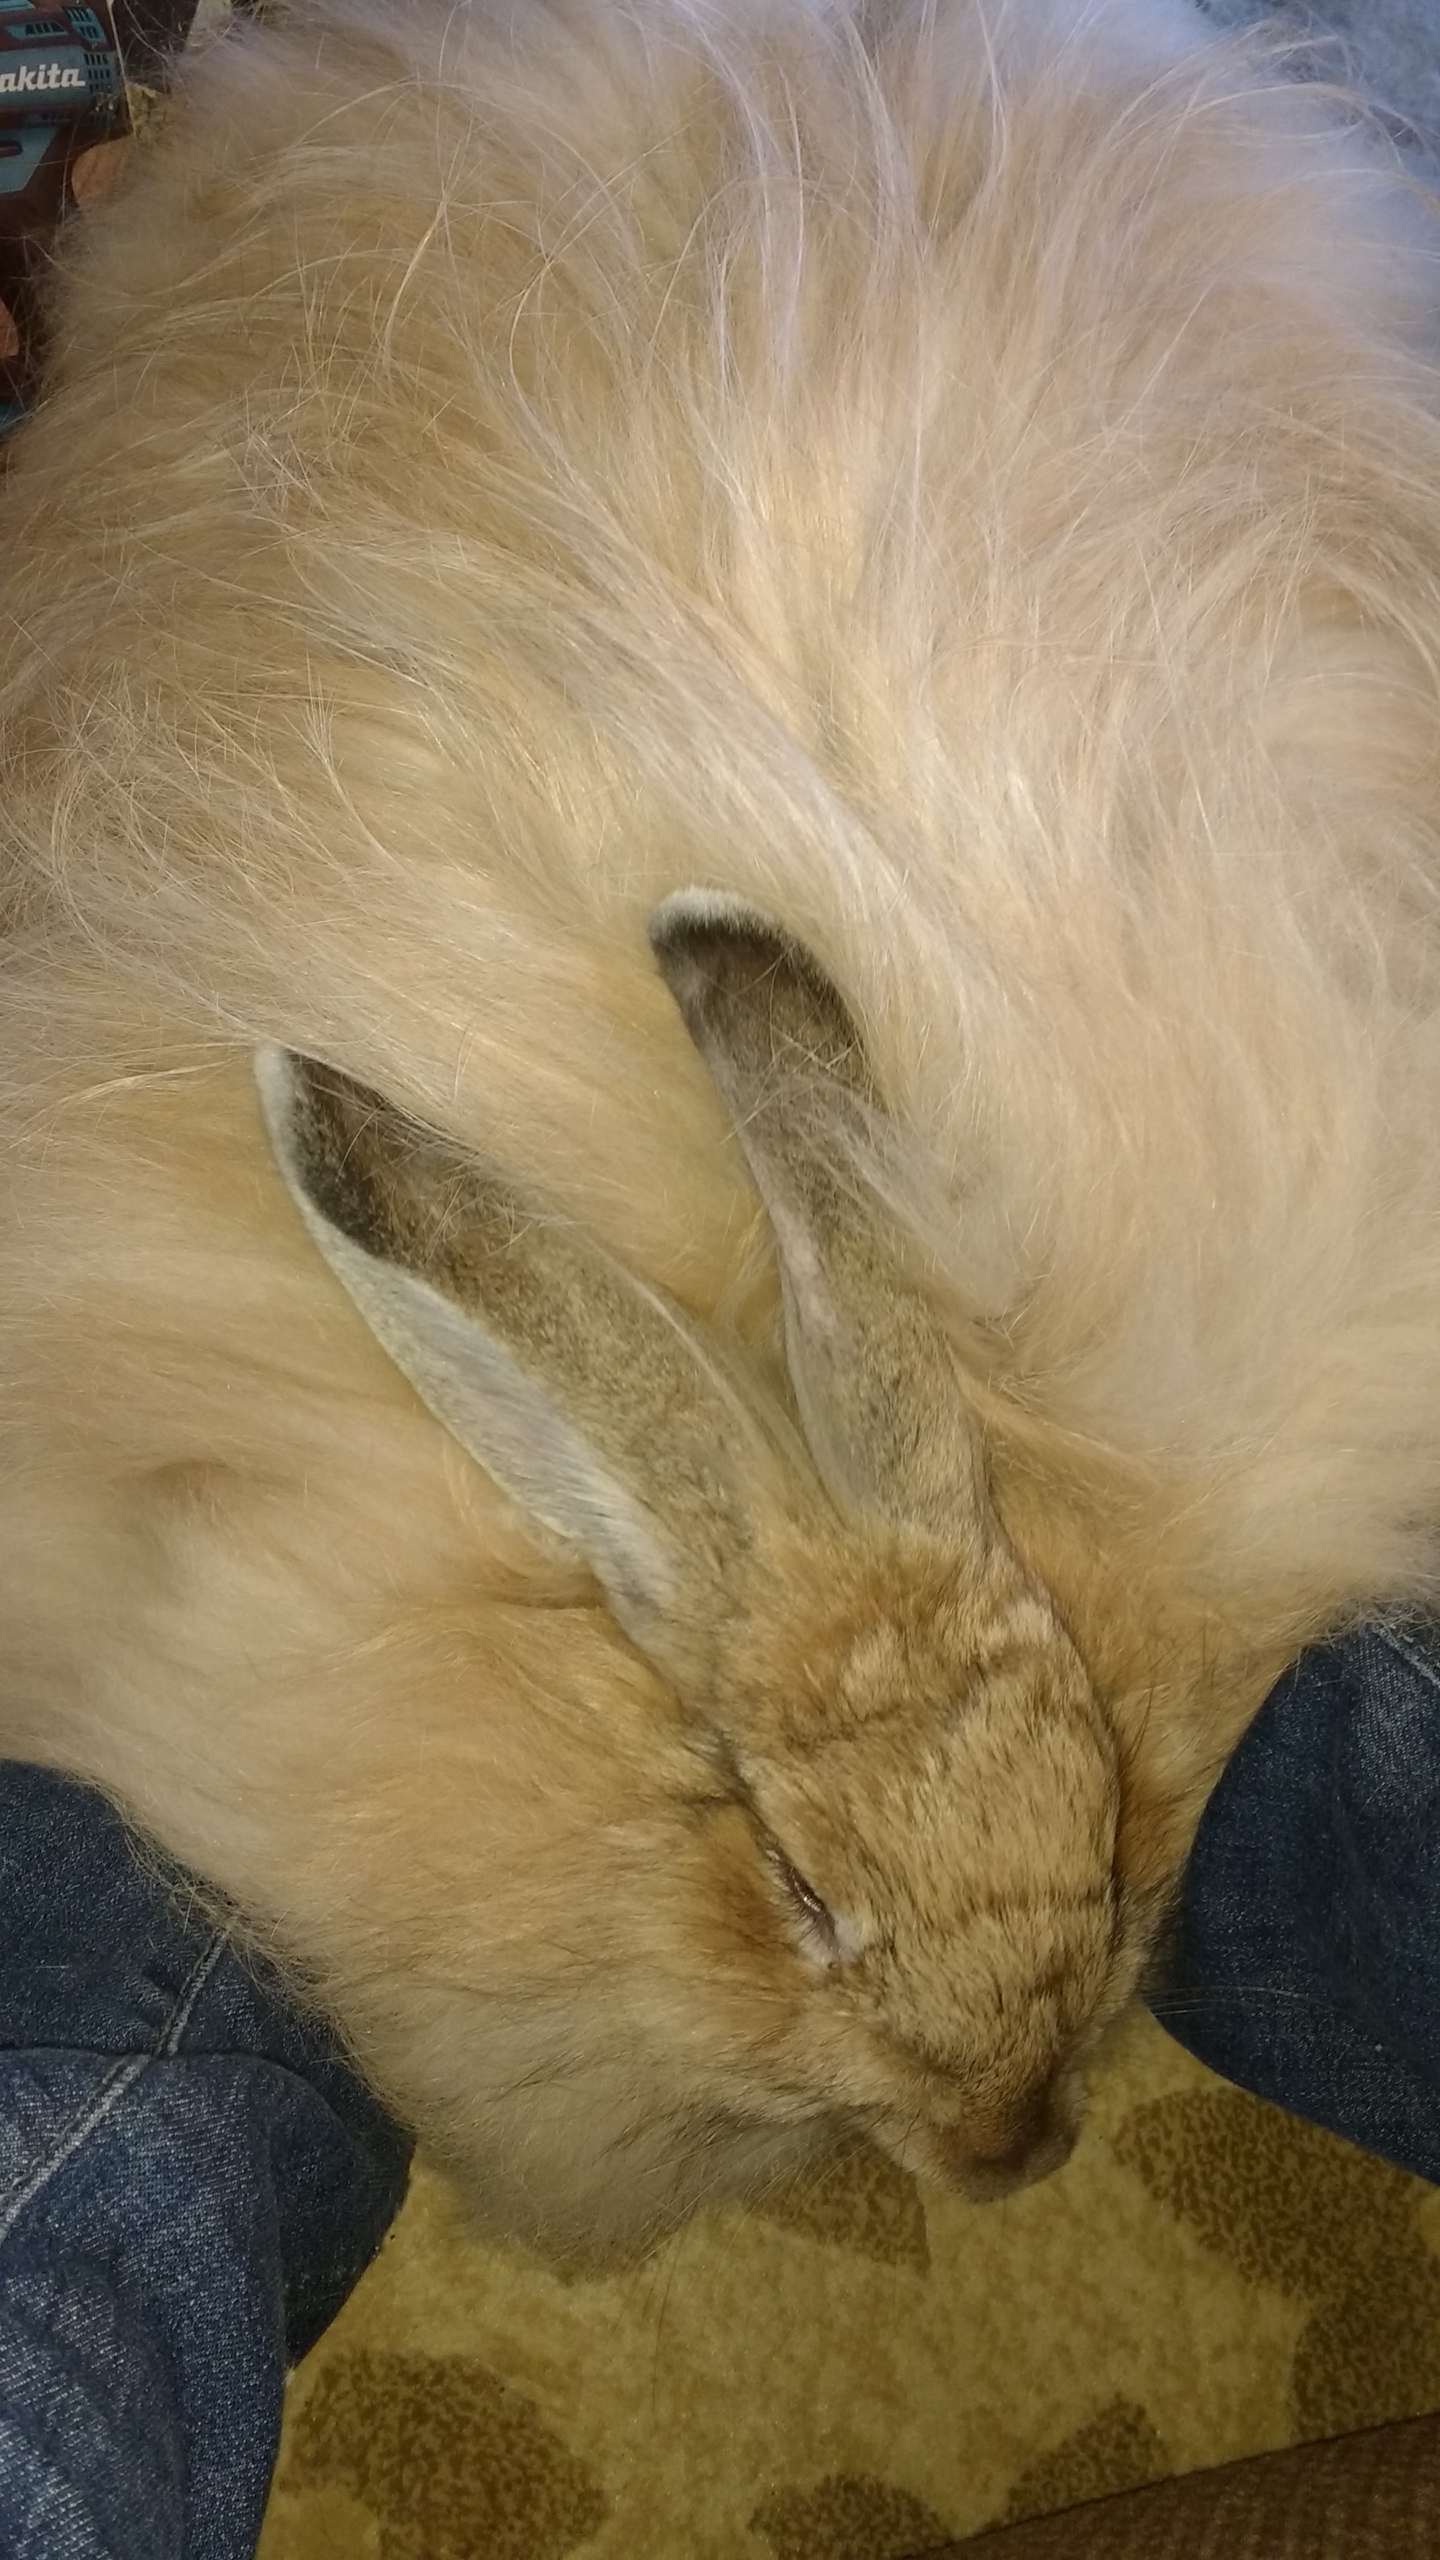
You see, my spinning journey flourished at the same time my love of very fuzzy rabbits was fulfilled. My first angora was an English that I named Flurry. She was “fur in a hurry”! Needless to say, pretty much all of my spinning has something to do with angora from rabbits.
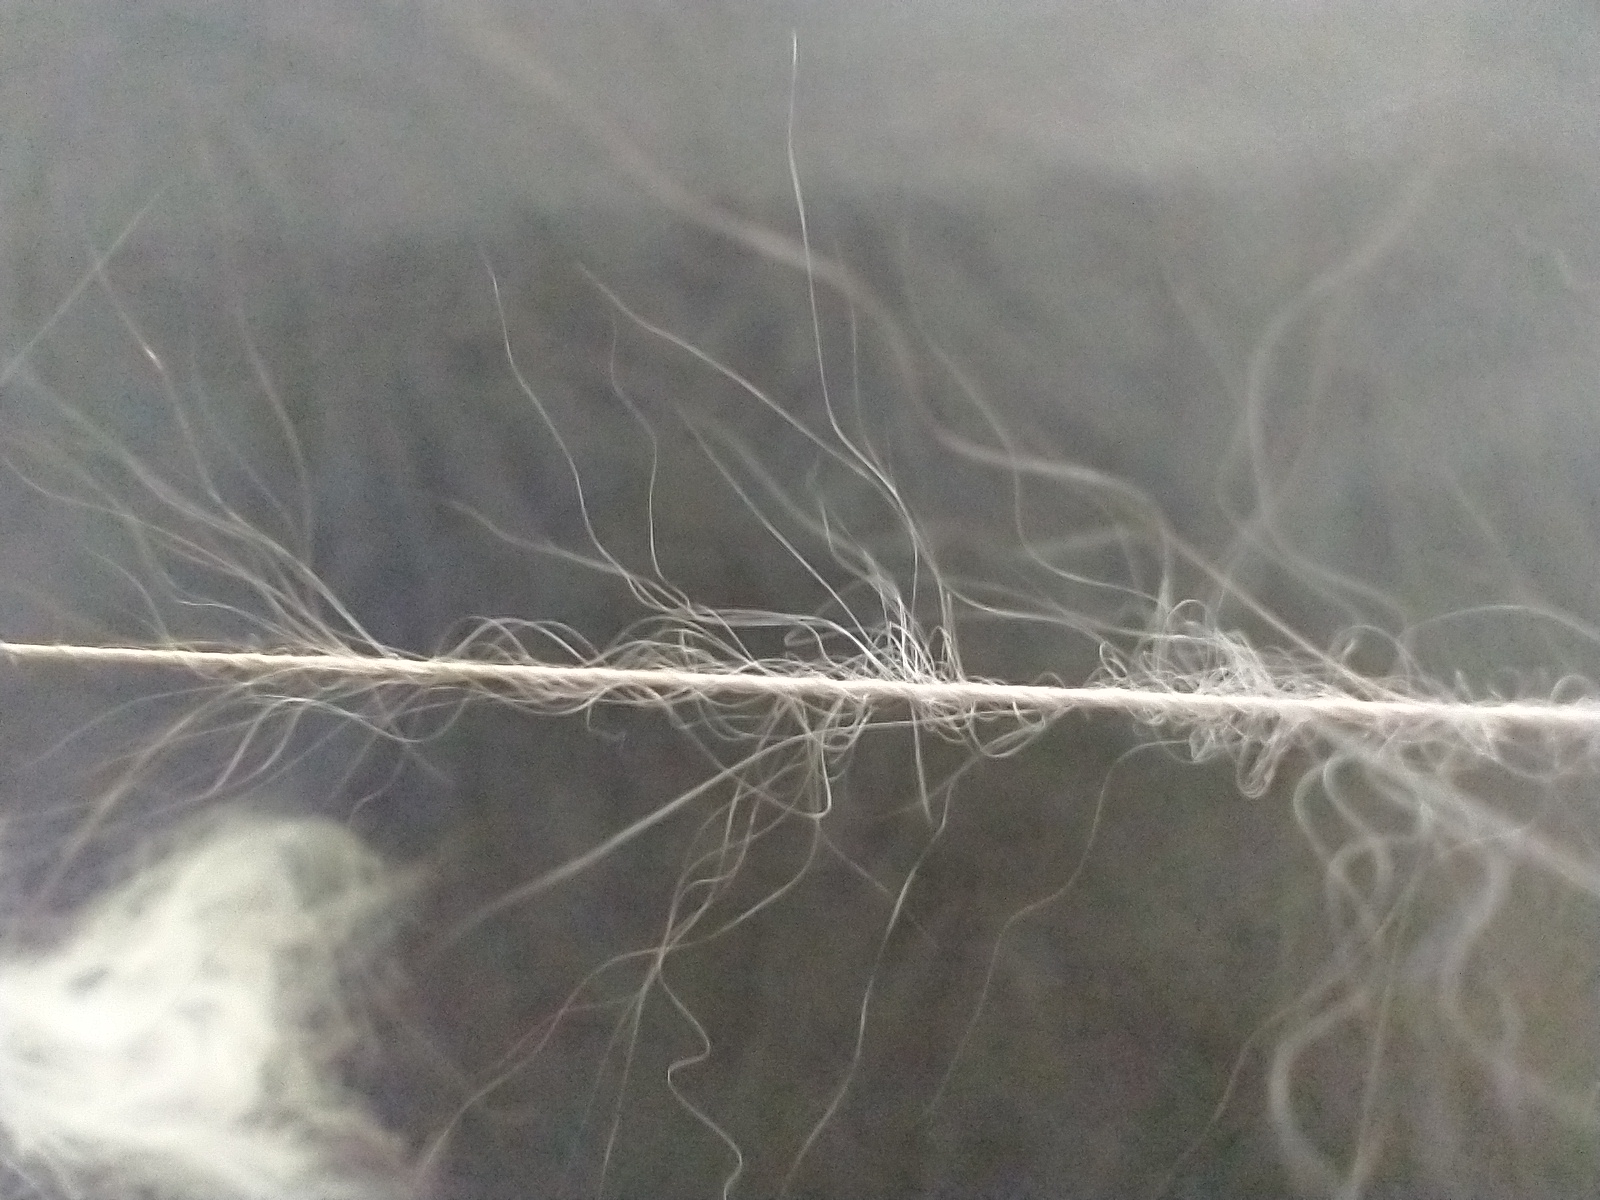
My favorite thing is to spin angora from a cloud (which is basically a fluffed up, or carded, small handful of airy angora fibre, which can be organized or not); it can be so magical. I especially like how the tips of the individual fibres protrude and spiral out from the centre of the single when they are drawn out and not smoothed down. It’s exactly what blooming spun angora should look like. This texture is accentuated by the long draw.
Angora is a finicky fibre; the more you fuss with it – try to handcard it or blend it with itself or other fibres – the more likely you are to put more nepps in it than it had from off the rabbit. Since angora is so fine (in the range from 7–8 microns to mid-teens, with an average of 10–12 microns), it easily tangles. Also, the average staple length is 4–7 inches for the blanket of the rabbit, the longest fur from their back, and unless its harvested correctly, it can get new tangles in it. Angora bunnies also have some lovely textured fur on their chest, belly, and legs; it’s shorter at 2–3 inches or so and it’s not as dark as the top side colour, mostly. As you spin their fibre, there will be colour changes as you go because the colour varies on the bunny. This colour changing ability is quite beautiful and gives angora yarns their character.
Some angora spinners don’t mix the two basic types, mostly because of the length difference, but colour differences can be the main reason. For some of my spinning projects, having both can make the yarn more textured, and it will be fuzzier. My favourite way to spin is straight from the storage box, loose and fluffy whatever comes so I may end up with some shorter fibres mixed with longer silkier ones. So I try to fluff up and mix the two so I hold a couple of staple lengths at the base with my thumbs and fingers and I pull apart from so it separates into one layer in each hand. I lay it back on top of the other layer, hold the base end, pull it apart, and this time I put the new layer on the bottom. I’ll put many of these little bundles aside in a smooth container to spin later.
I like my angora spun with tiny slubs and uneven blending, and with a long draw technique that lends to loose airy preparations. So with my long draw technique, I need some tension to pull against to draft out the fibres as the twist is holding everything together just enough to be a thread.
Back to the e-spinner
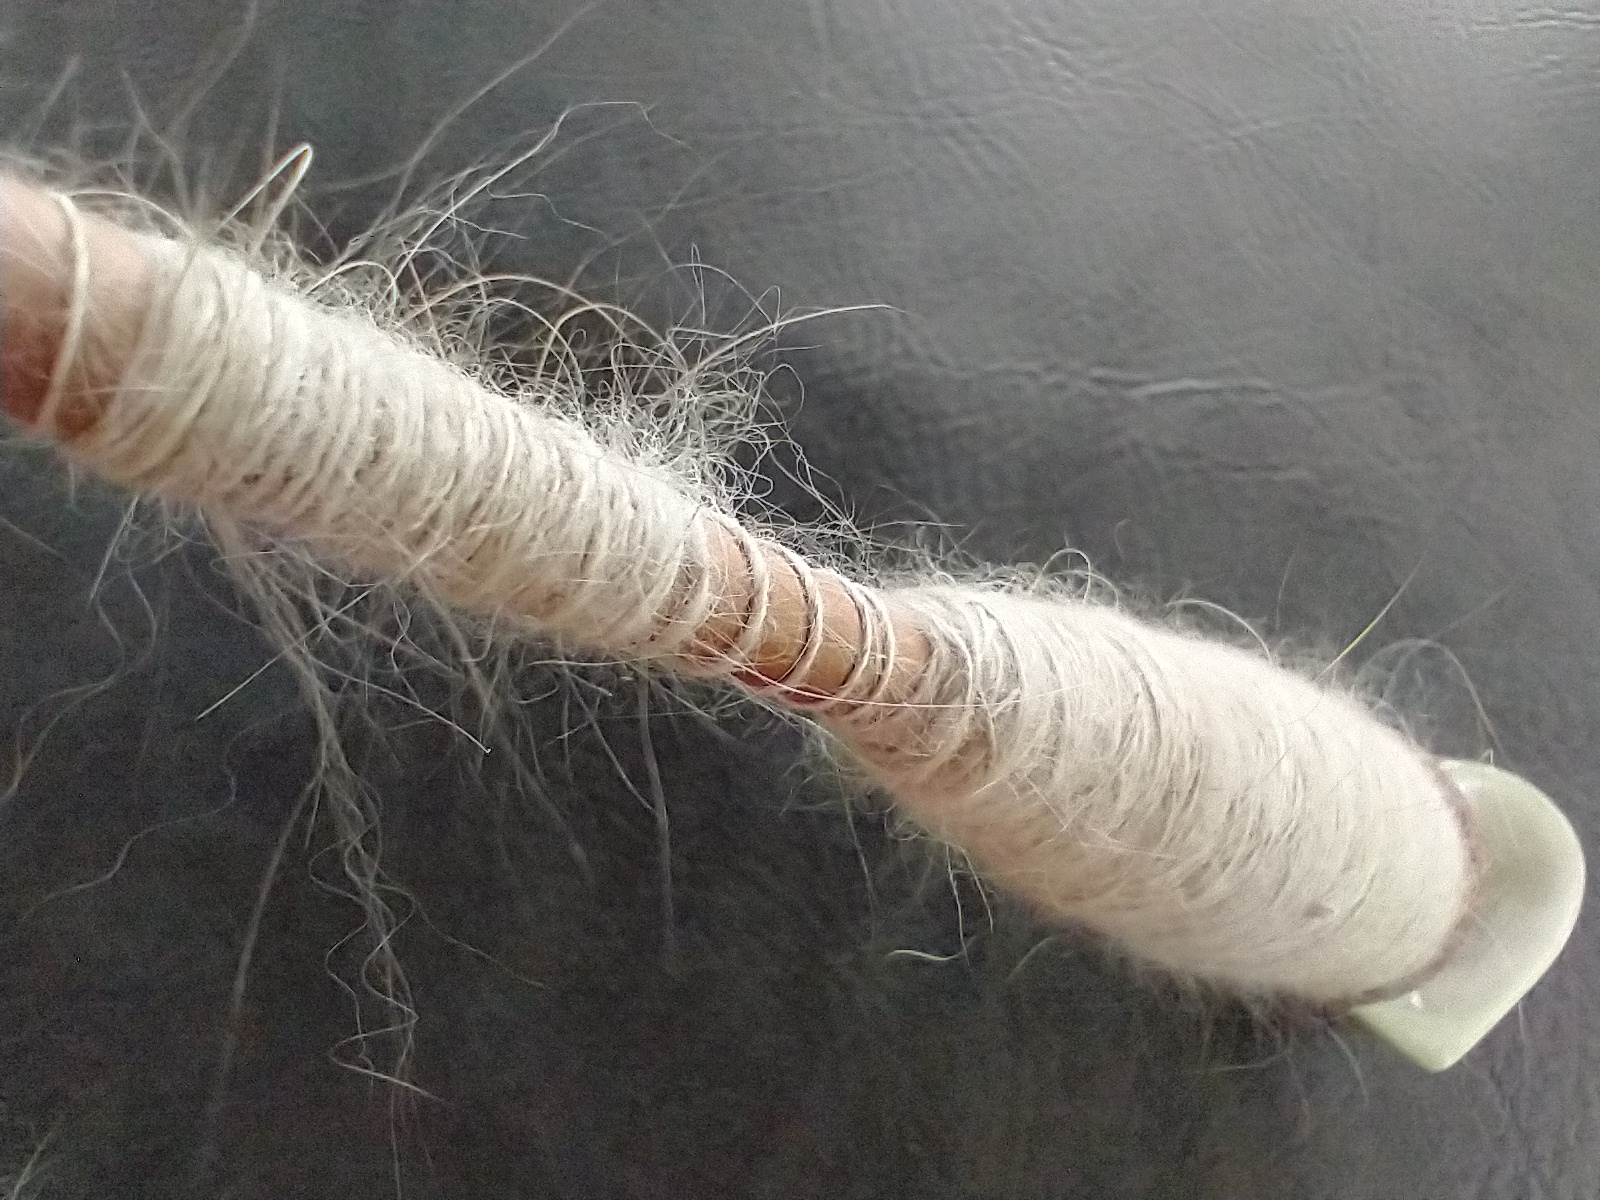
So my secret is out, I’m a long draw girl. Now I get to play around with my new toy and translate this style of long draw to the e-spinner. I need to have very little take-up tension while I’m drafting so my single doesn’t prematurely feed onto the bobbin before it gets sufficient twist. The single when using short draft is basically always moving through the orifice, but not with a long draw. My long draw draft is about 14–16 inches, so there’s a lag in time before I can wind on. I don’t want the flyer to pull too hard and pull apart the newly forming single. I like to use a supported long draw. My right hand helps me control twist to the cloud of fiber and gives me something to pull (draft) against. I stop drafting to let my twist come into the single and I visually check for my chosen angle of twist and then slowly push the thread into the orifice, and the bobbin starts to wind the single and it seems to gather a bit of momentum till I stop. Leaving my leader out with extra twist building up in it and again having very little draw in, I start drafting out again.
So after all this is said, remember that I’m spinning Angora at 100 percent or about 20–25 percent in a blend with very fine wool (22 microns or less) and silk or maybe some alpaca or other fine fibres. Angora is very slippery, hence the very light takeup on the bobbin, and it lets me get more twist in my single. I usually spin from laceweight to fingering weight, so I’m spinning fine. My plies for my yarns are made of one or two singles of angora and the others are a blend of dyed wools, silks, and angora or dyed wool, all the while playing with colours. Depending on the project and how much angora I want, I can use different combinations of these, but I usually stick to 2 or 3 plies per yarn.
How do I fix my dilemma as to how to make this machine work the way I need it to?
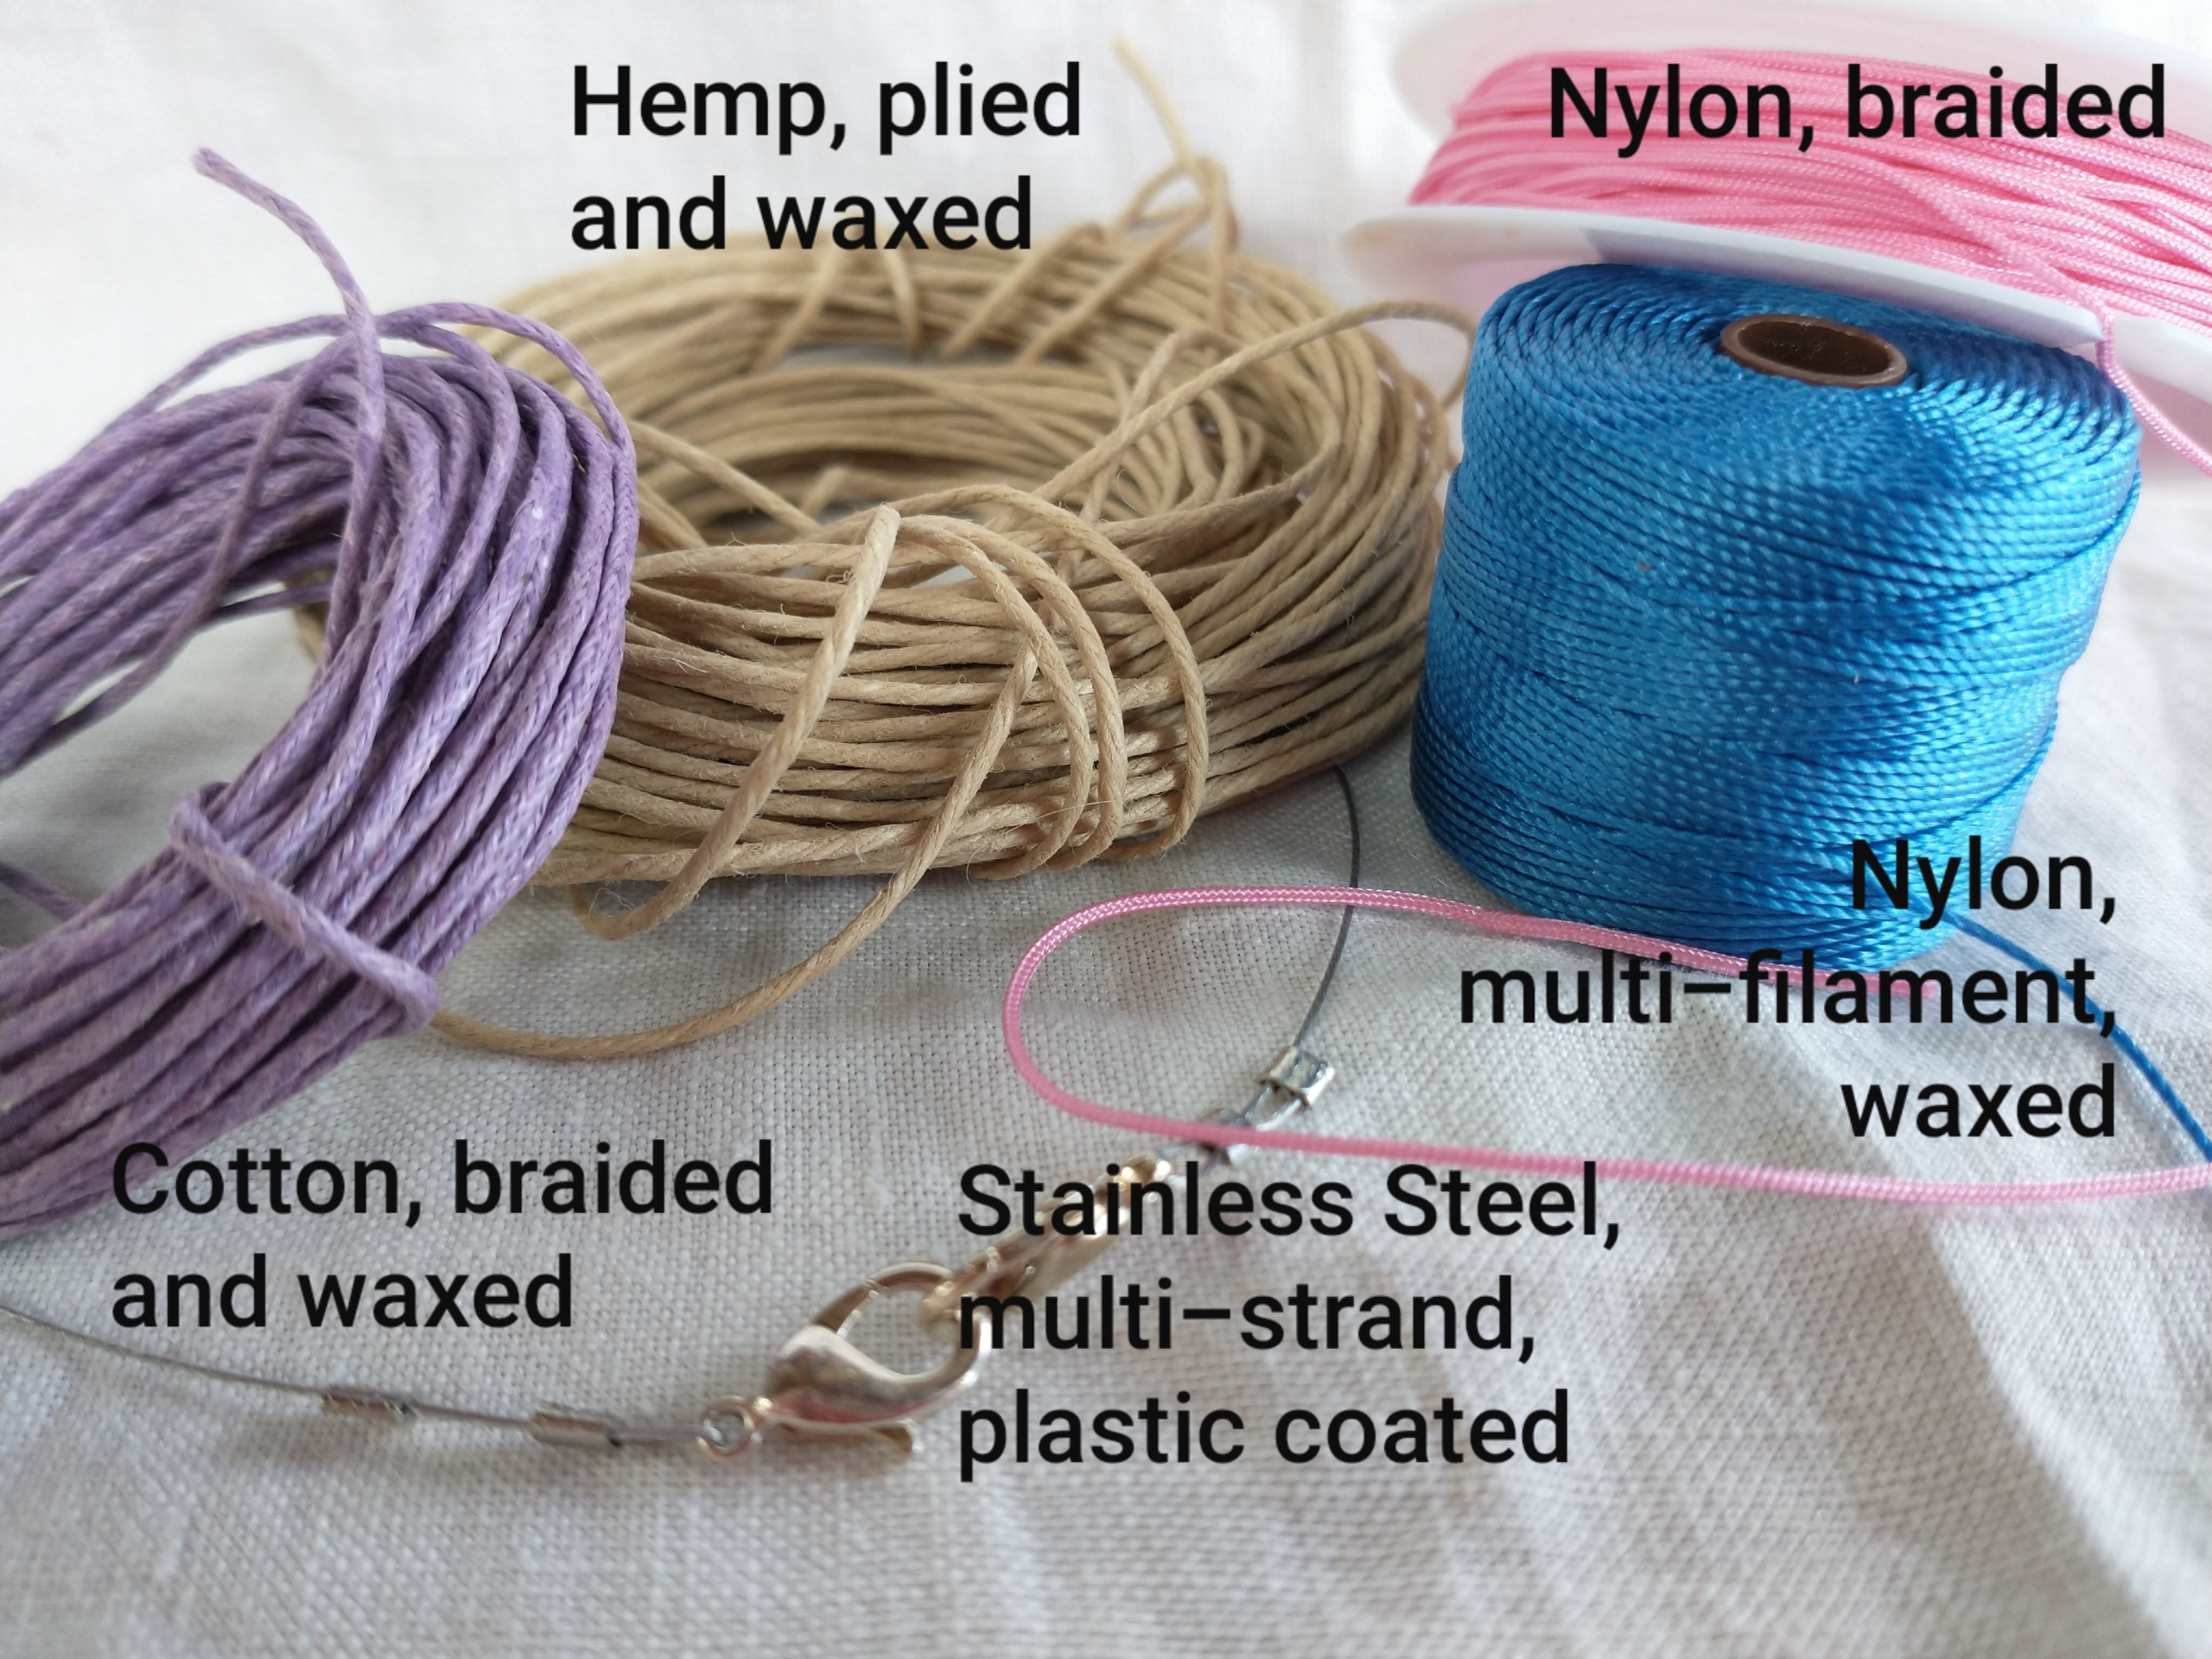
Planning my attack, depending on how and what I wanted to spin, I could use cords of different materials for the brake band to give more slipperiness. I might try a finer nylon filament or the plastic coated stainless steel jewellery wire, some nylon threads, or high end fishing lines made of plies from titanium or other advanced materials. I also wanted to try adding a bit more drag to increase tension and help with spin-on of the bobbin, so I’ve tried cords that were a bit rough like hemp (thin and thick) and whatever else I could think of. I’ve even tried something similar to the traditional cotton. I tried the string that sealed the rabbit feed bags, which seemed to be more slippery than the usual cotton. It’s probably a form of polyester, which is more durable than the cotton. The diameter of a cord also comes into play. I need to be able to quickly snap different brake bands into place to find my favourite band.
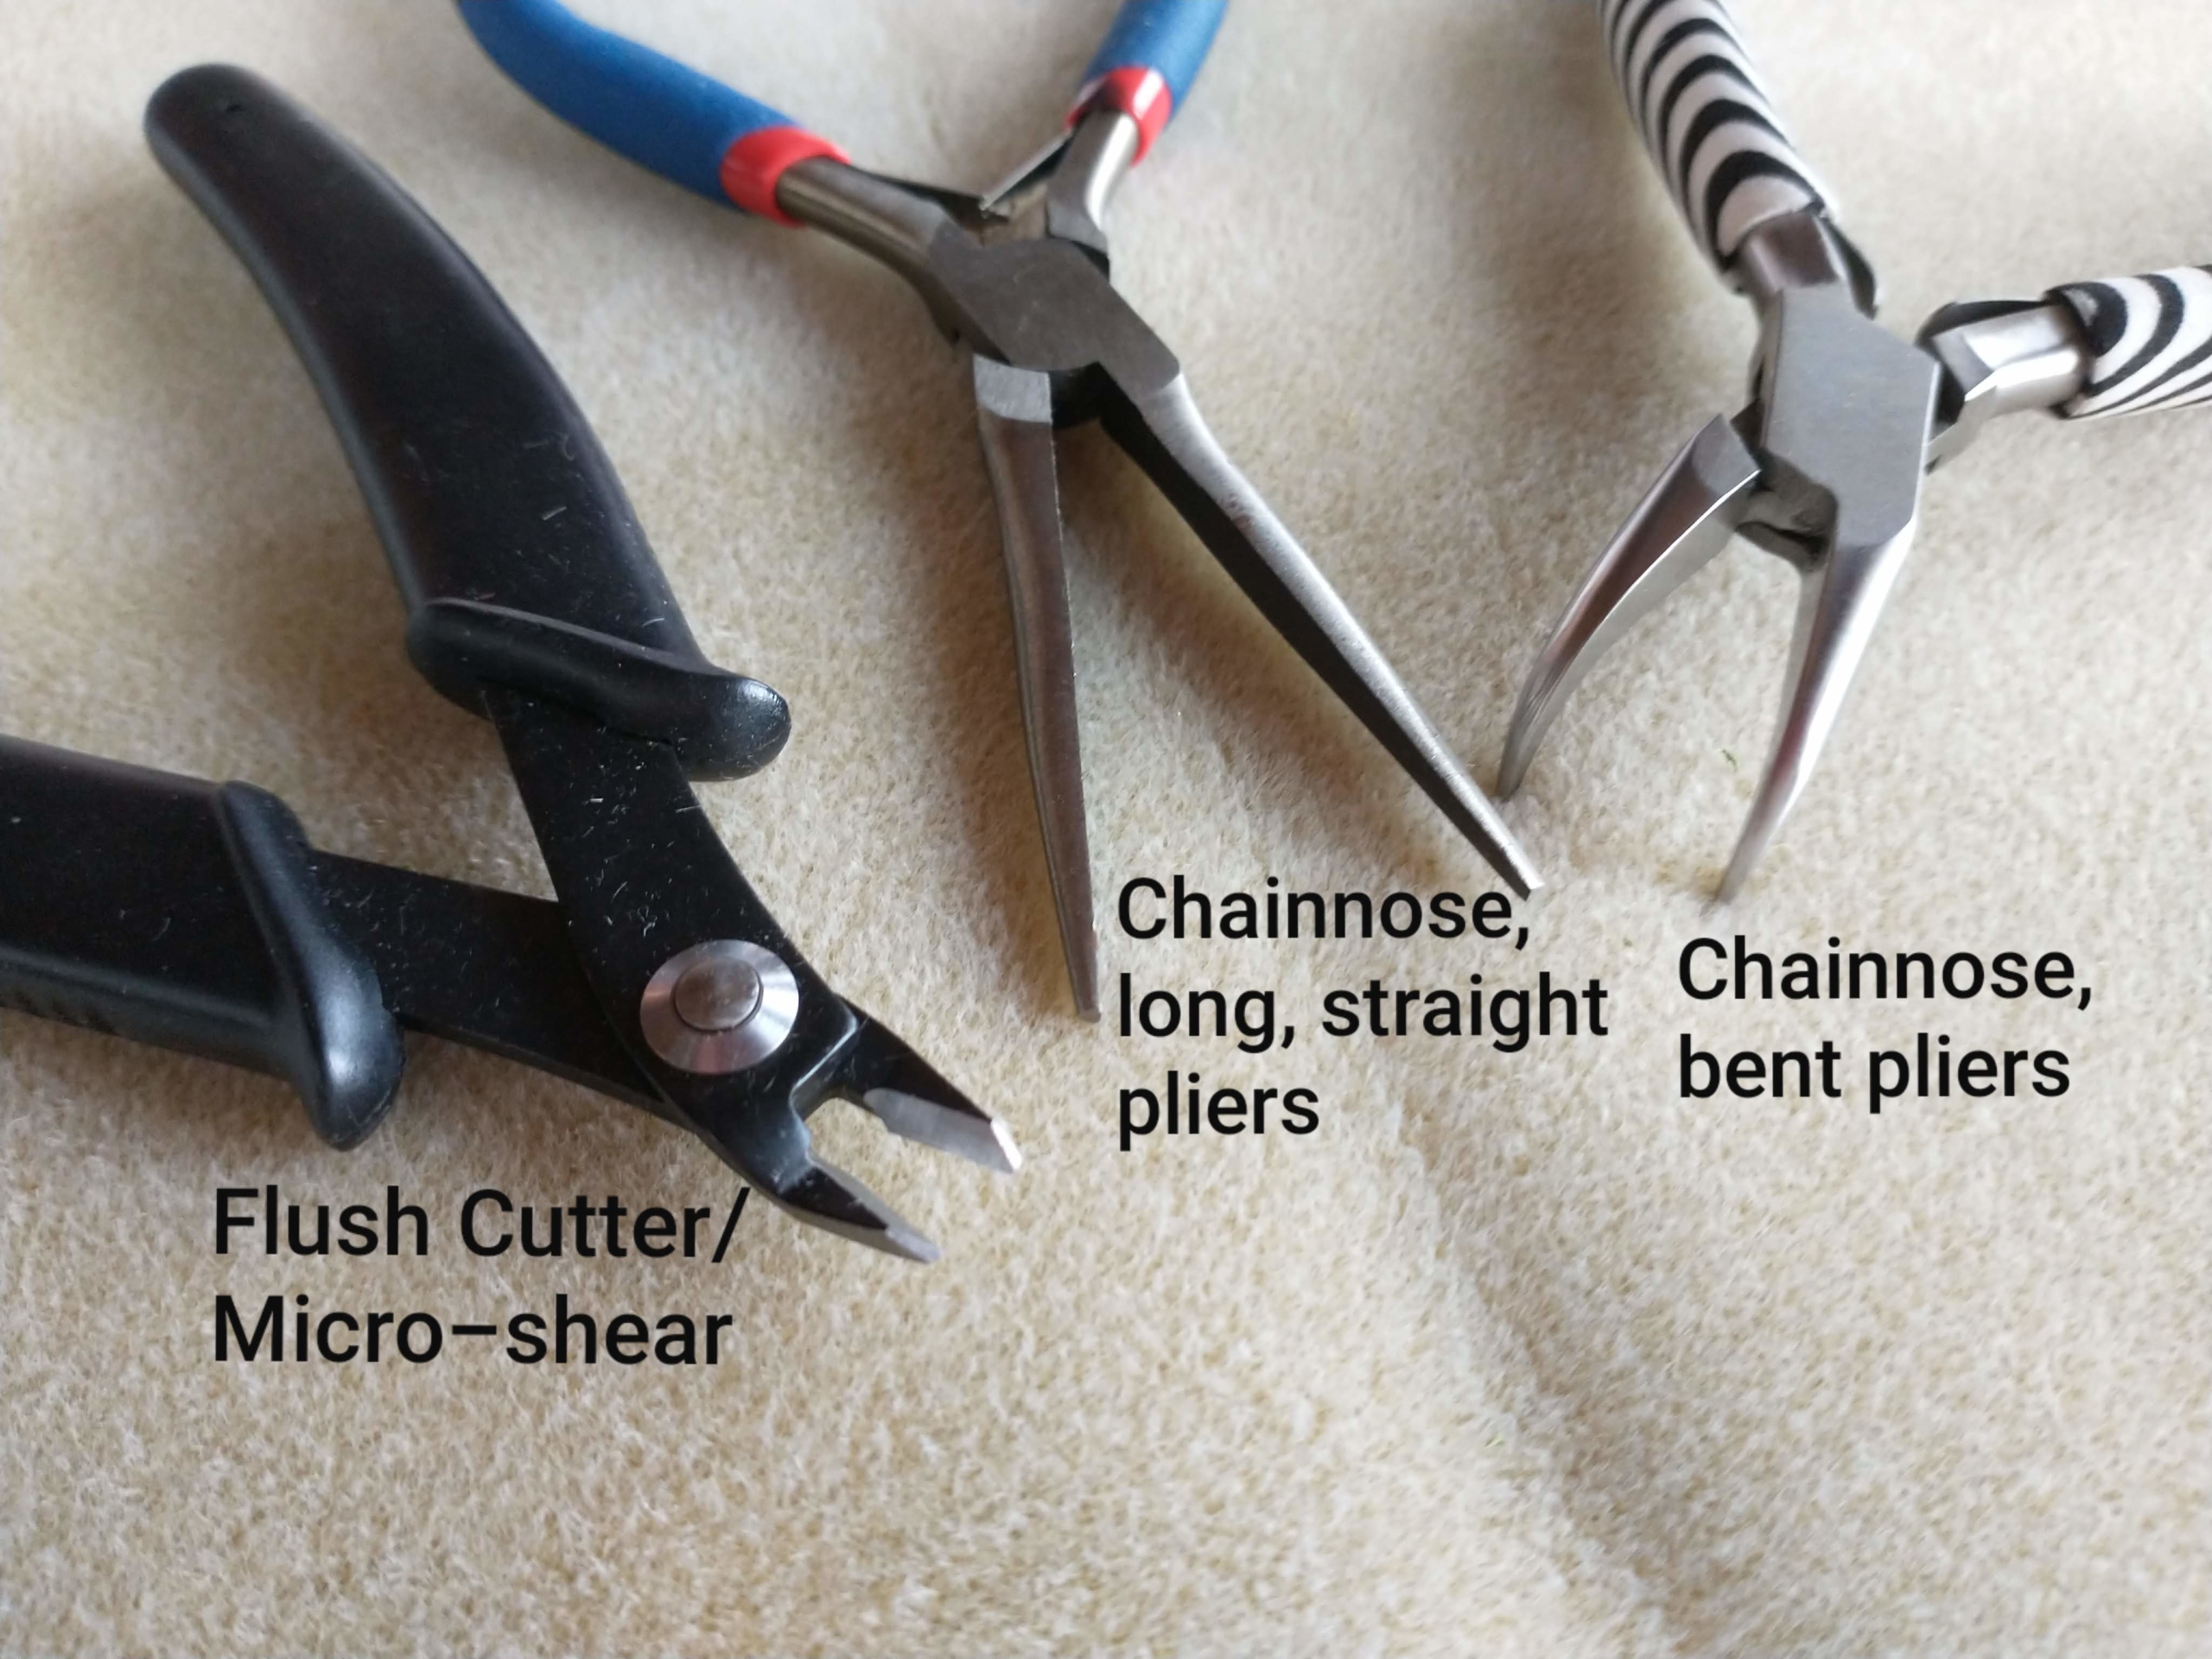
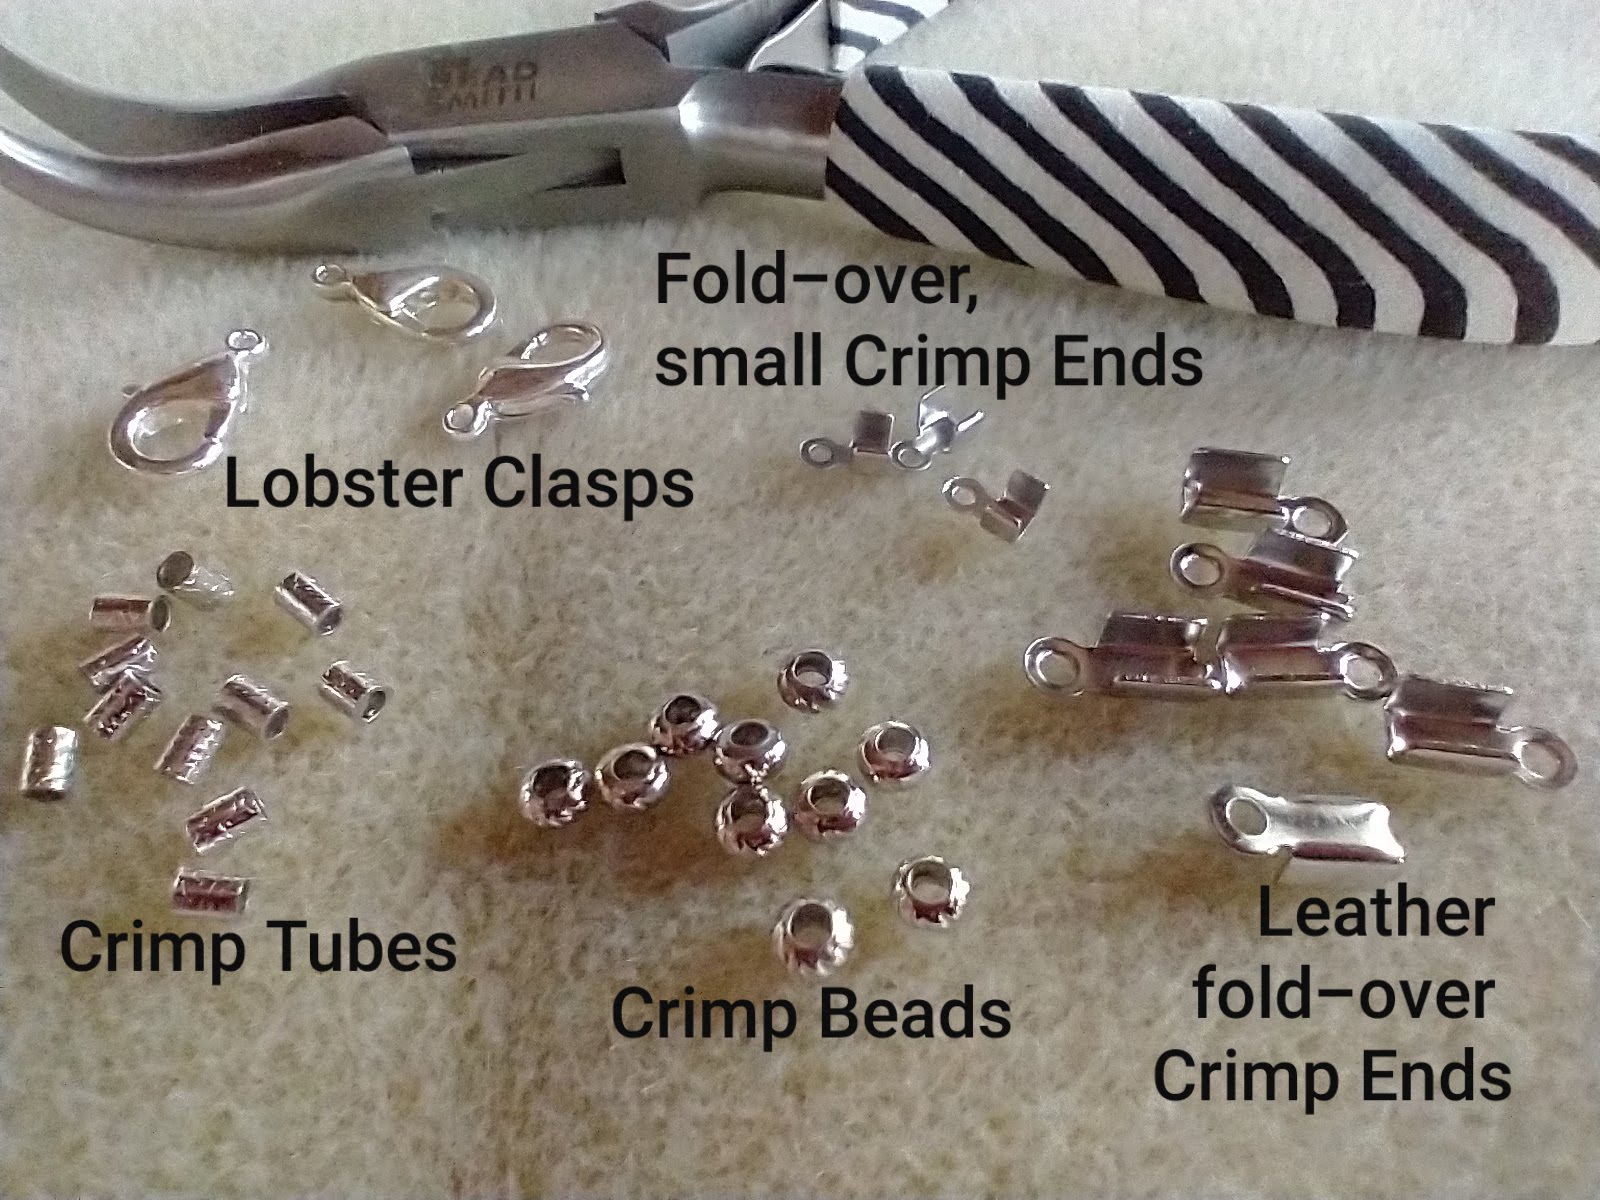
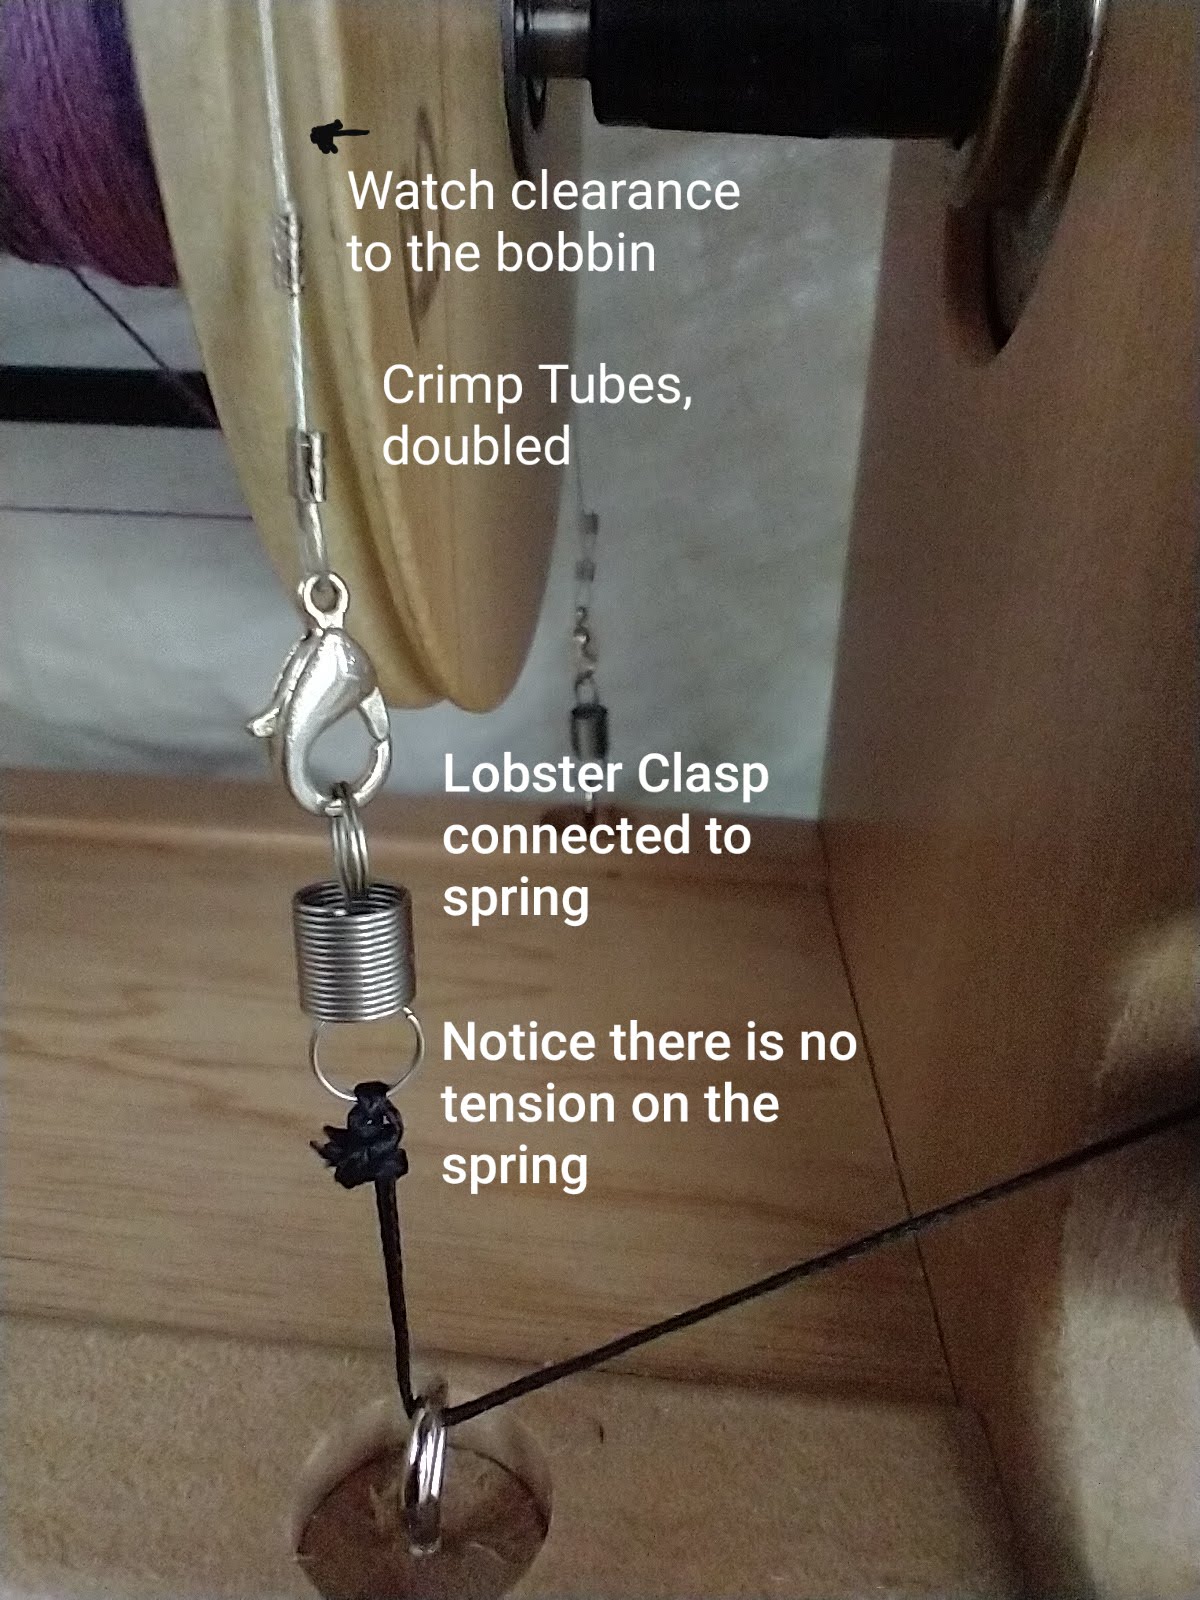
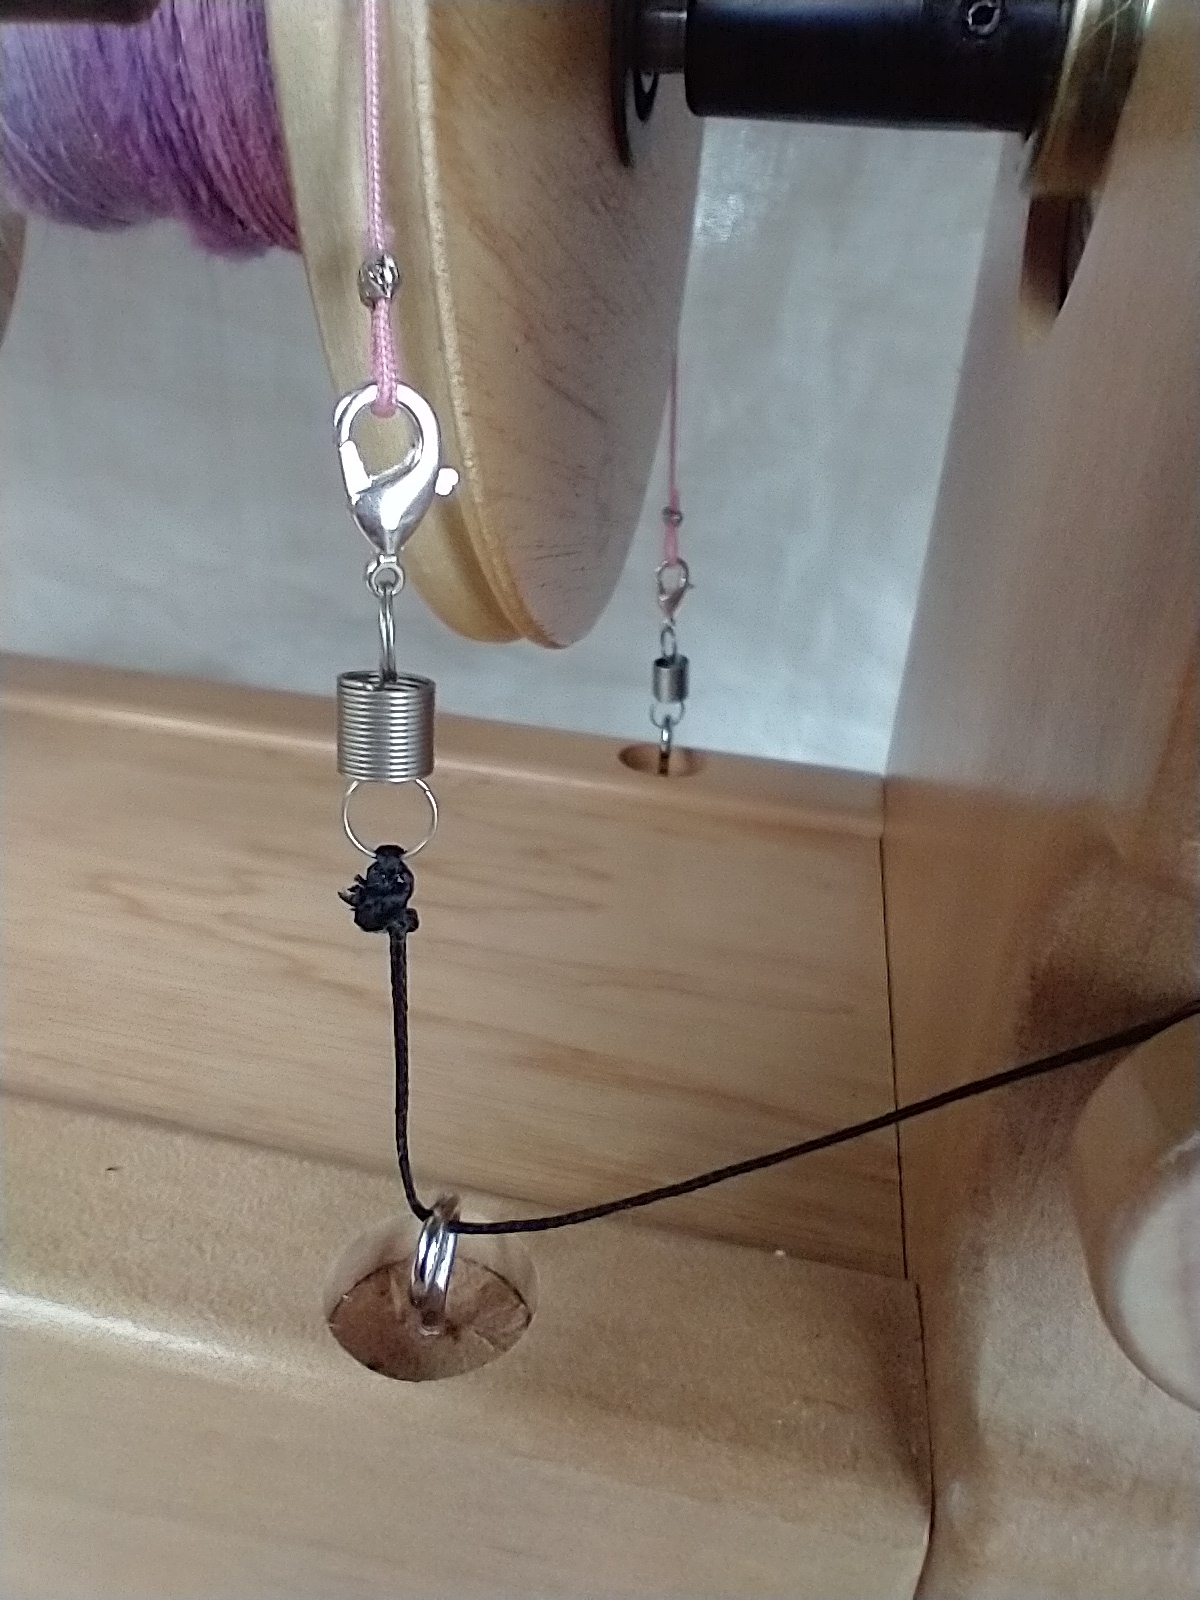
I realized that if I wanted to experiment with different bands it wasn’t going to be so easy to untie knots attached to the springs. I decided to make different quick-connect brake bands. I used small lobster clasps approximately 10mm and crimps beads or tubes, 1.5mm size. I also had foldover crimp ends (with connector eye) in various sizes, which would close better with crimpers.

So far, my favourite band over the rabbit feed bag string was the plastic coated multi-filament beading wire. It’s quite fine and seems to give me varying degrees of tension that I didn’t have before. Like any journey, I’m still playing around with different cords and different fibre blends. There’s not enough time in a day or a week for that matter to ever have enough spinning time.


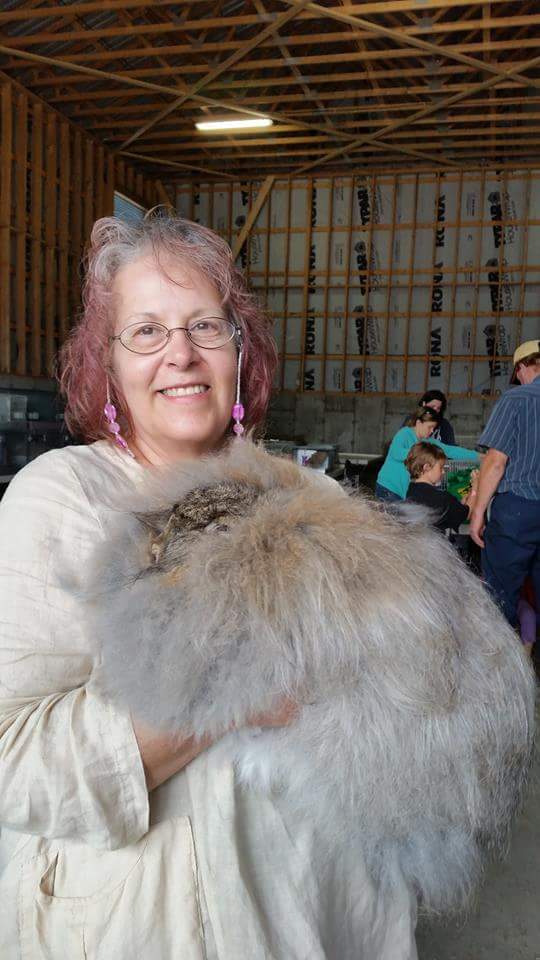
Terry Clemo has had soft spot for fuzzy animals from a very young age. It seemed to follow that her interests spanned to other fibre arts like knitting and sewing and other textural crafts while still a child. Her mother was an expert machine knitter and told her she needed to hand knit before she would give her any machine knitting lessons. With the lessons came a toolbox of techniques that opened up the door to designing her own knitting patterns. Working with her luscious angora, Terry makes batts, handspun yarns, and semi-precious beaded wire knitting jewellery such as shawl pins. You can find Terry on Facebook and Instagram and at various fibre events.
Did you know we also have a monthly PLY newsletter? Sign up here!
PLY Magazine believes that Black lives matter, as well as LBGTQI+ lives. Those most vulnerable and persecuted in our communities deserve our love and support. Please be good to each other.


Leave a Reply
Want to join the discussion?Feel free to contribute!