Supported Spindle Tips Needed

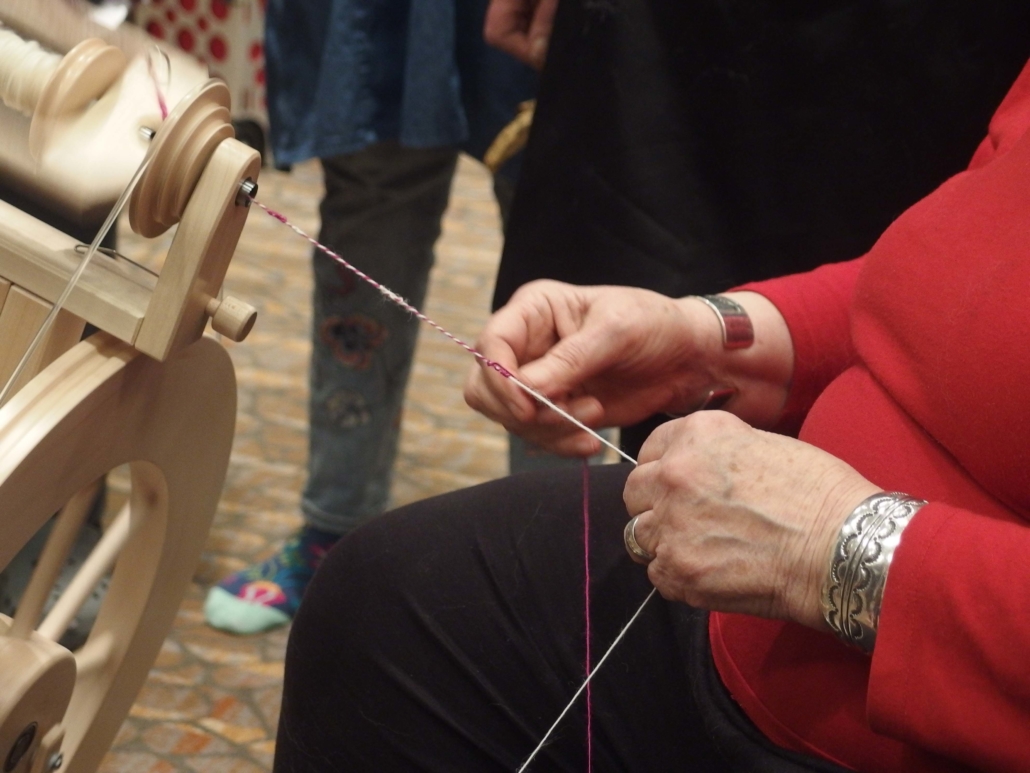
Calling all supported spindle spinners! How do you travel with your supported spindles (and their support)?

Share your tip by going to our Tip Jar submission page.

Your tips will be printed in the Summer 2020 issue on supported spindles. The person who submits our absolutely favorite tip will get a prize from us! It’s our way of saying thanks for sharing your wisdom with the PLY readers.

Guilded: Creating Community Through Cloth

Words and Photos by Sarah Thornton

There’s a piece of cloth in my office: a shawl, about 22×72 inches, with twisted fringe, woven in a simple 4-shaft twill. The weft is a 2-ply white wool – nothing too special, rather coarse in fact, and somewhat unevenly spun and plied. The warp is a mirrored gradation of blues, from dark on the outer borders to light in the middle sections – all handspun of varying colours, textures, and grists. The drape is, well, to put it kindly, more that of a heavy blanket than of a shawl. But none of those details matter to me. This shawl is more than it appears.

My team wove the shawl in July 2018 at a Sheep to Shawl competition held as part of the Salt Spring Island Fibre Fair. The fair was a 2-day event of classes, vendors, and demonstrations, and the competition was a key part. Salt Spring Island is one of the Gulf Islands of British Columbia, situated in the Salish Sea between Vancouver and Vancouver Island. The island is known for its sheep, Garry Oak meadows, artisans, and local food. Their Saturday Market attracts tourists all summer long. It’s a 35-minute ferry ride from Victoria or an hour from Vancouver and is an all-round delightful place to visit.

Planning the Shawl

At the Victoria Handweavers and Spinners Guild, we heard about the upcoming event and decided we had to field a team! Our Island guilds are a friendly bunch, and we love getting together at various fibre fests and spinning events throughout the year. This time, we’d throw some friendly competition into the mix.

We needed a theme for our team of 5 people – the section for “team spirit” was a significant amount on the score sheet! Brenda and I brainstormed – we love blue and knew we would need to work quickly to finish a shawl in the 5-hour limit. I definitely wasn’t thinking of the online fundraising website or the 90s music folk rock duo, but between the two of them, the Indigo-Go Girls was born. We had a name and a theme! Now, what should the shawl look like? We knew our weft would be white – we’d seen a small sample of the fleece – and an indigo warp would set off that white weft well. We solicited donations of blue handspun skeins from other guild members, and Jennifer and Brenda planned and made the warp. Plain weave is fast but isn’t too eye-catching, so twill it would be. I have to admit, I’m not much of a weaver, so when I asked for lightening bolts… But Jennifer did a great job with the interpretation, I thought! Other guild members donated time to sew our aprons. July approached. Even though we’d done lots of planning in advance, we hadn’t actually managed to practice at all. Generally, a successful sheep to shawl team will have some sense of how long it takes to produce the kind of yarn they want, but somehow getting together eluded us. Our team had challenging work and travel schedules, but we all knew each other and had seen each others’ spinning and weaving, so we hoped we could manage and adapt on the fly.

Arriving for the Competition

My fiancé and I took the opportunity for a short vacation and rented a small cottage for 4 nights. A teammate and her husband joined us for 2 nights. The reality of the ferry schedules meant all participants had to stay on the island the night before the competition.

Bright and early on Saturday morning, we delivered all the equipment to the Farmers Institute hall – 4 spinning wheels (3 to use and a spare, just in case!), a drum carder, a loom and bench, various extra tools, and the display boards explaining our process. Also important, the bluetooth speakers and tablet to play our spinning tunes! (We did check with the judge and other teams about having the music, and they all knew they could ask us to turn it off/down at any time). At the last minute, we found the bobbins for one of the wheels which had been packed into a different box for transportation – crisis averted.

Each guild had a cordoned off area in the hall. We all had 5 team members – one weaver, 3 spinners/plyers, and one gopher/fibre prep person. The rules were clear – no more than 3 people could be spinning at once, and the gopher could only step into a weaving or spinning role if the original person was taking a break. We donned our costumes – denim aprons with the team logo embroidered onto the pocket, blue chalk in our hair, glittery blue nail polish (for some!), and denim capris/shorts or skirts.

The three teams approached the judging table for last-minute instructions and drew numbers to choose a fleece. All 3 were Cheviot crosses, and unfortunately, all had issues, though each in a different way. Ours seemed to have short coarse hairs sprinkled liberally throughout, which we didn’t take the time to remove at first. Ah well, had we known how quickly we could work (remember that lack of practice?), we could have done a better job!

Jumping Right to Work

Just before 10 am, the whistle blew and my teammates jumped right to work. But before joining them, I jumped to the tablet and pressed play to start the playlist! “Greased Lightnin’” filled the air – it was time to get going! Next came “Wake me up before you go-go,” and then the spinning and weaving tunes started (see full playlist below).

This competition allowed the use of a drum carder, so that was our prep tool. Three of us started pulling fleece apart, and Beatrice loaded the carder and started cranking. Within just a few minutes the first carded batt was ready, and Lindsay and Christine got down to the spinning.

Jennifer and I continued sorting fleece, and Beatrice got going on the next batt. As soon as the spinners had 1/3 bobbin each, I started to ply. I quickly handed off my bobbin to Jennifer, who readied her weaving bobbin and got to the weaving. A cheer went up as she threw the first pick!

The minutes flew by. At one point, the whole room was singing along when Darius Rucker sang “Wagon Wheel” – the tunes helped keep our energy high. Some competitions allow for a team break, but not this one! We swapped out as needed for bathroom, food, and fresh air breaks, and we were making good enough time that I took a few minutes to check out the competition as I ate a sandwich. As the hours accumulated, though, we all began to flag. But then Jennifer said our shawl was long enough! She had more than enough weft to finish the last few inches. So as she threw those last few picks, we spinners cleaned up and prepped our table for fringe twisting. It must have been quite a sight – 5 of us intently bent over the shawl, twisting fringe on both ends at once, from both sides. And then we were done! A full 15 minutes before the final bell rang at 3 pm.

From left to right: Sarah (the author), Jennifer, Christine, Lindsay, and Beatrice
The Results

After the final judging was completed, we received second place – while we did finish the fastest, our spinning was a bit less consistent than the winning shawl and our shawl only just met the minimum length requirement (it shrank over 15% after coming off the loom and waiting for judging). We were finally able to chat with our fellow participants and see the beautiful shawls they created. And then we headed off for a swim in the lake (Jennifer) and much-deserved cold drinks!

All 3 teams created cloth – a shawl of minimum size 18×72 inches – but we created more than just cloth. We created community. Each team consisted of 5 members during the competition, but many more guild members participated, from providing warp yarns to cheerleading and interacting with the public who came to watch the event. We also created an amazing teaching tool in the shawls we made. How often are we, as spinners and weavers, asked how long it took to make a particular item? How long does it take to spin for a sweater? For a shawl? The answer is always “it depends,” but with the competition shawl, we now have a tangible piece that gives us a metric. We know that all the carding, spinning, plying, weaving, and fringe twisting took 5 people 4.5 hours, so 22 hours total. And that wasn’t working extremely carefully – our technique definitely leaned towards fast rather than good! We learned a lot. We now have an estimate of how quickly we can work, so we know to take more care and time at the beginning with the carding and that we have some extra time for getting the spinning consistent.

On a personal note, the cloth we created is very special to me. I moved away from Victoria in the fall of 2018, leaving my guild and friends of 11 years. My teammates decided I could have the shawl we made. I am so happy to have a warm reminder of our very fun day on Salt Spring Island. And I still get “Dream Weaver” stuck in my head whenever I see the shawl!

The Playlist
  • Greased Lightnin’ – John Travolta
  • Wake me up before you go-go – Wham!
  • It Don’t Mean a Thing (If It Don’t Have the Go-Go Swing) – Chuck Brown and the Soul Searchers
  • Don’t Go Breaking My Heart – Elton Jon and Kiki Dee
  • You Spin Me Round (Like a Record) – Dead or Alive
  • Spinning Wheel – Blood, Sweat, and Tears
  • Spinning Around – Kylie Minogue
  • Spin Our Wheels – Sloan
  • World Spins Madly On – The Weepies
  • Spinning Like a Top – The Devil Makes Three
  • Spinnin’ N Reelin’ – Creed Bratton
  • Roving Gambler – Hart Valley Drifters, Jerry Garcia
  • Jolly Roving Tar – Great Big Sea
  • Dream Weaver – Gary Wright
  • Weave Me the Sunshine – Peter, Paul, and Mary
  • Weave On – Serj Tankian
  • The Goddess and the Weaver – Spiral Dance
  • Wagon Wheel – Darius Rucker
  • Wheel in the Sky – Journey
  • Wheels on the Bus – Raffi

Sarah Thornton is an ocean scientist by training and educator by vocation. From 2007–2018, she lived on Vancouver Island, getting involved in all sorts of fibre pursuits. She now lives in Vancouver and teaches knitting, spinning, and college biology and competes in sheep to shawls with her new fibre community.

The Palindrome Experiment

Words and Photos by Rachel Simmons

I remember the first time I heard the word palindrome. I was in the 4th grade, and I thought it was awesome. I mean, could “straw warts” really read the same backward as it does forward? The answer is yes. And that makes me happy in a strange inner region of my brain. It makes me outwardly happy, too. Just say it out loud – “straw warts.” I bet you’re smiling now.

What does this have to do with spinning? On the surface, nothing. However, when you combine spinning with the goal of making cloth, you can create a palindrome warp for weaving. At least that was my goal in this experiment of wooliness. I am not sure if you’ve ever experienced the disappointment of the chaos that can come from randomly warping a multi-color yarn, but this technique avoids the weird mud through careful measurement. Many handpainted skeins of yarn have repeats, which means that if you can measure out the repeat, you can use it to create vertical color pooling in your warp.

Examples of a color sequence that has the needed symmetry to use for a palindrome cloth and one that does not. Notice the bottom sequence is a pattern, but it does not reverse order at the symmetry line so you can’t fold it back on itself. The top sequence is not a pattern but does have a reversed color repeat, giving it the required symmetry.

This simply means, as long as you’ve measured correctly, the colors out to your warping peg turn back on themselves as you head back to your loom. (This would also apply to the down and back journeys on a warping board.) By taking advantage of a hidden symmetry, you can preserve the beautiful painterly effect of your handpainted yarn in the cloth you create. An excellent resource on creating cloth with palindrome skeins is from Syne Mitchell, in both her book Inventive Weaving on a Little Loom as well as her article on Weavezine.[1]


It is not hard to find a skein of yarn at your local yarn shop that can be used for a palindrome warp. Many (not all) hand-dyed yarns naturally have this repeat because of the way they are dyed. The real question was if I could create a palindrome skein of yarn by spinning a painted braid of fiber. My belief was that I could create this wonderful, mysterious color repeat through spinning in order to create a cloth with vertical color pooling that preserved a hand-dyed fiber’s beauty. I will state right up front that I was somewhat successful in this first attempt, but a first attempt was never expected to yield perfect results, right? I did learn a lot from this experience and have a lot of new ideas for future directions, as well as a very pretty skein of yarn.

My thought was that I could ensure a palindrome repeat by taking a braid of fiber and spinning it down the side from end A to end B and then flipping the braid to continue spinning from end B to end A. This would create a colorway that could fold back on itself. I am sure someone much cleverer than I has already given this technique of spinning a name, but I will call it the back and forth string cheese method. Using my Ladybug, on a 6.5:1 medium speed whorl, I got to work. The fiber I used was the repeating colorway Southdown by Hilltop Cloud.

Fiber used in Palindrome Experiment

A lot worked with this idea, but a lot didn’t work, too. First, it was a little cumbersome trying to manage the length of an entire 4 oz. braid as I spun. The length never shortened, either, because I never spun across the fiber, only down the side. In addition, this length created a really long repeat. I tried cheating by thinking a repeating colorway in the braid itself would shorten my repeats, but this did not actually help due to the variability in color group sizes. For example, the yellow color at the top of the fiber was much smaller than the one in the middle, and thus essentially was its own color group that could not be matched with a middle yellow. However, it is a lovely visual of how a colorway can turn back on itself. In future efforts, if I try this string cheese method again, I will have to considerably shorten the length of fiber I am using in order to shorten my repeat length.

I spun the fiber as a single that I then chain plied.

Chain-plied yarn created. The yarn was a worsted weight at about 10 WPI. I finished the yarn in a hot water bath with a mild wool detergent. After soaking, I snapped the skein on my hands and allowed it to air dry unweighted.

This, too, presented some issues. I introduced too much variability. First, there was the variability in spinning the single. For example, perhaps I lingered in one spot too long and altered the length of a color group. The color runs were a little short to take full advantage of chain plying, too. This yielded unwanted barbershop poling within my skein. I could not create exactly the same size loop on every ply, so this also affected the length of the color runs. In future attempts, a 2-ply yarn may give me more control over which colors land where, making the overall effect of the yarn more successful. I am also considering singles yarn – perhaps a better place to start though a trickier beast to warp. However, using a rigid heddle loom is fairly forgiving with yarn abrasion and I could try sizing the singles yarn prior to warping for added strength.

As a proof of concept, I warped a small section of yarn on a 10-inch SampleIt rigid heddle loom. The yarn itself was a worsted weight at 10 WPI, and I used a 7.5-dent reed. I warped 30 ends and wove a plain weave pattern. This is where the length of my repeat in the yarn became a little unruly. Ideally, a repeat should happen in a normal skein that can be wound in a 1.5–2 meter loop. The repeat would then be on the scale of inches. My repeat was on the scale of feet. My yarn could fold back on itself at 13 feet. That’s a little long. However, this proof of concept trudged ahead regardless of its lankiness. To see the whole sample, I had to use my front steps of my house.

The final sample has 3 colors of weft: a dark purple, white, and speckled grey. This was the length of one repeat which was a little too long to be practical.

I was able to match general color groupings. The color pooling was not as clean as I would like, but the cloth has distinct areas of color dominance. In the warp, the shift from the darker colors to the yellow was the most obvious vertical color pooling. I sampled with both a dark and light and medium tone weft to experiment how to create the cloth to make the warp threads visually come forward or recede back. I wove the weft at approximately 11 picks per inch for each of the 3 colors. The dark weft allowed the colors to show stronger than the light weft, but the light weft did show the yellow quite well. The medium tone hid the warp colors almost completely and would not be a good choice for a palindrome final project/spin, though it did create a pretty cloth in its own right.

The yellow color pools in the white weft (B), but the dark weft (C) showed the most successful color groups. The medium tone weft (A) was not as successful in showing the warp colors in the final cloth.

The end goal, of course, was a beautiful cloth. This little sample I created had its own beauty, and more importantly, it made me even more excited to achieve my palindrome dreams. It is close but not quite what I wanted in my cloth, nor did it allow me the freedom that a better executed skein would allow. While this is the end of the first attempt, I will continue to try (and document) my efforts to create my own form of “straw warts” through spinning.

Rachel Simmons lives in Huntsville, Alabama with her 3 small boys and her very patient husband. She loves all things fiber, most things chocolate, and some things pink. She maintains her own modest fiber blog at http://www.yarntyouglad.com.

[1] https://www.weavezine.com/spring2008/wz_sp08_SyneMitchell.php.html

Low-tech wool (and other fibres) prep

Words and Photos by Joanne Seiff

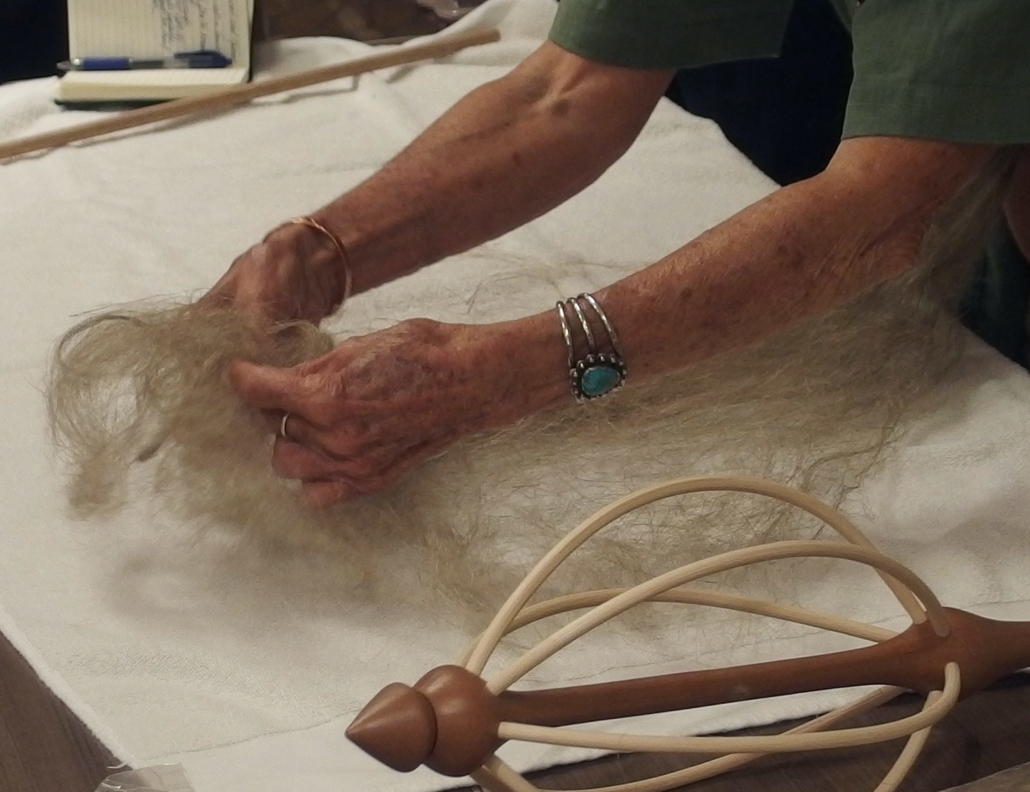
When was the last time you took a lock of raw or washed wool, teased it out into a cloud, and immediately spun it up? When I was taught to spin, back in the dark ages – the mid-1980s – we called this teasing the wool. This low-tech approach was part of how we explored spinning. In retrospect, perhaps this was called teasing as a product of its time. Beehives and teased hairstyles were old-fashioned then but not ancient history. People knew how to tease hair, too.

I was taught this as a kid, volunteering in a living history context. Offered a pile of dirty or minimally washed wool, I sat at the feet of an adult who was spinning. One or two of us teased each lock of wool into a cloud, allowing much of the vegetable matter to fall out onto the ground. An older kid might then take the teased wool and card it, making it into tidy rolags for the spinner. We were all busy, feeding the orifice and producing a higher quality, cleaner yarn.

I still explore basic fiber prep with my hands whenever possible. Whether you choose to spin raw or washed wool, worsted or woolen style, there are ways to prepare your wool without the use of any tools, just your hands. This allows a chance to really experiment and learn about a particular breed and fleece choice up close, giving a chance to sample and study what will work best. It also connects us to the many generations of spinners who lacked fancy tools. In the end, you might choose cards or combs to complete your processing – but you’ll know why you did it!  

Part of the allure of teasing your wool out, one lock at a time, is that you can ensure an entirely woollen preparation, with locks in every direction like a cloud. If you hold it up to the light, you can see the jumble clearly.

Shetland lock and teased cloud
Finnlamb teasing vs locks

Or you can do a semi-worsted approach, by gently spreading and teasing out the lock but keeping the fibers neatly aligned in parallel to the wheel or spindle.

Romney-Texel semi-worsted teasing
Romney-Texel semi-worsted vs woollen

Teasing a fleece dyed in the lock can allow for color experimentation and close-up examination before undertaking a faster prep method, such as with a drum carder.

Sometimes you’ll find your fiber really doesn’t need anything more than teasing to make it ready for spinning. If you’re seeking a textured single or an art yarn, teasing may provide you with the process you need. A bonus is that if you set yourself up with unprocessed fiber and a basket for the teased fiber beside it, you may be able to get yourself through a marathon TV or audiobook binge – complete with something mindless to do with your hands!

On a more philosophical level, starting with raw fleece and a spindle – and no other tools – allows you to examine how things can be done entirely by hand. We are products of our time. Many of us love all the available gadgets that come with spinning. There are odes online to flick carders, hackles, blending boards, cards, combs, drum carders, and commercial processing. Although sometimes expensive, these tools are available to many spinners. We can try every kind of technique. However, people have been spinning all over the world for thousands of years, often with very little equipment. Did it keep them from spinning?

Absolutely not.

The next time you take a hike, look at the hedgerows. Do you see a wisp of wool caught on a bush? Do you collect downy fibers from plants, wondering if they can be spun? There’s also something magical about helping out at a sheep shearing, returning home with a fleece, digging into the bag on the porch, teasing a lock at a time, and spinning the yarn up before it ever comes indoors.

Teasing allows you a nearly instant way to find out the potential – a chance to immediately imagine what your newest acquisition might be. Separate out a lock of wool, a bag of alpaca seconds, a cloud of cashmere, or a cotton boll. Find out what you can do – solely with your hands. Practice getting in touch with fibers with your fingers. You may be surprised at what you learn.

Joanne Seiff has written 3 fiber-related books: Three Ply,Fiber Gathering, and Knit Green. She writes, edits, spins, knits, designs, and teaches in Winnipeg, Manitoba. See Joanne Seiff’s designs on Ravelry and on Lovecrafts.com – her designs might sing in your handspun. Read Yarnspinner, her blog, at joanneseiff.blogspot.com, to learn more!

Ply Logo

Ply Magazine: Now Hiring

Want to work for a great fiber magazine? PLY Magazine has 2 openings! We are looking for a layout/design person and an illustrator.

Layout/design

This is a freelance, satellite position that is ongoing and includes 4 issues per year. It pays a flat fee per issue, and experience has shown us that, depending on your work style and speed, each issue takes between 45–75 hours over a 2.5-month period (so between 4.5 and 7.5 hours each week, on average). You’ll be responsible for taking the copy, photos, illustrations, ads, and well, just every single thing that’s going to be inside the issue of PLY and format it in a pleasing and creative way! PLY is a small team consisting of the editor in chief, managing editor/copy editor, photographer, customer service, developmental editor, illustrator, and you. That’s it. Among all of us, we get everything done.

You’ll be responsible for the following (while meeting the deadlines given):

  • Creating a cohesive look for each issue that builds on the look of the overall canon of PLY.
  • Creating a half-page mood board for each issue using copy provided and then using those colors in the respective issue.
  • Working with the editor in chief and managing editor to create a list of needed illustrations for the illustrator.
  • Using InDesign to design and lay out each issue, cover to cover, using the copy, photographs, illustrations, and ads in the allotted time (between 6–8 weeks).
  • Delivering pdfs to editor in chief, managing editor, and developmental editor and then implementing any changes requested.
  • Uploading final pages to printer, approving and finalizing pages.
  • Creating an image (usually just a crop) from each article for the authors to use to promote and tantalize.
  • Uploading final digital issue to server.

You should:

  • Have at least 2 years of magazine design/layout (or comparable) experience.
  • Be comfortable and well-versed in InDesign and the Adobe Creative Suite on a Mac platform.
  • Be organized and pay close attention to details.
  • Work and deliver on firm deadlines.
  • Work independently and be self-motivated.
  • Have strong communication skills and not be afraid to speak your mind and give your opinion.
  • Work well with others (or at least a small staff).
  • Have a clean and creative design aesthetic.
  • Be able to implement changes in your design without hurt feelings.
  • Have some experience with fiber arts.

The Process:

Please submit (to jacey@plymagazine.com) your portfolio and/or examples of your work , your past experience with layout/design, the programs you’re comfortable using, your work history as it applies, and 3 references by January 15, 2020. You’ll hear from us by February 1. Our plan is to pick a few people we really like and ask them to do a small mock-up of the magazine (a couple articles, a cover, masthead, project), going through an abbreviated version of our process. We’ll pay each designer we ask to go through this process a stipend for their time and work. For those who aren’t among our choices, if you want to go through the mock-up process too, you can, but we won’t be offering the stipend. The final decision should be made by February 1!

Illustrator

This is a freelance, satellite position that is ongoing and includes 4 issues per year. It pays a flat fee per issue, and experience has shown us each issue falls between 10–20 illustrations and over time averages out at 15/issue. At the beginning of each issue cycle, you’ll be given a list of between 10–20 illustrations ranging from very small and simple to more complex, and you’ll be responsible for asking for any clarification needed, creating and digitally delivering the illustrations to PLY. Turn-around on these illustrations should be fairly quick, 2–3 weeks, and may include some edits. PLY is a small team consisting of the editor in chief, managing editor/copy editor, photographer, customer service, developmental editor, layout/design, and you. That’s it. Among all of us, we get everything done.

You’ll be responsible for the following (while meeting the deadlines given):

  • Creating illustrations that are original and distinct to PLY but fit into the cohesive look for each issue and build on the look of the overall canon of PLY.
  • Working with the editor in chief, managing editor, and layout/design person to clarify the look and content of the illustrations.
  • Delivering illustrations to PLY by set deadline and then implementing any changes requested.

You should:

  • Have at least 2 years of illustration experience.
  • Have a range of illustration styles.
  • Be creative and have confidence in your work.
  • Be comfortable with line drawings, pattern sketching, repeating designs, renderings of fiber tools, spinning wheels, hands, spindles, people (shown with diversity), animals, etc.
  • Be organized and pay close attention to details.
  • Work and deliver on firm deadlines.
  • Work independently and be self-motivated.
  • Have strong communications skills and not be afraid to ask for clarification.
  • Work well with others (or at least a small staff).
  • Be able to implement changes in your illustrations without hurt feelings.
  • Have some experience with fiber arts.

The Process:

Please submit (to jacey@plymagazine.com) your portfolio and/or examples of your work your past experience with illustrations, your work history as it applies, and 3 references by January 15, 2020. You’ll hear from us by February 1. Our plan is to pick a few people we really like and ask them to do a small mock-up of an issue (we’ll give you a list of 5–7 illustrations), going through an abbreviated version of our process. We’ll pay each illustrator we ask to go through this process a stipend for their time and work (which we won’t use or keep; you retain all rights). For those who aren’t among our choices, if you want to go through the mock-up process too, you can, but we won’t be offering the stipend. The final decision should be made by February 1!

PLYAway Wants (and needs) you!

There are still great classes available. Check them out here!

And if you’re a small business that makes something fiber lovers would love, consider donating to PLY Away’s goodie bag, silent auction, or door prizes! It’s almost time to wow and tempt the devoted 500 fiber aficionados that attend PLYAway, but we’d love to have you join and your goods represented. If you’re interested, email me (jacey@plymagazine.com) and I’ll hook you up! Here are the deets:
 
Goodie bags: Every single person registered for a class gets a goodie bag, and trust me, they have always been stellar! We want this year to be the same. You can send 100, 150, or 300 items and we’ll stuff those sacks full! We’ll also give you a thank you in our 2020 program and a shout out on social media (FB and IG along with a photo). We’ve had everything from a single lock from a shepherd for each bag to artisan teabags to tiny samples of balms to mini-batts, colorful rolags, tape measures sporting business names, small batch chocolates, printed patterns, 1 oz mini braids, and on and on. We’d love to include you and for us to support each other.
 
Door prizes: If you don’t have the time or energy (or if your product isn’t suited for goodie bag parsing), a door prize or a silent auction item might be just the thing! We like to punctuate our nightly spin ins and/or banquets with loud, squeal-inducing giveaways and we’d love to give away your stuff. Please include details about your item so we can make sure and holler them out to the crowd!
 
Silent Auction: Finally, the silent auction is one of the ways we help spinners come to PLY Away, and we’d like to build our scholarship fund even more so we can continue to bring talented spinners who couldn’t otherwise attend PLY Away. We hope to bring 2 at a time, even 3! ALL the proceeds from the silent auction go to the scholarship fund. The silent auction items and signage will be set up in public for several days (secured at night), and towards the end of the event, we’ll see who won. We think a range of items is ideal, some small and some large, so people of several budgets can participate.
 
Send everything here: Whether you’re in for the goodie bags, the door prizes, or the silent auction, let me know so I can make sure your info gets into the 2020 program. February 15th is the due date (so we have time to pack all those bags) to PLY Magazine, PO Box 3329, Kansas City, KS 66103.

Dyeing Cloth with Mud

Words and Photos by Suzanne Correira

I’ve been experimenting with using mud for coloring cloth ever since I took a class from Judy Dominic in the early 2000s. She studied African mud dyeing extensively. Then I started reading about the Japanese technique of Dorozomo – also mud dyeing. I fell in love with the fun and experimental aspect of it. And the historical bits of course. Plus, how can you resist playing in the mud?

Colors

I’ve worked mostly with clay-ey type soil – most easily obtainable for me – and these tend to have the best colors. Think Georgia red clay, Oklahoma red dirt, Texas red dirt, and Montana red mud. There is a whole business built around the Montana red: Montana Dirt Shirts. And they’re rather nice T-shirts. For the record, my students have all declared the Georgia red clay as the out and out winner in the red department.

Red seems to be the most available color in nature. Green is also something you can find in heavily naturally mulched soils and in desert areas – New Mexico and far West Texas have several spots for a good deep green. And black is something you can get from a good deep natural mulch – or a peat bog. These are going to be your basic colors, but you can also find some others including some good yellows. And if you don’t want to drive around with a bucket and shovel, think facial clays, yes, clay masks – certainly for the green clay and a black clay mask. The red may be harder to find, but there is a rose facial clay out there.

Plain old mud from the garden or a potting soil also works, especially if it is full of composted leaf material – think tannin here – and this works extremely well if you are dyeing or painting on cotton. The tannin acts as a mordant, intensifying and fixing the colors.

Mordant

You are not actually dyeing with these clays, as they are a pigment and do not absorb into the fibers and fabrics, but are rather staining with them. Think of what happens when the kids play in the mud and grass and what happens when you kneel down to work in your garden. This time, we are doing it deliberately. And for that, we need something to “mordant” the colors if you don’t have a swamp or peat bog handy. While it is a tradition to bury the decorated cloth in the ground, in peat bogs, or in other areas for weeks, evens months at a time, I’ve been using mostly soy milk as I learned in Judy’s class. Canned or fresh, it doesn’t matter. In fact, the last time I taught this technique in New Mexico in 2016, I used 2-year-expired soy milk. Quite honestly, I think the colors were the best I’ve ever seen a class of mine come up with! The photos included are from that class.

A Collection from the Class

Our real star here as far as fixing the colors is the soy milk. Soak whatever you are dyeing in it, use it to emulsify the clay, or do both. I like to do both. The enzymes in the soy milk serve as a binder for the clays. Leave it on as long as you can – even months to bind the clay to the piece.

Types of Dyeing

You can use immersion dyeing techniques – the Montana Dirt Shirts are done this way – and you can design tie dye effects. Soak the fabric in a solution of soy milk and clay, where the solution has taken on the color of the clay (think of the color of the water of the Red River or any clay pond), and leave it as long as you can to soak – overnight is good. Dipping more than once helps build up color. Hang it to dry and “cure” as long as you can – about a week. Rinse and let it dry and cure again. Hand wash in a gentle soap and dry carefully. I experimented with wool yarn and achieved a soft color this way, but it required a lot of rinsing. If you plan on wearing your clay-dyed pieces, handwashing is definitely recommended.

Mud Immersion Tie Dye

Clay painting is what you most commonly see, both using clay as the actual color and as a resist to other natural colors. Again, mix the clay and soy milk, and even dip your cloth in soy milk first, then paint on the surface using cheap disposable brushes or even Q-tips. Leave the clay paint on the piece as long as possible to cure as above. Layer gradually to build up the colors. Please note: You may get some really deep colors, but you will be washing out a great deal of that color. Still, the longer you let it sit, the deeper it gets!

Mud Painting
More Mud Painting
Resources

Mud/clay dyeing shows up in many cultures and has become quite popular with surface design artists and hobbyists, so there are tons of articles and tutorials. There is a wonderful tutorial online. It is suitable for grade schoolers but interesting to all.

Kimberly Baxter Packwood: Clay Dyeing Info

Judy Dominic – I took one of her first classes on the subject in Berea, Kentucky, after she’d been to Africa to study the method. Turkey Red Journal, Vol 17, no.1, Fall 2011, Bogolan Fini Mud Cloth from Mali Africa (U.S. adaptation). This is decorating a cloth with clays painted onto the cloth, using the clays both as color and/or as a resist. The cloth may be buried in mud for months.

John Marshall: Also Turkey Red Journal, same issue – Dorozomi Japanese Mud Dyeing (he is quite insistent on using fresh made soy milk, not the prepared stuff, but then, he is a stickler for traditional methods). Here he writes about 2 distinct Japanese methods: Bingata, in which various muds, as pigments, are glued to the cloth using soymilk as a binder, and Dorozome, where the mud is serving as a mordant to the vegetal juice color that the cloth is saturated with first. Both articles can be found at Turkey Red Journal, along with more recent articles on all sorts of dyeing.

Suzanne Correira has been a professional fiber artist since the 1980s and has been Fire Ant Ranch since 1992. She has published with Knitter’s, Knitting Digest, Threads, Lion Brand, and Ravelry. She has exhibited/taught in many places, including PLYAway, Estes Park, Taos, Big Sky, Kid ‘n Ewe, DFW, Interweave Yarn Fest, and Georgia Fiber.

Chasing Cloth

Words and Photos by Melanie Duarte

As spinners we are always chasing cloth. The yarn we create may be beautiful on its own and it might hang out longer in our stash than we intended it to, but there probably was a goal when we set out to spin it. More often than not, that goal is to produce some kind of cloth, be it woven, knit, or crocheted. Over time, we become more comfortable in our ability to make cloth and we can begin to make choices based on how we want the cloth to look, feel, and drape before we even start spinning. We can decide what breed of sheep, fiber, or blend we will use and how we will spin it to produce something close to the cloth we want. From there, it can be a few short sampling exercises to pin down the exact details of the perfect yarn for our project. Sometimes the yarn comes before there is an idea of the final cloth, but from our experience we know what will work best for that yarn or how to make the yarn sing.

As a confident wool spinner and knitter, I decided to shake things up by learning to spin and weave cotton. For me, learning to spin cotton was like learning to write with the opposite hand. Not only was it a challenge physically but also mentally. It has been incredibly fun and also incredibly frustrating. At times I felt like spinning cotton was truly magical, the way all those tiny fibers seemed to reach for each other. Then, other times, I felt like banging my head against the wall. Just when I thought I was getting the hang of it, I ruined it somewhere in the process. Cotton was making me start over and create a new relationship with cloth.

My first skeins of cotton were spun on my Schacht Flatiron. The fastest whorl I had was 17.4:1, and I had 2 different fiber preps: natural green in sliver and white ginned cotton. My father had given me the natural green sliver at our Christmas swap. I was so excited to try it, but I failed at every attempt. Green cotton has such a short staple, so I used a long draw draft. The wheel needs to have a balance between twist and take up; the fibers need a lot of twist to stay together, and if your wheel tries to take the fiber away from you before there’s enough twist, the singles will just keep drifting apart. After watching all of Joan Ruane’s videos on YouTube, I was finally successful.

Next up was the white ginned cotton. I tried my hand at making a puni, but that didn’t work. The fibers wouldn’t draft freely, so it felt a bit like tug of war. After that, I tried Norman Kennedy’s method of carding a rolag, and spinning was much smoother. I still had a bit of trial and error with how much twist versus take up, but in the end I had a finished skein of yarn. The ginned cotton had a lot of VM and debris in it, but thankfully after I washed it, most of it came out.

Even though I ended up with 2 skeins of yarn, I wasn’t happy with the results. My yarn was lumpy and uneven. It was nothing like the fine cotton yarns I had used to weave tea towels in the past. My experience spinning fine wool yarns had me expecting the same or similar results with cotton. I put these yarns aside and started researching cotton spinning tools.

The first tool I decided to try was a Schacht pear tahkli spindle, an inexpensive but very effective tool. Suddenly I was able to spin very fine singles. However, the issue I was having was how much twist? When spinning wool, I want just enough twist to hold the fibers together. With cotton I was afraid of adding too much twist. I spun and plied 2 singles. The first ply held together but was severely underspun. Stephenie Gaustad says in her book, when checking the twist, you want the plies to sit like beads on a string.[1] That was key for me. The second ply had much more twist. This difference in twist gave my 2-ply yarn a lot of texture. The skein of singles I have are leftovers from the second ply, but I was so pleased with the smooth and consistent thread I was able to create.

Very soon after my experience with a tahkli, I received a book charkha for my birthday. I started spinning my green cotton sliver on it right away. For this tool, I had to get used to how fast the charkha, which has a ratio of around 100:1, can spin. For someone who spins wool, that is unheard of! I quickly got into a rhythm of cranking the wheel and drawing out the fiber. What I didn’t know was just how much twist cotton really needed. I spun about 7 spindles of the green sliver and then plied them up. My yarn broke a few times during plying, but it fuzzed up a lot during the scouring process. Looking closely at my yarn and examples shown in Stephenie Gaustad’s book and videos, it was clear my yarn still didn’t have enough twist. There was enough twist to hold the fibers together but not enough to protect it from abrasion.

After the green sliver, I started spinning Egyptian cotton on my book charkha. Once I got the hang of spinning a longer fiber cotton (it was surprisingly difficult after getting used to the really short fibers of green and brown cotton), I really enjoyed it. I could see so much potential in Egyptian cotton. I was imagining all the different cloths I wanted to make. I had finally started to spin the type of cotton I had dreamed of: thin threads that I could weave into soft cloth with incredible drape. So on that note, it was time to work up my samples into woven swatches on my Zoom Loom.

The first swatches I made were from the 2 original wheelspun yarns. As yarns, I was disappointed in them. They were not at all what I wanted, but I love them as woven swatches. They have drape and texture. They feel soft and durable. I think they would make wonderful kitchen towels or face cloths.

The next swatch was the 2-ply natural brown cotton spun on the tahkli. This swatch had texture from the twist difference in the 2 plies. This yarn was finer than the wheelspun yarn, making the gauge looser and more open, thus attributing to a soft cloth with great drape.

The swatch made from the tahkli spun singles did not work at all. The skein of leftover singles had a lot more twist in them than the first ply, but they do not have enough twist to hold up even as weft in my swatch.

The last set of swatches were spun on my book charkha. The green 2-ply yarn held together wonderfully and had great depth and a really nice texture. It was very soft and smooth. The white singles yarn held up a little better than the tahkli spun singles but did break a few times towards the end of the swatching process. With a pin loom, I used a needle to pull the weft over and under the warp, and this excessive drag caused the breaks in the singles. The process is different on a harness loom, but it definitely makes me question the yarn’s durability. I do not think any of my singles yarns would hold up as a warp, but I think the collective strength of the 2-ply yarns would work.

Some amazing things have happened for me through this process. My skills as a spinner have grown leaps and bounds. Not only have I progressively gotten better as a cotton spinner, but it has definitely increased my skills as a wool spinner, too. Learning to weave and creating simple samples has shown me how gauge and sett can change fabric. It has also taught me not to discount some of my handspun yarn. What doesn’t speak to me as yarn will probably speak to me as cloth. So if you are ever in a creative rut, try something new. It will strengthen your skills and renew your relationship with making cloth.

Resources

Joan Ruane – cottonspinning.com and her YouTube channel

Stephenie Gaustad – Book: The Practical Spinner’s Guide: Cotton, Flax, Hemp (Interweave) – Video: Spinning Cotton (Interweave)

Norman Kennedy – Video: Spin Flax and Cotton: Traditional Techniques with Norman Kennedy (Interweave)

Melanie Duarte is a spinner, knitter, and weaver from Portland, ME. She homeschools her 2 daughters and is learning to play the piano. Check her out on Instagram @porchpegasus.


[1] Stephenie Gaustad. The Practical Spinner’s Guide: Cotton, Flax, Hemp. Loveland, CO: Interweave, 2014.

Spinning for Lace: A Test

Words and Photos by Barbara Bundick

My favorite default yarn is, to put it mildly, frog hair. I spin fine. Lucky for me, I also love to knit lace. The 2 go together quite handily.

I’ve heard a number of old wives’ tales about the best yarn for lace knitting. First, 2-ply yarn is supposedly better than 3-ply yarn. The 2 strands in a 2-ply yarn push against each other. The yarn, by its own wont, keeps lace holes open and, dare I say it, lacy. A 3-ply yarn, on the other hand, is rounder than a 2-ply yarn, providing for better stitch definition. The old wives will tell you, “Knit lace with a 2-ply yarn. Knit cables or stockinette with a 3-ply yarn.”

The make-up of the yarn also matters, even when everything is wool, such as which of the 2 major methods of prepping wool is used. Combing aligns all the fibers so they’re neatly parallel, while carding mixes all the fibers up higgledy-piggledy. Combed fiber is sleek. Carded fiber will keep you warm in winter.

Then there’s the wool. To grossly oversimplify, wool comes in at least 3 varieties: fine, medium, and long. Fine wools, such as Merino, are naturally short stapled, with very tight crimp, and average around 20 microns in diameter. Longwools average closer to 33 microns, with a staple length that can be as long as a foot. A classic longwool staple is lustrous and wavy. Medium wools fall neatly in between.

Setting up the Experiment

So what makes the best yarn for lace knitting? I put the old wives’ tales to the test by preparing 12 samples. I started with 3 wools: Merino, the classic fine wool; Montadale, a medium wool developed in the U.S.; and Cotswold, a traditional longwool and the basis for the British wool trade. I combed some of each and carded some of each and spun 4 yarns from each: a 2-ply combed, a 3-ply combed, a 2-ply carded, and a 3-ply carded. I knit each yarn into a lace swatch – and voilà! I could figure out if the old wives were right.

I immediately encountered a problem. I used Merino and Montadale from fleeces I’d purchased. I knew the fiber was sound and would spin well. However, I was not happy with the Cotswold I received. Perhaps because it was lambswool, it did not have the luster and curl I had fantasized. The fiber was matte white with a light yellowish tinge. Fortunately, the Cotswold spun better than I expected, so I suspect my ultimate results are reasonably reliable. However, the next time I encounter the kind of longwool locks that I first envisioned, I may repeat the longwool part of the test.

Prepping and Spinning

Combing and carding went about as expected. The Merino, a greasy fleece to begin with, did not wash fully clean. The trace of residual lanolin made no difference in the combing. In carding, though, it did tend to hold the rolag together tightly, almost as though I’d made a puni. All residual grease washed out when I washed the yarn. The Montadale, ever obliging, and the Cotswold, with a little grumbling, all combed and carded without difficulty.

Yes, I handcarded Cotswold, even though the staples were over 3 inches long. Longwools can be carded, albeit carefully. They sometimes even benefit from the extra air. I once tried spinning some combed Gotland locks, but the fiber kept trying to felt in my hands. I carded the Gotland, adding air, and the fiber became spinnable. While combing remains the preferred method of preparing longwools, carding is worth a try.

I spun all my yarn on a top whorl drop spindle because, heck, I love spindles. My spindle spinning is neither pure worsted nor pure woolen, but a mix of each. My finished combed yarns, therefore, did not have all the sleekness of a pure worsted draft – just most of it. The carded yarns didn’t inhale as much air as they would have if I had spun standard woolen. The difference between the preparations still showed in the yarns and the final swatches.

The combed Cotswold taught me a valuable lesson. It wanted, insisted really, on being drafted from the butt end. Wool has scales that point towards the tip. When you spin from the tip, you’re pulling against the scales. When you spin from the butt, the scales remain closed. The Cotswold drafted sleek as silk when I spun it from the butt end. When I spun it from the tip, it balked. The Merino and the Montadale were also happier spun from the butt end. Lesson learned. (Hint: If you’re not sure which end is which, rub the combed fiber between your thumb and your first finger. Your fingers will naturally move towards the tip end. Start drafting at the other end.)

Knitting

Yarns plied, it was time to knit. The yarns were close enough in wraps per inch that I decided to knit them all on the same pair of US size 3 needles. I chose a traditional lace pattern called the Spider Stitch, which is based on a 6-stitch repeat over 4 rows:

Row 1: K1, k2tog, *yo, k1, yo, ssk, k1, k2tog*; repeat between asterisks, then finish with ssk, k1.

Rows 2 and 4: Purl.

Row 3: K2tog, yo, *k3, yo, slip2-k1-psso, yo*; repeat between asterisks, then finish with k3, yo, ssk.

Results

The results both proved and disproved the old wives’ tales. Some differences were obvious and to be expected. The 3-ply yarns were thicker than the 2-ply yarns. The carded yarns were fuzzier than the combed ones.

I will happily challenge the old wives, however, about the superiority of a 2-ply yarn for lace. I could see no evidence that the lace holes in any of the 2-ply swatches were larger or rounder than the holes in the corresponding 3-ply swatch. The 3-ply yarns, however, did have slightly better stitch definition. Thus, the key benefit of knitting lace with a 2-ply yarn is the fineness of the yarn. If your goal is to pull your shawl through a wedding ring, why crowd the ring with an extra ply? The carded yarns were also slightly thicker than the combed yarns. Because carding adds air, carded yarns puff when they’re washed. The puffing, especially with the carded Montadale, somewhat obscured the laciness of the lace.

3-Ply Carded Montadale

If your goal is elegance, use a combed yarn. If your goal is warmth, however, a 3-ply carded medium wool is well worth considering. Of the 3 wools, the Merino, in its combed, 2-ply form, produced the finest, softest lace. I could knit a wedding ring shawl with that stuff.

2-Ply Combed Merino

The Montadale, even combed, has a natural fuzziness and bounce that keeps it out of wedding ring territory. But a soft warm wrap? Pull out the Montadale. While I was disappointed with the Cotswold in general, the 2-ply combed yarn did knit into a showy lace.

2-Ply Combed Cotswold

The fiber was a bit scratchy, with no elasticity. It would not work for next-to-the-skin wear. A 2-ply combed longwool scarf, however, would be just the thing for dressing up a winter coat.

All wools and all prep methods and all yarns have their uses, even for lace. If there’s any lesson I learned from this experiment, it’s don’t spin and knit to please the old wives. Experiment, and then do as you please.

Barbara Bundick has been knitting for 50 years and spinning for 20. She is a graduate of the Olds College Master Spinner Program. She lives in northern Illinois with her husband, one daughter, her daughter’s two cats, and more wheels, spindles, knitting needles, and stash than are worth mentioning.