

Mixing Things up for a Sweater
words and photos by: Johanna Carter
I always admire those who are able to spin mountains of yarn for a big project, ready to knit a wonderful sweater or cardigan. It is a satisfying feeling when you finish all that work, especially if you started with washing and combing the wool or even raising your own sheep.
Mixing spinning and knitting
The typical way to work through a larger project is to spin all the singles first and ply them in a particular order so you get the yarn even throughout the whole project. I don’t have so many bobbins, but my bigger problem is that I am quite impatient and want to get on with knitting once I have an idea. And normally, my brain is full of ideas for fibre work and the limit is the time, as I am a musician and teacher. I can’t sit at the spinning wheel for a long time if I’m not on holiday, so during the school year I mostly knit, and during the holidays I can dye, spin, use my drum carder, and do lots of fibre work. The only time I was able to produce bigger quantities of yarn before I knitted them up was during the Tour de Fleece in the two years during the pandemic, when we did not go on holiday at the beginning of July.

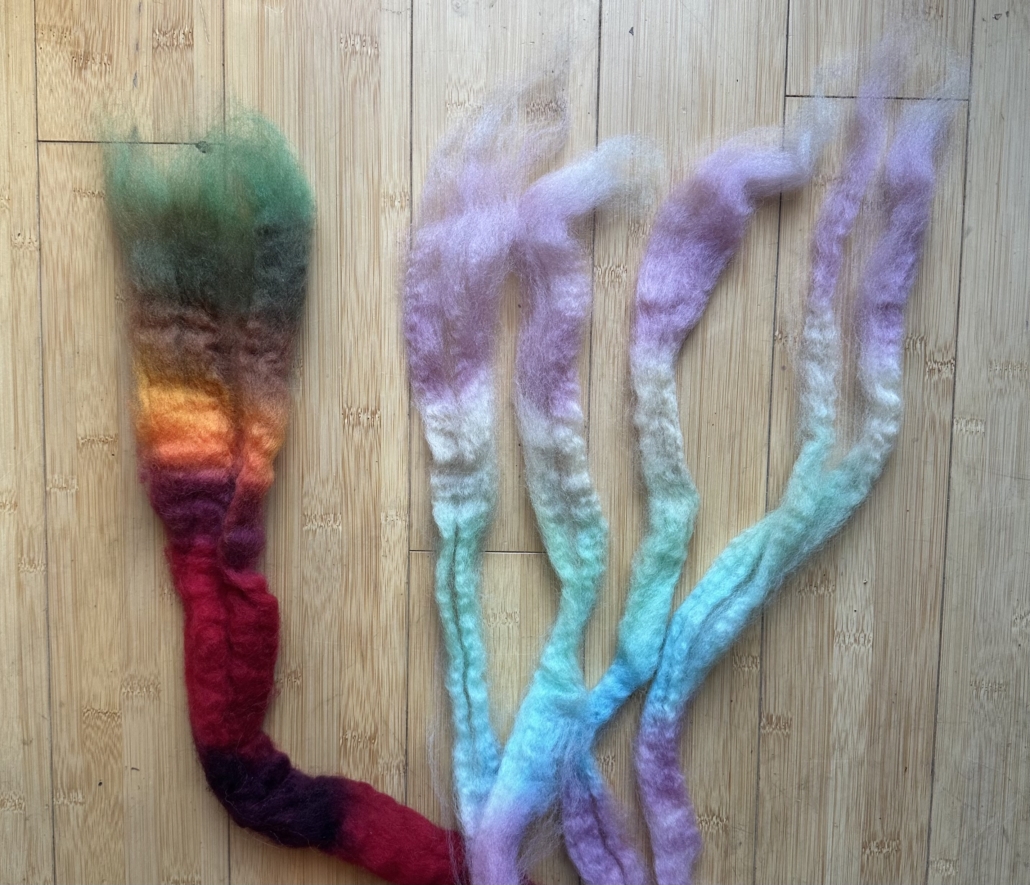
A highly photogenic collection of naturally dyed fibres.
I like to finish knitting one big project like a sweater or cardigan before I start the next one, or at least until I can’t carry it in my bag easily anymore, so I have an excuse to begin the next one. Sometimes it is good to have a second project on the go – I call it mindless knitting, where I don’t have to look very much – which I can keep my hands busy during Zoom or other meetings, which helps me listen.
Mixing colours and fibres
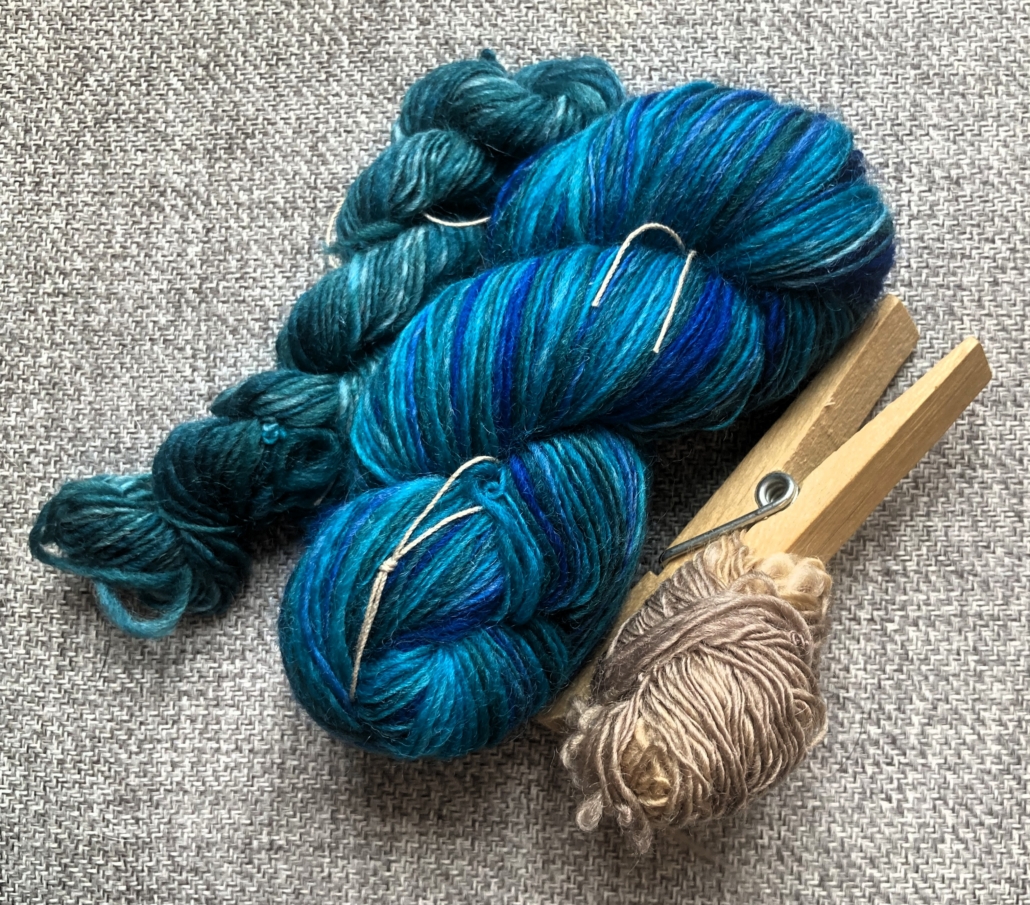
Usually I dye my yarn with plants which I collect in the woods or get from garden flowers. I also use cochineal and indigo, which I buy, to get lots of different colours. I really love the greens and blues I get from dyeing with indigo. I have lots of dyed wool, and all those colours give me inspiration for further projects.

Beautiful greens and blues dyed by the author using indigo and other natural dyes.
Blending the wool on the drum carder I can get even more shades. I like to blend with fibres like silk, alpaca, or plant fibres, and I love sari silk, to get those little bits of colour in my yarn.
Fibres of different types and colours are blended on a drum carder for elegant results.
When I have an idea for the next sweater, I start carding, and then I can begin to spin. Once I have spun enough yarn – say, for one day – I cast on and start knitting, usually top down, so I don’t have to decide too much in advance about length and width.

An idea for the author’s next sweater in the gathering stages.
When I spin on my wheel, I have to sit at home, but while spinning I can read a book or talk to others during online meetings. I also like to spin on my spindles, and that works on a walk, or a museum visit. I take them on holiday as they don’t need much space, and when I spin for a lace shawl, I don’t even need much wool either. At home there are spindles all over the place; I can spin when I am waiting for the kettle to boil, when the computer is slow, when I am cooking. Like that I can make good use of a short time and the yarn still grows.

Knitting as soon as the yarn is spun helps the author complete sweater projects in a timely manner.
I can take my knitting almost everywhere, which is why I don’t want to wait to get started until I have spun all the yarn for a whole sweater. I knit at home, on the bus or train. The only thing I have to make sure of is to be one step ahead with the yarn.
I love to knit Fair Isle sweaters. My favourite method is to use only one bobbin, which I don’t even fill, because I need smaller quantities of lots of colours. Then I wind a ply ball and ply it on itself. For that I put my thumb through the ball, so I can tension the two singles with my fingers and they don’t get tangled, as long as my thumb (or a cardboard roll or a pencil) stays in the middle. I don’t have any leftovers from plying, and it is quick when I suddenly need more yarn.

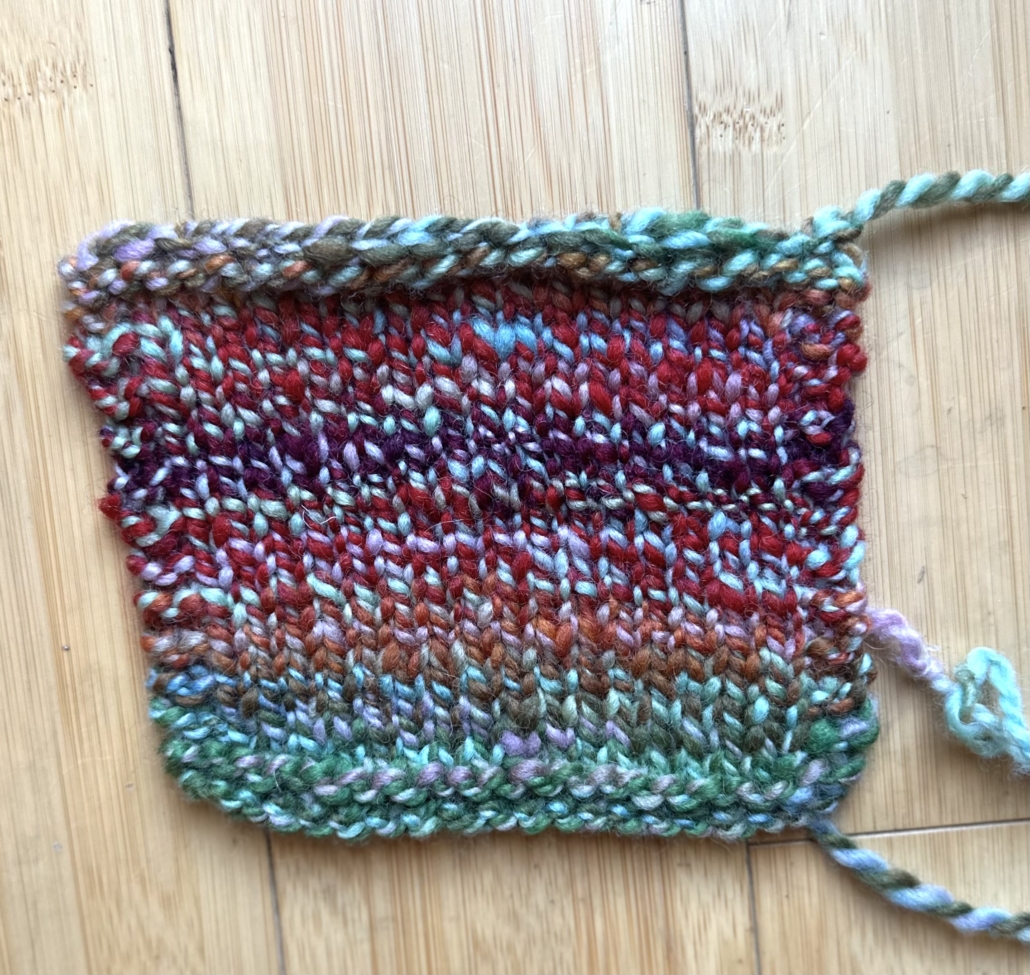
Several charming sweaters dyed, spun, and knit by the author.
I have never had problems with the yarn not being consistent enough throughout a project. I just know what yarn I want and my fingers seem to remember what to do. I am sure it is good advice to have a little card tied to the spinning wheel with a bit of the singles you are aiming for, so you can check and make sure you are spinning a consistent yarn.
Mixing breeds
There are so many different breeds, but some of my favourites are Shetland, BFL, and Jämtland – a Swedish breed. After dyeing them, I often forget what I have used, so when I do a new project it often turns out that I have used different breeds and fibres just to get the right colour. For the Fair Isle knitting I want to juggle lots of colours, which is more important to me than making a sweater out of only one breed.
Recently I made a pullover for my husband using about 12 different breeds and colours, even mixing short and long draw. For me it was a breed experiment and a way to use up lots of smaller quantities of wool I had in my stash. For that sweater I used combed top without blending.

Mixing in knitting during the spinning process is a wonderful way for a spinner to avoid being overwhelmed during a sweater project.
My feeling is that some people don’t dare to start spinning for a bigger project because they get overwhelmed by the quantity they have to spin and then all the knitting there is to do, especially when you want to spin the yarn entirely on spindles. Mixing the spinning and knitting for the same project is more interesting; you get more variety and more freedom to choose what you want to do next as long as you don’t run out of yarn. It breaks the project down into smaller, less daunting parts. The only thing you might want to plan is to have enough fibre at the start, but even that is not necessary, there is always a sheep growing more wool.
Combo Spinning as a Reflective Practice: Intentional Gradients
words and photos by Gaelle Troude
Reflective practice involves thinking about your actions, learning from your choices, and using this analytic process to improve your current skills and your future experience as well as the overall process itself. As a mental health professional, this manner of engaging with one’s activity has become second nature. Spinning became a significant part of my life about twelve years ago and plays a large role in my work-life balance. Perhaps through the generalization of professional reflexes, I’ve paid attention to the ways in which certain fiber-related decisions may contribute to improved final outcomes, as well as the ways in which these outcomes, in turn, inform future decisions. I’d like to share my reflective journey through combo spinning in the hope that it may serve as a creative springboard for fellow spinners and single-braid-stashers.
The essence of combo spinning
Combo spinning may be understood as a way of combining several braids of fiber into a larger project, such as a sweater or blanket. The braids may be related in some ways – they may share some characteristics such as types of fiber, colors, textures – or they may not!
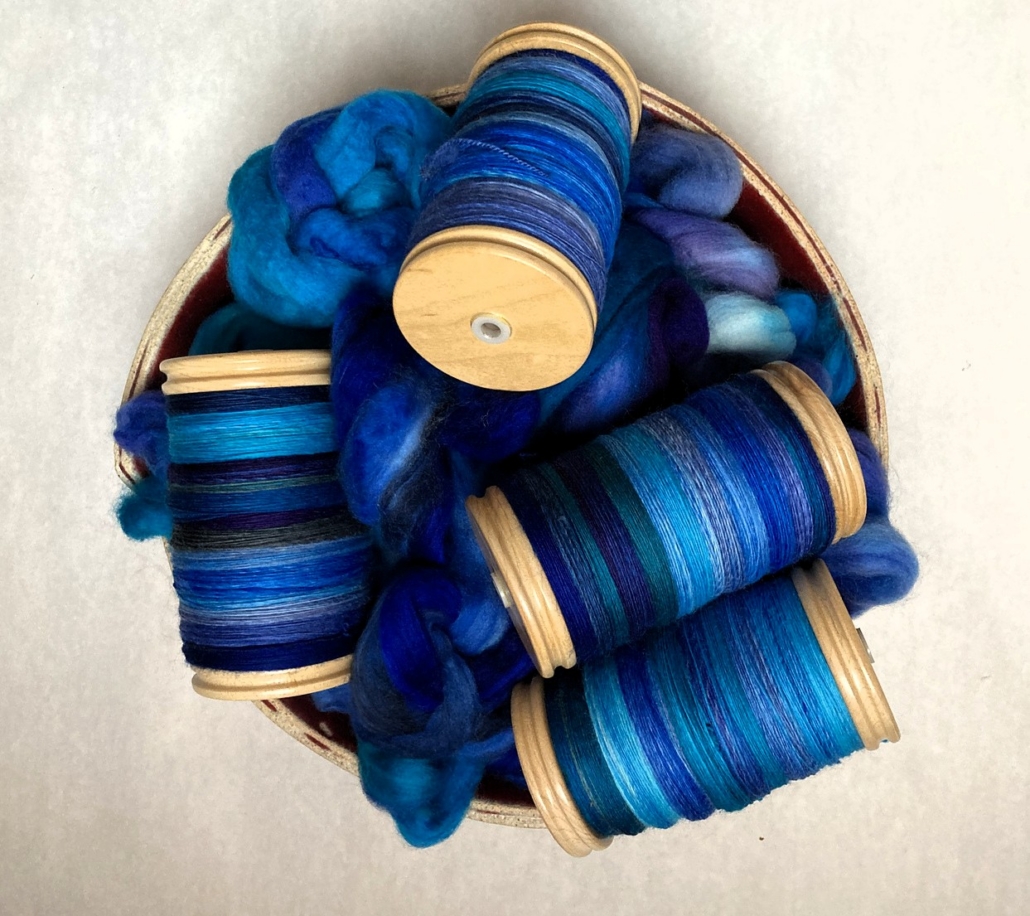
Combo spinning is a wonderful way of enjoying the many possibilities contained in one’s fiber stash. My personal stash, like that of many spinners, is largely made of unique braids of different colors, fibers, and preparations, which all look lovely on their own. But this collection sometimes proves challenging when considering a project requiring a larger yardage than, say, a hat or a pair of socks. This is where combo spinning saves the day.
The traditional way of practicing combo spinning involves selecting any number of braids, separating them into several lengths, mixing them up, and spinning away. I’ve enjoyed drawing randomly from a bag of fiber nests until my bobbin is full, then three-plying bobbins into a variety of skeins for a uniformizing effect.
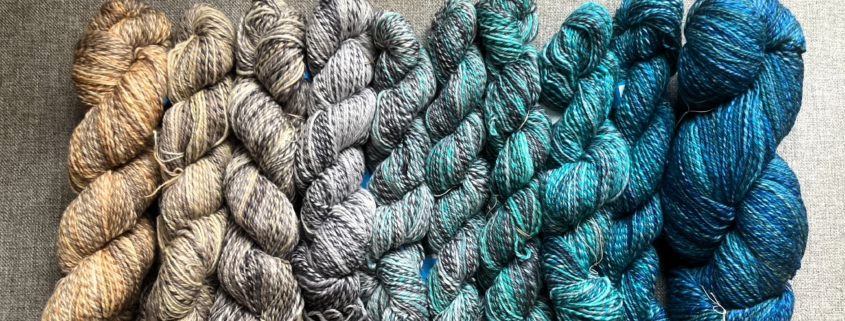
These bobbins will, one day, turn into matching sweaters for my children and their cousins. This combo spinning project yielded approx. 3000 yards of 3-plied yarn, from 921 grams of superwash blue, black, and turquoise merino mill ends, dyed by Fiber Pusher Fairy in Gatineau, Quebec, Canada.
A reflective twist on combo spinning: Intentional gradient, take one
While combo spinning may provide a delightful opportunity to reduce one’s fiber stash while exploring new manners of combining colors and textures, all the while enjoying a very creative way of interacting with fiber, I sought out a more deliberate experience this time around.
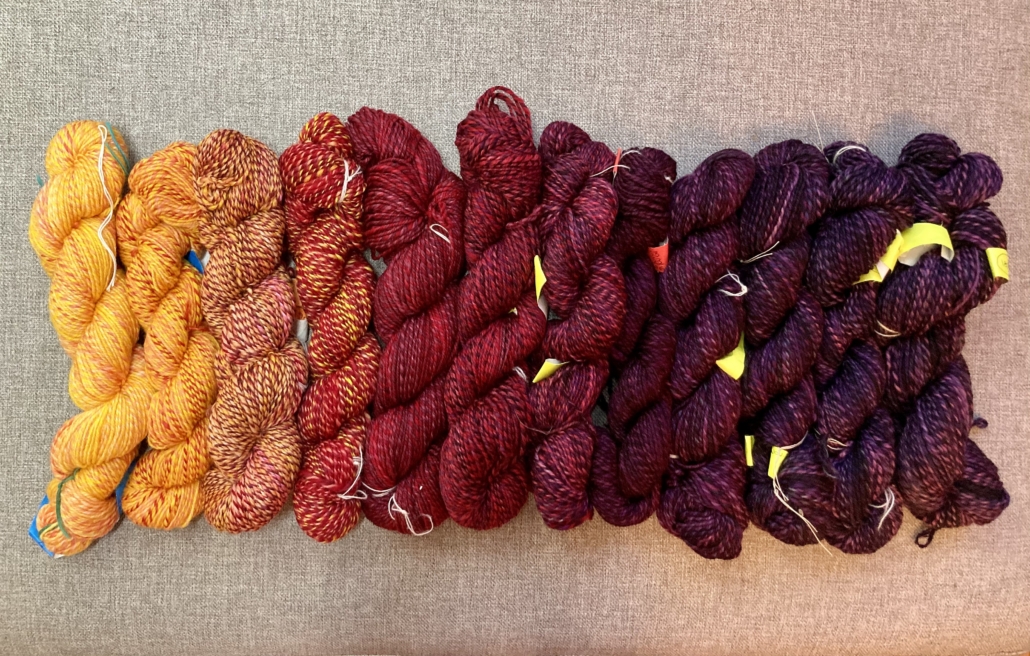
Four bags of superwash merino mill ends of different colors (yellow, red, burgundy, purple) had made their way into my stash and I was struck by the idea of spinning them together. I’ve always loved gradients and believed there was a way of turning these mill ends into one. I jotted down some thoughts and devised a way that could, perhaps, lead to such an outcome. It was upon drawing the three separate plies and coloring them in their own colors that the process became clearer to me.

In order to gradually move from one color to the next, every color goes from 3, to 2, to 1 ply per 3-plied yarn.
For example, the transition from yellow (Y) to red (R) to burgundy (B) to purple (P) goes as such:
Skein 1: (Y)(Y)(Y)
Skein 2: (Y)(Y)(R)
Skein 3 : (Y)(R)(R)
Skein 4 : (R)(R)(R)
Skein 5: (R)(R)(B)
Skein 6: (R)(B)(B)
Skein 7: (B)(B)(B)
Skein 8: (B) (B) (P)
Skein 9: (B) (P) (P)
Skein 10: (P) (P) (P)
For this first attempt, every mill end bag contained approximately 200 grams of fiber (Y: 192 g; R: 184 g; B: 213 g; P: 192 g) and each was separated into nine fiber bumps of approximately equal weight (21 g; 20 g; 23 g; 21 g). The bumps were spun as singles on three different bobbins and three-plied according to the color progression presented above, shifting gradually from one color to the next. To make the spinning process as smooth as possible, the bumps were kept in numbered baggies containing the three colors necessary for every skein. I spun one baggie at a time, one bump per bobbin, using my trusty Jensen Tina wheel. I then plied the three singles together using my Schacht Matchless.
The overall process took me from September to December 2024, spinning and plying here and there. It made for a very pleasant spin, respectful of my time and energy, as the baggies were relatively small, and my life was very full then! The baggie system made gradient combo spinning very manageable and allowed for quick bursts of mindful creativity in an otherwise busy schedule.
The result proved quite lovely, color-shift wise, and provided a total of 1944 yards from 781 grams of fiber.
| Skein | Composition | Yardage |
| 1 | (Y)(Y)(Y) | 160 yds |
| 2 | (Y)(Y)(Y) | 146 yds |
| 3 | (Y)(Y)(R) | 196 yds |
| 4 | (Y)(R)(R) | 152 yds |
| 5 | (R)(R)(R) | 152 yds |
| 6 | (R)(R)(B) | 174 yds |
| 7 | (R)(B)(B) | 184 yds |
| 8 | (B)(B)(B) | 106 yds |
| 9 | (B) (B) (P) | 170 yds |
| 10 | (B) (P) (P) | 174 yds |
| 11 | (P) (P) (P) | 144 yds |
| 12 | (P) (P) (P) | 186 yds |
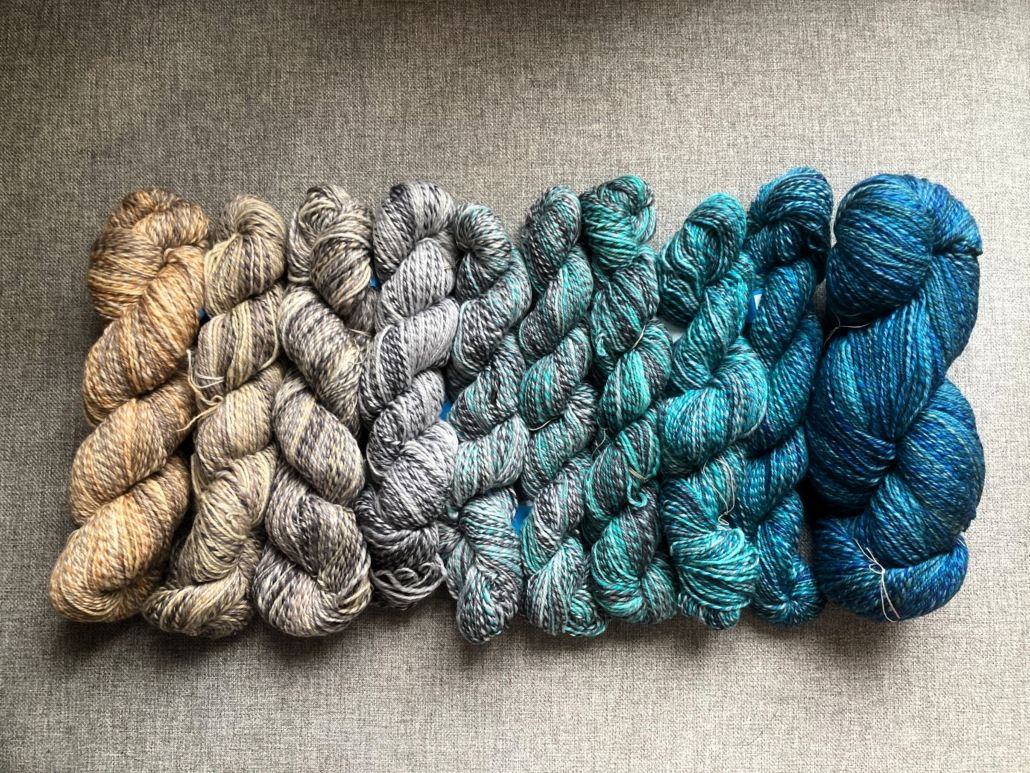
A second take on an intentional gradient
I truly enjoyed my first intentional gradient combo spinning experience and decided to give it another go, beginning in mid-February and ending in mid-March 2025. Once again, I dug into my stash of colorful superwash merino mill ends. My goal this time around was to use up as much of the fiber as I possibly could, minimizing leftovers.
To achieve this goal, I weighed every bag of mill ends carefully:
Beige (Be): 177 g
Gray (G): 184 g
Sky (S): 146 g
Dark blue (D): 250 g
I maintained the shifting color sequence described above over a three-plied yarn. However, instead of dividing my mill ends into 9 bumps of equal weight per color (which made for larger bumps for some colors than others, and therefore, more remnants), for this project, I changed the weight of the color bumps forming each skein to that of the color I had less of for that given skein. This approach was successful in using up most of my fiber. When I had more fiber in one of the initial colors (such as D), the leftovers were added into the skein containing three plies of that color.
Here is how it went:
| Skein | Composition | Weight of each color bump | Yardage |
| 1 | (Be)(Be)(Be) | 19 g, plus leftovers | 288 yds |
| 2 | (Be)(Be)(G) | 19 g | 176 yds |
| 3 | (Be)(G)(G) | 19 g | 180 yds |
| 4 | (G)(G)(G) | 20 g, plus leftovers | 172 yds |
| 5 | (G)(G)(S) | 16 g | 155 yds |
| 6 | (G)(S)(S) | 16 g | 144 yds |
| 7 | (S)(S)(S) | 16 g, plus leftovers | 150 yds |
| 8 | (S) (S) (D) | 16 g | 162 yds |
| 9 | (S) (D) (D) | 16 g | 146 yds |
| 10 | (D) (D) (D) | 28 g, plus leftovers | 486 yds |
I achieved my goal of including as much fiber in my project as possible. The leftover singles were minimal.
Some colors are more present than others in my second attempt, which makes for a different gradient than my first. Both are equally interesting and would make for wonderful projects. I’d like to knit myself a long cardigan out of this first intentional combo-spun gradient, and a woven blanket would be lovely out of the second.
I hope this process inspires you to create your own intentional gradient by teaming up single braids into a cohesive project that inspires you.

Textiles have been part of Gaelle’s day-to-day since childhood. She quilts, spins, weaves, and dyes in Montréal, Québec, surrounded by animals, children, and fellow artists.

Experiments in Joy
by Christina Socorro Yovovich
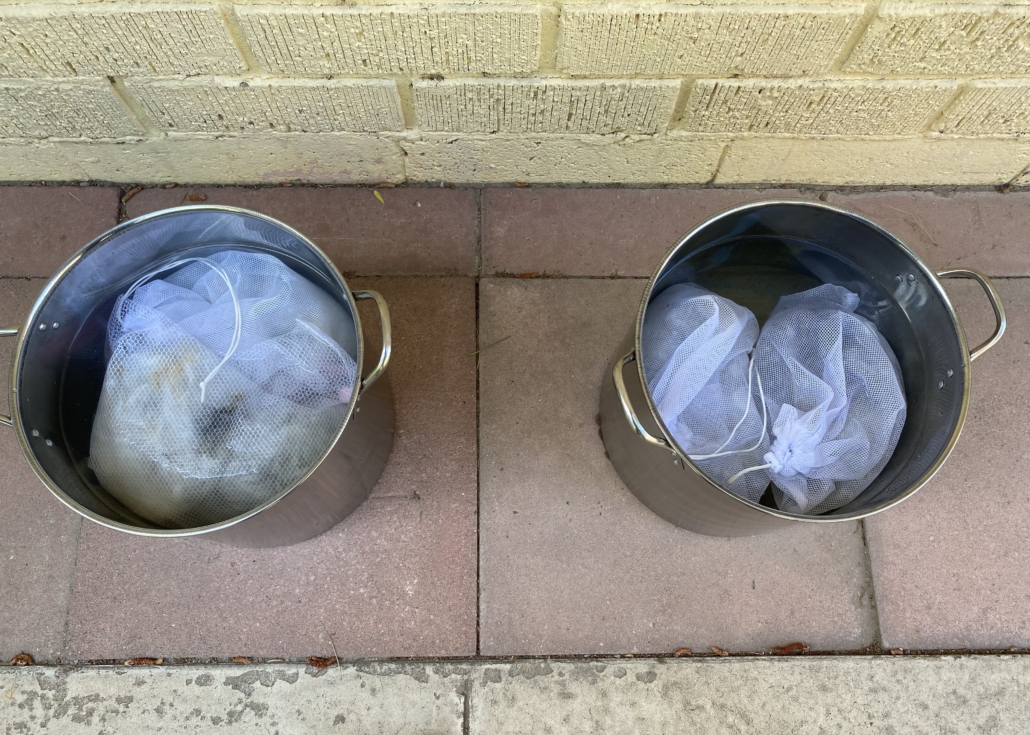
Late May in 2023 found me gleefully bent over steaming metal pots on my back patio in the early morning. I was scouring my first fleece. I didn’t know what I was doing. I’d started knitting in late January after a thirty-year hiatus. I’d started noodling around with a drop spindle in February. In April a friend had offered to loan me her unused Majacraft Suzie Pro and I’d accepted. Somewhere in there I’d decided to dive all the way down the fiber rabbit hole and process a sheep’s fleece.
I knew I didn’t know what I was doing. I’d done some reading online. I’d gotten a tetanus shot. But I didn’t have anyone to offer in-person advice, and I knew I could use some. Playing with the scouring pots had everything to do with a promise I had made myself when the year turned.
I’d told myself 2023 was going to be the Year of Chasing Joy. No worrying about if I was being silly. No worrying about shoulds. No worrying about what other people thought of me. I was going to pursue joy in the form of creative play by following my heart. And from the moment I felt the wool moving through my fingers as I re-learned how to knit, that joy largely came in the form of fiber arts.
It took some work to find that local Shetland fleece. Lots of searching online and sending out emails. But eventually I found a local shepherd willing to sell me this wonder. I bought it from her at a fiber festival, brought it home, unrolled it on my back patio, and tried to guess which parts of it had belonged to which bits of the sheep. I separated it into a few bundles and set two of them to soak in my large, covered metal scouring pots overnight.
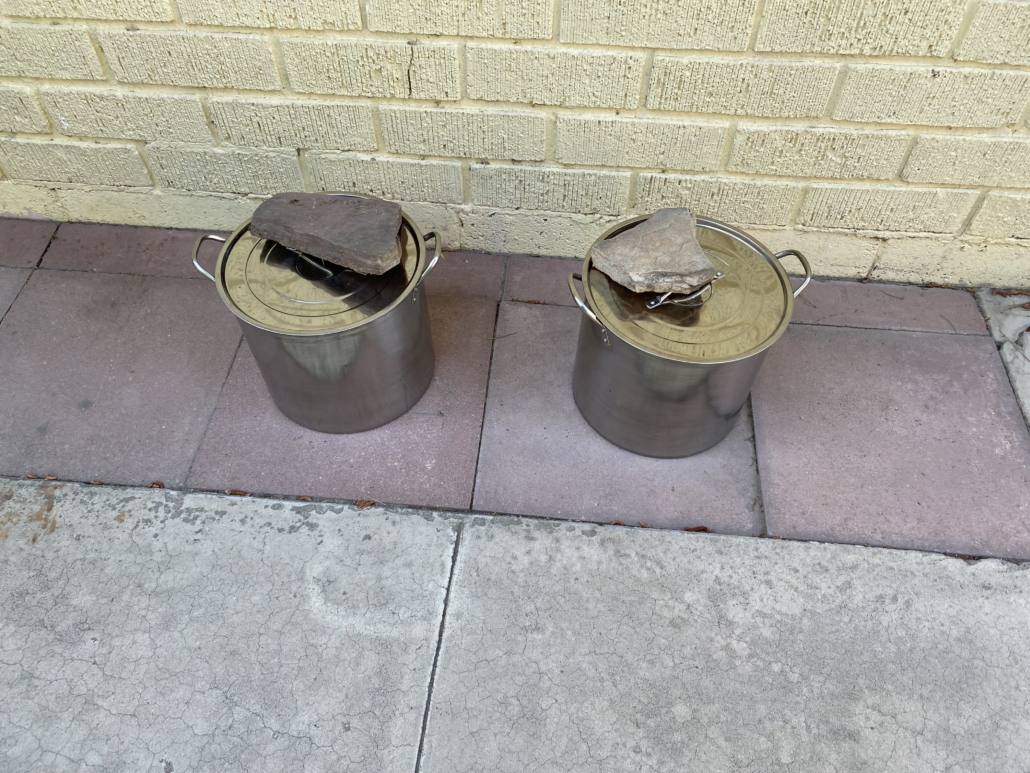
The next morning, as the sun rose, I set myself to scouring. I hauled hot water from the kitchen sink out to the patio. I added what I hoped was the right amount of Unicorn Power Scour. I felt like a sailor trying to navigate by the stars after reading a couple pages on the internet. Would I felt the wool? Would I get it clean enough? Would I manage to comb it after it dried? What the heck was I doing?!
It was glorious. I giggled to myself all that morning. It had hit me sometime that spring, at age forty-nine – when was the last time I’d done something I didn’t know how to do? I learned, as I struggled first with the spindle and then with the borrowed wheel, that I dearly loved doing things I didn’t know how to do. Especially things that were low stakes in the moment. Nobody but me cared if I produced usable yarn. It was play. Experimentation. I was trying things to see what would happen.
What happened the morning I scoured wool is that eventually I carefully laid some of the wet wool over a screen on a drying rack and I left it, confident the New Mexico sun would do its job quickly. In the afternoon, I checked on it. It was dry! Sort of fluffy! Definitely not felted. And… as I looked closely, I saw something. Thousands of somethings, or at least hundreds. Somethings out of a replica of the movie Aliens. I saw what must be tiny eggs nestled in the fiber, and out of many of them were the heads of little white grubs, bursting forth. They weren’t moving. Probably some, or several, parts of the scouring process had killed them. But what about the tiny eggs without emerging grubs? What, exactly, was I supposed to do?
I went to the internet and asked a spinning chat group for guidance. The response was unanimous: Do NOT take that wool into the house. Bin it. Or use it as mulch in the yard. Do not even try to spin it. I looked again at my horror show of a scoured fleece. All that work and time and even a tetanus shot. All those pots of water hauled outside.
All that fun. I started to laugh. All this work for wool full of grubs, and it was hilarious. When was the last time I’d worked so long for something so disastrous? And when was the last time I’d felt so much glee in the space of a season? In one sense, my great scouring experiment had failed. But in another, it was part of a long series of things that were giving me life.
I’ve scoured wool more successfully since – though not large amounts, because my bad knees make hauling all that water tricky. I’ve kept on learning more about knitting and spinning. I have a beautiful Schacht-Reeves now that lives in the house with what is now my Majacraft. Always, I experiment. To become a better fiber artist is one reason. But more than that, to become a more joyful human.
I live with bipolar and PTSD and in much of my adulthood, joy was difficult for me to access. That isn’t a problem anymore. I have my joy every day, reliable as the sun. But also, as tricksy as the wind. If I feel myself becoming too sure of myself, I experiment. Try a new thing. Recently, I took a nålbinding workshop. Now I’m learning to weave on an inkle loom. I’ve started sketching daily with fountain pens. I’m not necessarily good at all these things, definitely not at first. But the play is in the experimenting and the joy lives there too.
It’s 2026 now and I no longer need to label this the Year of Chasing Joy. I could label my life that way, maybe. I have a life of chasing joy. That doesn’t mean I don’t face the hard things. I’ve been doing trauma work this past year that goes beyond anything I once thought myself capable of. But beside the hard stuff is play, experiments, joy. It has been years since I was listless and bored. Perhaps that chorus of grubs bursting forth were a reminder to celebrate my path – the ugly, the ridiculous, and the joyous all bundled together.
Christina Socorro Yovovich is a Latina diagnosed by professionals with bipolar and PTSD and by herself as autistic and ADHD. When she isn’t parenting, writing memoir, or making art, she writes fundraising copy for progressive organizations. You can find her at christinasocorroyovovich.com or as Desert Agave Fiber Arts on YouTube.
Ask Jillian: Playing with Fractal Spinning
Do you ever use the fractal style spinning for anything else besides a single braid?
~Kate, Taos, New Mexico
Hi Kate! I do! I first read about fractal spinning in an article by Janel Laidman way back in 2007. I like to use the technique to break up hard or clear striping in braids that are dyed with a pattern, but I also use it to create more marling in other yarns.
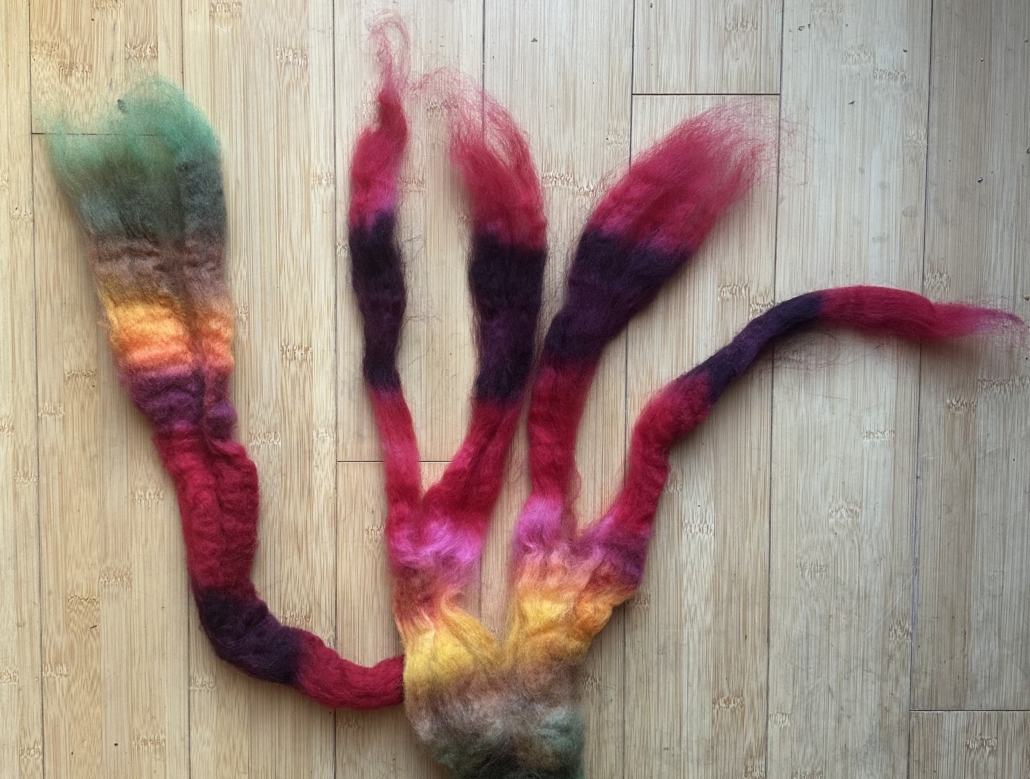
Here’s an example of a fractal spin with a single braid dyed to stripe.

I split a braid in two lengthwise and spun one half on a bobbin. I divided the other half into four parts lengthwise and spun them one after the other on a second bobbin. Then I plied them together.
Each time a braid is stripped narrower, each color is shortened. By plying different-sized divisions together, I’m combining long and short color runs within a colorway. This fractures the stripes so that the colors meet up in some spots, marl in some spots, and meet then marl in some spots. The difference between a matching ply and a fractal ply looks like this:
I love the look of the fractal ply because it has motion and visual texture and it’s just more exciting to me than simple stripes. Of course you can play with the numbers of divisions and the order of the colors and the number of plies. It provides endless fun.
I use a fractal-style division anytime I want colors more mixed up. The results are usually pretty subtle, but I like them.
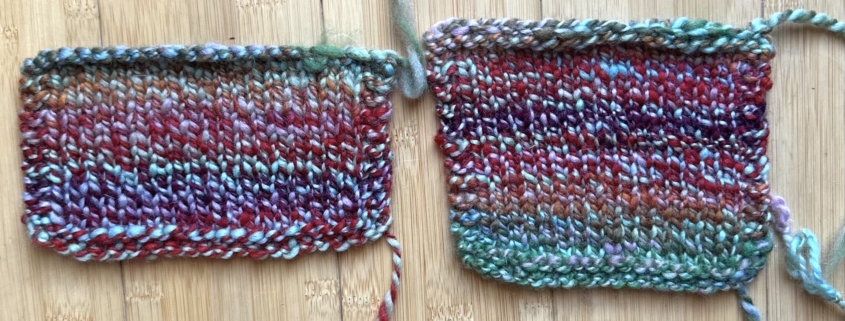
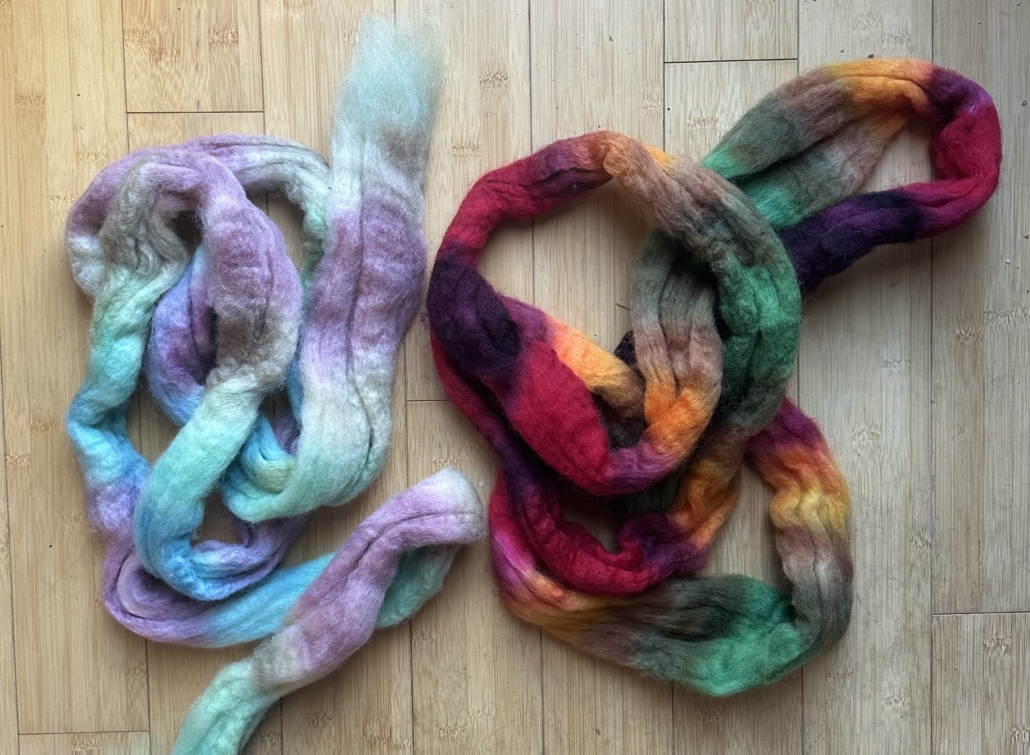
I did it when I combined these two braids:
I used the darker braid as the long color and spun it onto one bobbin. I divided the lighter braid into four pieces and spun them in succession on another bobbin, then plied.
It ended up looking like this:
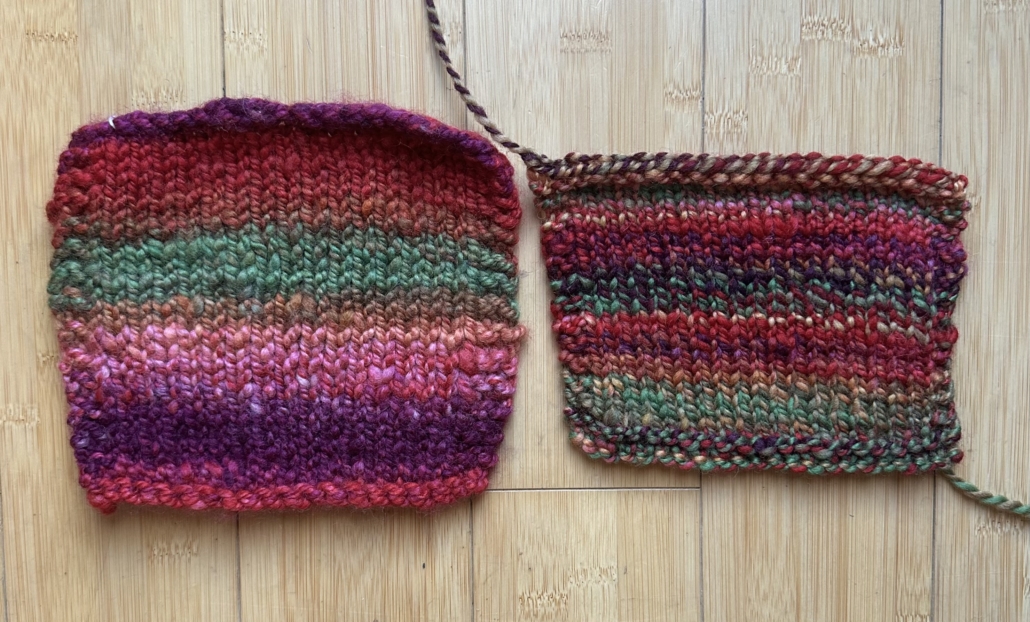
Here’s a comparison between one ply of each: both long color runs (on the left) and the fractal division (on the right).

Like I said, it’s subtle, but I like how the lighter colors seem sprinkled or more dispersed over the darker color braid as it rolls through its color pattern in the fractal division. The 2-ply with equal amounts of color runs looks more like two colorways competing for my attention.
So play with that fractal-style division. You’ll make amazing and sometimes surprising yarns. My next fractal play is going to be combining fractal division with a cable structure.
Want Jillian or Jacey to take a stab at your question? Tell us what you want to know:


Leave a Reply
Want to join the discussion?Feel free to contribute!