

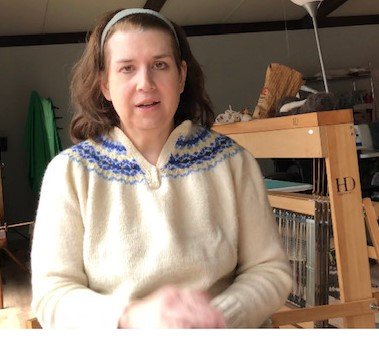
Mixing Things up for a Sweater
words and photos by: Johanna Carter
I always admire those who are able to spin mountains of yarn for a big project, ready to knit a wonderful sweater or cardigan. It is a satisfying feeling when you finish all that work, especially if you started with washing and combing the wool or even raising your own sheep.
Mixing spinning and knitting
The typical way to work through a larger project is to spin all the singles first and ply them in a particular order so you get the yarn even throughout the whole project. I don’t have so many bobbins, but my bigger problem is that I am quite impatient and want to get on with knitting once I have an idea. And normally, my brain is full of ideas for fibre work and the limit is the time, as I am a musician and teacher. I can’t sit at the spinning wheel for a long time if I’m not on holiday, so during the school year I mostly knit, and during the holidays I can dye, spin, use my drum carder, and do lots of fibre work. The only time I was able to produce bigger quantities of yarn before I knitted them up was during the Tour de Fleece in the two years during the pandemic, when we did not go on holiday at the beginning of July.

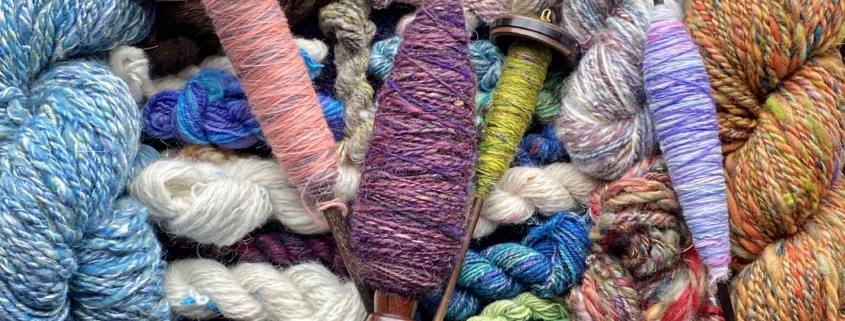
A highly photogenic collection of naturally dyed fibres.
I like to finish knitting one big project like a sweater or cardigan before I start the next one, or at least until I can’t carry it in my bag easily anymore, so I have an excuse to begin the next one. Sometimes it is good to have a second project on the go – I call it mindless knitting, where I don’t have to look very much – which I can keep my hands busy during Zoom or other meetings, which helps me listen.
Mixing colours and fibres
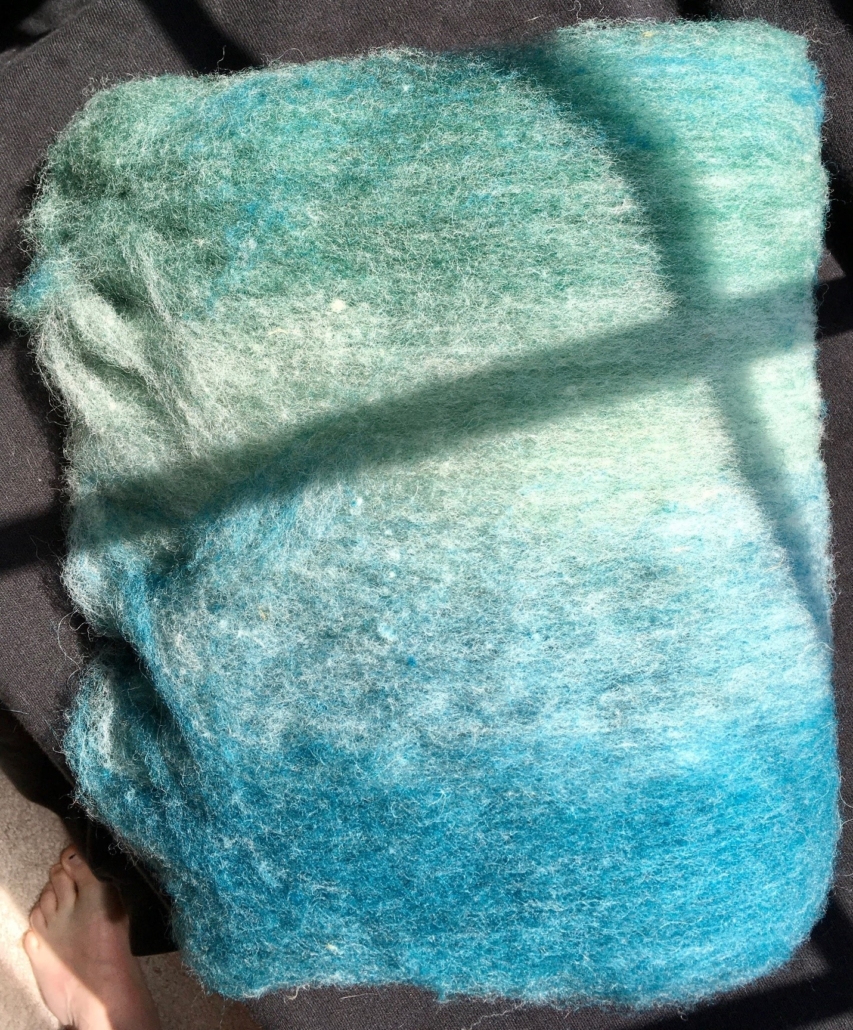
Usually I dye my yarn with plants which I collect in the woods or get from garden flowers. I also use cochineal and indigo, which I buy, to get lots of different colours. I really love the greens and blues I get from dyeing with indigo. I have lots of dyed wool, and all those colours give me inspiration for further projects.

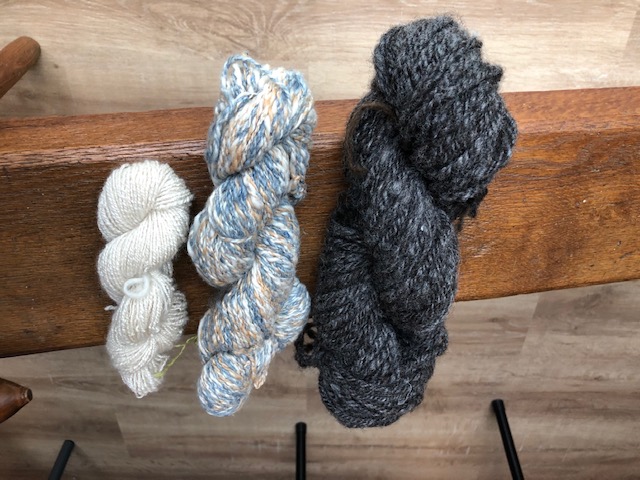
Beautiful greens and blues dyed by the author using indigo and other natural dyes.
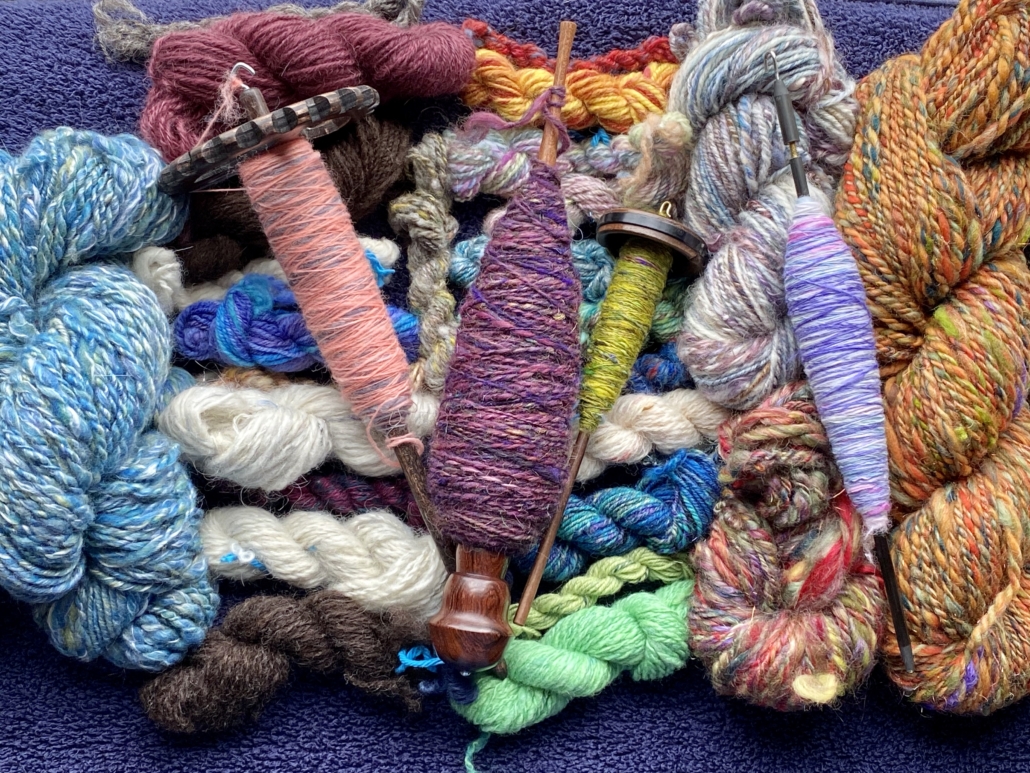
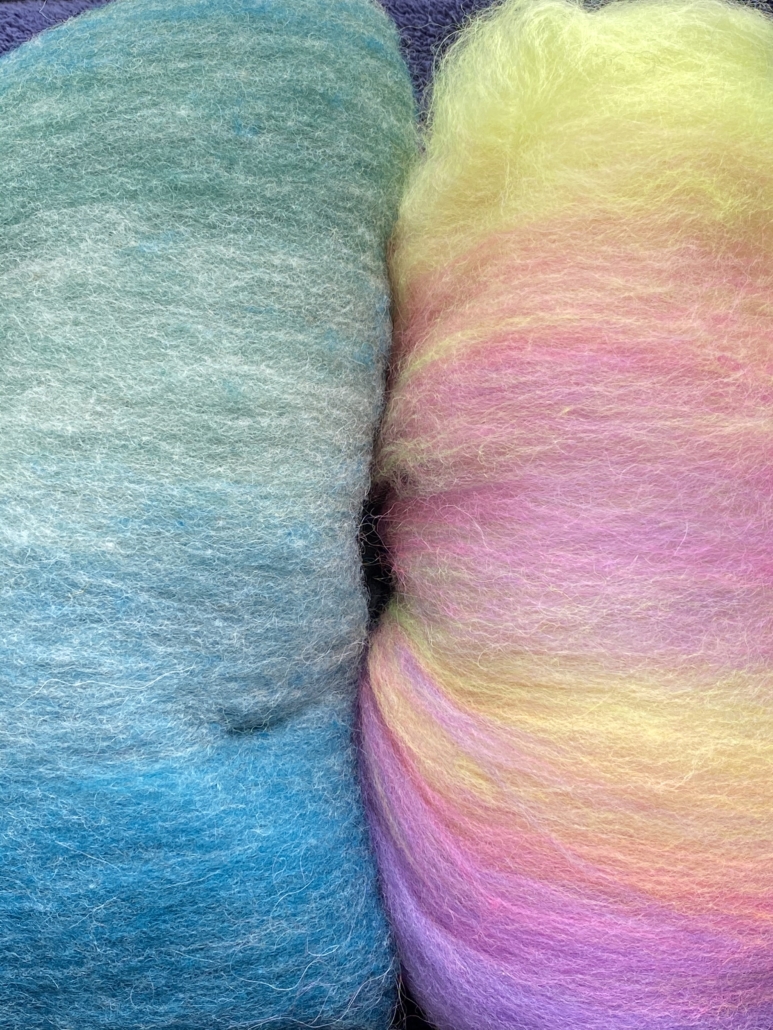
Blending the wool on the drum carder I can get even more shades. I like to blend with fibres like silk, alpaca, or plant fibres, and I love sari silk, to get those little bits of colour in my yarn.
Fibres of different types and colours are blended on a drum carder for elegant results.
When I have an idea for the next sweater, I start carding, and then I can begin to spin. Once I have spun enough yarn – say, for one day – I cast on and start knitting, usually top down, so I don’t have to decide too much in advance about length and width.

An idea for the author’s next sweater in the gathering stages.
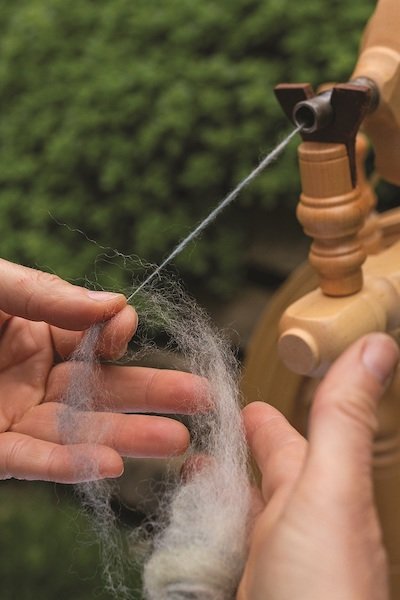
When I spin on my wheel, I have to sit at home, but while spinning I can read a book or talk to others during online meetings. I also like to spin on my spindles, and that works on a walk, or a museum visit. I take them on holiday as they don’t need much space, and when I spin for a lace shawl, I don’t even need much wool either. At home there are spindles all over the place; I can spin when I am waiting for the kettle to boil, when the computer is slow, when I am cooking. Like that I can make good use of a short time and the yarn still grows.

Knitting as soon as the yarn is spun helps the author complete sweater projects in a timely manner.
I can take my knitting almost everywhere, which is why I don’t want to wait to get started until I have spun all the yarn for a whole sweater. I knit at home, on the bus or train. The only thing I have to make sure of is to be one step ahead with the yarn.
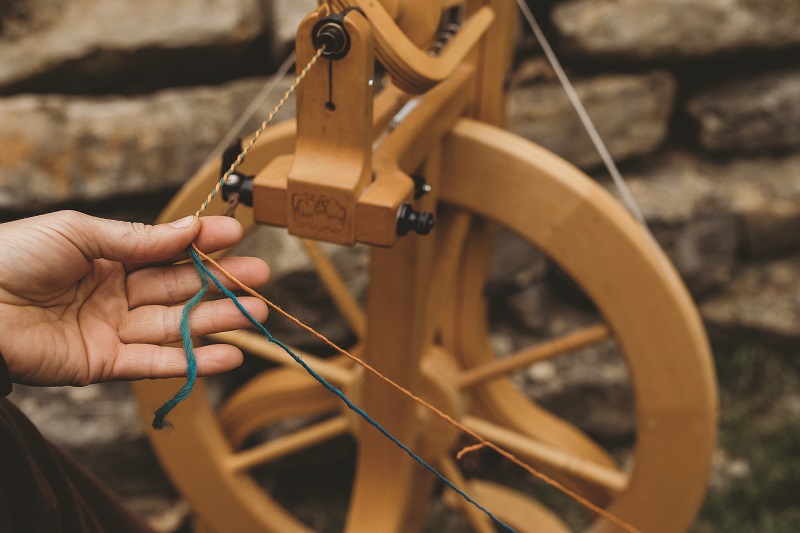
I love to knit Fair Isle sweaters. My favourite method is to use only one bobbin, which I don’t even fill, because I need smaller quantities of lots of colours. Then I wind a ply ball and ply it on itself. For that I put my thumb through the ball, so I can tension the two singles with my fingers and they don’t get tangled, as long as my thumb (or a cardboard roll or a pencil) stays in the middle. I don’t have any leftovers from plying, and it is quick when I suddenly need more yarn.

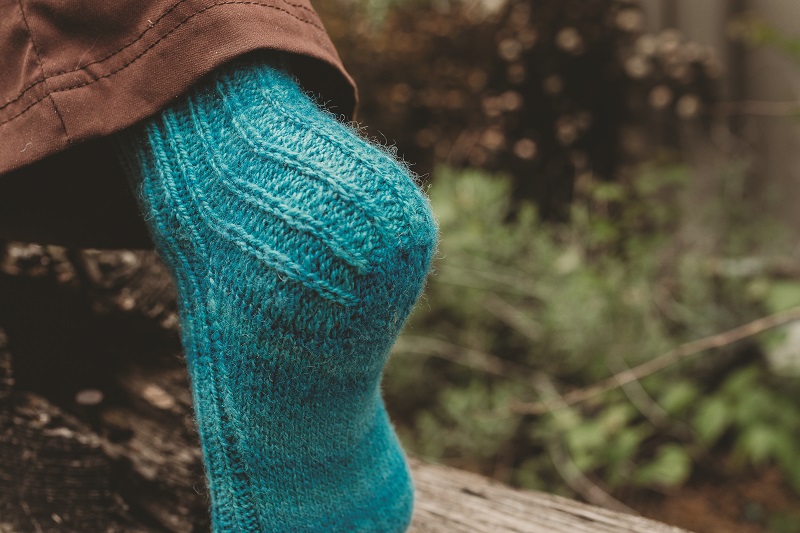
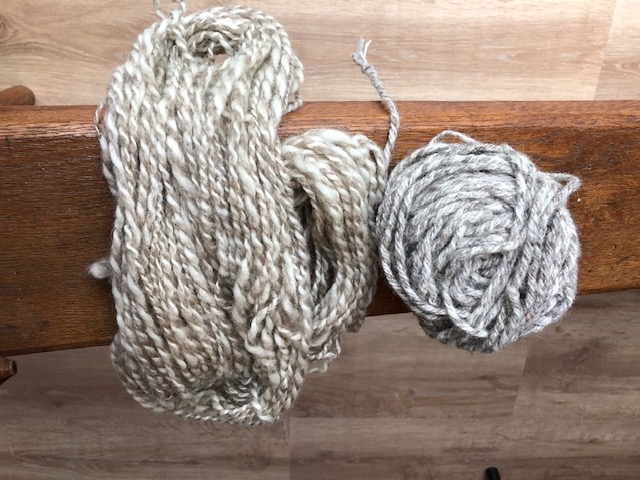
Several charming sweaters dyed, spun, and knit by the author.
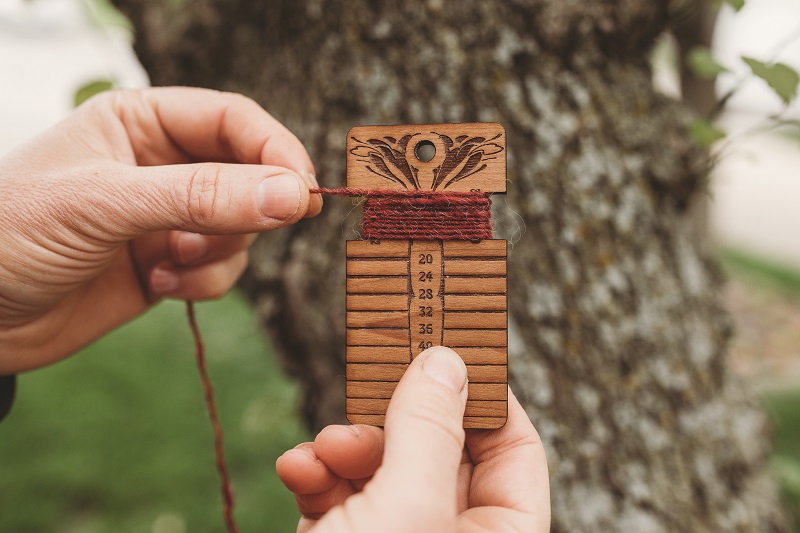
I have never had problems with the yarn not being consistent enough throughout a project. I just know what yarn I want and my fingers seem to remember what to do. I am sure it is good advice to have a little card tied to the spinning wheel with a bit of the singles you are aiming for, so you can check and make sure you are spinning a consistent yarn.
Mixing breeds
There are so many different breeds, but some of my favourites are Shetland, BFL, and Jämtland – a Swedish breed. After dyeing them, I often forget what I have used, so when I do a new project it often turns out that I have used different breeds and fibres just to get the right colour. For the Fair Isle knitting I want to juggle lots of colours, which is more important to me than making a sweater out of only one breed.
Recently I made a pullover for my husband using about 12 different breeds and colours, even mixing short and long draw. For me it was a breed experiment and a way to use up lots of smaller quantities of wool I had in my stash. For that sweater I used combed top without blending.

Mixing in knitting during the spinning process is a wonderful way for a spinner to avoid being overwhelmed during a sweater project.
My feeling is that some people don’t dare to start spinning for a bigger project because they get overwhelmed by the quantity they have to spin and then all the knitting there is to do, especially when you want to spin the yarn entirely on spindles. Mixing the spinning and knitting for the same project is more interesting; you get more variety and more freedom to choose what you want to do next as long as you don’t run out of yarn. It breaks the project down into smaller, less daunting parts. The only thing you might want to plan is to have enough fibre at the start, but even that is not necessary, there is always a sheep growing more wool.

The Basics Issue is coming: sneak peek
The new issue of PLY is almost ready! Make sure you get your subscription in/renewed by August 25th to get this fantastic issue.
The Basics issue is anything but basic! Since all of us learn about spinning in vastly different ways, in various places, and at different times, we’ve all got knowledge gaps. This issue strives to rectify that, informing newer spinners while exciting those who have been adding twist to fiber for some time – from what you should have in your spinning toolkit to why staple length matters to different types of joins to what to do if a strand breaks while plying (2-ply, cables, chain plied, etc). We cover balance and measuring your yarns as well as color, treadling, and the difference between woolen and worsted. Plus, there are some fantastic projects you’ll want to knit over and over, in all the yarn sizes! This is an issue to keep and refer back to again and again.

PLY Magazine believes that Black lives matter, as well as LBGTQI+ lives. Those most vulnerable and persecuted in our communities deserve our love and support. Please be good to each other.

Putting Your Best Skein Forward: Tips for Preparing Skeins for Fair Competition
words and photos by Sue Meissner
You may be considering entering a skein in the handspun competition of a fair, but you may not know how to enter. Or you may have entered but did not have a pleasing outcome. Let’s talk about how to put your best skein forward – not in terms of technical spinning but the very basics of getting your handspun skein pleasantly noticed by the judge. These top 5 tips will improve your chances even before the judge looks at your twists per inch.
Read all the entry rules for the handspun category
Each fair publishes its own entry or program book. These list the entry classes or categories for fair submissions, and in the thick, small font books, it can be easy to get overwhelmed by unfamiliar terms. For county and state fairs in the U.S., the 2 broad entrant divisions are 4-H and Open Class, though actual nomenclature could be different from state to state. Unless you are entering under the county youth agriculture club, you will be considered Open Class, a catch-all for anyone not in 4-H. If you are a youth but not in 4-H, you too can enter under the Open Class division.
Handspinning may take a bit of searching to find in the program book as it may be a subcategory under Needle Arts or Fiber Arts. Getting the correct category or class number is important. You must know the specific competition number in order to enter. You could lose valuable points or even be disqualified if you do not enter the correct competition class number. Double check or have the entry fair official verify you are submitting the correct item in the correct class number. Fair officials and judges are not allowed to correct tag entries once submitted.
Next, carefully read the rules for handspun skein entries. Rules may be revised with updated requirements. Competitions may have very specific rules on weight, yardage, ply, fiber content, tie up, number of skeins per class, accompanying material, and label requirements. Be sure you read every word, and check the next page as rules may carry over. It is up to the entrant to have read and complied with the published rules.
Submit your best yardage
Each competition should have printed rules on yardage or weight required. Read these carefully. A search of 5 state fair competitions listed ranges of 1-oz to 2-oz skeins depending on the actual entry requirements for that particular class. Why fixed lengths or weights? Judges need to see a certain length of yarn to properly evaluate. And if the skeins of a particular class are set side by side, it makes judging easier as the skeins are approximately the same size.
Some spinners are so thrilled with their bobbin full of yarn that they feel they should submit every inch. That is not required. Choose the best continuous length of yardage that meets the minimum requirement. It is common for the first yards and final yards to differ from the center section. Chop off those uneven, lumpy beginning and ending yards and keep the best continuous center section. Always put your best yardage forward.
Present skeins well
One of the most important things you can do is to present a beautiful skein. That means well tied and labeled according to the rules. Some fair books are explicit about the length, weight, or tie up of the skeins. Even if entry books are vague, skein presentation follows some basic conventions.
Some fair entry rules require 1- or 2-yard wound skeins. To achieve this, be sure your niddy noddy measures a standard length. Use a tape measure and wind around as if you were winding your yarn. My first niddy noddy measured 54 inches. I decided to invest in 1-yard and 2-yard niddy noddys. If you are required to submit in metric, use a metric niddy noddy.
How do you know which length to use? If the competition rules specify, apply those. A general rule of thumb is to use a niddy noddy of sufficient length for the type of yarn and yardage or weight required. So, for a 1-oz laceweight, I would probably use the 1-yard niddy noddy. For thicker worsted yarn, I would reach for a 2-yard winder. Basically, what I want is to make sure it will not look too thin nor too thick as a skein.
Some competitions may emphasize weight minimums. Be sure to pre-weigh your entry skein at home. Yes, some judges do weigh if they suspect the minimum weight was not submitted. Yet overly heavy skeins with excessive weight will not win any bonus points.
Once the yarn is wound on the niddy noddy, be sure the ends and the yarn threads are secure. When you get to the end of winding on your best continuous length of yarn, be sure you secure the beginning to the end of the yarn with a little knot. That will make a continuous hank with no loose, dangling ends.
The figure 8 tie in 3–4 places is a standard tie up. This tie up is often specified in the entry book rules. Beginner spinners may have been encouraged to use a half hitch method whereby you take the final length of yarn and make a half hitch with the same yarn, but do not use this method for competitions. Your skein may be untwisted and examined closely and needs to hold up under that potential handling.
Finally, after you have measured out the required length and used an appropriate tie up, twist the skein until the ends meet. This helps with presentation and handling during competition.
A beautifully tied and presented skein demonstrates the spinner understands the basics of skein tie up and presentation. And you want your skein to look as tidy and neat as possible to catch the judge’s eye. Yarn that fails to meet required length, weight, tie-up or presentation may easily be set aside by busy judges.
Note: Novelty yarns may only require a tied hank and not twisted upon itself. The rules may mention how specialty yarns should be presented.
Label skeins properly
A review of state fair guidelines shows most require not only the standard tag with class number but also information such as end use, which is what this yarn would be best used for. So a laceweight could be labeled “for a lace shawl.” It would not be labeled for a tote bag. Although this may seem obvious it shows that you the entrant understand an appropriate use for this particular yarn.
Moreover, you may be required to include other information such as ply, yardage, weight, fiber content and percentages, spinning method (e.g., worsted, woolen), or kind of spinning for novelty yarns (e.g., core spun, bouclé). Some of these may not be required but are good practice in my opinion.
Where should you put that information? My review of a few fair books says it may be written on the back of the entry tag. Other competitions specify a separate 3×5-inch information card attached to the entry tag or skein.
Supplemental submissions may also be required. For example, one fair required a 4-inch square knitted or crochet swatch along with the yarn. In such competitions, do not be surprised if your entry gets disqualified for not submitting the additional swatch requirement. Why would a swatch be required? Seeing how the yarn looks in a piece gives extra attention to balance, ply, and consistency as that yarn is used. It may also help judges scrutinize whether the yarn is truly handspun and not a commercially spun and relabeled submission.
States may promote “Made in X state” competitions that require other supporting documentation such as sales receipt from a state producer and/or submission of a staple of raw fleece. These additions help verify the fiber meets the class competition requirements. Special prize money has been set aside to promote state producers, and integrity of the stipulations needs to be upheld.
Other considerations
You have spun, tied, and labeled your skein beautifully, but it can still get disqualified. How? It was submitted under the wrong class number.
Why would this happen? Most competitions limit one skein per entrant per class. So, the entrant who really wishes to submit 2 skeins may submit the second into any other category. But a 2-ply 100% wool worsted spun skein does not belong in the alpaca/llama class, so choose the category appropriately.
In an effort to keep abreast with current spinning trends, fairs have revised and even expanded categories to encourage more submissions. There are unique categories for exotic fibers, plant fibers, camelids, and silks. There are entry categories for beginners, youth, or seniors. State-sourced fleeces and fibers are not unusual. Therefore, consider all the listed categories your skeins could be entered under. And if you have 2 skeins in mind, choose the category that best fits the skein, fiber, and your experience. Often the more specialty fiber or yarn categories have fewer entries, thus increasing your chance of winning.
Entering handspun yarn competitions can seem intimidating, but the above tips will make sure your skein is accurately and beautifully presented. Judges are human. They are under a lot of pressure to do a lot of work in a limited amount of time. One way to reduce that workload is to assign fewer points or even disqualify skeins that do not meet the printed requirements so their most valuable time can be used for actually judging the spinning.
It may seem weird to emphasize rules over the finished yarn. Isn’t a competition about judging spinning? Of course, but once the minimum requirements are met, that is when a judge brings out measuring tape, WPI tools, and linen counters for actual yarn scrutiny.
Much of a yarn competition is actually up to you. Simple attention to detail in terms of skein presentation and entry accuracy will put your best skein forward. Who knows, you could very well end up with Best in Show.
Sue Meissner’s fiber journey has led her to work through the Old’s College Master Spinner Program with her current thesis project spinning linen and metallic thread for 17th-century English bobbin lace. She has been a fair judge for several years and is in the process of opening a fiber arts shop called Nauvoo Fiber Arts in the 1840s tourist town of Nauvoo, Illinois. Her historical spinning chat and fiber arts tutorials are on her YouTube channel, Spinning the Past as well as on Facebook. And she is pleased to announce the imminent launch of a new historical handspinning/fiber arts podcast, The Spinner’s Craft.
PLY Magazine believes that Black lives matter, as well as LBGTQI+ lives. Those most vulnerable and persecuted in our communities deserve our love and support. Please be good to each other.
Reader Feature: Ilona Vitti
Although disappointed at having PLYAway canceled this year, Ilona didn’t let that stop her from expanding her spinning knowledge and experience.
Tell us a little bit about yourself and how you got started spinning.
My alter ego is a cat, so curiosity must be satisfied. Every year at the Kansas City Renaissance Festival, I stop at the spinners and weavers area, watching as they commit acts of magic. Turning fluff into string, string into yarn, yarn into shawls – magic. One year, I was fascinated with the continuous strand weaving, the next, spinning. The week after I interrogated the poor spinning demonstrator, I found a small shop in downtown Kansas City where I acquired a spindle made of an old CD on a stick and some wool dyed by the proprietress. She showed me the basics, and I left to return to my loft studio apartment in the River Market to practice, much to the amusement of my two cats. I watched You Tube videos to see what in blue blazes I was doing wrong since my spinning didn’t look anything like what I had seen at the Ren Fest. I took classes at the Yarn Barn in Lawrence and vvveeerrryyy slowly started to produce something that looked like string if you squinted your eyes just right. Queue the training montage as the years pass, tweaking my spinning technique with a lot of practice, until one day I actually made yarn. On that day, I added “Spinner” to my self-description list of attributes.
Do you have a favorite type of yarn to spin?
Most of what I have produced has been a basic DK two-ply, but chain plying has become my latest fascination.
What do you like to make with your handspun yarn?
I’m supposed to actually make something with my handspun yarn?? I like it as the art installation it currently is – a pile of woolly satisfaction.
How long have you been reading PLY?
When was the first PlyAway? Right after that, I started reading PLY. I didn’t know it existed until I heard of a new spinning conference taking place in downtown Kansas City. Of course I learned about the conference too late to be able to take any classes, but I made a point to shop at the marketplace. I may have purchased a bump of a Merino silk blend specifically to keep on my desk at work just so I could pet it.
What do you look forward to most when you get an issue?
Learning a new skill!
Tell us about a project you worked on that was inspired by an article, project, or issue of PLY (or in your case, not being able to have PLYAway).
So, this answer requires a longer story. On October 12, 2019, I was at my desk, refreshing the PLYAway website until registration became active. Quick like a bunny, I signed up for Exploring the Drum Carder; Adventures in Drumcarding; Blending Boards: The Good, The Bad, The Ugly; and a couple of other classes. You see, I had attended a Nerd Girl Yarns Retreat earlier, and they had a drum carder we could play with, ummm, I mean, that we could try out, blending our own batts. I was hooked and wanted to learn more. Queue stalking the PLYAway website for blending classes.
On the day I signed up for my classes, I was triumphant. On the day PLYAway 5 (2020) was cancelled, I was despondent. Okay, now what? I still wanted to learn how to card my own batts, so I took the refund from the classes and bought a drum carder. The week approached when we should have been attending PLYAway, learning new things, and even though it was cancelled, I still had the week off from work. I still wanted to learn new skills. I decided to create my own set of classes to learn about carding, dyeing, and spinning across the top. Flipping through my stack of PLY magazines, I found articles I could use to set up my own classes. I created a schedule for my Craft Camp: Monday morning was for blending, Thursday afternoon was for dyeing, etc.
Monday morning rolled around. After a traditional PLYAway breakfast of a Panera bagel & schmear, I fired up the laptop. Spending time perusing YouTube, I watched various videos on how to use the drum carder. Pulling out the Woolen issue of PLY from Winter 2013, I studied Lacy Ziemkiewicz’s article on “How to Card Striped Batts” and read Jillian Moreno’s article on “9 Ways to Spin a Batt.” Okay, if I make a striped batt, I could actually spin it into something cool…
I broke out the roving I had ordered from Bartlett Yarns after reading “Vanishing Fleece: Adventures in American Wool.” It was a very toothy, woolly wool that would be great spun up woolen-style.
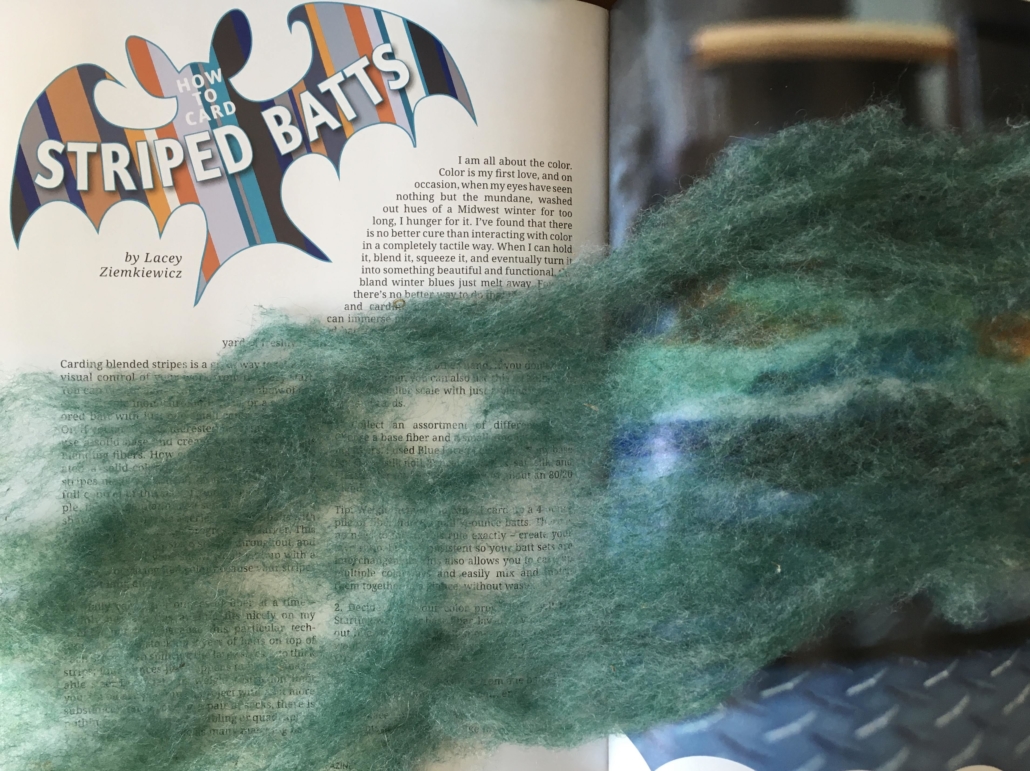
Following the article step by step, I finally pulled a beautiful striped batt from the carder.
I’ve created several striped batts since then, and they lie proudly on the shelf, basking in the admiration of those who visit with fingers itching to pet the softness.
Have I actually spun anything from them? Oh no, not yet. That may happen the next time I declare a Craft Camp week off from work. If it’s going to be a staycation, I might as well still have fun learning, right? After all, I still haven’t tried out Jacey Bogg Faulkner’s article on “Lying About Longdraw: Helping spinners get from worsted to woolen”…
You can find out more about Ilona on Ravelry as Crafti.
If you’d like to participate in an upcoming reader feature, fill out the reader feature form and Karen will contact you.
PLY Magazine believes that Black lives matter, as well as LBGTQI+ lives. Those most vulnerable and persecuted in our communities deserve our love and support. Please be good to each other.


Leave a Reply
Want to join the discussion?Feel free to contribute!