

Mixing Things up for a Sweater
words and photos by: Johanna Carter
I always admire those who are able to spin mountains of yarn for a big project, ready to knit a wonderful sweater or cardigan. It is a satisfying feeling when you finish all that work, especially if you started with washing and combing the wool or even raising your own sheep.
Mixing spinning and knitting
The typical way to work through a larger project is to spin all the singles first and ply them in a particular order so you get the yarn even throughout the whole project. I don’t have so many bobbins, but my bigger problem is that I am quite impatient and want to get on with knitting once I have an idea. And normally, my brain is full of ideas for fibre work and the limit is the time, as I am a musician and teacher. I can’t sit at the spinning wheel for a long time if I’m not on holiday, so during the school year I mostly knit, and during the holidays I can dye, spin, use my drum carder, and do lots of fibre work. The only time I was able to produce bigger quantities of yarn before I knitted them up was during the Tour de Fleece in the two years during the pandemic, when we did not go on holiday at the beginning of July.

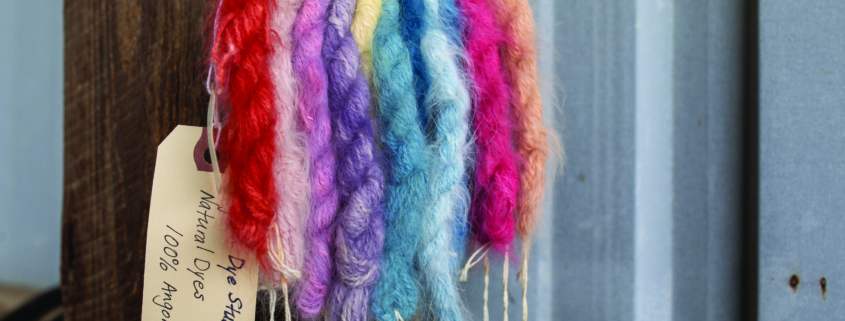
A highly photogenic collection of naturally dyed fibres.
I like to finish knitting one big project like a sweater or cardigan before I start the next one, or at least until I can’t carry it in my bag easily anymore, so I have an excuse to begin the next one. Sometimes it is good to have a second project on the go – I call it mindless knitting, where I don’t have to look very much – which I can keep my hands busy during Zoom or other meetings, which helps me listen.
Mixing colours and fibres
Usually I dye my yarn with plants which I collect in the woods or get from garden flowers. I also use cochineal and indigo, which I buy, to get lots of different colours. I really love the greens and blues I get from dyeing with indigo. I have lots of dyed wool, and all those colours give me inspiration for further projects.

Beautiful greens and blues dyed by the author using indigo and other natural dyes.
Blending the wool on the drum carder I can get even more shades. I like to blend with fibres like silk, alpaca, or plant fibres, and I love sari silk, to get those little bits of colour in my yarn.
Fibres of different types and colours are blended on a drum carder for elegant results.
When I have an idea for the next sweater, I start carding, and then I can begin to spin. Once I have spun enough yarn – say, for one day – I cast on and start knitting, usually top down, so I don’t have to decide too much in advance about length and width.

An idea for the author’s next sweater in the gathering stages.
When I spin on my wheel, I have to sit at home, but while spinning I can read a book or talk to others during online meetings. I also like to spin on my spindles, and that works on a walk, or a museum visit. I take them on holiday as they don’t need much space, and when I spin for a lace shawl, I don’t even need much wool either. At home there are spindles all over the place; I can spin when I am waiting for the kettle to boil, when the computer is slow, when I am cooking. Like that I can make good use of a short time and the yarn still grows.

Knitting as soon as the yarn is spun helps the author complete sweater projects in a timely manner.
I can take my knitting almost everywhere, which is why I don’t want to wait to get started until I have spun all the yarn for a whole sweater. I knit at home, on the bus or train. The only thing I have to make sure of is to be one step ahead with the yarn.
I love to knit Fair Isle sweaters. My favourite method is to use only one bobbin, which I don’t even fill, because I need smaller quantities of lots of colours. Then I wind a ply ball and ply it on itself. For that I put my thumb through the ball, so I can tension the two singles with my fingers and they don’t get tangled, as long as my thumb (or a cardboard roll or a pencil) stays in the middle. I don’t have any leftovers from plying, and it is quick when I suddenly need more yarn.

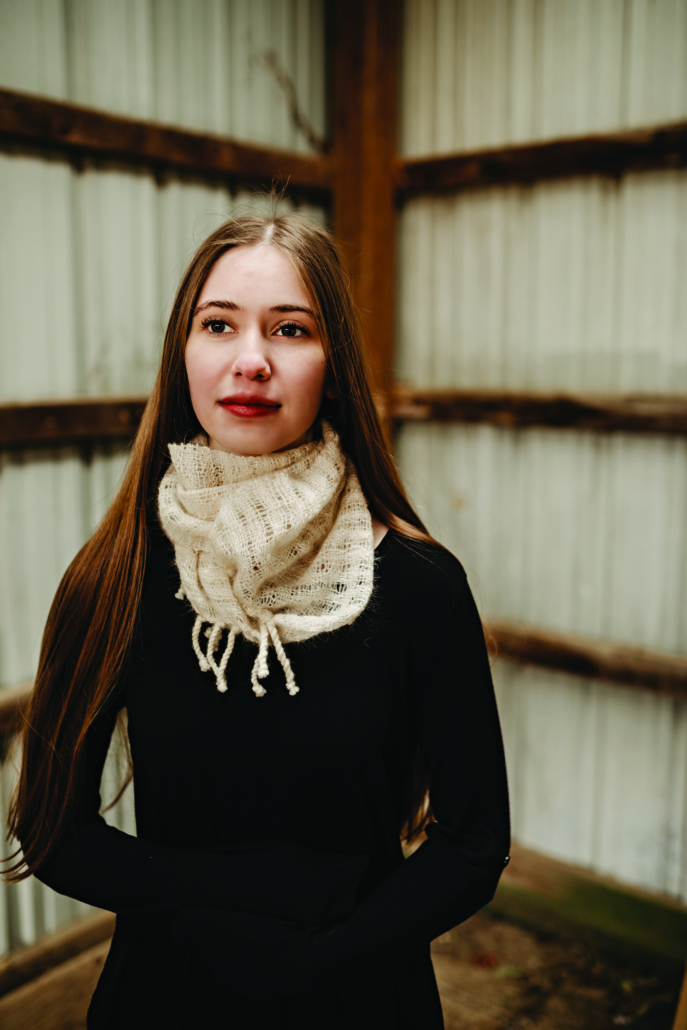
Several charming sweaters dyed, spun, and knit by the author.
I have never had problems with the yarn not being consistent enough throughout a project. I just know what yarn I want and my fingers seem to remember what to do. I am sure it is good advice to have a little card tied to the spinning wheel with a bit of the singles you are aiming for, so you can check and make sure you are spinning a consistent yarn.
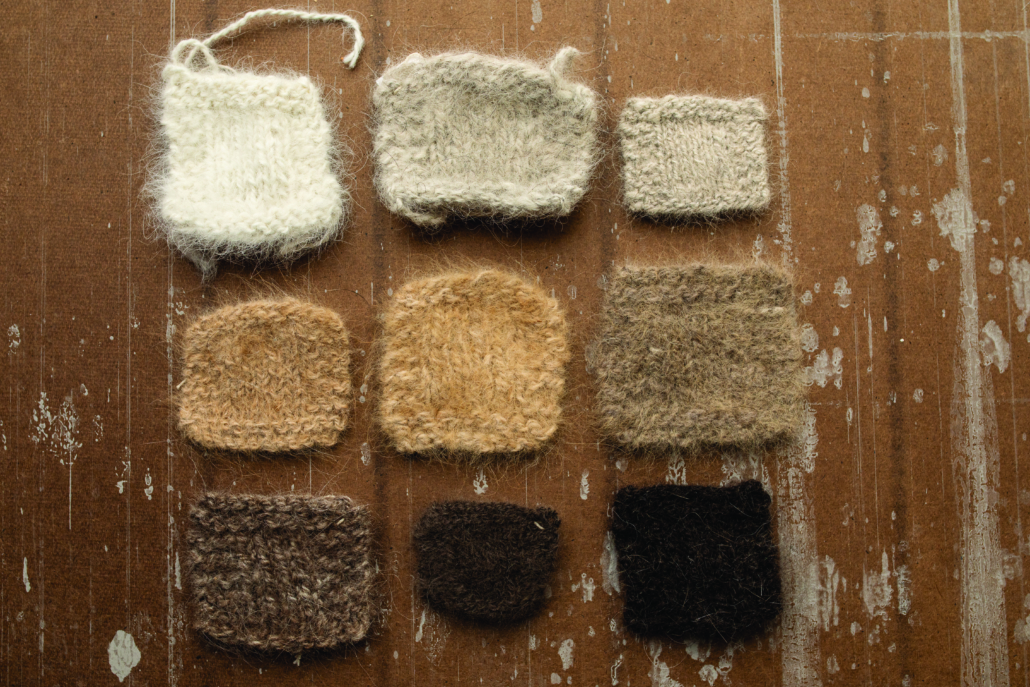
Mixing breeds
There are so many different breeds, but some of my favourites are Shetland, BFL, and Jämtland – a Swedish breed. After dyeing them, I often forget what I have used, so when I do a new project it often turns out that I have used different breeds and fibres just to get the right colour. For the Fair Isle knitting I want to juggle lots of colours, which is more important to me than making a sweater out of only one breed.
Recently I made a pullover for my husband using about 12 different breeds and colours, even mixing short and long draw. For me it was a breed experiment and a way to use up lots of smaller quantities of wool I had in my stash. For that sweater I used combed top without blending.

Mixing in knitting during the spinning process is a wonderful way for a spinner to avoid being overwhelmed during a sweater project.
My feeling is that some people don’t dare to start spinning for a bigger project because they get overwhelmed by the quantity they have to spin and then all the knitting there is to do, especially when you want to spin the yarn entirely on spindles. Mixing the spinning and knitting for the same project is more interesting; you get more variety and more freedom to choose what you want to do next as long as you don’t run out of yarn. It breaks the project down into smaller, less daunting parts. The only thing you might want to plan is to have enough fibre at the start, but even that is not necessary, there is always a sheep growing more wool.

Can We Feature You!?
One of the things we’d like to do on the PLY blog is feature you, our readers. We’d love to hear about how an article or issue of PLY has helped you in your spinning journey. Maybe you’ve made a project from one of the issues or maybe you’ve tried a new technique based upon one of the articles. Maybe you had an ah ha! moment while reading an article that solved an issue in your spinning. Whatever it might be, we want to hear about it and share it on the blog.
We’ll do a short interview (over email) with you about your experience and if you have pictures you can share as well, that would be great. If you’d like to find out more about this new blog featurette, fill out this form. Karen will contact you for more information and to set up your short interview. Thank you!
Small Batch Yarn Prep
Words and Photos by Margaret Wright
Three years ago, I went from a Jersey Shore schoolteacher and suburban mom to living in the woods of Western Maine. I purchased my first spinning wheel and joined an amazing group of people in a spinning group out of Cornish, Maine. They insist they love me despite the way I say coffee and dog, and they totally took pity on my lack of fiber knowledge, taking me under their wings. They truly are my fiber angels. It was from them I learned how to prepare small batches of fiber.
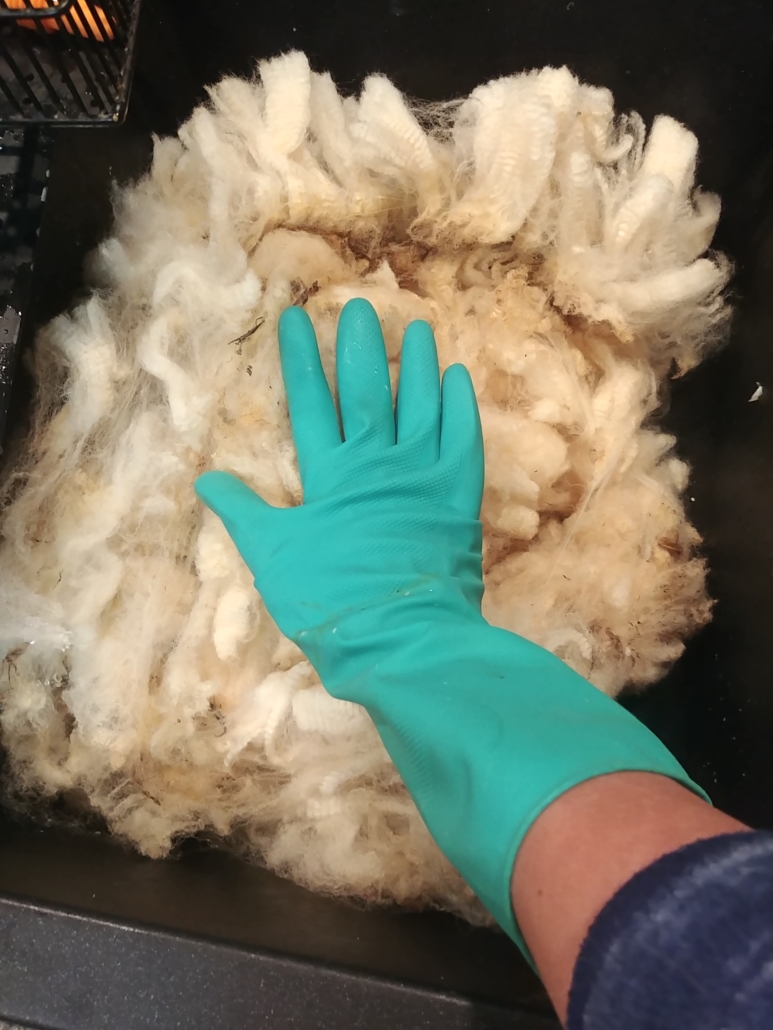
After buying a few really dirty and stinky fleeces, I decided I really hated the whole process of cleaning the poop parts off the fleece, known as skirting. So I now purchase my fleeces at fiber festivals or at reputable fairs as they are usually skirted and much better quality. Although the fleece still has some poop, there’s a whole lot less of it. At the Fryeburg Fair in Fryeburg, Maine, I purchased a very nice Romney fleece. I prepared the fleece in small batches for spinning.
Supplies
I recommend using a double sink, but you can improvise and use a single sink. You’ll also need Dawn blue dish soap, really hot water, a salad spinner, and some sort of rack to dry your fiber on. I have used a dog crate, a fireplace screen, and lawn chairs! Improvise is my middle name. I also wear gloves as I like really hot water, and, oh yeah, I hate poop.
Process
I squeeze 3 to 4 circles of Dawn into my clean sink after making sure the stopper is in. You do not want too much soap or it will be too sudsy. I then fill the sink about 3/4 full of the hottest water I can get from my tap.
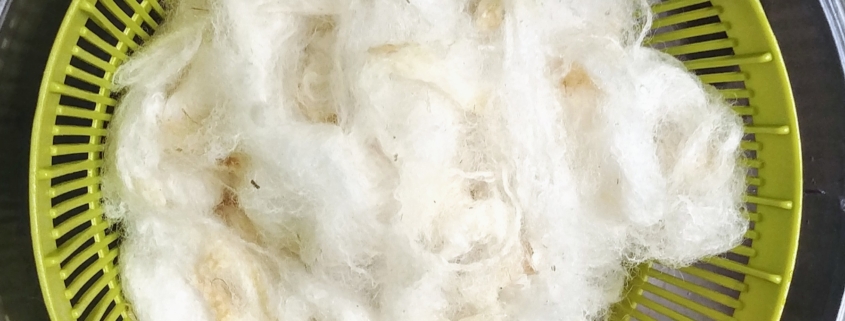
I gently pull a chunk of fiber off the fleece, making sure to remove any straw or poop. Then I gently submerge my fiber into the hot water. Be careful not to agitate it or it will turn into felt like you buy in the craft store.
I set my timer for 30 minutes. Then I go do whatever. Pet the dog, have a coffee, whatever. After 30 minutes, the water will be dark and nasty looking due to the combination of dirt and lanolin that occurs naturally on wool. I unplug the drain and gently press the water from the fiber. I like to press it against the side of the sink. I know I say gently often, but it really is important to be gentle.
At the same time, I have the second sink filling with clean, very warm water, but not as hot as the first sink was originally. I submerge the fleece gently into the clean water and allow this to sit for 30 minutes also. If you don’t have 2 sinks, put your wet fiber in a bowl or pot while you refill the sink with clean water.
Note: I like my fleece a little greasy, meaning I like to spin it with more of the natural lanolin in it. My friend washes it twice, repeating the first wash, as she likes her fleece really clean. Try both and see what you like best.
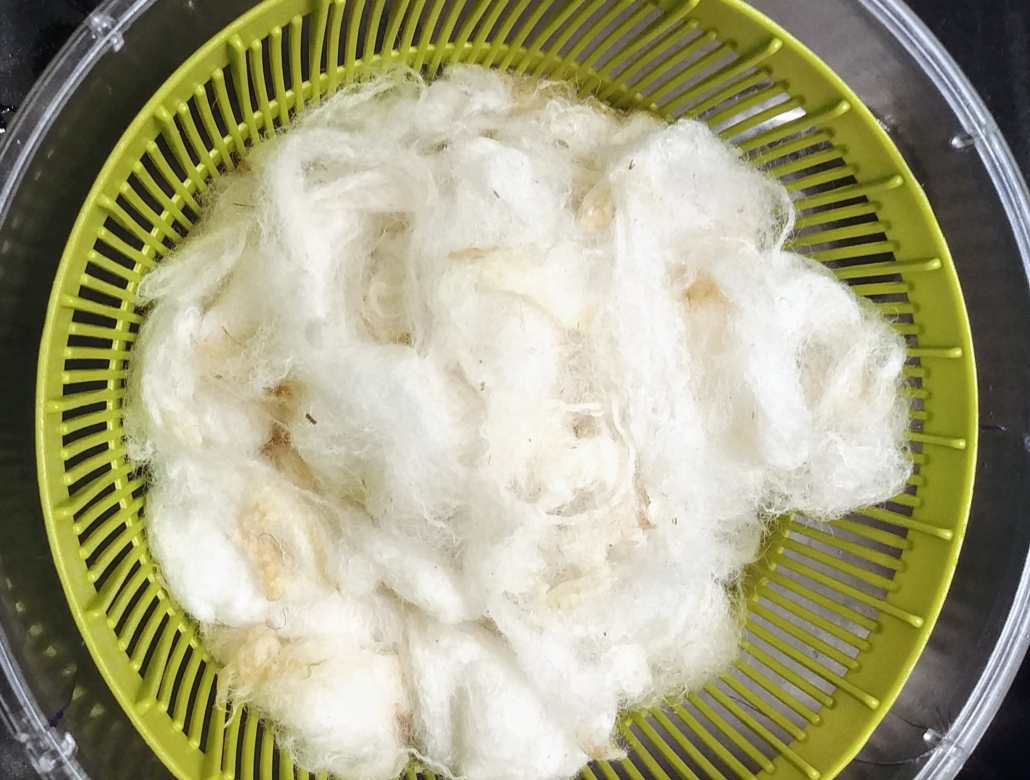
I drain the rinse sink, gently press the water from the fiber, and divide the fiber into smaller batches that can fit in the salad spinner. I place the wet fiber into the salad spinner and spin it twice, one time in one direction and the second time in the other direction, dumping the water out in between spins.
Prep for Spinning
Once your fiber is dry, you can prep it for spinning a variety of ways. As you gain more experience and become more comfortable, you may want to try different methods to prep your fiber.
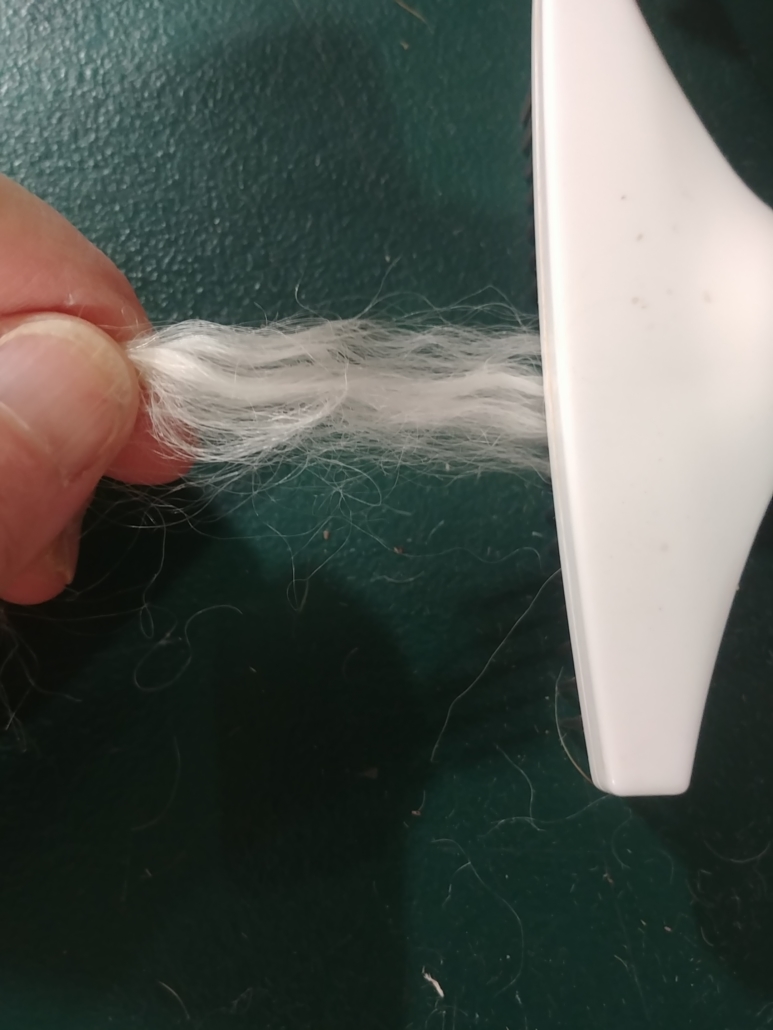
For spinning prep, the easiest way for a newbie like I was just 3 short years ago is to do what is called flicking. I love to sit in the evenings and flick the ends of my fiber locks open using a dog comb. To do this, I firmly hold one end of 1–3 locks, depending on thickness, and gently pull the dog comb over the ends until the tips are nice and fluffy. I then turn the fiber around and repeat the process.
You can also use a hand carder or a dog brush to open up the fiber ends. I find this very relaxing in the evening when my husband is mesmerized by his Bigfoot shows and I listen to an audiobook. When we go places, I frequently take fiber with me. I combed enough fiber one night watching our son play lacrosse to spin 75 yards. Plus, it’s a great icebreaker as people will come up to investigate and you end up meeting some great people.

Margi Wright lives in Maine where she sells baked goods and fiber products at a local farmers market, a switch from her former Jersey Shore life as a teacher. Margi enjoys an active lifestyle completing triathlons, cross country skiing, and traveling with her husband to see her children and grandchildren.
The Fur Issue is coming: sneak peek
Spring is upon us and that means the Fur issue is coming! It’s filled with all the fluffy little animals with fiber so fine and flighty that they delight spinners all over. The issue starts off with wise words from Judith MacKenzie and her take on spinable wild fibers.
From there it delves into exactly how to deal with fur. Stephenie Gaustad, Terri Guerette, and Roy Clemes give you the basics on prepping and spinning these short slick fibers.
Then we get specific with articles about processing, blending, spinning, weaving, and knitting with dog, cat, chinchilla, wolf, and rabbit (along with bits about sea otter, mountain goat, and possum).
There are a couple of great projects and important community news as well. It’s definitely one of PLY’s cutest (and informational) issues yet. Make sure your sub is current by going here. This issue will ship out March 10th (digital issues will be in your account on March 1st).


Leave a Reply
Want to join the discussion?Feel free to contribute!