


Mixing Things up for a Sweater
words and photos by: Johanna Carter
I always admire those who are able to spin mountains of yarn for a big project, ready to knit a wonderful sweater or cardigan. It is a satisfying feeling when you finish all that work, especially if you started with washing and combing the wool or even raising your own sheep.
Mixing spinning and knitting
The typical way to work through a larger project is to spin all the singles first and ply them in a particular order so you get the yarn even throughout the whole project. I don’t have so many bobbins, but my bigger problem is that I am quite impatient and want to get on with knitting once I have an idea. And normally, my brain is full of ideas for fibre work and the limit is the time, as I am a musician and teacher. I can’t sit at the spinning wheel for a long time if I’m not on holiday, so during the school year I mostly knit, and during the holidays I can dye, spin, use my drum carder, and do lots of fibre work. The only time I was able to produce bigger quantities of yarn before I knitted them up was during the Tour de Fleece in the two years during the pandemic, when we did not go on holiday at the beginning of July.

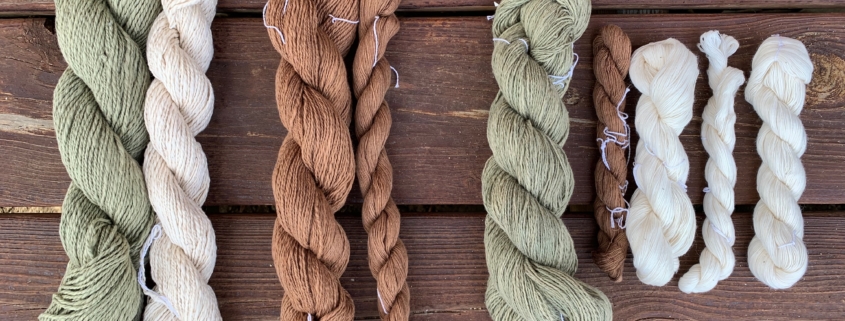
A highly photogenic collection of naturally dyed fibres.
I like to finish knitting one big project like a sweater or cardigan before I start the next one, or at least until I can’t carry it in my bag easily anymore, so I have an excuse to begin the next one. Sometimes it is good to have a second project on the go – I call it mindless knitting, where I don’t have to look very much – which I can keep my hands busy during Zoom or other meetings, which helps me listen.
Mixing colours and fibres
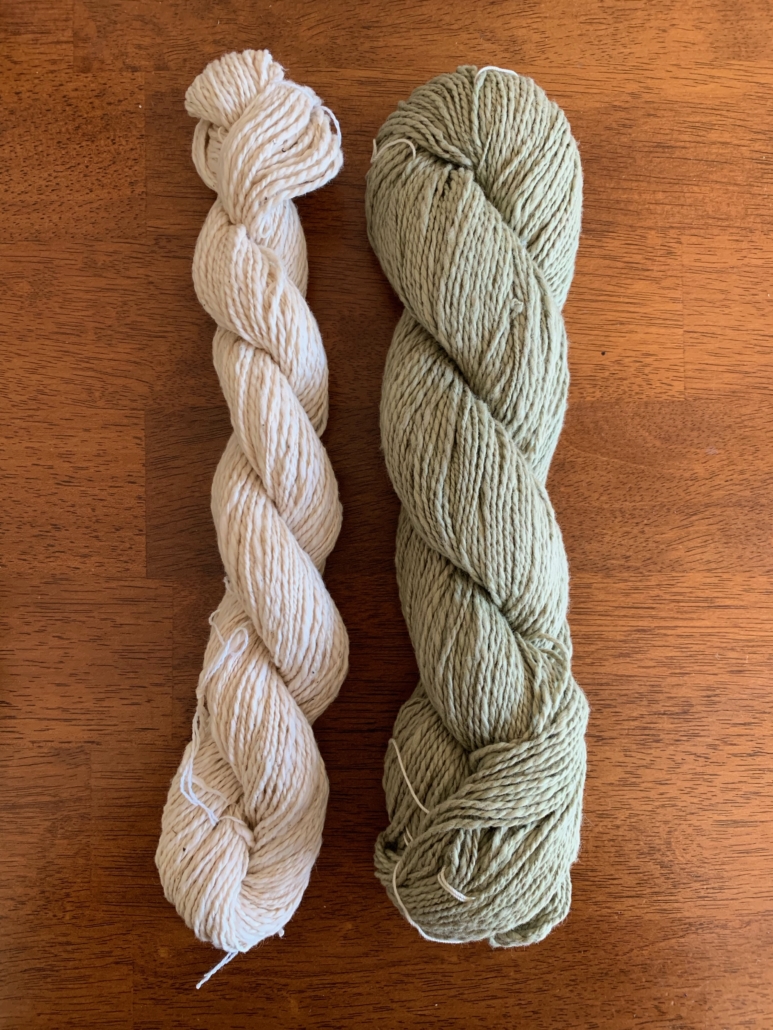
Usually I dye my yarn with plants which I collect in the woods or get from garden flowers. I also use cochineal and indigo, which I buy, to get lots of different colours. I really love the greens and blues I get from dyeing with indigo. I have lots of dyed wool, and all those colours give me inspiration for further projects.

Beautiful greens and blues dyed by the author using indigo and other natural dyes.
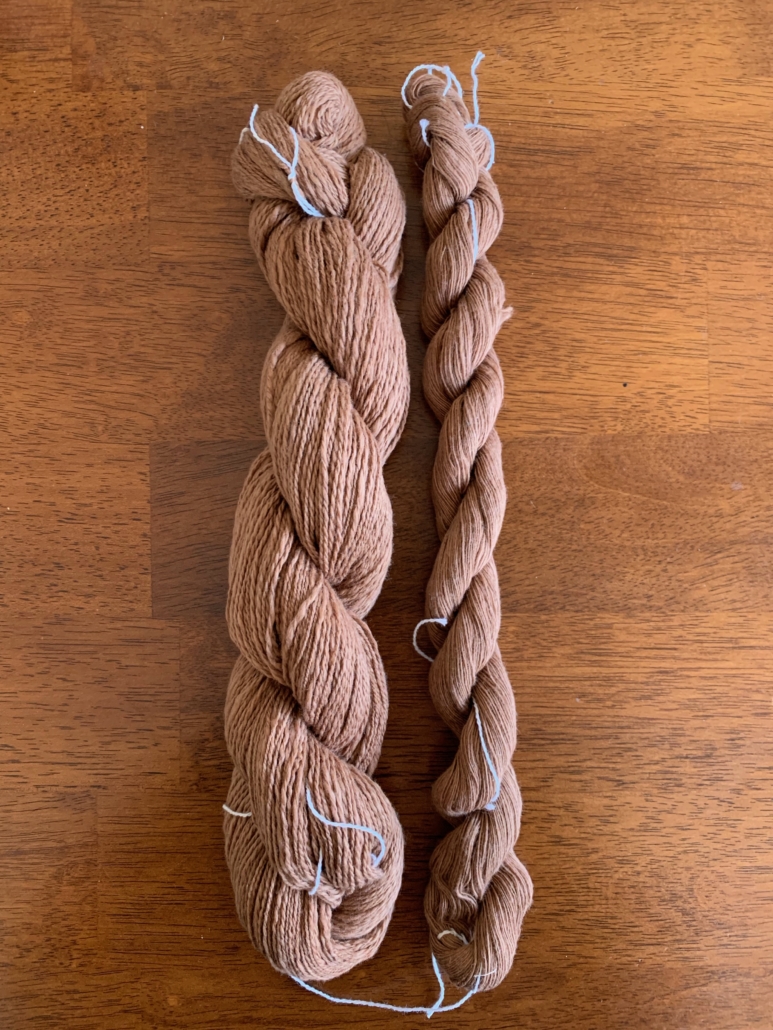
Blending the wool on the drum carder I can get even more shades. I like to blend with fibres like silk, alpaca, or plant fibres, and I love sari silk, to get those little bits of colour in my yarn.
Fibres of different types and colours are blended on a drum carder for elegant results.
When I have an idea for the next sweater, I start carding, and then I can begin to spin. Once I have spun enough yarn – say, for one day – I cast on and start knitting, usually top down, so I don’t have to decide too much in advance about length and width.

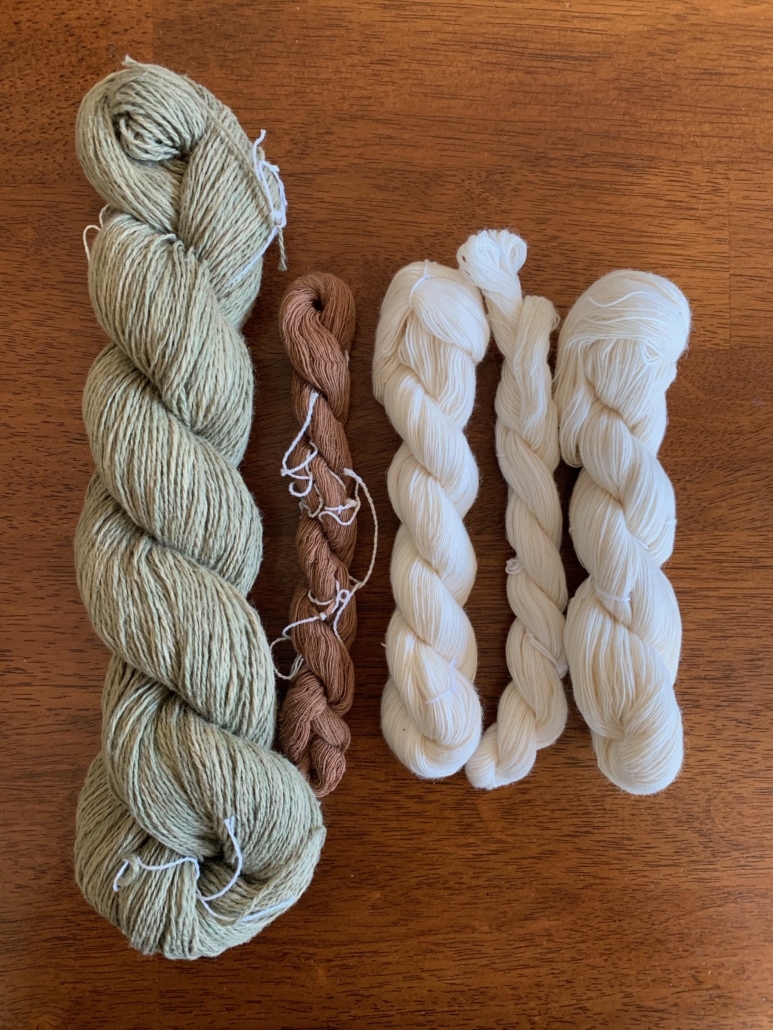
An idea for the author’s next sweater in the gathering stages.
When I spin on my wheel, I have to sit at home, but while spinning I can read a book or talk to others during online meetings. I also like to spin on my spindles, and that works on a walk, or a museum visit. I take them on holiday as they don’t need much space, and when I spin for a lace shawl, I don’t even need much wool either. At home there are spindles all over the place; I can spin when I am waiting for the kettle to boil, when the computer is slow, when I am cooking. Like that I can make good use of a short time and the yarn still grows.

Knitting as soon as the yarn is spun helps the author complete sweater projects in a timely manner.
I can take my knitting almost everywhere, which is why I don’t want to wait to get started until I have spun all the yarn for a whole sweater. I knit at home, on the bus or train. The only thing I have to make sure of is to be one step ahead with the yarn.
I love to knit Fair Isle sweaters. My favourite method is to use only one bobbin, which I don’t even fill, because I need smaller quantities of lots of colours. Then I wind a ply ball and ply it on itself. For that I put my thumb through the ball, so I can tension the two singles with my fingers and they don’t get tangled, as long as my thumb (or a cardboard roll or a pencil) stays in the middle. I don’t have any leftovers from plying, and it is quick when I suddenly need more yarn.

Several charming sweaters dyed, spun, and knit by the author.
I have never had problems with the yarn not being consistent enough throughout a project. I just know what yarn I want and my fingers seem to remember what to do. I am sure it is good advice to have a little card tied to the spinning wheel with a bit of the singles you are aiming for, so you can check and make sure you are spinning a consistent yarn.
Mixing breeds
There are so many different breeds, but some of my favourites are Shetland, BFL, and Jämtland – a Swedish breed. After dyeing them, I often forget what I have used, so when I do a new project it often turns out that I have used different breeds and fibres just to get the right colour. For the Fair Isle knitting I want to juggle lots of colours, which is more important to me than making a sweater out of only one breed.
Recently I made a pullover for my husband using about 12 different breeds and colours, even mixing short and long draw. For me it was a breed experiment and a way to use up lots of smaller quantities of wool I had in my stash. For that sweater I used combed top without blending.

Mixing in knitting during the spinning process is a wonderful way for a spinner to avoid being overwhelmed during a sweater project.
My feeling is that some people don’t dare to start spinning for a bigger project because they get overwhelmed by the quantity they have to spin and then all the knitting there is to do, especially when you want to spin the yarn entirely on spindles. Mixing the spinning and knitting for the same project is more interesting; you get more variety and more freedom to choose what you want to do next as long as you don’t run out of yarn. It breaks the project down into smaller, less daunting parts. The only thing you might want to plan is to have enough fibre at the start, but even that is not necessary, there is always a sheep growing more wool.

PLYAway Wants (and needs) you!
There are still great classes available. Check them out here!
And if you’re a small business that makes something fiber lovers would love, consider donating to PLY Away’s goodie bag, silent auction, or door prizes! It’s almost time to wow and tempt the devoted 500 fiber aficionados that attend PLYAway, but we’d love to have you join and your goods represented. If you’re interested, email me (jacey@plymagazine.com) and I’ll hook you up! Here are the deets:
Goodie bags: Every single person registered for a class gets a goodie bag, and trust me, they have always been stellar! We want this year to be the same. You can send 100, 150, or 300 items and we’ll stuff those sacks full! We’ll also give you a thank you in our 2020 program and a shout out on social media (FB and IG along with a photo). We’ve had everything from a single lock from a shepherd for each bag to artisan teabags to tiny samples of balms to mini-batts, colorful rolags, tape measures sporting business names, small batch chocolates, printed patterns, 1 oz mini braids, and on and on. We’d love to include you and for us to support each other.
Door prizes: If you don’t have the time or energy (or if your product isn’t suited for goodie bag parsing), a door prize or a silent auction item might be just the thing! We like to punctuate our nightly spin ins and/or banquets with loud, squeal-inducing giveaways and we’d love to give away your stuff. Please include details about your item so we can make sure and holler them out to the crowd!
Silent Auction: Finally, the silent auction is one of the ways we help spinners come to PLY Away, and we’d like to build our scholarship fund even more so we can continue to bring talented spinners who couldn’t otherwise attend PLY Away. We hope to bring 2 at a time, even 3! ALL the proceeds from the silent auction go to the scholarship fund. The silent auction items and signage will be set up in public for several days (secured at night), and towards the end of the event, we’ll see who won. We think a range of items is ideal, some small and some large, so people of several budgets can participate.
Send everything here: Whether you’re in for the goodie bags, the door prizes, or the silent auction, let me know so I can make sure your info gets into the 2020 program. February 15th is the due date (so we have time to pack all those bags) to PLY Magazine, PO Box 3329, Kansas City, KS 66103.
Dyeing Cloth with Mud
Words and Photos by Suzanne Correira
I’ve been experimenting with using mud for coloring cloth ever since I took a class from Judy Dominic in the early 2000s. She studied African mud dyeing extensively. Then I started reading about the Japanese technique of Dorozomo – also mud dyeing. I fell in love with the fun and experimental aspect of it. And the historical bits of course. Plus, how can you resist playing in the mud?
Colors
I’ve worked mostly with clay-ey type soil – most easily obtainable for me – and these tend to have the best colors. Think Georgia red clay, Oklahoma red dirt, Texas red dirt, and Montana red mud. There is a whole business built around the Montana red: Montana Dirt Shirts. And they’re rather nice T-shirts. For the record, my students have all declared the Georgia red clay as the out and out winner in the red department.
Red seems to be the most available color in nature. Green is also something you can find in heavily naturally mulched soils and in desert areas – New Mexico and far West Texas have several spots for a good deep green. And black is something you can get from a good deep natural mulch – or a peat bog. These are going to be your basic colors, but you can also find some others including some good yellows. And if you don’t want to drive around with a bucket and shovel, think facial clays, yes, clay masks – certainly for the green clay and a black clay mask. The red may be harder to find, but there is a rose facial clay out there.
Plain old mud from the garden or a potting soil also works, especially if it is full of composted leaf material – think tannin here – and this works extremely well if you are dyeing or painting on cotton. The tannin acts as a mordant, intensifying and fixing the colors.
Mordant
You are not actually dyeing with these clays, as they are a pigment and do not absorb into the fibers and fabrics, but are rather staining with them. Think of what happens when the kids play in the mud and grass and what happens when you kneel down to work in your garden. This time, we are doing it deliberately. And for that, we need something to “mordant” the colors if you don’t have a swamp or peat bog handy. While it is a tradition to bury the decorated cloth in the ground, in peat bogs, or in other areas for weeks, evens months at a time, I’ve been using mostly soy milk as I learned in Judy’s class. Canned or fresh, it doesn’t matter. In fact, the last time I taught this technique in New Mexico in 2016, I used 2-year-expired soy milk. Quite honestly, I think the colors were the best I’ve ever seen a class of mine come up with! The photos included are from that class.
Our real star here as far as fixing the colors is the soy milk. Soak whatever you are dyeing in it, use it to emulsify the clay, or do both. I like to do both. The enzymes in the soy milk serve as a binder for the clays. Leave it on as long as you can – even months to bind the clay to the piece.
Types of Dyeing
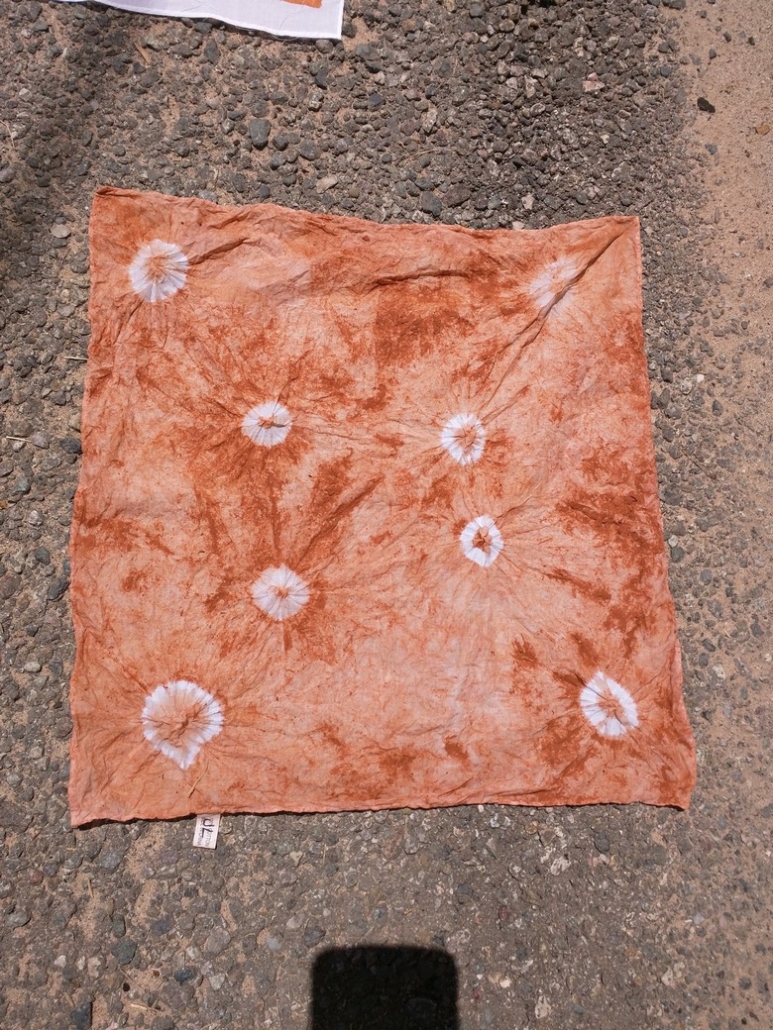
You can use immersion dyeing techniques – the Montana Dirt Shirts are done this way – and you can design tie dye effects. Soak the fabric in a solution of soy milk and clay, where the solution has taken on the color of the clay (think of the color of the water of the Red River or any clay pond), and leave it as long as you can to soak – overnight is good. Dipping more than once helps build up color. Hang it to dry and “cure” as long as you can – about a week. Rinse and let it dry and cure again. Hand wash in a gentle soap and dry carefully. I experimented with wool yarn and achieved a soft color this way, but it required a lot of rinsing. If you plan on wearing your clay-dyed pieces, handwashing is definitely recommended.
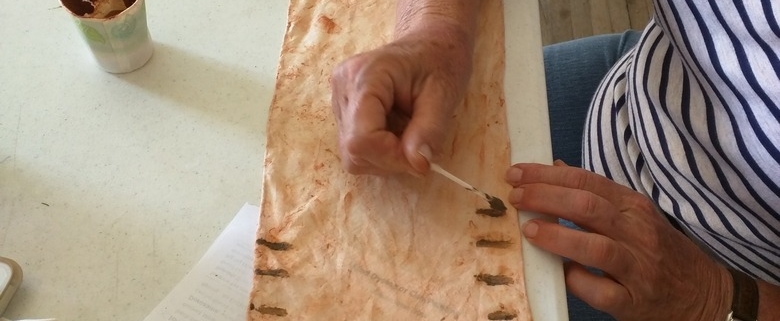
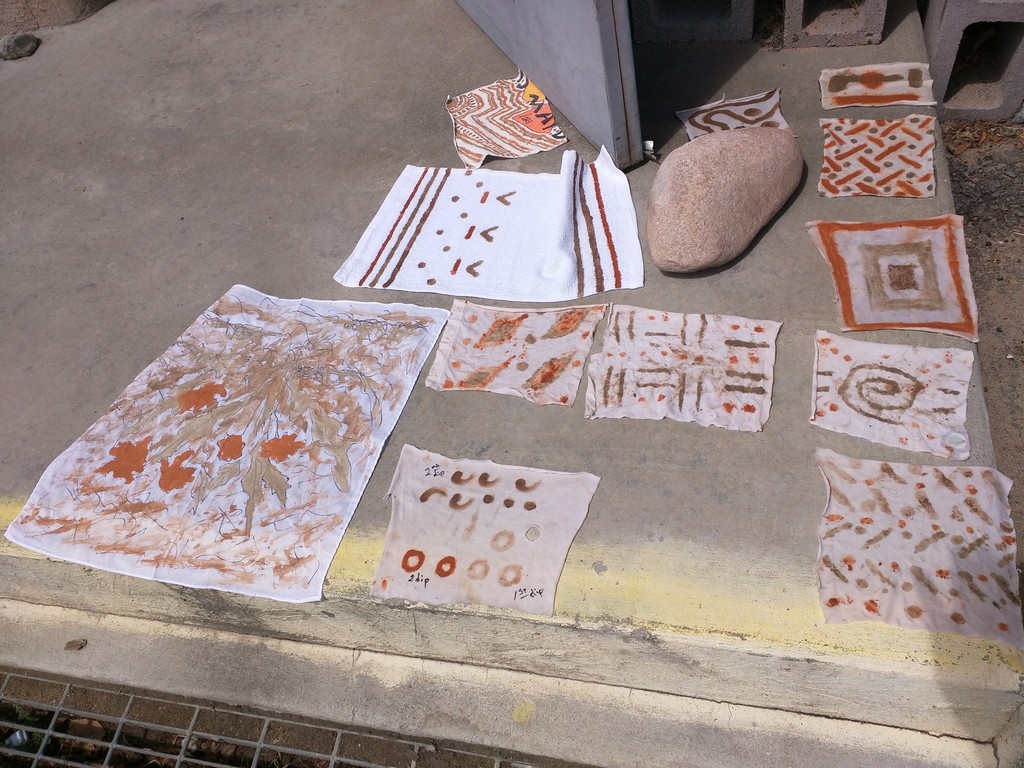
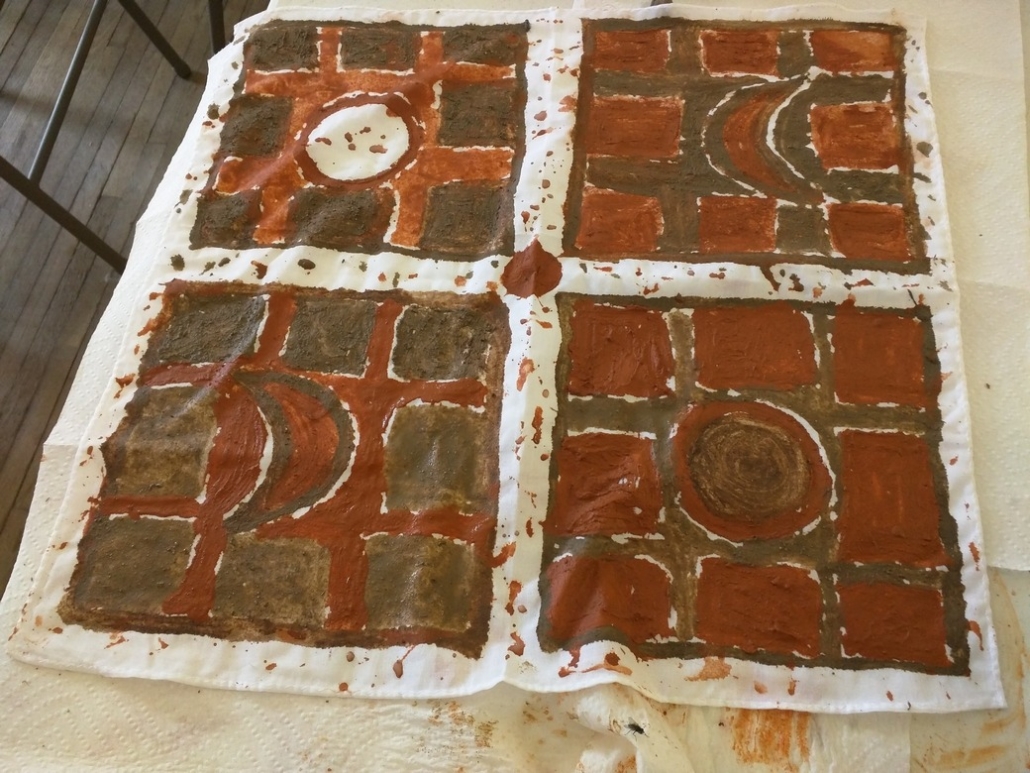
Clay painting is what you most commonly see, both using clay as the actual color and as a resist to other natural colors. Again, mix the clay and soy milk, and even dip your cloth in soy milk first, then paint on the surface using cheap disposable brushes or even Q-tips. Leave the clay paint on the piece as long as possible to cure as above. Layer gradually to build up the colors. Please note: You may get some really deep colors, but you will be washing out a great deal of that color. Still, the longer you let it sit, the deeper it gets!

Resources
Mud/clay dyeing shows up in many cultures and has become quite popular with surface design artists and hobbyists, so there are tons of articles and tutorials. There is a wonderful tutorial online. It is suitable for grade schoolers but interesting to all.
Kimberly Baxter Packwood: Clay Dyeing Info
Judy Dominic – I took one of her first classes on the subject in Berea, Kentucky, after she’d been to Africa to study the method. Turkey Red Journal, Vol 17, no.1, Fall 2011, Bogolan Fini Mud Cloth from Mali Africa (U.S. adaptation). This is decorating a cloth with clays painted onto the cloth, using the clays both as color and/or as a resist. The cloth may be buried in mud for months.
John Marshall: Also Turkey Red Journal, same issue – Dorozomi Japanese Mud Dyeing (he is quite insistent on using fresh made soy milk, not the prepared stuff, but then, he is a stickler for traditional methods). Here he writes about 2 distinct Japanese methods: Bingata, in which various muds, as pigments, are glued to the cloth using soymilk as a binder, and Dorozome, where the mud is serving as a mordant to the vegetal juice color that the cloth is saturated with first. Both articles can be found at Turkey Red Journal, along with more recent articles on all sorts of dyeing.
Suzanne Correira has been a professional fiber artist since the 1980s and has been Fire Ant Ranch since 1992. She has published with Knitter’s, Knitting Digest, Threads, Lion Brand, and Ravelry. She has exhibited/taught in many places, including PLYAway, Estes Park, Taos, Big Sky, Kid ‘n Ewe, DFW, Interweave Yarn Fest, and Georgia Fiber.
For more articles like this, subscribe!
Get sneak peeks, extra content, behind-the-scenes details, and updates straight to your inbox
Chasing Cloth
Words and Photos by Melanie Duarte
As spinners we are always chasing cloth. The yarn we create may be beautiful on its own and it might hang out longer in our stash than we intended it to, but there probably was a goal when we set out to spin it. More often than not, that goal is to produce some kind of cloth, be it woven, knit, or crocheted. Over time, we become more comfortable in our ability to make cloth and we can begin to make choices based on how we want the cloth to look, feel, and drape before we even start spinning. We can decide what breed of sheep, fiber, or blend we will use and how we will spin it to produce something close to the cloth we want. From there, it can be a few short sampling exercises to pin down the exact details of the perfect yarn for our project. Sometimes the yarn comes before there is an idea of the final cloth, but from our experience we know what will work best for that yarn or how to make the yarn sing.
As a confident wool spinner and knitter, I decided to shake things up by learning to spin and weave cotton. For me, learning to spin cotton was like learning to write with the opposite hand. Not only was it a challenge physically but also mentally. It has been incredibly fun and also incredibly frustrating. At times I felt like spinning cotton was truly magical, the way all those tiny fibers seemed to reach for each other. Then, other times, I felt like banging my head against the wall. Just when I thought I was getting the hang of it, I ruined it somewhere in the process. Cotton was making me start over and create a new relationship with cloth.
My first skeins of cotton were spun on my Schacht Flatiron. The fastest whorl I had was 17.4:1, and I had 2 different fiber preps: natural green in sliver and white ginned cotton. My father had given me the natural green sliver at our Christmas swap. I was so excited to try it, but I failed at every attempt. Green cotton has such a short staple, so I used a long draw draft. The wheel needs to have a balance between twist and take up; the fibers need a lot of twist to stay together, and if your wheel tries to take the fiber away from you before there’s enough twist, the singles will just keep drifting apart. After watching all of Joan Ruane’s videos on YouTube, I was finally successful.
Next up was the white ginned cotton. I tried my hand at making a puni, but that didn’t work. The fibers wouldn’t draft freely, so it felt a bit like tug of war. After that, I tried Norman Kennedy’s method of carding a rolag, and spinning was much smoother. I still had a bit of trial and error with how much twist versus take up, but in the end I had a finished skein of yarn. The ginned cotton had a lot of VM and debris in it, but thankfully after I washed it, most of it came out.
Even though I ended up with 2 skeins of yarn, I wasn’t happy with the results. My yarn was lumpy and uneven. It was nothing like the fine cotton yarns I had used to weave tea towels in the past. My experience spinning fine wool yarns had me expecting the same or similar results with cotton. I put these yarns aside and started researching cotton spinning tools.
The first
tool I decided to try was a Schacht pear tahkli spindle, an inexpensive but
very effective tool. Suddenly I was able to spin very fine singles. However,
the issue I was having was how much twist? When spinning wool, I want just
enough twist to hold the fibers together. With cotton I was afraid of adding
too much twist. I spun and plied 2 singles. The first ply held together but was
severely underspun. Stephenie Gaustad says in her book, when checking the
twist, you want the plies to sit like beads on a string.[1] That
was key for me. The second ply had much more twist. This difference in twist gave
my 2-ply yarn a lot of texture. The skein of singles I have are leftovers from
the second ply, but I was so pleased with the smooth and consistent thread I
was able to create.
Very soon after my experience with a tahkli, I received a book charkha for my birthday. I started spinning my green cotton sliver on it right away. For this tool, I had to get used to how fast the charkha, which has a ratio of around 100:1, can spin. For someone who spins wool, that is unheard of! I quickly got into a rhythm of cranking the wheel and drawing out the fiber. What I didn’t know was just how much twist cotton really needed. I spun about 7 spindles of the green sliver and then plied them up. My yarn broke a few times during plying, but it fuzzed up a lot during the scouring process. Looking closely at my yarn and examples shown in Stephenie Gaustad’s book and videos, it was clear my yarn still didn’t have enough twist. There was enough twist to hold the fibers together but not enough to protect it from abrasion.
After the green sliver, I started spinning Egyptian cotton on my book charkha. Once I got the hang of spinning a longer fiber cotton (it was surprisingly difficult after getting used to the really short fibers of green and brown cotton), I really enjoyed it. I could see so much potential in Egyptian cotton. I was imagining all the different cloths I wanted to make. I had finally started to spin the type of cotton I had dreamed of: thin threads that I could weave into soft cloth with incredible drape. So on that note, it was time to work up my samples into woven swatches on my Zoom Loom.
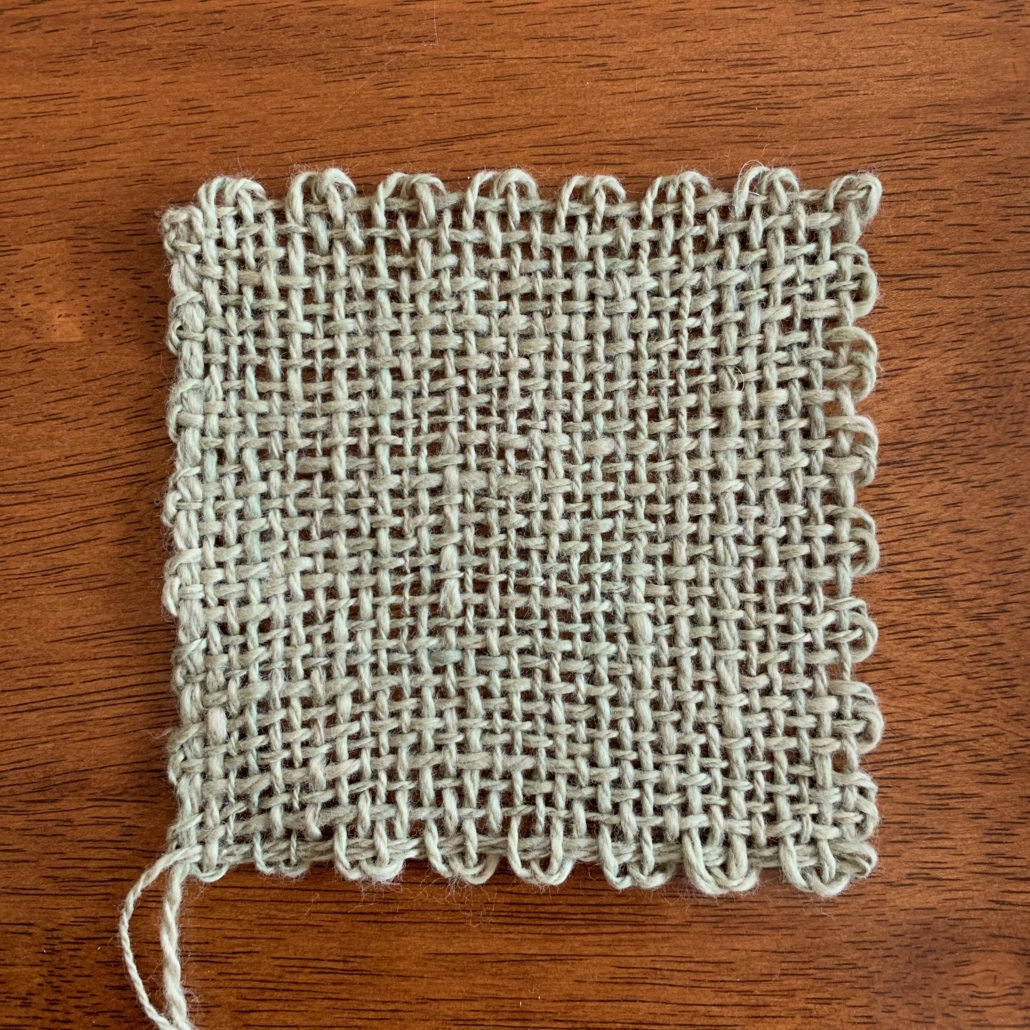
The first swatches I made were from the 2 original wheelspun yarns. As yarns, I was disappointed in them. They were not at all what I wanted, but I love them as woven swatches. They have drape and texture. They feel soft and durable. I think they would make wonderful kitchen towels or face cloths.
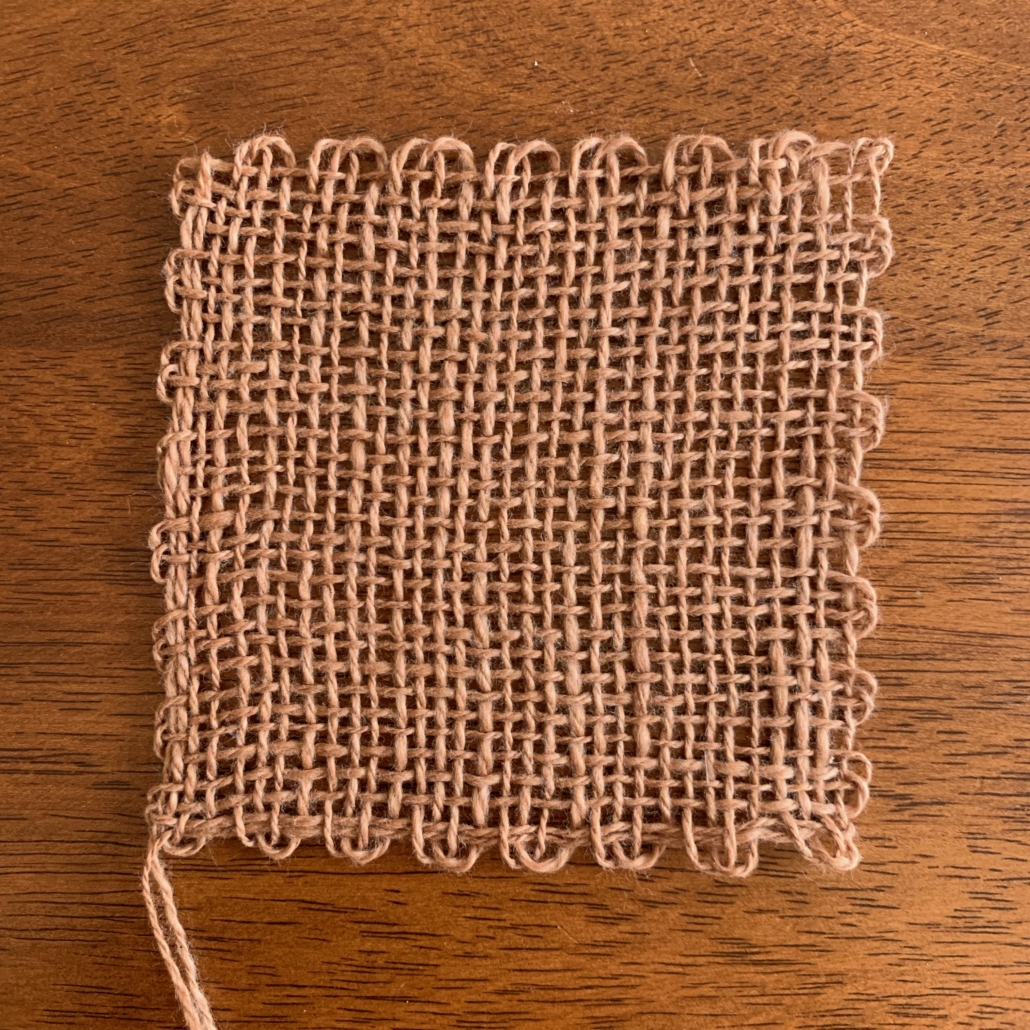
The next swatch was the 2-ply natural brown cotton spun on the tahkli. This swatch had texture from the twist difference in the 2 plies. This yarn was finer than the wheelspun yarn, making the gauge looser and more open, thus attributing to a soft cloth with great drape.
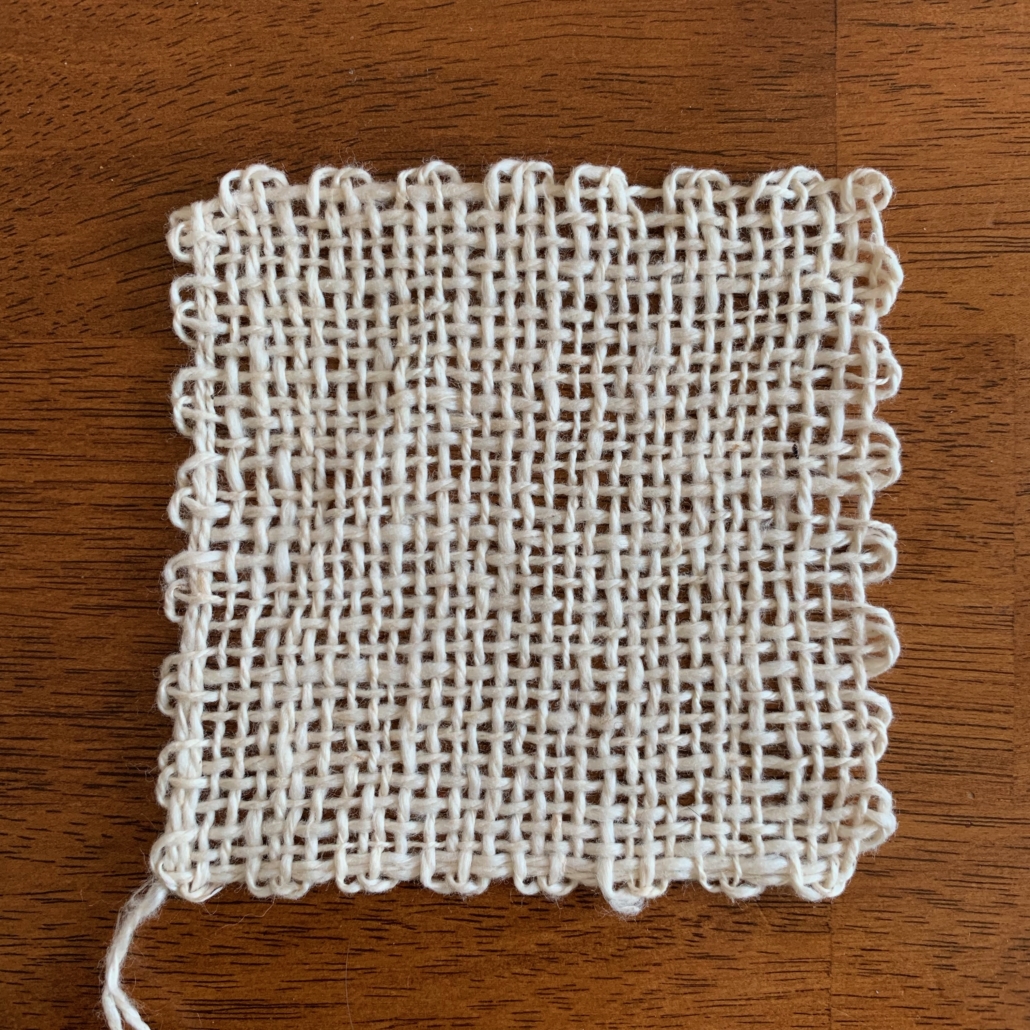
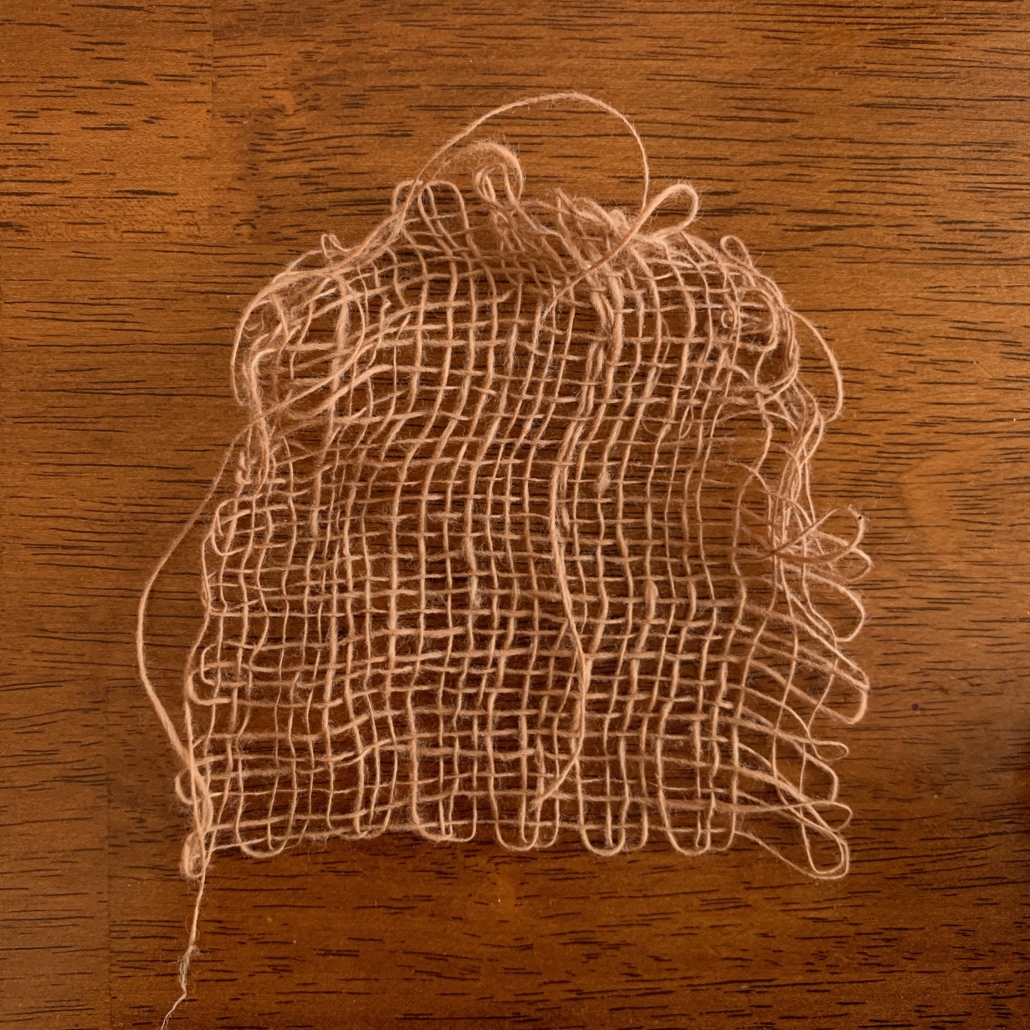
The swatch made from the tahkli spun singles did not work at all. The skein of leftover singles had a lot more twist in them than the first ply, but they do not have enough twist to hold up even as weft in my swatch.
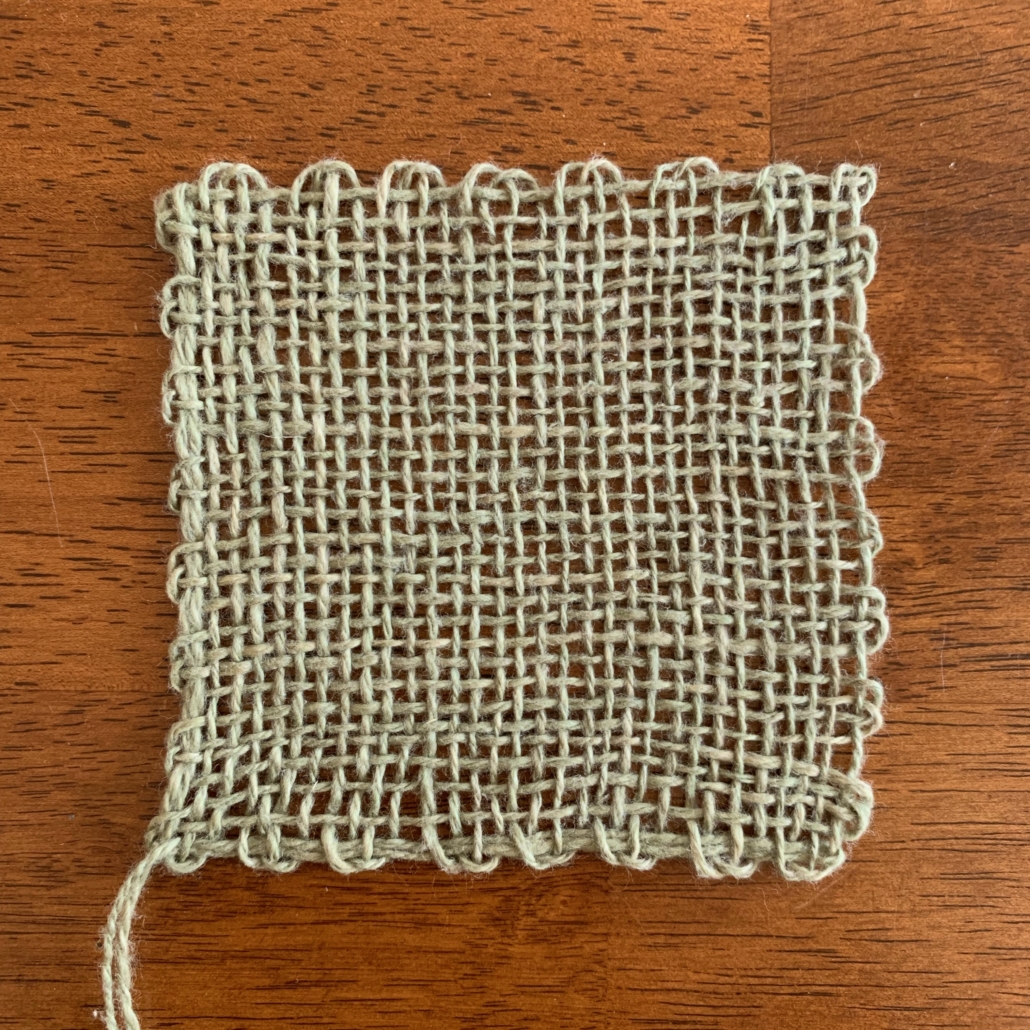
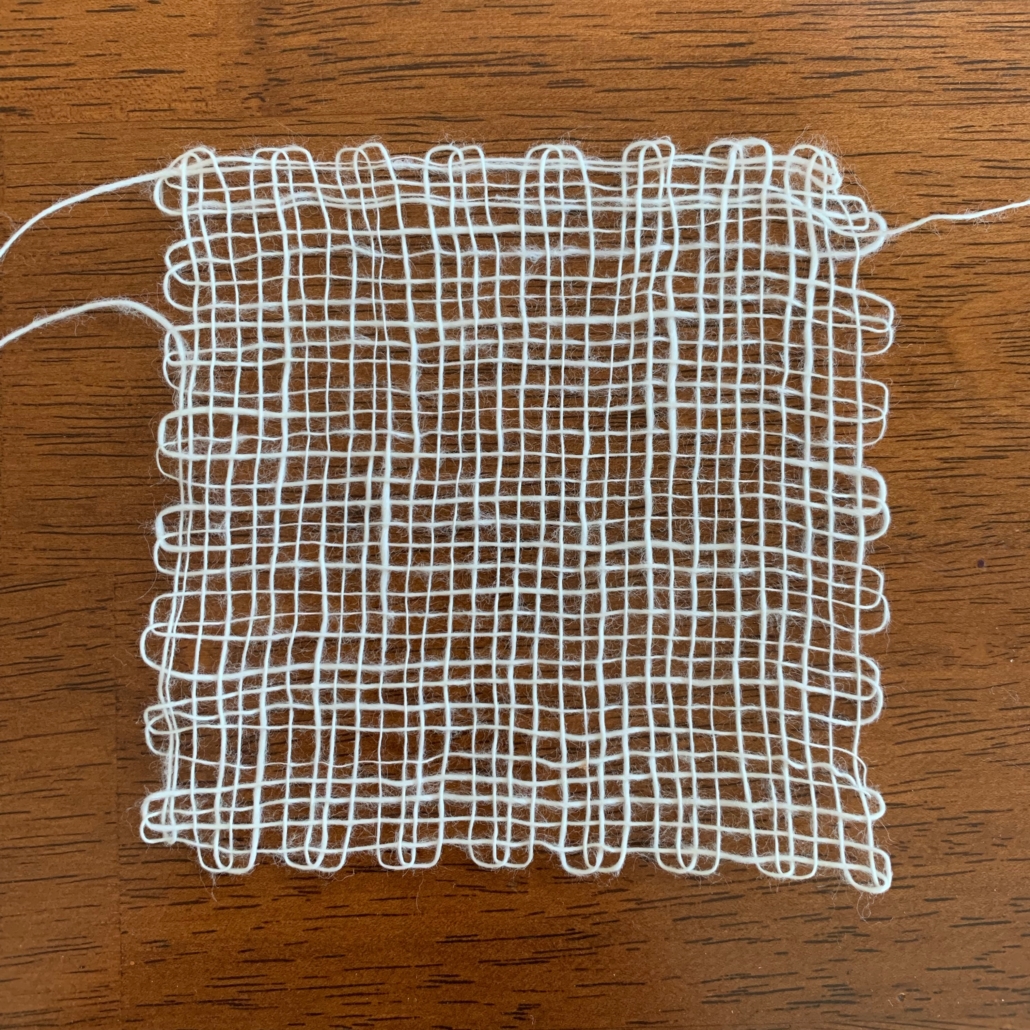
The last set of swatches were spun on my book charkha. The green 2-ply yarn held together wonderfully and had great depth and a really nice texture. It was very soft and smooth. The white singles yarn held up a little better than the tahkli spun singles but did break a few times towards the end of the swatching process. With a pin loom, I used a needle to pull the weft over and under the warp, and this excessive drag caused the breaks in the singles. The process is different on a harness loom, but it definitely makes me question the yarn’s durability. I do not think any of my singles yarns would hold up as a warp, but I think the collective strength of the 2-ply yarns would work.
Some amazing things have happened for me through this process. My skills as a spinner have grown leaps and bounds. Not only have I progressively gotten better as a cotton spinner, but it has definitely increased my skills as a wool spinner, too. Learning to weave and creating simple samples has shown me how gauge and sett can change fabric. It has also taught me not to discount some of my handspun yarn. What doesn’t speak to me as yarn will probably speak to me as cloth. So if you are ever in a creative rut, try something new. It will strengthen your skills and renew your relationship with making cloth.
Resources
Joan Ruane – cottonspinning.com and her YouTube channel
Stephenie Gaustad – Book: The Practical Spinner’s Guide: Cotton, Flax, Hemp (Interweave) – Video: Spinning Cotton (Interweave)
Norman Kennedy – Video: Spin Flax and Cotton: Traditional Techniques with Norman Kennedy (Interweave)
Melanie Duarte is a spinner, knitter, and weaver from Portland, ME. She homeschools her 2 daughters and is learning to play the piano. Check her out on Instagram @porchpegasus.
[1] Stephenie Gaustad. The Practical Spinner’s Guide: Cotton, Flax, Hemp. Loveland, CO: Interweave, 2014.


Leave a Reply
Want to join the discussion?Feel free to contribute!