

Mixing Things up for a Sweater
words and photos by: Johanna Carter
I always admire those who are able to spin mountains of yarn for a big project, ready to knit a wonderful sweater or cardigan. It is a satisfying feeling when you finish all that work, especially if you started with washing and combing the wool or even raising your own sheep.
Mixing spinning and knitting
The typical way to work through a larger project is to spin all the singles first and ply them in a particular order so you get the yarn even throughout the whole project. I don’t have so many bobbins, but my bigger problem is that I am quite impatient and want to get on with knitting once I have an idea. And normally, my brain is full of ideas for fibre work and the limit is the time, as I am a musician and teacher. I can’t sit at the spinning wheel for a long time if I’m not on holiday, so during the school year I mostly knit, and during the holidays I can dye, spin, use my drum carder, and do lots of fibre work. The only time I was able to produce bigger quantities of yarn before I knitted them up was during the Tour de Fleece in the two years during the pandemic, when we did not go on holiday at the beginning of July.

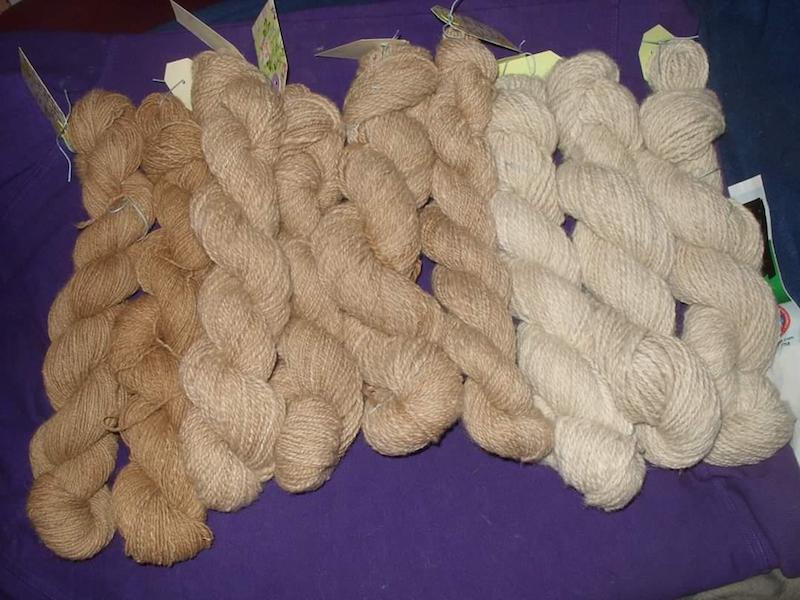
A highly photogenic collection of naturally dyed fibres.
I like to finish knitting one big project like a sweater or cardigan before I start the next one, or at least until I can’t carry it in my bag easily anymore, so I have an excuse to begin the next one. Sometimes it is good to have a second project on the go – I call it mindless knitting, where I don’t have to look very much – which I can keep my hands busy during Zoom or other meetings, which helps me listen.
Mixing colours and fibres
Usually I dye my yarn with plants which I collect in the woods or get from garden flowers. I also use cochineal and indigo, which I buy, to get lots of different colours. I really love the greens and blues I get from dyeing with indigo. I have lots of dyed wool, and all those colours give me inspiration for further projects.

Beautiful greens and blues dyed by the author using indigo and other natural dyes.
Blending the wool on the drum carder I can get even more shades. I like to blend with fibres like silk, alpaca, or plant fibres, and I love sari silk, to get those little bits of colour in my yarn.
Fibres of different types and colours are blended on a drum carder for elegant results.
When I have an idea for the next sweater, I start carding, and then I can begin to spin. Once I have spun enough yarn – say, for one day – I cast on and start knitting, usually top down, so I don’t have to decide too much in advance about length and width.

An idea for the author’s next sweater in the gathering stages.
When I spin on my wheel, I have to sit at home, but while spinning I can read a book or talk to others during online meetings. I also like to spin on my spindles, and that works on a walk, or a museum visit. I take them on holiday as they don’t need much space, and when I spin for a lace shawl, I don’t even need much wool either. At home there are spindles all over the place; I can spin when I am waiting for the kettle to boil, when the computer is slow, when I am cooking. Like that I can make good use of a short time and the yarn still grows.

Knitting as soon as the yarn is spun helps the author complete sweater projects in a timely manner.
I can take my knitting almost everywhere, which is why I don’t want to wait to get started until I have spun all the yarn for a whole sweater. I knit at home, on the bus or train. The only thing I have to make sure of is to be one step ahead with the yarn.
I love to knit Fair Isle sweaters. My favourite method is to use only one bobbin, which I don’t even fill, because I need smaller quantities of lots of colours. Then I wind a ply ball and ply it on itself. For that I put my thumb through the ball, so I can tension the two singles with my fingers and they don’t get tangled, as long as my thumb (or a cardboard roll or a pencil) stays in the middle. I don’t have any leftovers from plying, and it is quick when I suddenly need more yarn.

Several charming sweaters dyed, spun, and knit by the author.
I have never had problems with the yarn not being consistent enough throughout a project. I just know what yarn I want and my fingers seem to remember what to do. I am sure it is good advice to have a little card tied to the spinning wheel with a bit of the singles you are aiming for, so you can check and make sure you are spinning a consistent yarn.
Mixing breeds
There are so many different breeds, but some of my favourites are Shetland, BFL, and Jämtland – a Swedish breed. After dyeing them, I often forget what I have used, so when I do a new project it often turns out that I have used different breeds and fibres just to get the right colour. For the Fair Isle knitting I want to juggle lots of colours, which is more important to me than making a sweater out of only one breed.
Recently I made a pullover for my husband using about 12 different breeds and colours, even mixing short and long draw. For me it was a breed experiment and a way to use up lots of smaller quantities of wool I had in my stash. For that sweater I used combed top without blending.

Mixing in knitting during the spinning process is a wonderful way for a spinner to avoid being overwhelmed during a sweater project.
My feeling is that some people don’t dare to start spinning for a bigger project because they get overwhelmed by the quantity they have to spin and then all the knitting there is to do, especially when you want to spin the yarn entirely on spindles. Mixing the spinning and knitting for the same project is more interesting; you get more variety and more freedom to choose what you want to do next as long as you don’t run out of yarn. It breaks the project down into smaller, less daunting parts. The only thing you might want to plan is to have enough fibre at the start, but even that is not necessary, there is always a sheep growing more wool.
Handmaking Spinning Tools
Words and Photos by Denise Williams
Handspinning can be a very expensive craft.
When I decided to start spinning yarn, I had bags of wool but no tools. Internet groups were beginning to spring up, with ample advice encouraging beginners to buy everything under the sun. I’m sure you’ve seen it all: hand carders, drum carders, blending boards, hand combs, hackles… Yes, I wanted every single fiber processing tool there was. However, I had way more time and determination than disposable income. Spinning was not the first nor the only craft in my life, and I know how it is to buy everything out there to find I only use or need a small selection. So I decided to take things slowly and acquire tools as I gained experience and technique dictated.
Maybe when you are starting out, or starting to branch out, you can borrow tools from someone to try out. Unfortunately, at that time, I didn’t know anyone local who was a spinner, so I needed a budget-friendly way to acquire or create what I wanted.
I wish I could remember to credit the place or person where the original idea reached me, with ways to make or repurpose common objects for fiber tools. Surprisingly, I already had the items lying around the house, and I’ll bet you are familiar with these items: pet brushes, horse combs, and afro picks.
I liked to work with smooth, worsted yarns, so my first spinning goal was to reproduce what I used most. For a worsted prep, combs are most appropriate. Wool combs, whether they are viking combs or mini combs, are serious tools, and their price gave me my first taste of sticker shock (well before I bought my wheel).
DIY Combs
My first DIY was trying to find something that could work similarly to the raking action of combs. I started with a long flat hair comb, which isn’t a half-bad idea, except human long combs are not the sturdiest thing. Metal dog combs are sturdy, but the tines are short. So for a while I used a horse comb, made of a heavy enough plastic to rake wool, with longer tines. Still, I couldn’t load much on it. The afro pick became the perfect solution. Now, not all afro picks are created equal. I prefer the metal ones; however, there are a few heavy plastic ones.
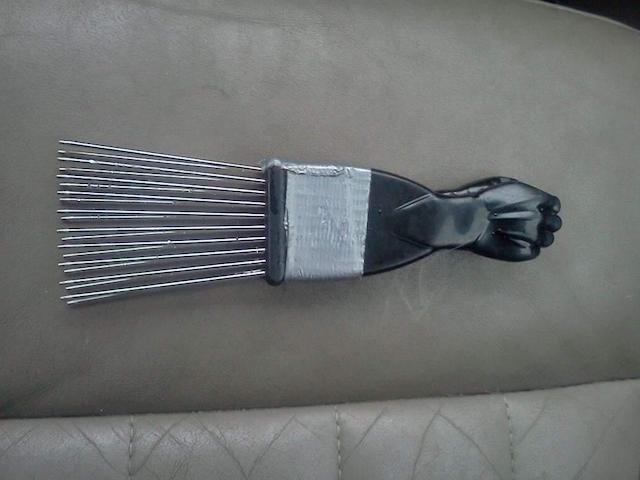
My first DIY was trying to find something that could work similarly to the raking action of combs. I started with a long flat hair comb, which isn’t a half-bad idea, except human long combs are not the sturdiest thing. Metal dog combs are sturdy, but the tines are short. So for a while I used a horse comb, made of a heavy enough plastic to rake wool, with longer tines. Still, I couldn’t load much on it. The afro pick became the perfect solution. Now, not all afro picks are created equal. I prefer the metal ones; however, there are a few heavy plastic ones.
DIY Hackle
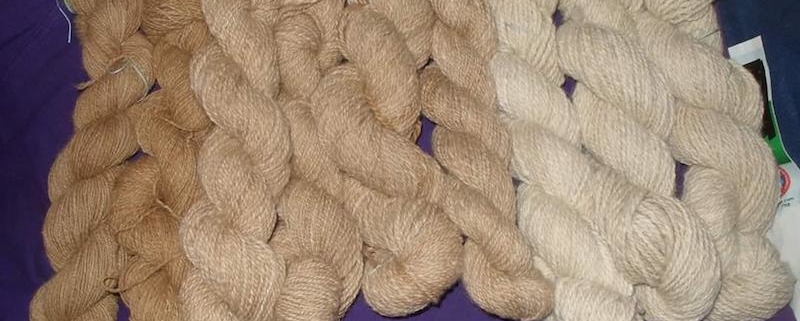
The very first wool I prepped was medium-stapled Cheviot cross. Using the afro pick worked very well, though as I predicted, my first attempts at spinning didn’t stick, and it was a little more than a year before I would try again. I traded my spindle for a wheel, and that is when the spinning began in earnest. I found I needed a faster way to process more raw wool than a single pair of afro picks could provide. Stringing a group of afro picks together to make my next favorite fiber tool, a hackle, was a very simple build.
All you need is a length of wood, such as a 2×4, a few picks, 2 screws for each pick, and 2 clamps. Set the picks as close as possible to make the gaps even. In some cases, you may have to shave off some of the ends so the picks sit closer. I also found, for the length of the pick, 2 screws hold better than one. Remember to leave room on the ends of the wood for the clamps so they are far enough that they don’t interfere.
DIY Carders
As I explored new fibers, I found I needed to add another tool to my collection: carders.
When it comes to hand carders and flickers, I used pet slickers. Between the German Shepherds and the Angora rabbits, slicker brushes are something I keep, and you bet I’ve tried all kinds of brands to find which will hold up well. Buy the best pet slickers you can afford. Cat brushes seem to have the smallest teeth per inch, but they are also the smallest size. Plastic brushes are less expensive, and I have found those in the largest sizes; I have also found the plastic handles don’t last long, though the cloth holds up pretty well.
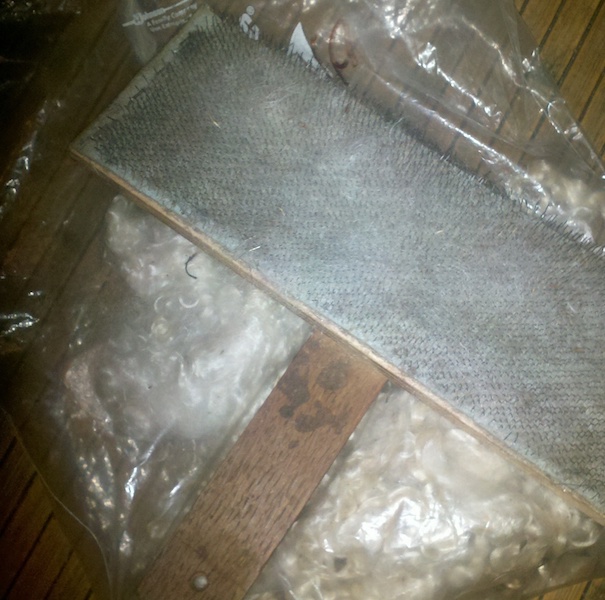
Another consideration is buying the carding cloth and building the base and handle. You can purchase a small amount of cloth online for a reasonable price. I bought a quarter inch thick piece of wood from a craft store, glued and then stapled the cloth onto it, and added a handle. Many years later, this is still my go-to large hand carder that I use for all of my flicking preps.
I process 90 percent of my own fibers from raw wool, and while I later bought hackles, carders, and combs, I still find myself reaching for some of my simpler DIY tools. Probably because, just like my handspun yarn, they were handmade to cater to my particular needs. Handspinning is a skill as old as time, with many fine textiles created with simple handmade tools. So don’t let your budget stop you from creating the yarn you want.
Denise Williams, a former school teacher, decided to live her dream and become a writer and artist. Her passion is processing and spinning fibers to knit, crochet, and weave. Denise chronicles her fiber adventures on her YouTube channel, Four Square MicroFarm.

Supported Spindle Tips Needed
Calling all supported spindle spinners! How do you travel with your supported spindles (and their support)?
Share your tip by going to our Tip Jar submission page.
Your tips will be printed in the Summer 2020 issue on supported spindles. The person who submits our absolutely favorite tip will get a prize from us! It’s our way of saying thanks for sharing your wisdom with the PLY readers.
Guilded: Creating Community Through Cloth
Words and Photos by Sarah Thornton
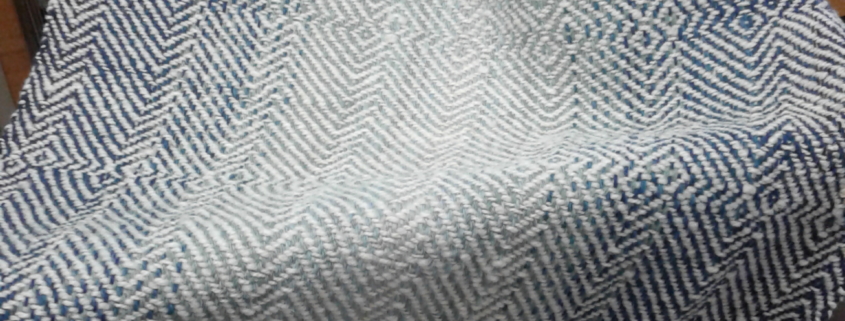
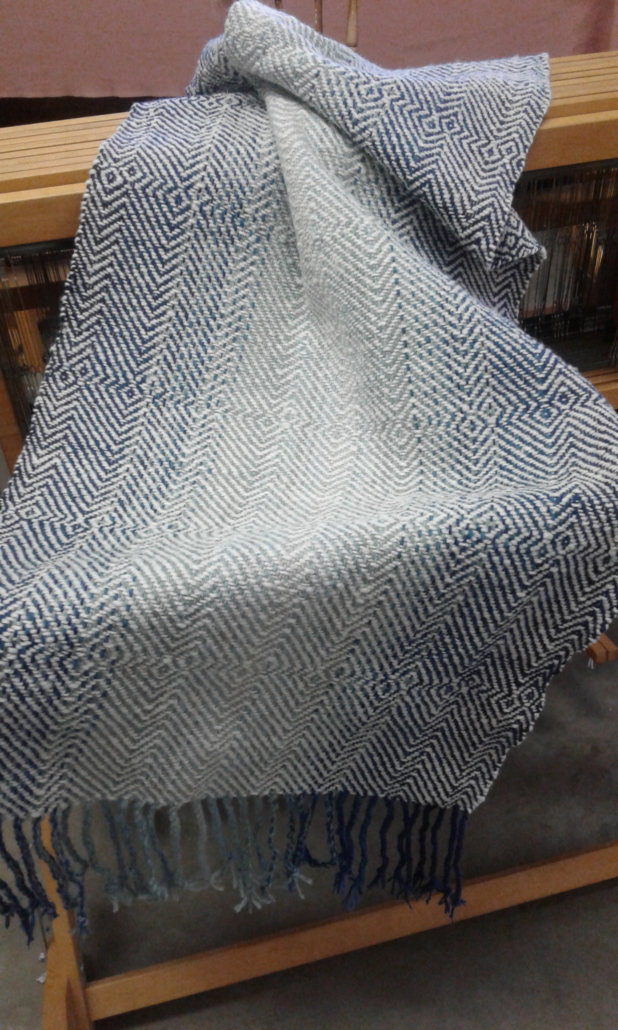
There’s a piece of cloth in my office: a shawl, about 22×72 inches, with twisted fringe, woven in a simple 4-shaft twill. The weft is a 2-ply white wool – nothing too special, rather coarse in fact, and somewhat unevenly spun and plied. The warp is a mirrored gradation of blues, from dark on the outer borders to light in the middle sections – all handspun of varying colours, textures, and grists. The drape is, well, to put it kindly, more that of a heavy blanket than of a shawl. But none of those details matter to me. This shawl is more than it appears.
My team wove the shawl in July 2018 at a Sheep to Shawl competition held as part of the Salt Spring Island Fibre Fair. The fair was a 2-day event of classes, vendors, and demonstrations, and the competition was a key part. Salt Spring Island is one of the Gulf Islands of British Columbia, situated in the Salish Sea between Vancouver and Vancouver Island. The island is known for its sheep, Garry Oak meadows, artisans, and local food. Their Saturday Market attracts tourists all summer long. It’s a 35-minute ferry ride from Victoria or an hour from Vancouver and is an all-round delightful place to visit.
Planning the Shawl
At the Victoria Handweavers and Spinners Guild, we heard about the upcoming event and decided we had to field a team! Our Island guilds are a friendly bunch, and we love getting together at various fibre fests and spinning events throughout the year. This time, we’d throw some friendly competition into the mix.
We needed a theme for our team of 5 people – the section for “team spirit” was a significant amount on the score sheet! Brenda and I brainstormed – we love blue and knew we would need to work quickly to finish a shawl in the 5-hour limit. I definitely wasn’t thinking of the online fundraising website or the 90s music folk rock duo, but between the two of them, the Indigo-Go Girls was born. We had a name and a theme! Now, what should the shawl look like? We knew our weft would be white – we’d seen a small sample of the fleece – and an indigo warp would set off that white weft well. We solicited donations of blue handspun skeins from other guild members, and Jennifer and Brenda planned and made the warp. Plain weave is fast but isn’t too eye-catching, so twill it would be. I have to admit, I’m not much of a weaver, so when I asked for lightening bolts… But Jennifer did a great job with the interpretation, I thought! Other guild members donated time to sew our aprons. July approached. Even though we’d done lots of planning in advance, we hadn’t actually managed to practice at all. Generally, a successful sheep to shawl team will have some sense of how long it takes to produce the kind of yarn they want, but somehow getting together eluded us. Our team had challenging work and travel schedules, but we all knew each other and had seen each others’ spinning and weaving, so we hoped we could manage and adapt on the fly.
Arriving for the Competition
My fiancé and I took the opportunity for a short vacation and rented a small cottage for 4 nights. A teammate and her husband joined us for 2 nights. The reality of the ferry schedules meant all participants had to stay on the island the night before the competition.
Bright and early on Saturday morning, we delivered all the equipment to the Farmers Institute hall – 4 spinning wheels (3 to use and a spare, just in case!), a drum carder, a loom and bench, various extra tools, and the display boards explaining our process. Also important, the bluetooth speakers and tablet to play our spinning tunes! (We did check with the judge and other teams about having the music, and they all knew they could ask us to turn it off/down at any time). At the last minute, we found the bobbins for one of the wheels which had been packed into a different box for transportation – crisis averted.
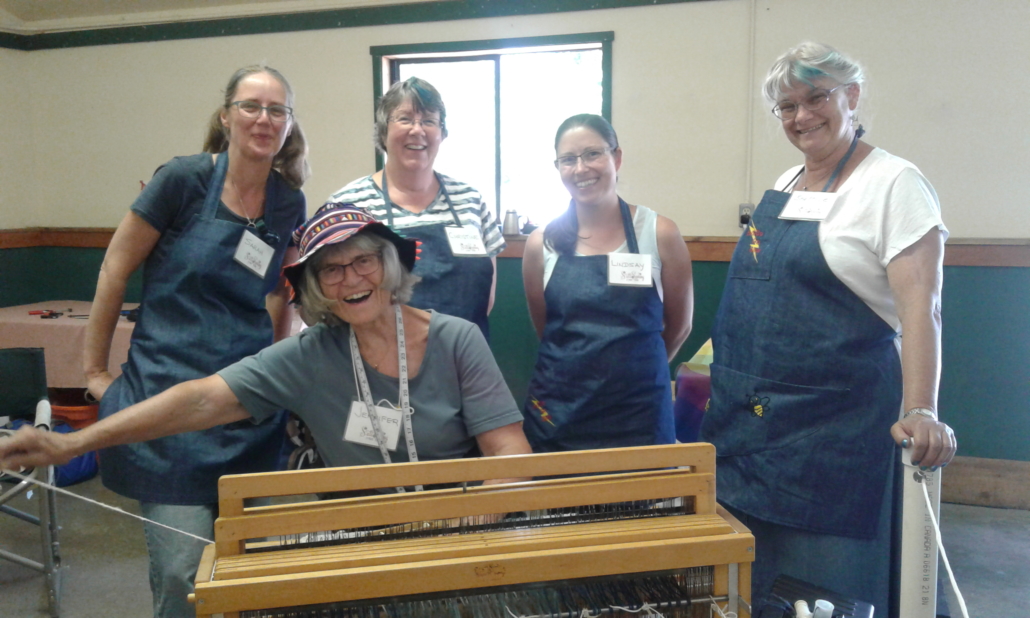
Each guild had a cordoned off area in the hall. We all had 5 team members – one weaver, 3 spinners/plyers, and one gopher/fibre prep person. The rules were clear – no more than 3 people could be spinning at once, and the gopher could only step into a weaving or spinning role if the original person was taking a break. We donned our costumes – denim aprons with the team logo embroidered onto the pocket, blue chalk in our hair, glittery blue nail polish (for some!), and denim capris/shorts or skirts.
The three teams approached the judging table for last-minute instructions and drew numbers to choose a fleece. All 3 were Cheviot crosses, and unfortunately, all had issues, though each in a different way. Ours seemed to have short coarse hairs sprinkled liberally throughout, which we didn’t take the time to remove at first. Ah well, had we known how quickly we could work (remember that lack of practice?), we could have done a better job!
Jumping Right to Work
Just before 10 am, the whistle blew and my teammates jumped right to work. But before joining them, I jumped to the tablet and pressed play to start the playlist! “Greased Lightnin’” filled the air – it was time to get going! Next came “Wake me up before you go-go,” and then the spinning and weaving tunes started (see full playlist below).
This competition allowed the use of a drum carder, so that was our prep tool. Three of us started pulling fleece apart, and Beatrice loaded the carder and started cranking. Within just a few minutes the first carded batt was ready, and Lindsay and Christine got down to the spinning.
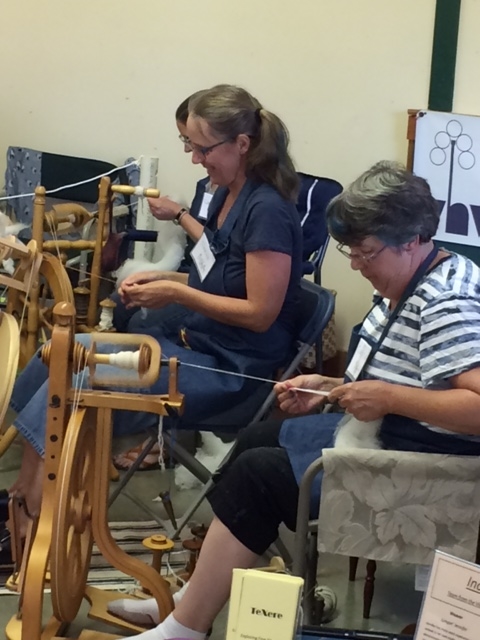
Jennifer and I continued sorting fleece, and Beatrice got going on the next batt. As soon as the spinners had 1/3 bobbin each, I started to ply. I quickly handed off my bobbin to Jennifer, who readied her weaving bobbin and got to the weaving. A cheer went up as she threw the first pick!
The minutes flew by. At one point, the whole room was singing along when Darius Rucker sang “Wagon Wheel” – the tunes helped keep our energy high. Some competitions allow for a team break, but not this one! We swapped out as needed for bathroom, food, and fresh air breaks, and we were making good enough time that I took a few minutes to check out the competition as I ate a sandwich. As the hours accumulated, though, we all began to flag. But then Jennifer said our shawl was long enough! She had more than enough weft to finish the last few inches. So as she threw those last few picks, we spinners cleaned up and prepped our table for fringe twisting. It must have been quite a sight – 5 of us intently bent over the shawl, twisting fringe on both ends at once, from both sides. And then we were done! A full 15 minutes before the final bell rang at 3 pm.
The Results
After the final judging was completed, we received second place – while we did finish the fastest, our spinning was a bit less consistent than the winning shawl and our shawl only just met the minimum length requirement (it shrank over 15% after coming off the loom and waiting for judging). We were finally able to chat with our fellow participants and see the beautiful shawls they created. And then we headed off for a swim in the lake (Jennifer) and much-deserved cold drinks!
All 3 teams created cloth – a shawl of minimum size 18×72 inches – but we created more than just cloth. We created community. Each team consisted of 5 members during the competition, but many more guild members participated, from providing warp yarns to cheerleading and interacting with the public who came to watch the event. We also created an amazing teaching tool in the shawls we made. How often are we, as spinners and weavers, asked how long it took to make a particular item? How long does it take to spin for a sweater? For a shawl? The answer is always “it depends,” but with the competition shawl, we now have a tangible piece that gives us a metric. We know that all the carding, spinning, plying, weaving, and fringe twisting took 5 people 4.5 hours, so 22 hours total. And that wasn’t working extremely carefully – our technique definitely leaned towards fast rather than good! We learned a lot. We now have an estimate of how quickly we can work, so we know to take more care and time at the beginning with the carding and that we have some extra time for getting the spinning consistent.
On a personal note, the cloth we created is very special to me. I moved away from Victoria in the fall of 2018, leaving my guild and friends of 11 years. My teammates decided I could have the shawl we made. I am so happy to have a warm reminder of our very fun day on Salt Spring Island. And I still get “Dream Weaver” stuck in my head whenever I see the shawl!
The Playlist
- Greased Lightnin’ – John Travolta
- Wake me up before you go-go – Wham!
- It Don’t Mean a Thing (If It Don’t Have the Go-Go Swing) – Chuck Brown and the Soul Searchers
- Don’t Go Breaking My Heart – Elton Jon and Kiki Dee
- You Spin Me Round (Like a Record) – Dead or Alive
- Spinning Wheel – Blood, Sweat, and Tears
- Spinning Around – Kylie Minogue
- Spin Our Wheels – Sloan
- World Spins Madly On – The Weepies
- Spinning Like a Top – The Devil Makes Three
- Spinnin’ N Reelin’ – Creed Bratton
- Roving Gambler – Hart Valley Drifters, Jerry Garcia
- Jolly Roving Tar – Great Big Sea
- Dream Weaver – Gary Wright
- Weave Me the Sunshine – Peter, Paul, and Mary
- Weave On – Serj Tankian
- The Goddess and the Weaver – Spiral Dance
- Wagon Wheel – Darius Rucker
- Wheel in the Sky – Journey
- Wheels on the Bus – Raffi
Sarah Thornton is an ocean scientist by training and educator by vocation. From 2007–2018, she lived on Vancouver Island, getting involved in all sorts of fibre pursuits. She now lives in Vancouver and teaches knitting, spinning, and college biology and competes in sheep to shawls with her new fibre community.


Leave a Reply
Want to join the discussion?Feel free to contribute!