


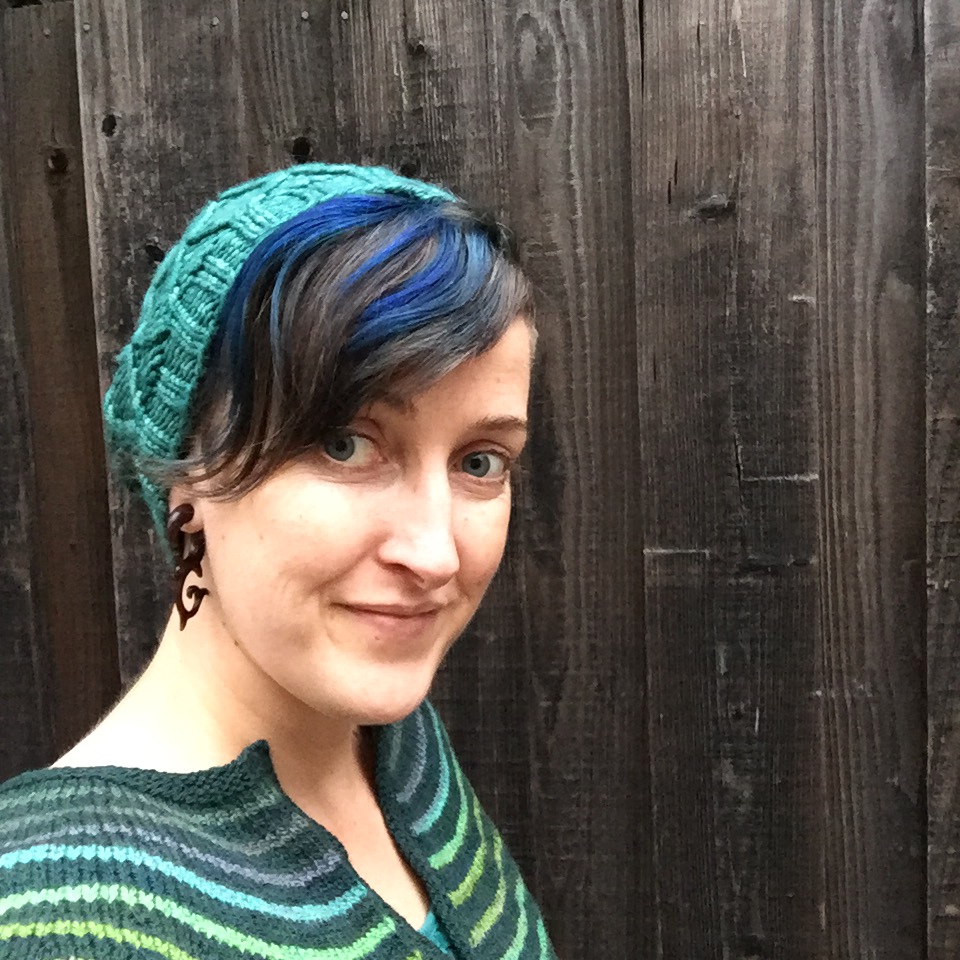
Mixing Things up for a Sweater
words and photos by: Johanna Carter
I always admire those who are able to spin mountains of yarn for a big project, ready to knit a wonderful sweater or cardigan. It is a satisfying feeling when you finish all that work, especially if you started with washing and combing the wool or even raising your own sheep.
Mixing spinning and knitting
The typical way to work through a larger project is to spin all the singles first and ply them in a particular order so you get the yarn even throughout the whole project. I don’t have so many bobbins, but my bigger problem is that I am quite impatient and want to get on with knitting once I have an idea. And normally, my brain is full of ideas for fibre work and the limit is the time, as I am a musician and teacher. I can’t sit at the spinning wheel for a long time if I’m not on holiday, so during the school year I mostly knit, and during the holidays I can dye, spin, use my drum carder, and do lots of fibre work. The only time I was able to produce bigger quantities of yarn before I knitted them up was during the Tour de Fleece in the two years during the pandemic, when we did not go on holiday at the beginning of July.

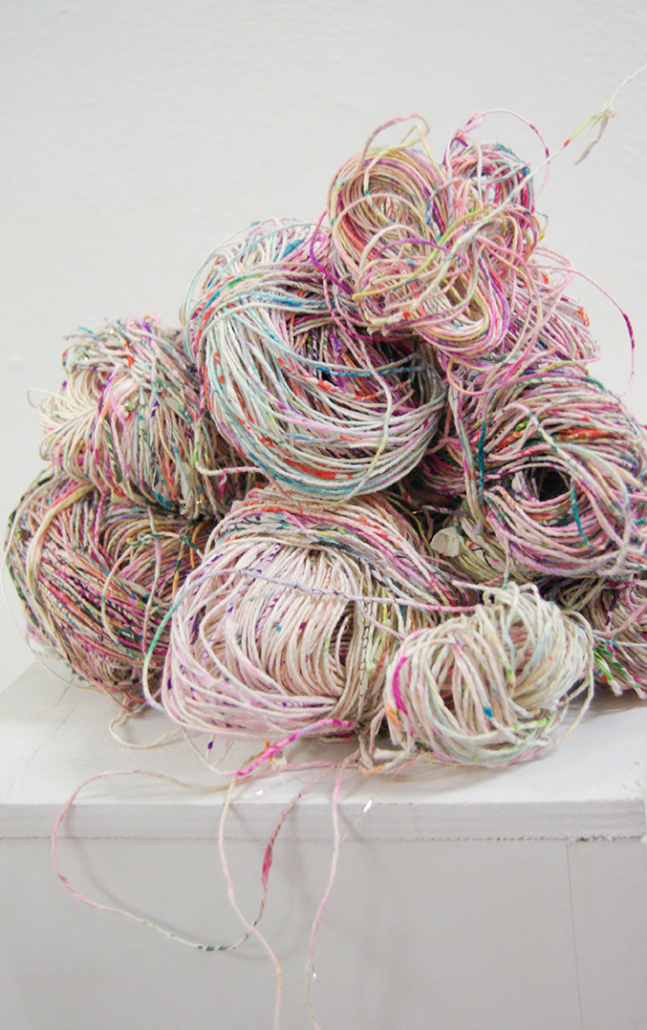
A highly photogenic collection of naturally dyed fibres.
I like to finish knitting one big project like a sweater or cardigan before I start the next one, or at least until I can’t carry it in my bag easily anymore, so I have an excuse to begin the next one. Sometimes it is good to have a second project on the go – I call it mindless knitting, where I don’t have to look very much – which I can keep my hands busy during Zoom or other meetings, which helps me listen.
Mixing colours and fibres
Usually I dye my yarn with plants which I collect in the woods or get from garden flowers. I also use cochineal and indigo, which I buy, to get lots of different colours. I really love the greens and blues I get from dyeing with indigo. I have lots of dyed wool, and all those colours give me inspiration for further projects.

Beautiful greens and blues dyed by the author using indigo and other natural dyes.
Blending the wool on the drum carder I can get even more shades. I like to blend with fibres like silk, alpaca, or plant fibres, and I love sari silk, to get those little bits of colour in my yarn.
Fibres of different types and colours are blended on a drum carder for elegant results.
When I have an idea for the next sweater, I start carding, and then I can begin to spin. Once I have spun enough yarn – say, for one day – I cast on and start knitting, usually top down, so I don’t have to decide too much in advance about length and width.

An idea for the author’s next sweater in the gathering stages.
When I spin on my wheel, I have to sit at home, but while spinning I can read a book or talk to others during online meetings. I also like to spin on my spindles, and that works on a walk, or a museum visit. I take them on holiday as they don’t need much space, and when I spin for a lace shawl, I don’t even need much wool either. At home there are spindles all over the place; I can spin when I am waiting for the kettle to boil, when the computer is slow, when I am cooking. Like that I can make good use of a short time and the yarn still grows.

Knitting as soon as the yarn is spun helps the author complete sweater projects in a timely manner.
I can take my knitting almost everywhere, which is why I don’t want to wait to get started until I have spun all the yarn for a whole sweater. I knit at home, on the bus or train. The only thing I have to make sure of is to be one step ahead with the yarn.
I love to knit Fair Isle sweaters. My favourite method is to use only one bobbin, which I don’t even fill, because I need smaller quantities of lots of colours. Then I wind a ply ball and ply it on itself. For that I put my thumb through the ball, so I can tension the two singles with my fingers and they don’t get tangled, as long as my thumb (or a cardboard roll or a pencil) stays in the middle. I don’t have any leftovers from plying, and it is quick when I suddenly need more yarn.

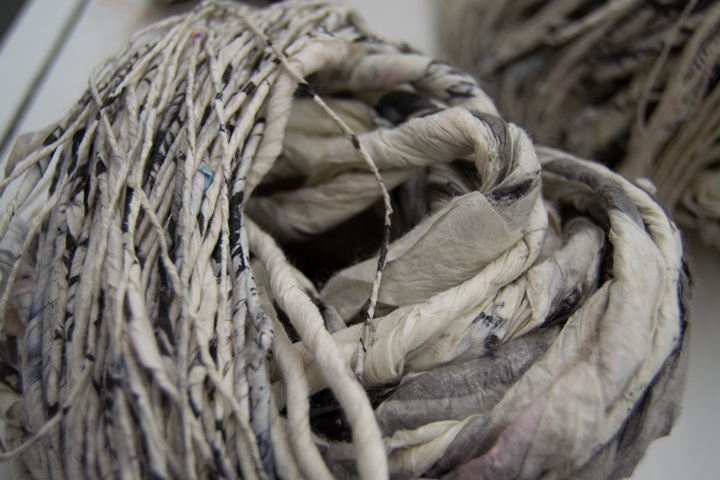
Several charming sweaters dyed, spun, and knit by the author.
I have never had problems with the yarn not being consistent enough throughout a project. I just know what yarn I want and my fingers seem to remember what to do. I am sure it is good advice to have a little card tied to the spinning wheel with a bit of the singles you are aiming for, so you can check and make sure you are spinning a consistent yarn.
Mixing breeds
There are so many different breeds, but some of my favourites are Shetland, BFL, and Jämtland – a Swedish breed. After dyeing them, I often forget what I have used, so when I do a new project it often turns out that I have used different breeds and fibres just to get the right colour. For the Fair Isle knitting I want to juggle lots of colours, which is more important to me than making a sweater out of only one breed.
Recently I made a pullover for my husband using about 12 different breeds and colours, even mixing short and long draw. For me it was a breed experiment and a way to use up lots of smaller quantities of wool I had in my stash. For that sweater I used combed top without blending.

Mixing in knitting during the spinning process is a wonderful way for a spinner to avoid being overwhelmed during a sweater project.
My feeling is that some people don’t dare to start spinning for a bigger project because they get overwhelmed by the quantity they have to spin and then all the knitting there is to do, especially when you want to spin the yarn entirely on spindles. Mixing the spinning and knitting for the same project is more interesting; you get more variety and more freedom to choose what you want to do next as long as you don’t run out of yarn. It breaks the project down into smaller, less daunting parts. The only thing you might want to plan is to have enough fibre at the start, but even that is not necessary, there is always a sheep growing more wool.
Spinning Paper
Words and photos by Kyla Crawford
Have you ever wanted to take a drawing and make it into yarn? I do that by spinning paper. I started this practice while I was in graduate school working on my MFA in sculpture. I have always been fascinated with artworks that cross the line between two and three dimensions, where drawing and painting become sculptural. Fibers are transformative: they can be flat or sculptural and everything in between.
I found my passion for textiles while working on my BFA in painting, to which I later added a fibers concentration. When I was learning how to spin yarn, I thought about how I could combine the worlds of fiber and paint. I scraped paint off my palette and noticed these long strands of paint film, and I wondered about spinning that into yarn. How could I create goopy paint yarn? Paint is not flexible and stable enough on its own, and wet paint would bond the strands of yarn together. But the idea of paint yarn has stuck with me and hangs out in the back of my mind.
In graduate school I pushed myself by trying different materials, one of those being paper. I used paper to capture the detritus of my art-making and reused it within my pieces. I wanted to incorporate my fiber techniques with different materials and forms. I had heard about spinning paper into yarn in my years of spinning research and looked through my books on spinning novelty yarns. I found a technique of taking strips of paper, mixing it with wool, and spinning it so the wool captures the paper into the yarn – but I didn’t want that. I just wanted the paper, and what was on the paper, to be turned to yarn.
I still had the idea of paint yarn on my mind, and wool would be adding new material, which would add something different to the art piece. With further research and google rabbit holes, I found a traditional Japanese technique, called shifu, for turning paper into yarn. This technique has been around for centuries as a way for people to recycle paper and turn it into a usable fabric in times of scarcity.
I had to learn more about this technique. What types of paper were suitable? What tools did I have and what did I need? How could I use this technique and bring it into my own art-making? I found Susan Byrd’s videos on shifu when googling for more info, along with her paper recommendations. These are an extremely valuable resource, and there are a lot more resources today if you want to try paper spinning yourself (references below).
So I ran over to the art supply store and picked up some mulberry papers. With the help of the experts at the paper desk, I found that Thai kozo paper would be the most cost-friendly option for this type of fine handmade paper. In the spirit of experimentation, I gathered up different types of paper and drawing materials and started mark-making. I tried following the traditional process of measuring and cutting the paper until I could not get part of it to work for me: the traditional pre-spinning of rolling the damp paper on a stone was not happening. I had to figure out another way.
What is happening to the paper in the pre-spinning technique? The paper becomes softer, and the process makes something flat into something round. How could I get a similar outcome in a way that works for me? I decided I could soften the paper by scrunching it in my hands. Then I spritzed the paper with some water so it was damp, to help it take shape as it twisted into yarn during the spinning process. With the damp paper and my spindle, I added twist.
To my delight, I had created yarn from paper! Amazing! I turned a two-dimensional drawing of lines into a three-dimensional physical line. It was transformative and full of energy.
In my artwork, I explore magic and rituals to capture energy and spirits within the work. Working in the space between reality and psychology, I build worlds and embrace transformation, energy, and actualization. After transforming that drawing into yarn I felt like the Fates capturing these ideas and spirits. To me yarn is a magical thing, full of energy and potential, waiting for its purpose to be actualized.
This technique opened a lot of doors: new doors in my art-making process and new types of papers to explore. What papers would and would not work? What painting and drawing materials would and would not work? What inks and paints, smeared and spread throughout the paper? What lines would stay put? What would that look like after it was twisted into yarn? How would the paper yarn behave in comparison to other yarn that I’m more familiar with?
Paper yarn is paper, but it’s also yarn. It lives in an interesting in-between space. It’s a little bit wiry and has a mind of its own, but it’ll also stay put when you tell it to stay.
Paper yarn can be used like yarn to knit, weave, and crochet. However, I am fascinated with it wound into a ball as a sculpture in itself. I have also gotten into weaving with the paper yarn as a decorative weft, like in overshot weaving structure. The weavings can be hung in interesting ways, with words woven into the fabrics as patterns. I invite people to join my process by drawing, writing, and marking their own paper that I then spin into a piece of art for them. It is a mindful and layered process that lets me embrace a personal spiritual ritual.
Paper yarn is a fun place to play because you get to draw and write on paper, and if it doesn’t look good, it’s okay – it will be hidden in the texture of the yarn. You can play and experiment with different types of paper, recycle old documents, and keep memories of a loved one on these papers. If you want to learn more about spinning paper, look into Susan Byrd’s videos, as well as the book Japanese Paper Yarn: Using Washi and Kami-ito to Knit, Crochet, Weave, and More.
Further resources
“Hand Spun Newspaper Yarn” by Megsta
“How To Make Paper Yarn” from Warped Fibers
“How-To Paper Chase: Spinning Paper Yarns” by Judith MacKenzie
Paper Threadmaking for Shifu by Susan Byrd (video)
“Paper Yarn: A brief history” from ORA Fabulous Fibres
“Shifu Paper Yarn” from Shuttles & Needles
“Shifu: The Art of Making Paper Into Thread” by Suzanne DaRosa
“Shifu: Weaving with Paper” by Peggy Osterkamp
“Spinning Paper” by Melissa Hilliard Potter
Hiroko Karuno, 生紙と紙糸 = Kigami and kami-ito: Japanese Handmade Paper and Paper Thread (Shikosha Publishing Co., 2017)
Andra F. Stanton, Japanese Paper Yarn: Using Washi and Kami-ito to Knit, Crochet, Weave, and More (Schiffer Craft, 2025)
Susan J. Byrd, A Song of Praise for Shifu = 紙布讃歌 (The Legacy Press, 2013)

Kyla Crawford is an artist and educator. She teaches at the University of North Texas and surrounding community colleges. She has had artwork shown at The Houston Center for Contemporary Crafts. She has taught workshops with the CHT Conference, HGA’s Convergence, the Meadows Museum, and the Dallas Handweavers and Spinners Guild.
Ask Jillian: How Do I Steam My Fiber?
I’ve seen lots of people lately steaming their fiber before they spin. Why do they do this and how do I do it if I want to try it? ~Bethany, Denver, Colorado
Why to steam your fiber
Steam wakes up the crimp in a fiber whether it’s a woolen preparation that’s been hanging out too long and squished in stash, or compressed top that has the crimp pulled straight during preparation, and then squeezed in stash or in chaining.
There are a few reasons that spinners steam their fiber before they spin.
The most common one is that their fiber is compacted, this usually happens with combed top, and dyed braids. Sometimes the fiber has been your stash for a long time, sometimes a dyer might squeeze their fiber when dyeing, or braid their fiber too tightly. Whatever the reason the fiber doesn’t want to draft, it’s just stuck.
It’s a great way to revive woolen preparations like batts without re-carding them.
I like to steam my combed top when I want a loftier preparation, something more a step toward a woolen preparation. Waking up the crimp makes a combed top lighter, airier, and easier to spin long draw.
How to steam your fiber

Any way that you can get steam into the fiber is good. I wouldn’t let it get completely soaked, you’ll just have to wait for it to dry to spin.
If you live in a humid place you can hang your fiber outside. You can hold your fiber in the steam of a kettle or a boiling pot of water. You can use a steamer basket in an Instapot or a pot on the stove. You can take your fiber into a steamy bathroom with you.
I hang my fiber on a hanger and use an inexpensive clothes steamer; I like to watch the crimp come alive.
I fluff my fiber, steam it, lightly fluff again (if needed), let it dry and spin.
Be careful of steam burns, they really hurt! I like to use tongs instead of my hands to manipulate the fiber while I’m steaming.
How steam changes the fiber
I steamed some Merino and Corriedale commercially combed top and slid some not steamed fiber into the photo with each. I shot the fiber from straight down so you can see the spread, and from the side so you can see the poof.
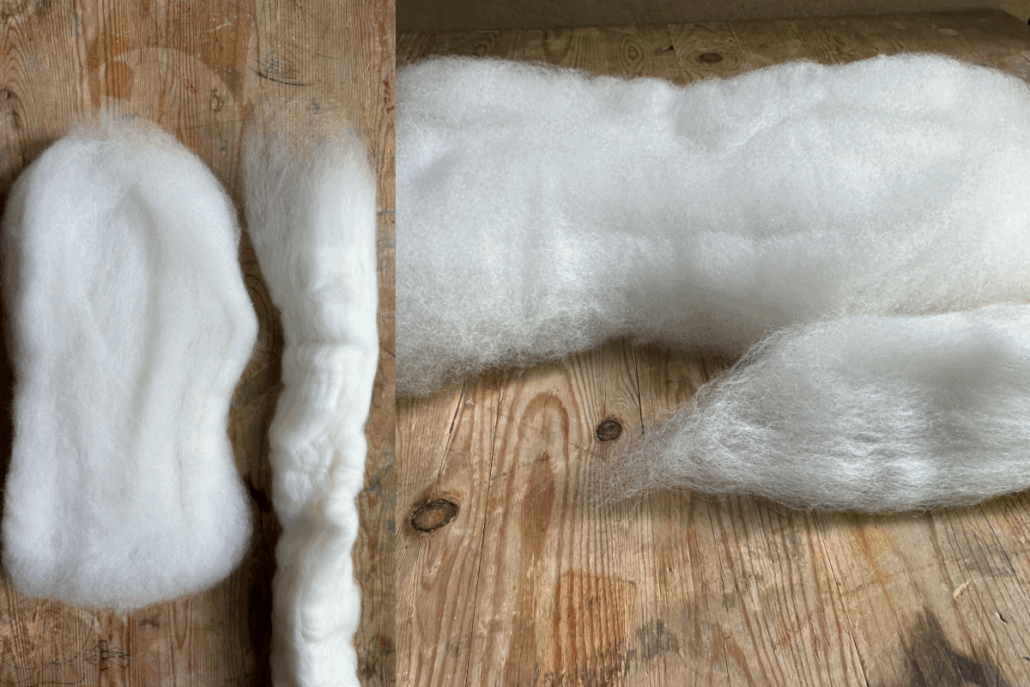
Look how the crimp comes alive. I knew the Merino would super puff, love that intense crimp.

But look how much the Corriedale changed, it’s no slouch in the crimp department!
I wish I could hand you the post steamed fiber so you could feel the squish and spin it! It’s a dreamy draft and it’s much easier to draft combed top long draw after steaming.
If you a spinning note-taker, remember steamed combed top isn’t a wholly worsted preparation. I make sure to mention it in my notes and on my spinning tags.
What about braids?
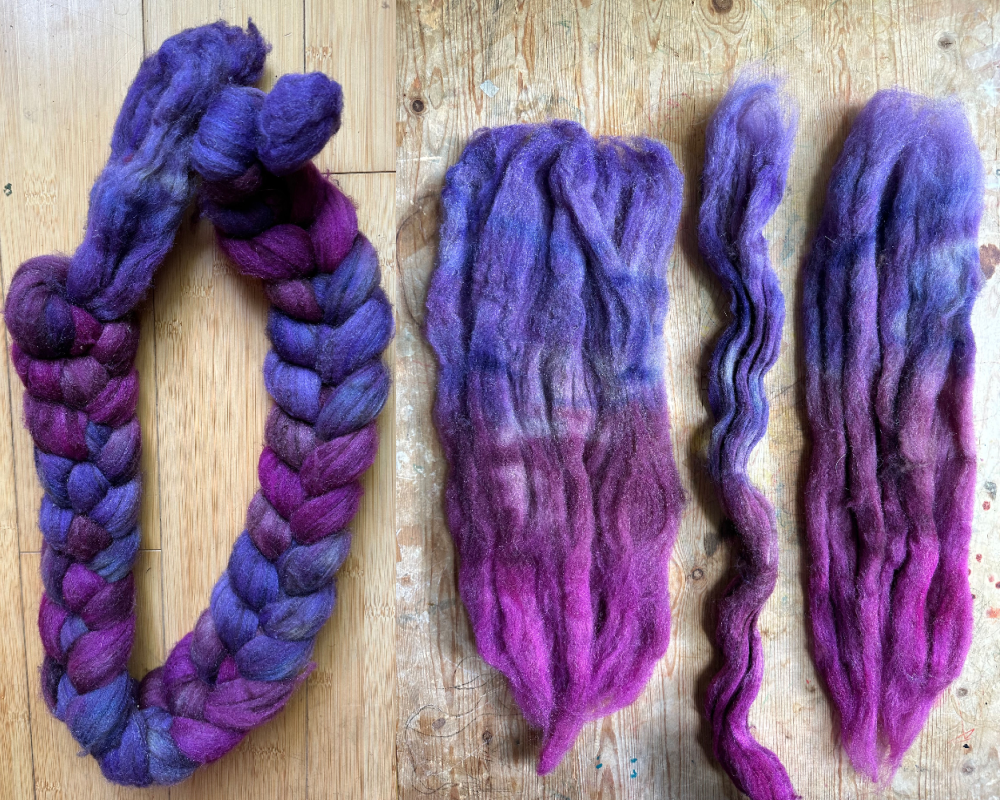
When I steam braids, I always do a little prepping beforehand. I always unchain and shake out my fiber before I steam it. The photo shows the original braid on the left, and two versions of steamed fiber flanking a strip of the unchained braid.
The difference between the two steamed pieces of braid is the one on the left I lightly fluffed sideways all the way down the fiber piece, I always do this before I steam a compacted braid.
The other piece of braid on the right is just steamed. It grew but not as much as the piece on the left. Both pieces of braid were shaken to open them up some, but only the one on the left was also fluffed open before steaming.
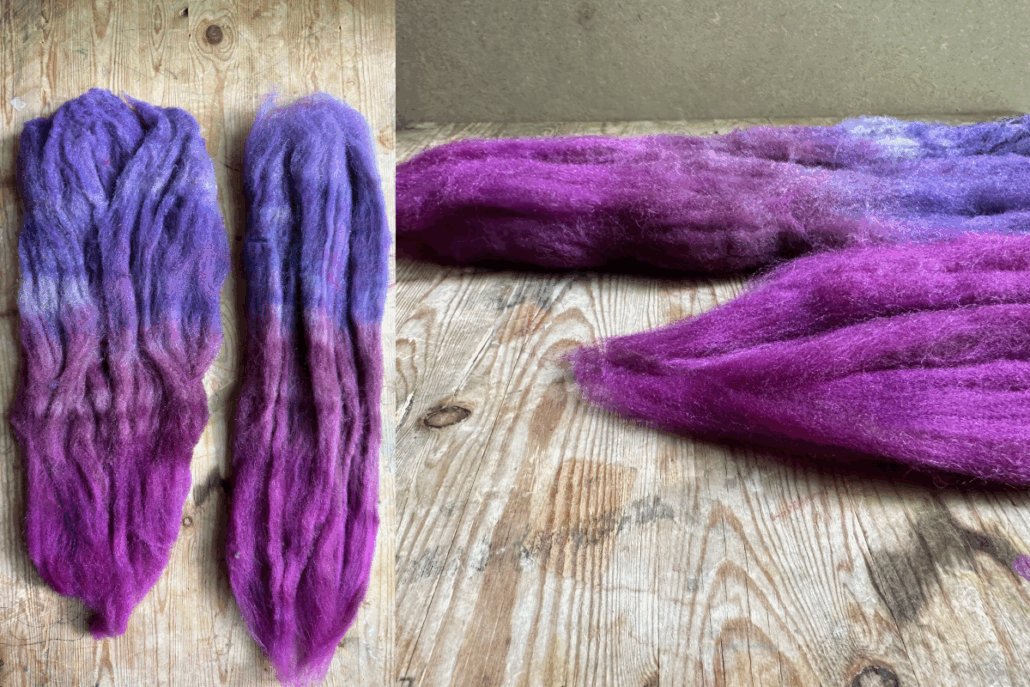
After I opened the piece of braid on the left, it was much thinner than the unfluffed piece. But once I hit them both with steam, the fluffed open piece (on the left) swelled in size and the just shaken piece opened mostly horizontally. In the photo of the fiber shot sideways the piece in the back is the prefluffed piece and the one in the front is the other. The are at least the same height, the prefluffed pieced almost doubled in loft. That’s a twisty way of saying, if you fluff open your compacted fiber before steaming it will poof more.
Want Jillian or Jacey to take a stab at your question? Tell us what you want to know!
Planting Seeds for Better Spinning Habits
by Kira Dulaney
Historically, spinning was a necessary household chore, but these days for most of us it’s a hobby, a creative outlet, or perhaps even an escape. You might spin yarn sporadically and inconsistently or in concentrated bursts that cause sore muscles the next day, or maybe you are getting bored by using the same old spinning techniques. So let’s plant seeds for better spinning habits, by taking small steps that will gradually grow to become integrated into your process.
Make time for crafting
I often hear from crafters that they just don’t have the time they want for their hobbies, including folks who are recently retired and had been looking forward to all that free time for years, only to find it didn’t appear as expected. Taking time for our hobbies is an act of self-care, and as crafters we also end up with useful items, something that, for example, stamp collectors can’t say.
Still, it can feel like there’s always something more pressing to do, so I suggest you add spinning to your to-do list! Set yourself some homework, even if it’s just ten minutes a day, since regular practice will improve your skills, keep your projects more consistent, lower stress, and add to your happiness.
Place a wheel or spindle and beautiful fiber in plain sight where you’ll see them and be tempted to do just a little spinning, and if you need to, block out time on your calendar. You might be surprised to see that once you get started, you figure out how to carve more time out of your day so you don’t have to stop.
Help with consistency
Lots of spinners are frustrated about a lack of consistency in their yarn, with variations throughout the skein that may not disappear simply with practice.
Matching your fiber with an appropriate preparation and drafting style makes it easier to spin a consistent yarn than trying to force a fiber in a direction it doesn’t want to go.
Using sample cards is helpful, especially if you’re a sporadic spinner and it takes a while to get through a project.
Rewinding your singles from a distance is an easy way to even out the twist with just a few extra minutes of effort – ta da, you’re a better spinner already just by adding this simple step!
Care for your body
Spinning can also put a physical strain on your body, and one way to help is to mix up what you’re doing. Rather than spinning a short forward draw for hours on end, switch it up with a different draft on another fiber, a bit of carding or combing, some swatching or sampling, or just a stretch break.
Try adjusting your chair, propping up tools to get a different angle, or doing some tasks standing up. Lighting is so important, and especially for those longer crafting sessions heading into evening, try turning on or moving your lighting source so you can see your work without hunching over.
Try something new
Playing with new techniques is an amazing way to broaden your range and remember what you love about spinning. Try a new-to-you fiber, preparation, draft, or plying technique to rediscover the joy of experimentation.
Taking a workshop is an ideal way to learn a new technique, and there are options online as well as at shops and fiber festivals. Joining a guild can be so fulfilling, and you’ll get to see other spinners’ processes and products, perhaps inspiring you to try something new or even just a little different from your usual process. The online PLY Spinners Guild is a wonderful way to access lessons, teacher talks, forums, and spin-ins, all from the comfort of home.
Enter a competition
Consider entering a spinning competition as a way to get feedback on your work and ideas for improvement. Many county fairs and sheep and wool festivals have competitions for handspun yarn and projects using handspun. Simply planning to enter can be a nice way to help you boost your enthusiasm, carve out time, and work to improve your skills.
Just looking at the categories may inspire you to start spinning. The judges’ comments will tell you what was successful and give you considerations for future projects, and you may even win a ribbon!
Create a project
There’s no better way to learn what you’re doing well and what could be improved than to create a project with your handspun yarn. It’s also so satisfying to use handspun yarn that you’ll be inspired to create more and different yarns for new projects.
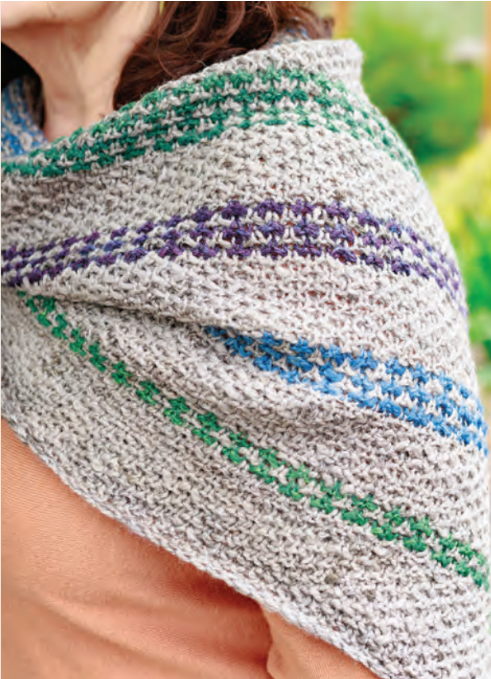
If you have a lot of little bits of yarn from workshops or experiments, make some small projects like amigurumi, incorporate the bits into tapestry weaving, or use them as contrast stripes with a handspun or commercially spun main color – my Wildflower Honey Shawl for the Plants issue was designed with this in mind.
Decorate your space with bunting or garlands of handspun yarn, frame some in a shadow box, or add it to embroidery with couching stitches. Seeing your work displayed in your studio or home is likely to entice you to spin more, and if you happen to have a wheel or spindle and beautiful fiber in plain sight, it will be so easy to sit down and spin for just a few minutes . . . or maybe more.
Kira Dulaney is the designer behind Kira K Designs, a line of original knitting and crochet patterns with a streamlined and eminently wearable aesthetic. Kira has been teaching fiber arts classes and hosting crafty events in the San Francisco Bay Area and beyond since 2002.


Leave a Reply
Want to join the discussion?Feel free to contribute!