My Favorite Way to Get Spinning Done

tv

Have you watched the Night Manager?

It seems like at the beginning of the new year every spinner I know has the goal of spinning more.

Me included! This year I want to spin 10 new-to-me-dyers and make 12 things for myself (some handspun some not).

I have a favorite trick to get myself to spin more, it works for me every time. I get hooked on a TV show.

More specifically, I get hooked on a TV show and only let myself watch it when I spin.


binge tvI am amazed how much I get done because I want to see that next episode (and the one after that).

I just finished watching The Crown (and yarn for a cowl, a hat and another 4 ounces of fiber spun) and I am just starting and am quite taken with Mozart in the Jungle (lots of swatching,yarn for another hat and I’m about to start some lace spinning).


How do you trick yourself into spinning more?

Save

Save

Don’t rely on the USPS to forward PLY!

I know, I know, you look at the USPS website and it promises that it will forward your periodicals (magazines) to you, at no cost, for 60 days. But it’s a lie. Or at the very least, it is likely to be a lie. I know that every once in a while they get forwarded but there seems to be no good way to predict which will and which won’t. So, I can’t explain why but I can tell you what is really likely to happen to your magazine when you move and rely on the USPS to forward your PLY Magazine to you. There are 3 different scenarios, each more gruesome than the last.

img_2432

The first one is that they take the plastic wrapper (either the whole thing or just snip off your address), write on your new address, put it in an envelope and mail it to PLY with a postage due of .57 (for the mailing of the plastic with your new address).  And then they shred the magazine.


img_2431

The 2nd and slightly more common one is that they print a label with your new address right on top of the plastic wrapper (or stamp “can’t forward”), photocopy the whole thing, mail the photocopy to me with postage due of .57. And then they shred the magazine.


The 3rd and most common is that they open the plastic wrap, tear the cover off the magazine (or sometimes, just the part that says PLY, put both the plastic (either with your new address or with a stamp that says “can’t forward”) and the cover of the magazine in an envelope and mail both to me with postage due of $1.17. And then they shred the rest of the magazine.


About a month after we ship each issue I get somewhere between 50 and 200 of these. It breaks my little heart and it keeps you from getting your magazine! And the costs of it all is starting to really add up. If you’re interested, here’s how it breaks down: if we reship it to you, we can’t reship your original mag because the PO has shredded it, so the original printing of the mag – $5, plus the $1 periodical shipping is gone and now it’s another $5 (new issue’s printing cost) plus now that we can’t use periodical postage (that only works for the initial shipping, from the printer), the new shipping cost is $6 because the magazine is so heavy! Plus the postage due for the USPS shipping me the notice that you didn’t get the magazine is either .57 or $1.17. So when you work it out, that one issue costs PLY $11-$12 extra to get it to you, which is exactly or a little more than what each domestic subscription brings in above the cost of the 4 mags (printing and shipping). And since we rely on that $12 from each subscription to pay all the bills and salaries, it’s rough.

Plus, you don’t get your magazine (or you don’t get it in a timely fashion).

Plus, they shred the magazine!

So please please please don’t rely on the USPS, log in to your PLY account on the subscribe page (choose resubscribe or change address) using your (previous) zip code and mag code (on the label of your magazine) or, if you don’t have that, your email and password. If you don’t have either, email us at contact.us@plymagazine.com and we’ll help!

Let’s put an end to senseless shredding together!

Oil That Spinning Wheel

The week before Christmas I went to Jillian’s house to spin with some friends I hadn’t seen in a long time. We were all spinning along and soon Jillian stated to struggle with her wheel. I don’t remember exactly what was happening (something about noise I think) but I do remember saying to her, quietly, in my most respectful voice, “oil it”. She said back to me in that way that she does, “I just oiled it!” I smiled at her.

She struggled for a few more minutes and then got out the oil bottle and oiled the appropriate spots. I tried to look natural and not gloaty as her problem was fixed. just a few small drops of oil and 30 seconds.

I’m not saying that oil fixes everything but it is definitely my first step when things begin to go down hill.

This same scenario happens often in classes while I’m teaching. Some people didn’t even realize they needed to oil their spinning wheel at all ever. Then 3 or 4 drops later the whole experience changes for them.

Where?

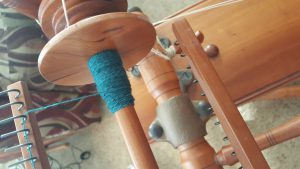
This is where it can get tricky because it depends on your wheel but I will say this. Every bobbin shaft needs to be oiled. I just put a drop of oil at each end of the bobbin if the bobbin is already on. If I’m changing the bobbin, I wipe the shaft clean and add a thin line of oil along the shaft before I put the bobbin on.

Also a drop of oil where the orifice goes through the front maiden and a drop where the bobbin shaft fits into the rear maiden.

20170104_145610

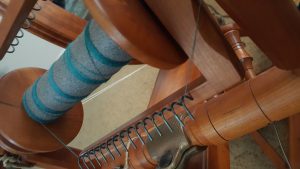
If you have a wheel with sealed bearings then the wheel hub doesn’t need oil. If it doesn’t then a bit of oil there periodically helps.

Also, once in a while I put a drop of oil where the footmen attach to the crank.

20170104_145629

How Often?

I oil 4 places on the mother of all on my wheel about once every hour to hour and a half of spinning and always right at the beginning of spinning even if the last time was only 15 minutes.

The rest of the places I oil about once per week or so. Sometimes more if I’m spinning a lot – like more than 20 hours in a week.

What to Use

I have two favorites. 30 weight motor oil which is what many wheel manufacturers recommend is the one that is most available. Gun oil is also great to use.

What not to use is sewing machine oil, or 3 in 1 oil. These are too thin, they break down faster resulting in having to oil more frequently. They also aren;t made for the amount of friction you get with a spinning wheel.

Also, I don’t recommend vaseline. It’s super thick and goopy and attracts dirt. The dirt that gets in there is gritty and will break down your spinning wheel parts more quickly.

Why?

Oil because it will help your wheel to last longer and wear better. You wouldn’t drive your car without oil. The oil in your car is there to lubricate all of the parts that are moving against each other. The same with oiling your wheel. There is a lot of friction and sometimes a little heat happens if it isn’t well lubricated.

If you aren’t sure about where to oil your particular wheel, most modern wheels wheels have a manual which you can probably find on line. If it is an older or antique wheel you can feel comfortable just putting oil anywhere there is a moving part.

I promise, you’ll thank me.


HansenCrafts introduces a whimsical history of spinning – REVOLUTION!

We are so happy to have the owners of HansenCrafts visit us today, along with Andrea Love who created a prety amazing project for them recently. We’ll let them tell you the story!


We, (Kevin and Beth – HansenCrafts owners) were talking about the history of spinning, and how tiny the present epoch is in the realm of a history some 30,000 years long. We were trying to think of a way to present the evolution of the craft leading to the introduction of the miniSpinner, when we saw a video short by Andrea Love, and BLAM, we decided to produce this story in conjunction with her wonderful use of stop-motion animation.  We thought that it would be great fun to share Revolution with the world… well, at the very least with the world of fiber enthusiasts!

The result is a whimsical view of the timeline of spinning using fiber to create the actors and sets!  It shows (in an entertaining way) where we came from, where we are, and maybe gets us thinking about where we will go to keep the craft of spinning vital and moving ahead.

 Here’s Andrea to tell and show you how she did it…

 My trunk of wool. I included sheep, goat, llama, camel, silk, cotton and grass.

My trunk of wool. I included sheep, goat, llama, camel, silk, cotton and grass.

When Kevin and Beth contacted me about a video, I saw the potential to try something I had been dreaming about for a while- a fully felted animation. I thought of it like claymation, but with wool. Wool-motion? I have been incorporating fiber into my work for the past six years, but I decided it was time to take it to the next level. The Olympic Peninsula is incredibly rich with fiber producers, which gave me a huge array of colors and textures to work with, from unprocessed goat fleeces to dyed and carded blends.

egypt

Egyptians drop spindling by the Nile River.

Having no prior knowledge of handspinning, I conducted a fair amount of research. I scrolled through Pinterest pages, watched videos on YouTube, and consulted books and online articles. I was blown away by all the painted portraits, pictures and videos of women spinning from all over the world. It emboldened me to include not just the spinning implement, but the women, landscapes and cultures as well.

Setting up a panning shot.

Setting up a panning shot.

Once sufficiently inspired by the rich history and tradition of handspinning, I started making scenes. This involved needle felting sets onto sheets of rigid blue foam sometimes upwards of two feet wide. The wire armature puppets were secured to the set using felting needles. The spinning wheels were felted over all sorts of things- wire, toothpicks, cardstock, scotchbrite, foam- anything to give it a stable structure. Kevin and Beth lent me a miniSpinner, so I was able to work in some handspun yarn as well. I enjoyed experimenting with short strands of different diameters and color combinations.

Using the HansenCrafts miniSpinner to wind some thread onto my felted spinning wheel

Using the HansenCrafts miniSpinner to wind some thread onto my felted spinning wheel

I filmed these scenes more or less in sequential order, so you can watch my technique evolve alongside the spinning implement. For the most part, these scenes originated in my imagination, but I did include one direct reference. The introduction of the spinning wheel in China is a felted homage to “The Spinning Wheel” by Wang Juzheng, one of the earliest illustrations of a spinning wheel, dating back to 960-1125 AD.

My felted homage to Wang Juzheng’s scroll “The Spinning Wheel”

My felted homage to Wang Juzheng’s scroll “The Spinning Wheel”

There are 10 unique frames per second, all manually arranged frame by frame. If this seems tedious, it’s because it is! It took me three and a half months to make this. I used the music (an original song by my friend Eric Kuhn) as a guide, determining the rhythm and timing of the piece. It’s fun to imagine this as a music video, with the spinners masterfully playing their instruments. Revolution is very dear to my heart, and I feel like I’ve only just begun on this journey into fiber animation. 2017 is shaping up to be a fiber-full year, and I will be sharing more behind-the-scenes pictures and clips of my current projects through Instagram, as @andreaanimates.

Be sure to check out the full video to see it for yourself: Revolution!


headshotresized

Andrea Love is a stop-motion animator and fiber artist, living and working out of her home in Port Townsend, WA. Her work can be found at www.andreaanimates.com. Here she is pictured between Kevin and Beth Hansen.

2016 Plying Cover

What’s inside the Plying issue?

The Winter 2016 “Plying” issue is busy making its way to various destinations around the world. Whether you’re a subscriber waiting for your copy to arrive, or you’ve been thinking of subscribing and you’d like a preview before you buy, today’s post is here to give you a sneak peek inside the issue!

—————————————————————————————————
2016 Plying CoverIn Jacey’s introduction to this issue, she talks about the idea that as a spinning community, we’re like plies of yarn: we’re stronger together. Perhaps it’s fitting, then, that we end the year with an issue all about Plying. What combinations will you come up with in the new year? Here’s a look at the rest of this issue:

Great Articles!

We’ve rounded up the a talented group of spinners and asked them to share their insights and experiments with us, and as always we’ve got a tip jar full of helpful hints from our readers, new information on the spinning SCENE, and how to keep your spinning body happy by Carson Demers! Take a look at what you’ll get:

  • Plying Primer, by Beth Smith  – Everything you ever needed to know about plying!
  • Plying by Numbers, by Michelle Boyd – Michelle’s controlled experiment on the numbers involved in plying, from ratios to bobbin size.
  • The Law of Diminishing Returns, by Sylvia Becker – Sylvia explains the variables in plying that matter most to the finished yarn you’re trying to create.
  • Plying my Longest Thread, by Kaye Cooper – One spinner’s perspective on the Longest Thread Competition of 2017.
  • Spin It! The “Miss America,” by Patsy Zawistoski – Patsy explains her alternative to Andean plying.
  • Flock to Fashion, by Katrina Walker – Katrina tells the story behind the Shepherdess Cardi, a project featured in this issue. It all began on Katrina’s farm with a sheep named Luke.
  • Spin It! Shepherdess Cardi, by Jason Mullet-Bowlsby – A how-to on spinning for the gorgeous crocheted cardigan featured in this issue.
  • Spin It! Plying through Rings, by Kim McKenna – Kim’s contraption for spinning a multi-plied yarn, inspired by her mother-in-law’s love of Aran sweater knitting. It involves the use of a ring, several bobbins, and a curtain rod – you’ll be amazed at the results!
  • Plying for Stretch, by Kara Perpelitz – Does adding plies to a yarn increase or decrease the elasticity? Find out with Kara in this experimental article.
  • Spin It! Illegal Plying, by Patsy Zawistoski – Do you just love to throw the rule book out the window? If so, you’re one of Patsy’s tribe. Read along with her and ignore the Spinning Police when they knock on your door! You’re too busy plying YOUR way!
  • The Mystery of the Elastic Cotton, by Stephenie Gaustad – Cotton fiber isn’t, by nature, elastic. So how can you spin a stretchy cotton yarn?
  • Match Making: Testing Different Singles with Ply Structures, by Esther Rodgers – An experiment using the same singles with three different plying techniques. What a difference a ply makes!
  • The Skirt Project, by Beth Smith – Beth set out to spin, weave, and sew herself a skirt: here’s how she did it.
  • Spin It! Plying for Color, by Jillian Moreno – We tend to think of plying as something that adds size, durability, or texture to our yarns. But what if we thought about what it does to the color of the knitted fabric?
  • Use Your Yarn, by Beth Smith – Don’t just let your handspun sit on a shelf – use it! Beth shows you some great pattern choices in this mini feature.
  • Spin It! Chain Plying, by Gwen Powell – Some debate on the validity of this yarn (is it even plied?), but if you’d like to give it a try, Gwen shows you how! It can be a fun and easy way to ply from a single bobbin and to maintain color striping, so we recommend giving it a go!
  • Spin It! Mendenhall Muff, by Carol G. McFadden – The how-to article on spinning for this issue’s muff project.
  • Spin It! Spin, Ply, Cable, by Mary Berry – How to cable ply your yarns, from start to finish.
  • What Went Wrong? by Maggie Casey – Plying should be the finishing touch on a fabulous yarn, but what if instead it’s more like a nightmare? Maggie walks us through some common problems and how to prevent them.

shib3-webFantastic Projects

In every issue of PLY, you’ll find a handful of projects for knitting, weaving, crocheting and more – along with instructions for how to best spin the yarns you’ll use in those projects. Here are the projects from the Winter issue:

  • Shepherdess Cardi, by Shannon Mullett-Bowlsby – A cozy yet lacy crocheted cardigan that’s sure to be a show-stopper.
  • Mendenhall Muff, by Carol G. McFadden – You’ll feel like a March sister in this cozy layered muff.

Everything Else!

Sometimes it’s hard to get plying just right, so in Tip Jar we’re rounding up the best tips from our readers to help you ply a little bit better. In Ergo Neo, Carson explains how to manipulate your setup and stance to make plying a pleasure. Scene is full of things on the spinning scene that you’ll want to know about including an animated film from HansenCrafts and a new spinning device (of questionable origin) from Abby Franquemont. In our Hot Button feature this issue, three different spinners tackle the topic of Lazy Kates. And don’t forget to check out our Independent Spinner page to find all the details on the products featured in this issue!

If you haven’t subscribed yet, you can do that right here on our website! And be sure to pick up a copy of this issue if you don’t already have one (or it isn’t on its way to you)!

A PLY-ing Giveaway!

ply-fiber-giveaway

UPDATE:

We have a winner! Chris P check your email!


Woo-hoo it’s a fiber giveaway!

My article about plying with color in the new issue of PLY was so much fun to write! My favorite part was spinning and knitting the samples, there are so many options it’s hard to stop.

I know when I read an article that gets me excited to spin, I want to do exactly what the author did, maybe with some tweaks of my own.

Thanks to Scarlet at Huckleberry Knits, one of you will be able to spin along with my article. She gave me a bundle of 5, 2-ounce braids of Targhee/silk , in the exact colors I used for the article for a giveaway!

What do you need to do to win? Leave a comment below telling me your favorite thing about PLY Magazine, before midnight EST, Tuesday December 20th, 2016. I’ll use a random number generator to pick our one winner.

Don’t forget a PLY subscription or renewal makes a great gift for your favorite spinner, even if that favorite spinner is you!


Save

Save

The Accidental Textile Archaeologist

We are thrilled to have regular contributor Christina Pappas back on the blog today – take it away, Chris!


So here’s the thing – I wasn’t supposed to be an archaeologist, let alone a textile archaeologist.

When I was in high school, I was the epitome of the nerdy art student. I always had paint on my clothes and a sketchbook tucked into my backpack. My plan was to go to college and study art; I even had a partial scholarship to help. My senior year, when I should have been putting my portfolio together, I was daydreaming about a different path. I loved history, and my constantly stained clothes proved I didn’t mind getting dirty, so I started thinking about what else I could do.

For a class project I had interviewed the curator of Egyptology at the Brooklyn Museum of Art. He was an archaeologist and told me what his job was like. He was brutally honest about the hard work and low pay, but it was still the most exciting job I could think of. I did a bit of research and found an archaeology program with an emphasis of hands-on experience. My parents were surprised but supportive, though my dad did encourage me to take ‘a nice accounting class’.

My first archaeological dig! My friend Ruth (right) and I (left) in the Allegheny National Forest, circa 1998. Alas, we did not find any textiles that summer.

My first archaeological dig! My friend Ruth (right) and I (left) in the Allegheny National Forest, circa 1998. Alas, we did not find any textiles that summer.

Mercyhurst University is a small liberal arts school located in northwestern Pennsylvania on a hill overlooking Lake Erie. Students in the Anthropology program were expected to work in the labs, either through work-study or on a volunteer basis. Even as a college freshman, you were expected to be there. The work was not glamorous – I washed and labeled artifacts (mostly window glass!) – but I loved it.

After your freshman year, you chose a specialty and started working under a professor with that expertise. You could study stone tools, ceramics, historic artifacts, or perishables and textiles. I will admit that I had no idea what I wanted to do. I was much more interested in my social life at that point and the cool kids of our department all worked in the perishables lab. That’s right folks: I did not choose to study perishables and textiles because I saw their importance in explaining cultural process or because I had a burning desire to understand the technology of textile production. I wanted to hang out with the cool kids.

I’ll let that sink in for a minute.


Hard at work in the perishables lab, sometime in late 2000. The perishables lab has continued to change and today’s lab is very different from when I was student. The training, however, is still as rigorous today as it was nearly 20 years ago.

Hard at work in the perishables lab, sometime in late 2000. The perishables lab has continued to change and today’s lab is very different from when I was student. The training, however, is still as rigorous today as it was nearly 20 years ago.

At the time, the perishables lab was directed by Dr. James Adovasio, one of the foremost experts on archaeological textiles (he’s better known for his work at Meadowcroft Rockshelter and peopling of the New World – but that’s a different story for another day). In hindsight, I realize now how fortunate I was to work under him, but at the time I was just really excited. My goal of hanging with the cool kids was quickly set aside. I loved working in the perishables lab! My first project was working on carbonized textiles and yarns from a Bronze Age site in Jordan. These fragments of cloth were thousands of years old and woven from carefully spun linen thread. I learned to identify the different textile weaves, how to pick apart the structure of a plied yarn, how to see all the tiny decisions that went into the making of the object. That’s what pulled me in.


Carbonized linen textiles from an early Bronze Age site in Jordan. These textiles date to approximately 2350 BC and were among the first objects I worked on in the perishables lab.

Carbonized linen textiles from an early Bronze Age site in Jordan. These textiles date to approximately 2350 BC and were among the first objects I worked on in the perishables lab.

As fiber folk, we all know the feeling. You look at a handmade textile and you see not just a pretty object, but the hours at the loom or knitting needles, the fiber drafting at the wheel, the alchemy at the dye pot, even the shepherds with their flocks. You can see all the steps and decisions that went into creating that object, all the places where one path or another was chosen. Archaeologists are constantly trying to trace back those paths, to see those moments when a decision had to be made and why. The whys are how we learn about culture in the distant past. We can look to the past and see when and why spinning one kind of fiber over another was chosen, what changes were happening that lead to that decision, and what were the ramifications of that decision. Best of all, we can take what we learned from those ancient decisions and apply that knowledge to the same kinds of problems we face today. Want to know how today’s cotton farmer should respond to increasingly arid conditions? Let’s see what they did 2,000 years ago and how it panned out.

The current perishables lab at Mercyhurst

The current perishables lab at Mercyhurst

My career (thus far!) has been full of happy accidents. I missed the deadlines to apply for an internship at the Metropolitan Museum of Art in New York City my junior year of college so I wrote a letter asking if I could volunteer. My dedication and enthusiasm impressed the head of the Textile Conservation department so much that she used her own research funds to hire me as a conservation assistant for the summer. I would work on and off at the Met for the next three years learning everything from basic object care to what scanning electron microscopes can tell us about textiles (it’s a lot – especially when you’re working with gilded yarns).

pic-4

I analyzed textiles impressed in pottery to see how social organization changed after political collapse during the Late Prehistoric in Kentucky.

I came to graduate school at the University of Kentucky intending to study the earliest Americans but once again found myself drawn the to the kinds of cultural questions textiles can help us answer – how do we respond to change? I looked at impressions of textiles in pottery to see how cultural groups reorganized themselves after the collapse of their political system, a surprisingly relevant topic in today’s world. Along the way, I worked with textile collections from the Sudan, Egypt, Asia, Peru, and of course, Kentucky. No matter where you find yourself in the world, textiles are a language spoken by everyone.


Through it all, I’ve always found the easiest way to understand textile production was to learn how to do it myself. What better way to know what can influence the choices of a spinner or weaver than to become one? I still advocate that anyone who wishes to study ancient textiles needs to learn how make them and any student who works with me finds themselves with a spindle in hand before too long.

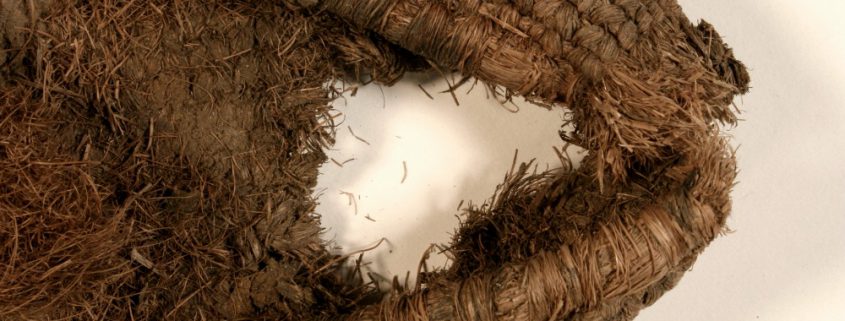
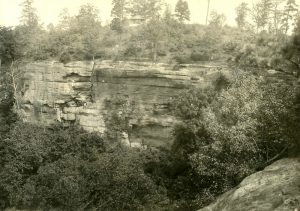
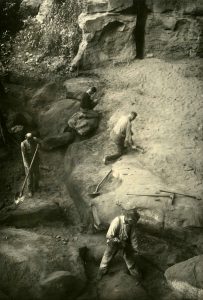
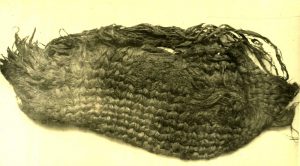
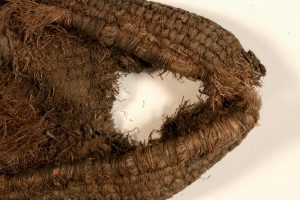
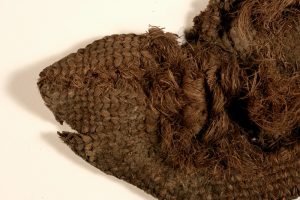
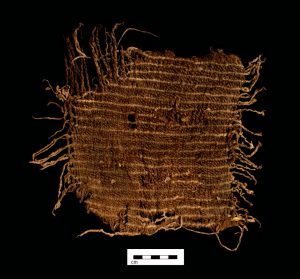
These days, most of my research is focused on the ancient yarns and textiles from dry rockshelters in Kentucky and the greater southeast. At work, there are still plenty of opportunities for surprises. Yesterday a collection of textiles from an 1895 time capsule in Louisville showed up on my desk. I’ll need to clean and analyze them to see what they can tell us about life in Louisville 120 years ago. There’s always something new to learn!


_mg_6651


Chris is an archaeologist by day and a fiber fanatic by night who is happiest when she can be both at the same time. She lives in Kentucky with her husband, adorable baby girl, and two crazy beagles.

Judging Fleeces – A dream come true

I’ve been judging fleeces on my own, for friends, and in classes for years! I know what I’m looking for, I understand the categories and I certainly know what makes a good fleece.

This year I was asked to judge the Fleece Competition at the Southeastern Animal Fiber Fair in Asheville, NC. I immediately said yes! Judging fleeces for a fleece competition is something that I have been wanting to do and just hadn’t gotten around to applying for. I was super excited for about 15 minutes. And then all of my self confidence and everything I knew about fleeces seemed to be questionable. And I had about 5 months to question  myself and worry.

At SAFF the fleece judging is a bit different than how they do it at Rhinebeck. At the New York State Sheep and Wool Festival the judges go in and judge the fleeces with no audience. At SAFF there is an audience and they are welcome to ask questions of the judge during the judging. That’s my favorite kind. I’ve been there at the Fleece judging at the Michigan Fiber Festival and I have learned so much watching those judges and asking questions.

But here’s what happened. I went to North Carolina. I walked into the place of judging. There were a lot of people in the chairs. My face was a little flushed, my hands shook a little and then they started spreading fleeces out in front of me and when I put my hands in the wool I began to talk and after a few minutes I wasn’t nervous anymore and I got to touch some fantastic fleece. (thanks to Jackie Ottino Graf for the photo.)

Check out my Madonna headset too!

The whole thing took about four hours. I judged 36 fleeces, if I’m remembering correctly, in four categories (more than that if you count the separation of white and colored fleeces into different groups). saff-grand-champion

Yuo know how ther ar things you want to do but they are scary but then you bravely do it and then you want to do it more? Well, that’s how I feel about the whole fleece judging experience. I want to do it every week. Anyone need a fleece judge? I can just come to your house…


Anyway, here is a picture of me and Joanne Maki (left) from Georgia Rustic Wool with her Grand Champion Gulf Coast Native. She was super excited and I was super excited to see that fleece. Not for sale though. boo hoo.

Loops, Plies, and Binding? Oh, my!

We’re delighted to have Rachel Anne MacGillivray back at the blog today! If you’ve been intimidated to try to spin a Bouclé yarn, you are not alone! In today’s post Rachel takes us through her beginner’s attempt at spinning this type of yarn.


My first, finished skein of boucle, after a go in the dye pot

My first, finished skein of boucle, after a go in the dye pot

I’d like to share with you all my deep, dark, spinning secret.  *deep breath* Ok. Here goes… I’ve never spun bouclé.  I’ve never even ATTEMPTED bouclé before and it’s not because I’m not into texture. I LOVE texture! I love playing with different thicknesses and tensions when plying; I LOVE using different fibers together, wild batts, and throwing in add-ins.  I love spirals and coils and knopps and bibs and bobs and springs and things… but bouclés? Teeny tiny sweet little loops? I dunno, they were always overlooked by my pinch and draft. 

Maybe I’m being deliberately misleading here… I implied I don’t know why I’ve never spun bouclé but I can tell you exactly why: It’s intimidating. It always seemed very technical, challenging, and time consuming. Then, the bouclé issue of PLY came out and, feeling inspired, I decided now is the time. I would attempt the most mythical (to me) of yarn structures: The Bouclé.

 First thing I did was gather my resources (I’m a book hound and having new reasons to go leafing through books fills me with glee). 

After some research, I started to understand how bouclé works:

Two plies: one high twist, one low twist and spun in opposite directions, then plied together in the same direction as the low twist yarn.  Some fancy handwork to make loops from the high twist yarn, then ply it all again in the direction opposite the first plying to bind it up with a fine yarn.  Uh… simple…. Right?

 On to materials: Wensleydale top for the loops because it’s long stapled, lustrous, and gorgeous; a wild carded batt for the core; and a fine, commercial spun silk noil for the binder because, well, it was purple.  Instead of the batt, I should have used something easier to draft consistently so I eventually switched to BFL top.

 Books & research? Check.  Materials? Check.

 *inhales and holds breath for a minute*

 OK. Go.

My first loop!

My first loop!

I spun my first bouclé ply VERY high twist and fine, and did the core ply exaggeratedly slowly to add little twist to that ply.  After awhile I started to doubt my definition of low twist and gave the second half of my core yarn a more medium twist.  I didn’t dive in and fill bobbins with these because I wasn’t sure how they’d work out.

On to plying.

The first note I made? “Whoa. This is tough.” But you know, lots of things are tough, especially when you first start, so I gave my hands some time to settle into a groove and start to understand the new motions.  I found I had to go rogue from what the books told me in terms of how to move my hands and got into this funny trick of passing the bouclé ply from one hand to the other and pinching it with the core.  It worked for my hands and I just trusted my body and went with it.  Refining technique can always come later. 

Well, I tell you, I was starting to feel like bouclé was overrated when then, like a tiny, bright, shining star, my first bouclé appeared! My hands must have made the right motion and timing worked out and there it was: a perfect little circle sitting on top of my yarn.  I was delighted!  Also hooked. Definitely hooked.  That tiny loop stole my heart.

After my first round of plying, sitting on my bobbin. I admit, at this point I was petty skeptical.

After my first round of plying, sitting on my bobbin. I admit, at this point I was petty skeptical.

Let me clear – it was not all sunshine, rainbows, and perfect little loops from there on in. My medium twist core really wasn’t loose enough, but the barely spun core worked quite a bit better.  My bouclé ply was too fine and highly twisted so I tried thicker and looser. It worked better, but still not quite right.

As I practiced I got more loops and they are totally darling!  I let out a little squeal with each one that appeared, but I wasn’t loving the yarn as a whole.

I set it down for awhile, busy with life and not convinced I’d done a good job. Finally, I decided to come back to it and plied it with the binder. Well, if I have any advice here, it’s don’t wait to add your third ply! All of a sudden I was totally in love with my yarn! Yes, it needs some work and I’ll learn more and make it better, BUT something completely magical happens when you do the final ply. Everything seemed to bloom and standout, and say “hey, here I am! I’m a bouclé!”

(Technical tip: I did a slight spiral ply here and loved the effect.)

So, I can finally say I’ve spun bouclé.  Was it perfect? No way! Was my yarn even all that good? Probably not. But, that’s what learning is! Trying things, making mistakes, trying new things, and having thrilling moments that get you closer to what you want. It was fun, and challenging, and I’ll keep at it – letting those little loops shine their light into my life.


bio-pic

In love with all things Textiley, Rachel Ann MacGillivray teaches spinning & other things at the New Brunswick College of Craft & Design in Fredericton, Canada.  A farm kid, spinning and wool are in her bones (well, not literally in her bones, that would be just a bit too wobbly).  Oh yeah, and she loves drinking tea.  Like, a lot.