The making of a prehistoric IKEA bag, Part 1

Ever wonder how people survived before the invention of those giant bags from IKEA? Apparently the answer is, they made their own! Christina Pappas shows us how it was done in this two-part post, starting today!


One of the bags we’re studying for replication. This was a large tote-style bag, much like the kind you can find at Ikea! Image courtesy the William S. Webb Museum of Anthropology, University of Kentucky.

When we last met, we took a long look at the slippers I’ll be replicating for this project. This week, we’ll be getting to know the bags. Have a look at my last couple of posts to learn about this project and the slippers I’m making:


Pop culture likes to show archaeology with artifacts that are intact and spectacular. Man, I wish that was how it really worked. I don’t think the Indiana Jones franchise would have been as successful if they showed Indy and his students during their summer field school carefully mapping individual pieces of stone tool debris. No, golden statues and gigantic rolling boulders are far more fun.

Braided warps give us both strength and flexibility for carrying bags. Image courtesy the William S. Webb Museum of Anthropology, University of Kentucky.

That’s sometimes how it feels when you’re a textile archaeologist. People imagine ancient Egyptian tombs or Chinese silks, but that’s rarely the case. The southeastern US, where I work, is not suited to preserving organic materials like fabric. When we find the fragments of ancient culture we must work to carefully piece them together to tell the story of our distant ancestors. It’s hard work, and finding a complete object is rare.

For the bag we’re going to try to replicate, we have to look at multiple different bags to figure out how to make one. That’s because we don’t have a complete bag and we need to piece together the different parts. All the objects we’ll be looking at today are in the collection of the William S. Webb Museum of Anthropology at the University of Kentucky.

The Webb Museum has several prehistoric bags from Kentucky. They are in varying degrees of completeness, but combined can help show us how a bag was constructed. We’re going to look specifically at two bags from one rockshelter, Newt Kash Hollow. We think they’re close in age to one another, and were made in a similar way to one another.

Rattlesnake Master plant – once the plant starts to die back for the winter, it’s time to harvest the leaves for fiber. Image from Wikimedia.org.

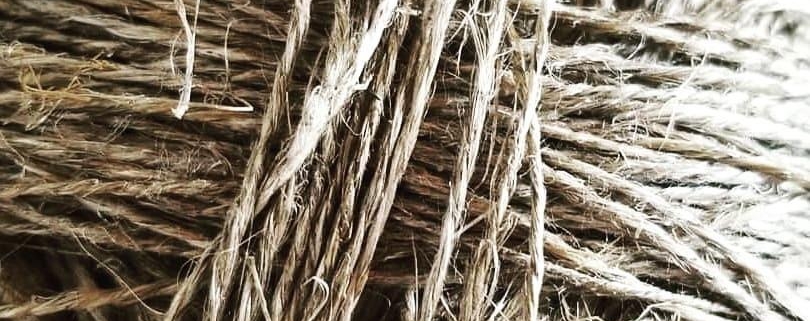
The first thing I notice when looking at these bags is that their warps aren’t spun – they’re braided! These bags appear to be made from a native grass called Rattlesnake Master (Eryngium yuccifolium). This grass makes for a hard-wearing yarn, but when processed into a 3-ply braid, it seems to be more flexible yet able to retain its strength. Perhaps that’s why the ancient Native peoples choose to braid their warp rather than spin it? They could make a strong yet flexible warp for a bag that could bend and support a heavy load. These warps are pretty thick, averaging about 1 ½ warps per centimeter and each about 0.6 cm (0.23 in) in diameter. The grass was well shredded before it was braided.


This knot is where the weaving ended. The twining was begun at the outter edge of the bag and twined around till you reached the bottom. Image courtesy the William S. Webb Museum of Anthropology, University of Kentucky.

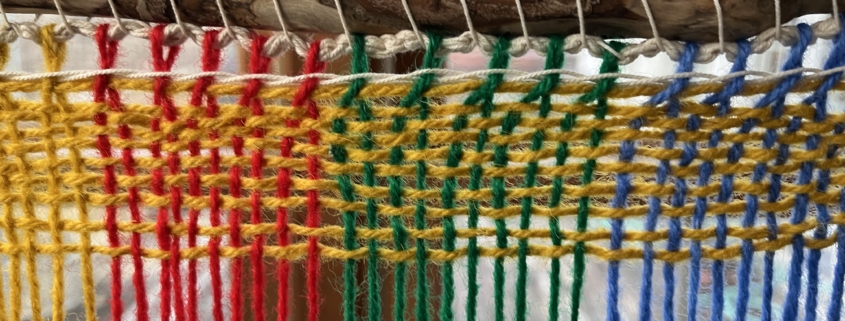
The wefts are made from a plied yarn, two Z-spun singles S-plied together. It’s much thinner than the braided warps, averaging about 0.3 cm (0.11 in) in diameter. I’m not sure if the wefts are also made of Rattlesnake Master. They are much thinner and more finely shredded than our braided warps. I will probably need to experiment with the Rattlesnake Master to see if I can make a yarn that fine. The weft rows are pretty far apart so measuring wefts/centimeter won’t help us much here. Each weft row is made up of two yarns twining around the warps. The wefts twine around individual warps near the edges and bottom of the bag but around pairs of warps in the body. This is probably to give additional strength and stability to the edge and bottom of the bag while keeping the sides flexible.


The tops of the bags are a bit different from one another. The edge of one bag was made by folding and twisting pairs of braided warps around a cord which then became a drawstring for closing the bag. The other bag had individual warps folding and twisting around a cord, but the cord was a part of a finished edge, almost like knitted i-cord, that went around the entire edge. Thickly twisted 2-ply yarns were tied along the edge to act as handles. The handles on this bag would have allowed it act much like the large tote bags you can get at Ikea. It was probably just a big – the warps each measured over a meter in length.

The top of our drawstring bag and a close-up showing how the cord was looped through the top of the bag. Images courtesy the William S. Webb Museum of Anthropology, University of Kentucky.


The top edge of the our tote bag. See how the finished edge acts like i-cord for knitting? Image courtesy the William S. Webb Museum of Anthropology, University of Kentucky.

So what do we know so far?

I’ll need to find some Rattlesnake Master and process it so I can make 3-ply braids for the warps. My bag will be much smaller than either of these bags to keep this project manageable and to make sure I can find enough Rattlesnake Master. I will also need to make the 2-ply yarn for the weft and for the edging. I’m not sure those were made from Rattlesnake Master so I’ll have to do some additional research and experimentation.

Practicing my thigh spinning. It has been a long time since I tried to make yarn this way and I’ll need the practice for this project. Rafia grass, readily available at most craft stores, is the prefect material for practice.

Our next step in this journey is to collect and process our plants for fiber and then the real fun begins: spinning and weaving! I’ve been experimenting with two different ways to spin my fiber – thigh spinning and finger twisting. It seems like there’s always something new and different to learn.

Till next time!


Chris Pappas is an archaeologist by day and a fiber fanatic by night who is happiest when she can be both at the same time. She lives in Kentucky with her husband, adorable baby girl, and two crazy beagles.

My Favorite Way to Get Spinning Done

tv

Have you watched the Night Manager?

It seems like at the beginning of the new year every spinner I know has the goal of spinning more.

Me included! This year I want to spin 10 new-to-me-dyers and make 12 things for myself (some handspun some not).

I have a favorite trick to get myself to spin more, it works for me every time. I get hooked on a TV show.

More specifically, I get hooked on a TV show and only let myself watch it when I spin.


binge tvI am amazed how much I get done because I want to see that next episode (and the one after that).

I just finished watching The Crown (and yarn for a cowl, a hat and another 4 ounces of fiber spun) and I am just starting and am quite taken with Mozart in the Jungle (lots of swatching,yarn for another hat and I’m about to start some lace spinning).


How do you trick yourself into spinning more?

Save

Save

Link to PLY Away

Fair Fiber Wage, a look from the other side

You can’t pay people what they’ll take, you have to pay them what they’re worth. This simple premise becomes difficult for a myriad of reasons. The first and most confusing for some is that often people don’t know what they’re worth. That not knowing comes from a culture of silence, a lack of transparency, and as usual, the relentless pursuit of the almighty buck by people in power.

This is a huge issue in all areas of creation, and it’s hard for anybody to get a fair shake (or even to know what a fair shake is, what with all the shushing that goes on about money), but where it concerns craft, artists, fiber-work, and women is the one I’m most familiar with and the one I’m specifically talking about here. Those are a lot of areas that historically don’t get a lot of respect, right? Craft. Artists. Fiber-work. Women. Geez, it’s like a stacked deck, and I’m thrilled that Mary Beth and Abby are willing to show their cards, if you will, and get the conversation rolling.

I taught for 10 years before I started PLY Magazine and then PLY Away. I supported a family of 3, then 4, then 5 with teaching and writing, and it wasn’t easy. I could talk about that, but the truth is, I don’t teach very often now, so that’s no longer my reality and there are people with strong voices who can (and are) speaking to that. What I can speak to is the position I’m in now, which is overwhelmingly informed by my previous position as a teacher trying to eke a living out of the thing I was good at and loved doing. Now I run a magazine and put on an annual fiber retreat, and I try to do it fairly and with transparency.

I want to talk about the financials of a retreat, of a big retreat. I want to assure you that anyone who says it’s just not financially viable to pay teachers fairly (they wouldn’t use that word, of course; they’d say “pay teachers more than the industry standard” or something that makes it easier to swallow) is wrong. The key is not expecting a huge profit. Why should that be my (the organizer, underwriter, parent company, corporation) right? I believe that. The first thing you have to be willing to do is pay people what they are worth, and shockingly, that must include yourself (what I mean here is that I should get paid fairly and not expect huge profits and large salaries).

Before I get into the actual nitty-gritty numbers of PLY Away, let me give you the bottom line, in case financials bore you like they bore me (unless they’re my own). With all the outgoing and incoming money, the bottom line is it can be done. When I started this retreat, I told myself that if I could run a first-time retreat the way I wanted it to be run, treat everyone fairly, have it be enjoyable for teachers, vendors, and students alike, and break even, then I’d do it again.

I did and I am. It wasn’t hugely profitable, but that’s okay, I don’t need it to be. I don’t know when we started needing things to bring in huge profits to be worth our while. We don’t need to be rich to be happy, and this industry is not about getting rich, right? It’s about making things with our hands, about community, about who we are and who we want to be. If any aspect of this industry suffers (the farmers, the shepherds, the dyers, the teachers, the designers, the writers), the community is less. What I’m trying to say is that I didn’t need PLY Away to make a million; I just needed it to be sustainable and good. It is both those things.

Here’s our bottom line. If we sell all of our classes ¾ of the way out, there is a profit of $12k. If we sell all of the classes all the way out, there is a profit of $42k. And if we only fill the classes half full, we’ll lose about $17k. The truth is we’ll probably hit around the ¾ mark. That’s the hope anyway. And if we don’t, if we can’t do this, do it well and fairly, we shouldn’t be doing it. That’s that. You don’t sacrifice people and their livelihoods for profit. I won’t ever do that, and that’s not just for them, it’s for me.

So if you’re interested, let’s run through the numbers of what PLY Away’s actual debits and credits are, shall we?

Money Out

First, the venue. And it’s a nice venue. Really nice. You’ve gotta have a nice venue because as much as people say that they’d travel to a shack in the middle of nowhere to take a class with X, you can’t really expect them to, at least not more than once. So you pay for a venue in a nice location with good rooms, well-lit and roomy classes, and lots of food choices that is walkable to interesting things and is generally nice to be in. For me, there’s only one such place within 2 hours and that’s the Westin at Crown Center. Next year a new venue is opening, and that may give me some bargaining room, but for now, this is what I have. I tell you all this so you don’t get it in your head that I must get off cheap and other retreats surely pay more.

Here’s what I pay for the venue: $20,000 (that’s for the classrooms and marketplace for 5 days)

Then there’s food. No venue will rent to you if you don’t sign a food and beverage guarantee. And it’s a lot. I have to agree to use $10,000 worth of food and beverages. At first I thought that’d be easy because it’d include what our attendees use – wrong. It’s just what I order for the event. Things that can and are included in that 10k: the coffee and tea cart open to all in the marketplace, the coffee and tea cart in the spinners’ lobby, the break time snacks in the spinners’ lobby, and the banquet.

And about the banquet, I chose the most inexpensive meal available, which is $50/plate, but because there is a 25% tax on top of it, it’s really about $65, which is what I charged for each banquet ticket. A straight wash, the banquet, but it’s worth it because it adds to the experience, gets everyone together, and is fun!

So that’s the main venue costs. But wait! It’s 20k and 10k, but like I said, there’s a 25% tax on each of those (and annoyingly, the tax doesn’t count towards the 10k food and beverage agreement; it’s added after I reach 10k). So that means the venue’s total cost to me is $37,500. About 50 people bought tickets to the banquet (the other 60 people booked a full schedule of classes, so I paid for their banquet), so that means you can take $3250 off that total. So my new check to the Westin is more like $34,250.

The next major expense is the teachers. Here’s what I pay (and here’s a link if you want to see more about this).

  • $650 per full day of teaching, $325 per half day of teaching, paid before departure for first-time teachers.
  • $700 per full day of teaching, $350 per half day of teaching, paid before departure for returning teachers.
  • $40 per diem for food, personal expenses, etc. (keep in mind we do cover at least 2 dinners too)
  • $25 per day for shipping expenses (no receipts needed)
  • travel (airfare or current IRS rate for car mileage up to price of airfare)
  • single room at PLY Away venue from the night before teaching begins until morning after teaching ends
  • optional teachers’ dinner
  • optional banquet ticket
  • optional last night dinner and teacher wind-down

When I break that down for the teachers we have, it looks like this:

15 teachers (9 new teachers, 6 returning teachers) teaching a total of 5 days (some teach 1, 2, 3, or 4 days; anyone with 3 days or more gets a half or full day break in the middle if they want it) for a total of:

New teachers total: $17,000

Returning teachers total: $15,500

Total teacher salaries: $32,500

But that’s not all it takes to bring a teacher. There’s the per diem, which for 15 at $40 each day they’re here comes out to $2000. There’s shipping at $25 per day for each teaching day, which equals $1300. There’s airfare and travel, which comes out to about $6700. All of those things together come to another 10k even. And of course we have hotel rooms, which come to $15,000 if you include my own room too.

So far that’s

$34,250 for the venue

$32,500 for teacher salary

$10,000 for per diems, shipping, and travel

$15,000 for hotel rooms

$91,750: total

But that’s not really all it costs. There’s the teachers’ dinner: $600.

I like to buy each teacher a pretty good assortment of snacks for their rooms because I know how sick I get of eating out each meal and it’s sometimes hard to find good, healthy stuff. I find out which teachers are GF, Veg, Vegan, etc. and I hit Trader Joe’s and Whole Foods and each teacher gets a goodie bag that I hope will last them the entire time they’re at PLY Away: a bunch of bananas, apples, oranges, muffins, trail mix, granola and cereal bars, nuts, chocolate, and a large bag of popcorn or something like it. This doesn’t cost a lot, but I can tell you it’s really appreciated. $300.

I also want the vendors to be happy and taken care of so I hire a couple of people to help unload their goods: $1600.

We also do a big $500 giveaway to one spinner who fills up his/her punch card in the marketplace. In an attempt to support the vendors, we run a contest; anyone who purchases from 10 different vendors in the marketplace is entered and the winner gets $500 to be spent in the marketplace. There’s also a *no purchase option, but to be honest, it’s super annoying and nobody did it last year, but we had over 100 cards in the drawing: $500.

Then there are the little things like banners, shirts, programs, buttons, goodie bags, advertising, website stuff, etc.: $2000.

So the total for those extra things is $5000.

Which brings our grand total outgoing money to $96,750.


Money In

Okay, now what about what we bring in? Here’s hoping it’s more than that, right?

I struggled with class fees. I want them to be fair, but they also have to cover that huge number up there, right? I looked at lots of different retreats and festivals, and in the end, what we needed to bring in to make it all work falls just below the the middle of retreat class prices, which I’m okay with. It’s a good chunk of change, for sure, but there’s a range and I feel like each class is worth it.

Here are the classes we offer and the money each brings in if it sells ½, ¾, or 100% out. The number is () is the cost and the other number is how many we’re holding of that type of class.

Class length                       ½ sold              ¾ sold                   sold out

3-day classes ($380): 3        $9,120            $13,680                      $18,240

2-day classes ($275): 6         $13,200          $19,800                      $26,400

1-day classes ($165): 17        $22,440          $33,660                      $44,880

1/2-day  ($90): 26                   $18,720         $28,080                      $37,440


Total class intake                   $63,480          $95,220                      $126,960


Of course, the event registration company takes a percentage of that so we have to adjust those numbers down a bit.

Total intake after reg fees  $60,306          $90,459               $120,612

But that’s not all we take in. We’d be in trouble if it was, right?

We have sponsors who help immensely and when I say we couldn’t do it without them, I truly mean it (to check out our sponsors, go here), to the tune of about $12,000.

We have vendors, and each booth space is $350 so that brings in about $7,000.

T-shirts are a wash because we sell them at cost, and we give away the goodie bags and the buttons.

So, here’s where we are:

Total intake if we sell all of our classes ¾ out, which I feel is a reasonable goal:

$90,459 class intake after fees

$12,000 from sponsors

$7,000 from marketplace booth sales

$109,459 total income with classes 3/4 filled

And with our output at $96,750, that stands to make PLY Away about $12,000 profit.

If we sell only half out, it’s a total intake of $60,306 plus sponsors and marketplace (total $79,306) and minus the total output for a total loss of  $17,453. Yes, that’s a loss. Scary stuff, but that won’t happen.

Of course, the ideal situation is that every class sells out totally and PLY Away makes a huge profit of 42k! But that’s a little much to ask, isn’t it? All I want is to keep going, make and pay a fair wage, and be and spread happiness. It’s what I got into this to do, and when I can’t do that anymore, either via the magazine or the event, it’ll be time to do something else. I don’t see that time around any corner though.

I want to note here that I could make more. I don’t have to have the extras like the give-a-ways, the vendor help, the teacher snack bags, and the teacher dinner. I could charge more for classes — if you look around at like-retreats, we’re a little below the middle. But I like the choices I’ve made and will keep making them as long as it works for PLY Away. I mostly want to point this out to point out that this type of model is viable even if you need to make more than I do. There’s a higher profit margin possible without paying people unfairly, you just have to want to make it work.

So that’s it. If you made it this far, I applaud your stick-to-it-ness and perhaps you’d like a job. Someday we’ll be hiring. You’re not going to get rich, but you will be treated fairly.

women spinning on a spindle

Spindles – They are for everybody

I’m primarily a wheel spinner. Actually it’s been that way since I learned to spin. I love my wheels. I love how they look. I love how I imagine I look when I’m using them (don’t laugh). Many of the classes I teach are wheel focused classes.

But I like spindles too. I have plenty of them. Don’t ask how many. It’s not important.

When I learned to spin I began on a spindle but it was slow going and I was convinced that my lack of progress was because of the tool I was using and I needed a wheel. So I bought myself a used Ashford Traditional. Needless to say, the tool was not my problem. But that’s another story. Anyway, I took some lessons and got to be decent on the wheel. When I was satisfied that I was learning and improving I picked up the spindle again and magically I could do it! From then on I was a fan.

2011-10-13_15-26-13_662

Let me tell you why I think you should like spindles too – beyond the fact that they can be beautiful.

For the last couple of years I have been immersed in a couple of projects that needed a wheel to complete so I hadn’t picked up a spindle in a while. Then, last month I was teaching at the Palouse Fiber Festival in Moscow, Idaho and I was there with my friend Esther Rodgers who was also teaching. Esther had been told several times by Abby Franquemont that her arm problems when she used a spindle were because she was using a spindle that we lovingly refer to as a boat anchor. What that means is that is was too heavy. I was able to drag Esther to the table of Greensleeves Spindles. I own at least 10 of their spindles myself and I know that they are super good spindles. Well, Esther began to spin IMG_20160702_182904and try some out and she chose one to buy. Well, she didn’t stop spinning on that spindle for the whole weekend and I think she’s still spinning with it! I also think she may have visited the Jenkins table and bought a second one before we left Idaho.

So I was inspired and last week we were headed to Greenfield Village in Dearborn, Michigan just to spend the day with all of our kids and grandkids and on the way out the door I grabbed a spindle and an illusive Abby Batt to work on while we walked around. I got pretty much done in the midst of semi chaos. and I began to think about what I learned from spinning on a spindle. all of the things I’ve learned translate to wheel spinning and make me a better overall spinner.

I learned to better handle live singles. I rarely have tangles. I learned this by butterflying the yarn onto one hand to raise the spindle rather than reaching for the spindle when it is hanging by a super long thread. If you are unsure what I mean by butterflying the yarn you can see it here at around the 5 minute mark. (yes, that’s me a few years ago.)

I learned that sometimes it’s better to take some time with a project rather than always trying to be in production mode. Please don’t mistake me, spinners all over the world spin pounds and pounds of yarn using only spindles but I am not as practiced at it as they are since my focus has been a different tool. I am thoroughly convinced if I made yarn exclusively on a spindle and carried one with me all of the time I would be able to do it too. but since that isn’t the case, I like to use a spindle for special fibers that I only ahve a little of so that I can savor the experience.

I learned (again) that the right tool for the job is often key to getting the results that I want. spindles can add twist extremely quickly and with very little tension on the yanr being made so they are perfect for spinning super fine/gossamer type yarns that spinning wheels may not be as good at.

I’m sure there is more that I’ve learned but it’s all in my hands and not in my brain right now.

Do you spin on a spindle? What have spindles taught you?

Use Your Yarn

I teach a lot of classes and I am always surprised at how many spinners I meet who don’t use their handspun yarns for projects. They give me lots of reasons for it. (1) They don’t think they have enough yarn for a project or (2) they don’t have enough matching skeins or (3) they think their yarn is crappy or (4) they don’t really know how to use it or (5) they sell it.

I have answers for all of this and I hope if you are a person who doesn’t use their hand spun yarn that I can help you change your mind. Let’s go through the reasons one at a time.

Number 1: Not enough yarn for a project. 2015-11-29 12.06.07

For this problem, if you are a knitter or crocheter, I love Ravelry. If you go to the Patterns section you can search based on yarn size and yardage for projects and you would be amazed at how many projects there are available for small amounts of yarn. I just finished this Lucky Cowl  designed by Amy King with a teeny tiny skein.


Number 2: Not enough Matching Skeins

pinkorangeshawl

It’s funny how we all have some kind of color scheme that we stick to when we buy fiber. what that means is that most of your fiber will coordinate. It doesn’t need to matche exactly to make a project. In addition, this shawl was made with 3 different thicknesses of yarn. and it worked and it’s warm and I love it. This shawl was made using the Knitting Lace Triangle Shawls book by Evelyn Clark


Number 3: The Yarn isn’t Good EnoughIMG_20140128_164238

This is a terrible excuse! Here’s the great thing about using your yarn – The lumps get hidden in the fabric or make a nice texture. See the yarn on the right? It’s Columbia, three ply, spun with a long draw which is less consistent than short draw. It also is a roving that has a lot of neps in it so that adds to the texture. I used it for the Hiro hiroSweater which was designed by Julia Farwell Clay. But check ouot the finished sweater! All of those lumps disappear!

I wear this sweater all the time! You can even see the dirt stains in this photo because I don’t want to take it off long enough to clean it. I love it so much I’m thinking of making another one. Probably with lumpy yarn, too.columbiaskirt

I used the same fiber for a weaving project I’m working on. I made the yarn a bit thinner but it still is not very consistent but I made a beautiful skirt from the woven fabric! (Ignore maggie’s messy room behind me.)


Number 4: Not Sure What to Do With It

This is where sampling or trying things or just swatching comes in. Maybe you need a beginning knitting/crochet/weaving lesson. Maybe you need to find a group of people who are also interested in yarn. Maybe you should pick out a project from a Ply Magazine issue and work on it.Most of us are spinning smooth yarns and the magazine reflects that but there are plenty of articles, the current issue and a couple of issues coming up that will inspire those of you who love textured yarns.

Number 5: Sell The Yarn

Here is where I will climb atop my very tall soap box. And these words go for even those who don’t sell their yarn but aren’t using it. How can you know how to improve your yarn if it isn’t being used in any projects or swatches? How do you know that it even works as intended? Please, please, please! Use your yarn. See how it acts in the fabric. See if it softens or gets more firm. check if the plying is too tight or too loose. Make sure it doesn’t fall apart or begin to pill before the skein is even used up. These things will make you a better spinner.

If you don’t know how to weave/knit/crochet, ask a friend to try some out and give you feedback. You can always use these samples and swatches to help sell future yarns.

Yarn is not a finished object.

What are you working on with your handspun yarn? Let me know!

And the Winner Is!

Thank you so much for all of you who took the time to review the Texture Issue of Ply. The winner of the batts is Christina Bowers!


Learning to Love the Singles yarn

Guest blogger Amberlee Venters visits us today with her story of learning to spin outside her own box and give singles yarn a try, both for spinning and knitting. If you’ve ever been hesitant to spin a singles yarn, Amberlee’s story might just inspire you to try an experiment of your own.

——————————————————————————————————–


The Inspiration

In my spinning room (if you understand “room” to mean “bin in a closet in a room,”) I have a bunch of 4-oz braids of gorgeous, multicolored roving, which is mostly the result of several years in a fiber club that I never could quite stay on top of. These braids, bags, and bumps sit there, nestled in amongst their brethren, waiting for the day that they will reach their full potential.

I have only knit with singles yarns a few times, and during those experiments I learned of my tendency to remove twist from the yarn as I knit – a super-helpful technique for creating a finished object without a million ends to weave in. This, along with the multitudes of plied yarn available to me, has been enough to generally put me off spinning singles.

As I rarely knit with singles I also don’t tend to spin singles that will remain singles. My goal since learning to spin has been to achieve the coveted sock yarn, consequently I almost always approach my spinning with fingering weight in mind. So the idea of spinning something new, along with the motivation that this new method might result in going from braid to yarn in a shorter period of time, led me to give singles another try.

The Experiment

I sat down with a 4-oz braid of Falkland wool, zero expectations, and no plan. I debated with myself the best way to spin this fiber: Do I go with my default fingering weight? Or, more accurately: Will I be able to achieve anything else at this point? Maybe I should try to aim for something thicker. This is a singles yarn after all, it’s staying a singles yarn. And anyway what if I hate it? Better to have less yarn if I hate it.

As I discovered, spinning singles yarns goes refreshingly quickly! Within a few days I filled the bobbin and exhausted tPicture of Singles yarnhe fiber. Success! I had made a single that would stay a single, and with no plying to do I was practically done!  The next challenge would be winding the yarn off the bobbin. (See above comment re: I accidentally untwist everything I knit.) To my complete surprise I was able to wind the yarn from the bobbin easily and with no breaks. More Success! Perhaps it would even make it through its bath in one piece! Maybe I’d even manage to not felt it into a huge mess! I eagerly drew a tub of water and deposited the fiber within. What emerged some time later (I tend to forget when I put things in to soak. Surely I’m not the only one? No? Just me? Cool) was the most uneven mass of yarn I had created in years. When I first learned to spin I read that once you attain the thin, beautiful, even sock yarn of your dreams it is nigh impossible to spin anything other than fingering weight without extreme concentration and clarity of intent. Since I went in to this with neither of those qualities, I expected the worst. This yarn came out completely uneven and crazy, but also squishier and softer than anything else I’d managed to create thus far. So maybe it wasn’t a failed experiment after all!

Now the real test – could I knit with this yarn without untwisting it and ruining the project? I settled on a simple cowl pattern – the Variance Cowl by Lisa Mutch – a quick knit in case thing went hilariously awry. As it turns out this was a good choice, because I did indeed untwist the yarn while I was knitting. Twice. However, I ended up with a very lightweight, squishy, soft cowl. Lighter than anything I’ve made before, despite its lack of lace and abundance of wacky inconsistencies. This is a revelation! (This wacky hobby of mine is a bit silly out here in California, you see. Making lighter weight items is key to enjoying knitted things for more than a month or two each year.)

Picture of Singles yarn woven

The Results

Confronting my hatred of singles has taught me a few things:

  1. Spinning for singles yarn is speedy compared to the slow spin of sock yarn. This is great news, especially when faced with a seemingly unending bin of 4-oz braids from fiber clubs.
  2. I have to watch my twist, particularly because of my knitting problem. If I had been more fastidious regarding the amount of twist added I probably would have encountered less untwisting in the knitting process.
  3. Not spinning fingering weight yarn is really tricky! I still ended up with a finished yarn that’s somewhere in the range of heavy fingering to sport weight most of the time.

Going into this experience I fully intended to continue disliking singles yarns, but this is not the case at all. I’m sure I’ll experiment more with spinning singles yarns for the sake of singles in the future, but I definitely need to plan my attack more completely (if you understand “completely” to mean “at all”).

Photo of Amberlee


Amberlee exists on Ravelry under the slightly embarrassing username: amberleesapain. She currently has no blog but is considering starting one.

Where Does Spinning Lead You?

zoom-leaf-400x264 I was so excited to interview Diane Varney for this new issue of PLY. Her book, Spinning Designer Yarns, has been such an inspiration to so many spinners.

I was excited to hear what inspired her and to find out what she was spinning now. Except she’s not spinning now, not at all. She spun enthusiastically for a time, wrote the book, taught for a couple of years and then quit spinning. I was stunned. There is so much love of spinning and fiber her book, I assumed she would still be doing it 20 years down the road. It turned out that for Diane spinning lead her to other things, embroidery, metal work, and ultimately painting.

I’ve thought about that a lot since I talked to Diane. For me spinning had lead me to other things, but they also include spinning. I started stitching and instantly wanted to use handspun. I’m picking up weaving again and won’t pretend anything other than I’m most curious about how my handspun will behave in the loom. Spinning is so enmeshed in my craft thinking that every new craft I try includes spinning in some way, rather than just being a stepping stone to to other media. Twenty years down my road I’m sure I’ll still be spinning.

Where has spinning led you?

Thin? It’s All Relative

Moreno Big Yarn 1 sm Our latest issue of PLY is all about spinning thin yarn. When I think about thin yarn I think about that finer-than-fine yarn, that’s really thread, some spinners can spin.

I say some spinners because so far I’m not one of them.


As I read through this issue I realized that thin is relative. I usually like to spin fattish yarn, aran weight or worsted so my particular thin is a 2-ply fingering weight yarn. One person’s thin isn’t another person’s thin and it doesn’t have to be. I’m happy with that. All of the knitting I’m doing lately is for fingering to aran weight yarn, so my thin-for-me yarn is perfect.

I’m sure I could spin finer if I had a burning desire or a particular project where I want to use a finer yarn. Actually, there may be finer yarn for me in the near future because my current fingering weight yarn isn’t quite fine enough for the stitching I’m getting more and more excited about.

ply blog fine

How fine will I go?